Crawlspace Mold Remediation: What Homeowners Should Know
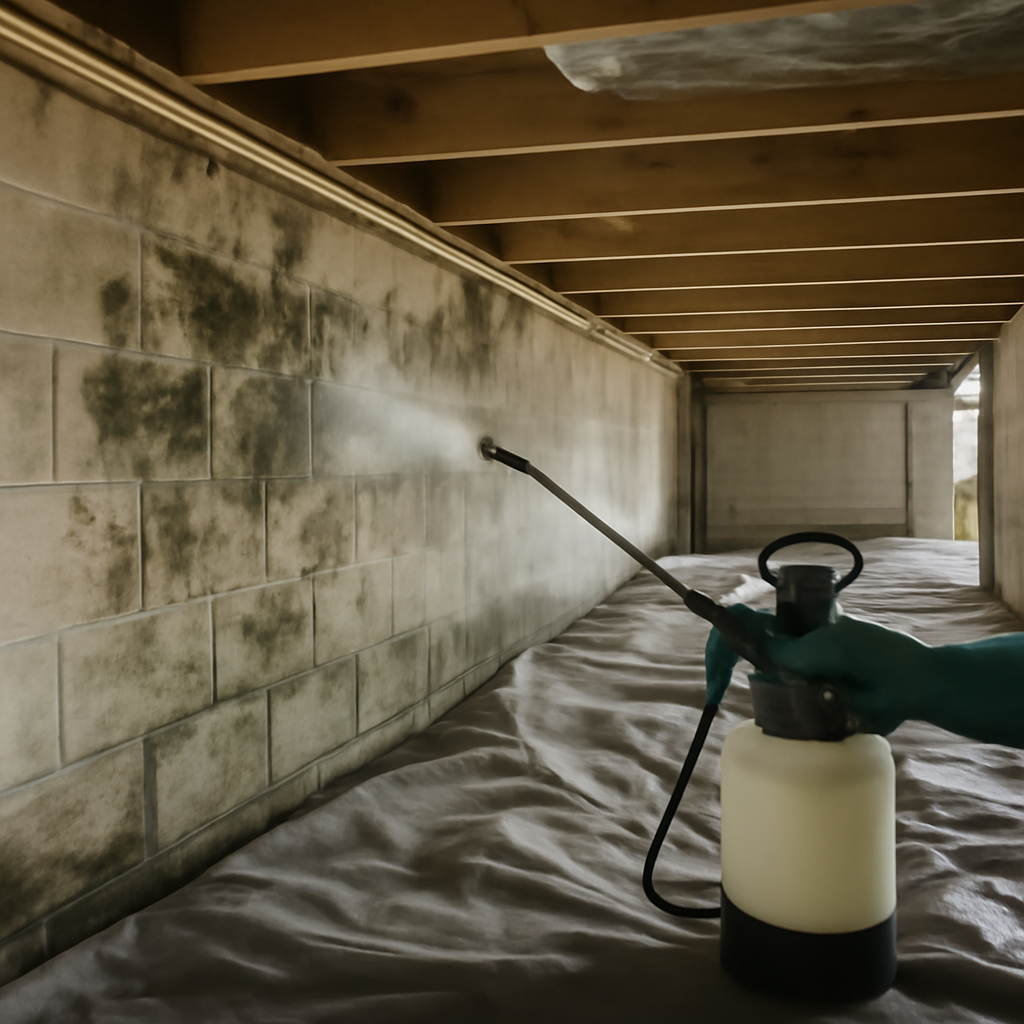
The crawlspace is one of the most common places mold takes hold, and one of the least likely for a homeowner to notice until a musty smell drifts upstairs or an inspector flags it during a sale. Crawlspace mold remediation is as much about controlling moisture as it is about cleaning, because the dark, damp, poorly ventilated space under a home is practically engineered to grow fungus. This guide summarizes EPA and CDC guidance current as of 2026; it is not medical advice, and anyone with symptoms should consult a physician while a certified professional evaluates significant contamination.
Part of our Crawl Space & Attic Guide guide — start there for the full picture →
Is this mold, asbestos, or water damage? Get a free instant screen
Upload a clear photo of the suspect area. You'll get an instant AI screening opinion and what to do next. This is screening guidance, not a professional determination.
Screening guidance only. AI can be wrong. Confirm asbestos, mold type, or lead with lab testing or a licensed professional before acting.
What Crawlspace Mold Remediation Involves
Remediation is the structured process of removing mold and the conditions that caused it. In a crawlspace it typically follows a clear sequence: assess the extent and find the moisture source, contain the area, remove or clean affected materials, treat surfaces, then control humidity so the mold cannot return. The EPA’s general guidance applies here too, with areas larger than about 10 square feet usually calling for a professional, and crawlspaces frequently exceed that.
Because crawlspaces have low clearance, poor light, and exposed soil, the work is harder than cleaning a wall. Insulation hanging from the floor joists is a prime mold host and often must be removed and replaced. Wood framing and the subfloor above can be cleaned if sound. The mold inspection and testing hub describes how an inspector defines the scope before any cleanup begins, which keeps a project from ballooning or falling short.
The physical realities of the space shape every part of the job. Crews work on their backs or stomachs in clearances often under three feet, dragging tools, bags, and equipment through a single small access hatch. Lighting has to be brought in, debris has to be hauled out the same tight opening, and respirators and coveralls are non-negotiable in air thick with disturbed spores. These conditions are a large part of why crawlspace remediation costs more than the square footage alone would suggest, and why it is rarely a comfortable do-it-yourself project even when the area technically falls near the homeowner threshold.
Why Crawlspaces Grow Mold
Three moisture pathways dominate. First, ground moisture evaporates from bare soil and condenses on cool framing. Second, vented crawlspaces in humid weather pull damp outdoor air in, which condenses on cold surfaces. Third, plumbing leaks, foundation seepage, and poor exterior drainage add liquid water directly.
Along Colorado’s Front Range the air is generally dry, so crawlspace mold here more often traces to a specific leak, poor grading that channels snowmelt under the house, or a missing vapor barrier over the soil rather than ambient humidity. Identifying which pathway is at work shapes the whole remediation plan; cleaning without correcting it guarantees regrowth.
The Step-by-Step Remediation Process
A typical crawlspace remediation moves through defined stages.
Containment and Setup
The crew seals the crawlspace access and uses an air scrubber with a HEPA filter and negative pressure so spores do not migrate into the living space above. Workers wear respirators, coveralls, and gloves in the cramped conditions.
Removal of Affected Materials
Moldy fiberglass insulation, vapor barriers, and any rotted wood are bagged and removed. Porous materials that have absorbed mold rarely clean up well and are usually discarded.
Cleaning and HEPA Vacuuming
Sound wood framing and the subfloor are scrubbed or HEPA-vacuumed and wiped, sometimes with an antimicrobial treatment. The goal is to remove the colony, not merely to bleach the stain.
Drying
Fans and a dehumidifier dry the space and framing. A moisture meter confirms wood has returned to a normal level before the space is closed up.
Encapsulation and Long-Term Moisture Control
Cleaning alone does not keep a crawlspace dry. Encapsulation, sealing the soil and walls with a heavy polyethylene vapor barrier and conditioning the air, is the most durable solution. A sealed liner over the dirt floor blocks ground moisture, and a dedicated crawlspace dehumidifier holds humidity in the 50 percent range that discourages mold.
Many remediation projects pair cleanup with conversion from a vented to a sealed, conditioned crawlspace, which building scientists increasingly favor in mixed climates. The approach mirrors the moisture logic used in basement mold removal: stop the water, then hold humidity low enough that mold cannot establish. Improving exterior grading and downspout placement so water drains away from the foundation completes the picture.
A proper encapsulation is more than a sheet of plastic tossed over the dirt. The liner should be a heavy-mil reinforced polyethylene, overlapped and seam-taped at the joints, run up the foundation walls, and mechanically fastened, with penetrations like piers sealed around. The dirt floor, the walls, and any sump basin all get addressed so ground moisture has no exposed path into the space. Done well, the crawlspace becomes a clean, sealed, low-humidity environment that effectively becomes part of the home’s conditioned envelope. Done poorly, gaps and torn seams let moisture back in and undermine the whole investment, which is why workmanship matters as much as materials on an encapsulation job.
What Crawlspace Mold Remediation Costs
Costs vary widely with crawlspace size, severity, and whether encapsulation is included. Industry price ranges commonly cited put basic crawlspace mold cleanup in the low thousands, with full remediation plus encapsulation running considerably higher depending on square footage and access. Removing and replacing insulation, installing a vapor barrier, and adding a dehumidifier each add to the total.
Treat any single quote with caution and get more than one. For a sense of how remediation pricing is structured across project types, our overview of mold remediation cost breaks down what drives the numbers. The lowest bid is not always the best value if it skips the moisture control that prevents a repeat.
Several factors push a crawlspace quote up or down. Access is a big one: a tight, low-clearance crawlspace with a small hatch slows the crew and raises labor. The volume of insulation and debris to remove, the square footage of soil to cover, and the severity of growth on the framing all matter. Whether the job includes only cleanup or adds full encapsulation with a dehumidifier roughly doubles the scope. Structural repairs to rotted joists or subfloor are separate and can be significant. When comparing bids, confirm each one specifies how it handles the moisture source, not just the visible mold, because a quote that omits drainage or vapor-barrier work is solving only half the problem and will likely lead to a repeat job.
Preventing Crawlspace Mold After Remediation
Once the space is clean and dry, maintenance keeps it that way. Inspect the vapor barrier for tears, confirm the dehumidifier is draining and running, and check the crawlspace humidity reading a few times a year. Keep the area free of standing water, repair plumbing leaks promptly, and verify that gutters and grading still move water away from the foundation.
If the crawlspace remains vented, monitor humidity closely during damp weather, since outdoor air can reintroduce moisture. A sealed and conditioned crawlspace generally needs less vigilance but still benefits from an annual look. Catching a torn liner or a new leak early prevents a full re-remediation later.
How to Tell If Your Crawlspace Has a Mold Problem
Because few homeowners crawl under their houses regularly, crawlspace mold often announces itself indirectly. A persistent musty smell in the rooms above, especially near floor registers or where the floor feels cool, is a common first clue, carried up by the stack effect that draws crawlspace air into the living space. Increased allergy or respiratory symptoms indoors that ease when occupants leave the house can point the same direction.
Physical signs in the crawlspace itself include visible growth on the underside of the subfloor and on joists, sagging or fallen insulation that has absorbed moisture, condensation droplets on framing or ductwork, standing water or damp soil, and a general dank smell on opening the access hatch. Buckling or cupping hardwood floors above can signal crawlspace humidity migrating upward. If a real-estate inspection flagged the crawlspace, or you notice any combination of these signs, it is worth a closer look with a flashlight before the problem worsens. Catching it through these indirect signals is usually the only way most homeowners discover a crawlspace issue at all.
Vented Versus Sealed Crawlspaces
The debate over crawlspace ventilation shapes any remediation plan. Older building codes called for vents to the outside on the theory that air movement would dry the space. In mixed and humid climates, building scientists have largely reversed that view, because outdoor air in warm, damp weather carries moisture in, condenses on cool framing, and feeds the very mold the vents were supposed to prevent. The modern preference in many regions is a sealed, conditioned crawlspace with the vents closed, the soil encapsulated, and humidity controlled mechanically.
Colorado’s Front Range climate is generally dry, which complicates the simple rule. A vented crawlspace here may stay reasonably dry for much of the year, but ground moisture from bare soil and the occasional water event can still drive mold without a vapor barrier. Whether you keep the crawlspace vented or convert it to sealed and conditioned, the non-negotiable steps are a continuous vapor barrier over the dirt and humidity control. A remediation contractor familiar with local conditions can advise which approach suits your specific home and moisture profile.
Health Reasons Crawlspace Mold Matters
A crawlspace is not sealed off from the rest of the home as completely as homeowners assume. Through a phenomenon called the stack effect, air rises through a house and pulls replacement air up from the lowest level, which means a significant share of the air you breathe upstairs originated in the crawlspace. Mold spores, musty odors, and the microbial compounds the colony releases ride that airflow into living spaces. The CDC and EPA describe consistent indoor mold effects, congestion, coughing, throat and eye irritation, with stronger reactions in people who have asthma, allergies, or weakened immunity.
That connection is why an unaddressed crawlspace problem can produce symptoms far from the source, and why remediation is an indoor-air-quality measure, not just a structural one. Anyone in the home experiencing persistent respiratory symptoms should consult a physician, while the crawlspace itself is assessed and corrected by a qualified professional. Treating the space as part of the home’s living environment, rather than an out-of-sight void, changes how seriously most homeowners take the problem.
When to Hire a Professional
Crawlspace remediation usually warrants a professional, because the area is often larger than the EPA’s 10-square-foot DIY threshold, the conditions are physically difficult, and proper containment and HEPA filtration matter when spores can travel into the home. Bring in a pro for widespread growth, recurring mold, contaminated-water flooding, or when anyone in the household has asthma, allergies, or weakened immunity.
A qualified inspector can assess moisture, identify the water source, and define the contaminated area before any work starts, which keeps the scope honest. That assessment also ties remediation to the encapsulation and drainage repairs that stop the problem from coming back, so the money spent solves the issue rather than postponing it.
For Front Range homeowners, a crawlspace is easy to forget about precisely because it is out of sight, yet it influences the air quality of the whole house and the durability of the floor structure above it. Scheduling a periodic look, especially after the spring snowmelt and summer storm season that drive local moisture, catches problems while they are small. A musty smell upstairs, a spike in indoor allergy symptoms, or floors that feel cool and damp are all worth a flashlight check at the access hatch, and a professional can confirm whether what you find warrants remediation before it grows into a larger structural and air-quality concern.
References
- Mold Cleanup in Your Home — U.S. Environmental Protection Agency
- A Brief Guide to Mold, Moisture and Your Home — U.S. Environmental Protection Agency
- About Mold and Health — Centers for Disease Control and Prevention
Frequently asked questions
Is crawlspace mold remediation a DIY job?
Usually not. Crawlspaces are often larger than the EPA's 10-square-foot DIY threshold, are physically cramped, and require containment and HEPA filtration to keep spores from entering the home. Professional remediation is the safer choice for most crawlspaces.
What is crawlspace encapsulation?
Encapsulation seals the soil and walls of a crawlspace with a heavy polyethylene vapor barrier and adds a dehumidifier to control humidity. It blocks ground moisture and holds humidity around 50 percent, which is the most durable way to keep mold from returning.
How much does crawlspace mold remediation cost?
Costs vary with size, severity, and whether encapsulation is included. Basic cleanup commonly runs in the low thousands, while full remediation with encapsulation costs considerably more. Get multiple quotes, since the lowest bid may skip the moisture control that prevents regrowth.
Why does my crawlspace keep growing mold?
It is almost always a moisture issue: ground moisture from bare soil, humid air entering a vented crawlspace, or a leak and poor drainage. Cleaning without sealing the soil and controlling humidity lets mold return within weeks.
Front Range homeowners worried about a musty crawlspace can reach out through our contact page to connect with a vetted inspector who can assess moisture and scope the remediation before work begins.