How Does Mold Remediation Work? A Plain Guide
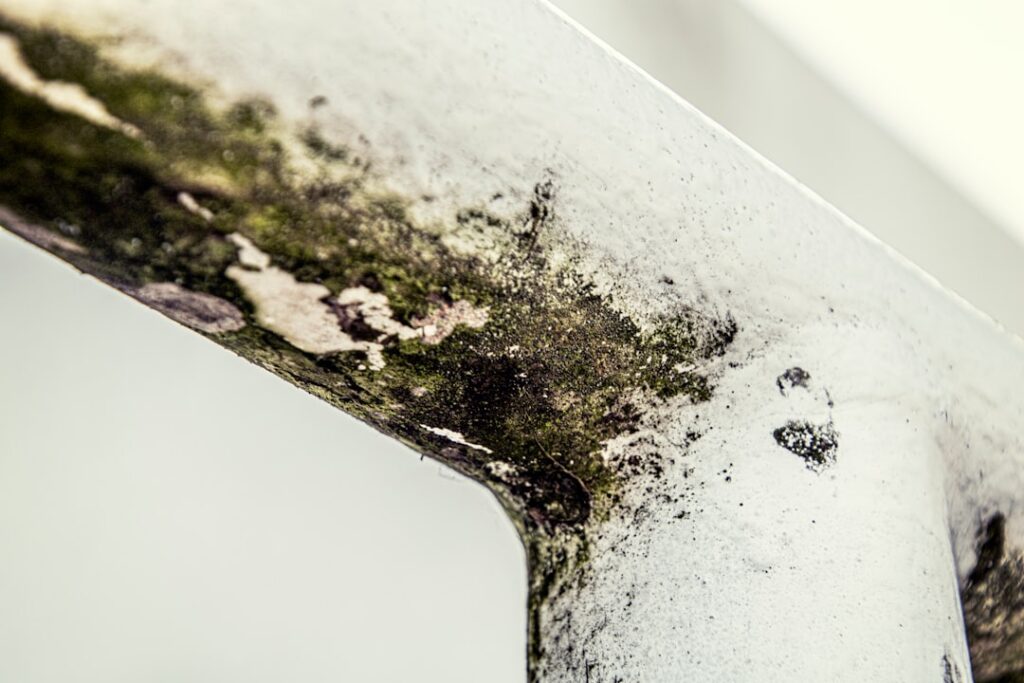
When mold spreads beyond a wipeable patch, the conversation shifts from cleaning to remediation, and many homeowners are unsure how does mold remediation work in practice. Remediation is a controlled, multi-step process designed to remove mold while keeping spores from spreading through the rest of the home. It follows EPA-based principles whether the job is a single closet or an entire basement. Knowing the stages helps you understand a contractor’s proposal and recognize when corners are being cut. This guide summarizes EPA and CDC guidance current as of 2026 — consult your physician about symptoms and a certified professional for testing and remediation decisions.
Part of our Mold Removal & Remediation guide — start there for the full picture →
Is this mold, asbestos, or water damage? Get a free instant screen
Upload a clear photo of the suspect area. You'll get an instant AI screening opinion and what to do next. This is screening guidance, not a professional determination.
Screening guidance only. AI can be wrong. Confirm asbestos, mold type, or lead with lab testing or a licensed professional before acting.
How Does Mold Remediation Work?
Mold remediation works by isolating the affected area, removing mold and unsalvageable materials, cleaning and drying everything, and fixing the moisture source so growth cannot return. The defining feature that separates remediation from ordinary cleaning is containment: professionals seal the work zone and use negative air pressure with HEPA filtration so spores disturbed during removal do not migrate into clean parts of the house.
The EPA’s remediation guidance frames the goal as both removal and moisture control. Killing mold is not the objective, because dead mold can still cause allergic reactions; the objective is physical removal and a dry environment that does not support regrowth. A typical project moves through assessment, containment, removal, cleaning, drying, and a final clearance check. The same workflow appears in the regional walkthrough on mold remediation in a coastal climate.
Step 1: Assessment and Moisture Diagnosis
Every credible remediation starts by mapping the problem. The crew determines how far the growth extends — including hidden areas behind walls or under flooring — and, just as importantly, why the mold grew. Moisture meters and sometimes thermal imaging locate damp materials and trace water back to its source.
This step is non-negotiable. Remediation that removes visible mold but ignores the leak, the humidity, or the condensation feeding it will fail within weeks. The assessment also sets the scope, which lets a homeowner compare bids fairly. The mold inspection hub explains how an independent assessment before remediation can identify the moisture source and define that scope objectively.
There is value in having this diagnosis performed by someone who does not also profit from the removal. A firm that both assesses and remediates has an incentive to find more work, and one that verifies its own results has an incentive to declare success. An independent assessor sidesteps both, producing a scope and a moisture diagnosis a homeowner can trust and use to compare contractor bids on equal footing. The few hundred dollars an assessment costs often pays for itself by preventing an oversized scope or, worse, an undersized one that lets the problem return.
Step 2: Containment
Containment is what makes remediation safer than haphazard cleaning. Workers seal the area with plastic sheeting, often building a barrier across doorways, and run HEPA-filtered air scrubbers to create negative air pressure inside the zone. That pressure pulls air inward, so when mold is disturbed, contaminated air is captured rather than spreading.
HVAC systems are shut down or sealed off to keep spores out of ductwork. For larger jobs, an airlock or decontamination chamber may be set up so workers can enter and exit without carrying spores out. Containment is the step most often skimped on by underqualified outfits, and its absence is a red flag.
The physics behind containment is straightforward but important. Negative air pressure means the air scrubber removes air from the sealed zone faster than it leaks in, so air flows inward through any gaps and contaminated air cannot drift out into clean rooms. The scrubber’s HEPA filter captures fine spores before exhausting the air, often to the outdoors. Without this setup, the act of removing mold — cutting drywall, pulling insulation — releases a burst of spores that ordinary room air currents then spread throughout the house. That is why a crew working without containment can leave a home with more widely distributed contamination than it started with, even as the original visible patch disappears. Containment is not a formality; it is what makes remediation safer than haphazard cleaning.
Step 3: Removal of Mold and Materials
With containment in place, the crew removes growth and materials that cannot be salvaged. Porous materials saturated with mold — drywall, carpet, padding, and some insulation — are typically cut out, bagged in sealed plastic, and disposed of, because cleaning rarely reaches mold that has penetrated.
Semi-porous and nonporous surfaces that can be saved, like framing or sealed wood, are HEPA-vacuumed and scrubbed with detergent solutions. The EPA does not recommend bleach as a routine remediation step. Misting helps suppress airborne spores during removal. Material that comes out is sealed before it leaves the containment zone so spores are not tracked through the house. The guide on black mold on insulation illustrates why some materials must be discarded rather than cleaned.
Salvage versus replacement
Within the removal phase sits a constant judgment about which materials stay and which go, and it follows porosity. Nonporous surfaces such as tile, metal, glass, and finished surfaces can usually be cleaned and kept. Semi-porous solid wood framing can often be saved through HEPA vacuuming, scrubbing, and sometimes light sanding, as long as the wood is still sound. Porous materials that have absorbed mold — saturated drywall, carpet and padding, ceiling tiles, most fiberglass insulation — are typically removed because mold roots into them where cleaning cannot reach. The EPA recognizes that porous materials saturated with mold often cannot be restored, so seeing them on the removal list is normal rather than a sign of overreach.
Step 4: Cleaning and Drying
After removal, every remaining surface in the zone is cleaned to capture residual spores and settled dust. HEPA vacuuming and damp wiping are standard. Because dead mold fragments still cause reactions, this detailed cleaning matters as much as the removal itself.
Then the space is dried below the moisture level mold needs. Industrial fans and dehumidifiers run until materials reach an acceptably dry reading, verified with moisture meters rather than guessed at. This is also when the underlying water problem should be repaired — the roof, the plumbing, the drainage, or the ventilation gap. Drying without fixing the source only delays the next outbreak.
Step 5: Clearance and Verification
The final step confirms the work succeeded. A clearance inspection checks that no visible mold remains, that materials are dry, and that the area is clean. For larger or health-sensitive projects, post-remediation verification testing — ideally by an independent party rather than the remediation company itself — provides objective confirmation.
Independent verification matters because a company that both performs and tests its own work has a conflict of interest. Once clearance passes, rebuilding can begin: new drywall, flooring, or insulation goes in. Skipping verification leaves a homeowner without proof the problem is resolved, which can complicate insurance or a future sale.
Verification typically combines a visual inspection — confirming no remaining growth and that materials are dry — with, for larger jobs, post-remediation air sampling compared against an outdoor baseline. The point is objective evidence rather than the contractor’s word. Documentation from this step also has practical value beyond peace of mind: it can support an insurance claim and, if you later sell the home, demonstrate that a past mold issue was professionally resolved. A homeowner who keeps the assessment, the scope, the clearance report, and the receipts has a complete record that protects them well after the work is finished.
How Long Each Stage Takes
Timelines vary with the size and complexity of the job, but the stages have rough rhythms worth knowing. Assessment and setup often take a few hours to most of a day, depending on how much hidden growth must be traced. Containment and removal can run from part of a day for a small contained area to several days for multiple rooms or heavy material removal. Cleaning follows the removal closely.
Drying is the stage homeowners most often underestimate. Materials must reach an acceptably dry reading before rebuilding, and that can take a day or more of running fans and dehumidifiers, verified with moisture meters rather than guessed. Verification and any independent post-remediation testing happen after drying, not before, which adds time but is what confirms the work succeeded. Repairing the moisture source may run on its own schedule with a separate trade. A contractor who promises a same-day finish for a job that clearly needs drying and verification is skipping steps, and skipped steps are how mold returns.
Remediation vs. DIY Cleaning
Not every mold problem needs full remediation. The EPA suggests homeowners can often handle areas under roughly ten square feet themselves with detergent, water, and protective gear. Professional remediation becomes appropriate for larger areas, mold from sewage or flooding, growth inside HVAC systems, hidden mold behind walls, or any situation where occupants have asthma or weakened immune systems.
The dividing line is mostly about scale and the ability to contain spores. A small patch on a bathroom wall is a Saturday task; widespread growth across a basement is a controlled removal that protects the rest of the home. When in doubt, an assessment clarifies which category your situation falls into.
There is also a hidden risk in do-it-yourself work on a job that turns out to be larger than it looked: disturbing established mold without containment can spread spores through the house, turning a one-room problem into a whole-home one. If you begin a small cleanup and discover the growth extends behind the wall, into insulation, or across more area than expected, the right move is to stop, re-seal the area, and reassess rather than push through. Recognizing when a job has outgrown a homeowner’s tools is itself part of doing it correctly.
When to Call a Professional
Call a professional for extensive growth, contaminated-water sources, mold in ductwork or structural materials, recurring growth despite cleaning, or any health concern among occupants. Professionals bring containment, HEPA filtration, and verification that do-it-yourself work cannot match.
An independent assessment before remediation helps by pinpointing the moisture source and defining a clear scope, so contractor bids are comparable and the root cause gets fixed. For health symptoms, consult a physician. Pairing independent diagnosis with qualified remediation gives the most durable result.
When evaluating contractors, ask directly how they will contain the area, which materials they plan to remove versus clean, how they will verify the work, and how the moisture source will be addressed. Clear answers to those four questions separate a thorough firm from one that will simply scrub and leave. The process described here is the standard the EPA’s remediation guidance points to, and a contractor who follows it should be able to explain each stage in plain terms rather than rushing past the parts — containment, drying, verification, and the moisture fix — that make the result last.
Keeping the records from the job matters after the crew leaves. Hold onto the initial assessment, the agreed scope, the clearance or verification report, and the receipts for materials and labor. That documentation can support an insurance claim, and if you sell the home later, it demonstrates that a past mold problem was professionally resolved rather than painted over. A complete paper trail turns a stressful episode into a documented, closed chapter that protects you well beyond the day the work finishes.
References
- Mold Remediation Guide — U.S. Environmental Protection Agency
- Mold Cleanup in Your Home — U.S. Environmental Protection Agency
- About Mold and Health — Centers for Disease Control and Prevention
- Mold and Your Health — Colorado Department of Public Health and Environment
Frequently asked questions
What are the steps of mold remediation?
The core steps are assessment and moisture diagnosis, containment with negative air pressure, removal of mold and saturated materials, detailed cleaning and drying, and a final clearance check. Fixing the water source is part of the process, not an afterthought.
How is mold remediation different from cleaning?
Remediation adds containment and HEPA filtration to keep spores from spreading, removes unsalvageable materials, and verifies the result. Ordinary cleaning suits small surface areas under about ten square feet without those controls.
How long does mold remediation take?
It depends on the size and complexity of the job. Small contained projects may take a day or two, while extensive growth or structural removal can take longer, especially when drying time and rebuilding are included.
Does remediation get rid of mold permanently?
Only if the moisture source is fixed. Remediation removes existing growth, but mold returns wherever moisture returns, so repairing the leak, humidity, or condensation that caused it is what makes the result last.
Front Range homeowners facing a mold problem who want an independent assessment before hiring a remediation crew can reach out through our contact page to connect with a vetted local inspector.