What Does Mold Remediation Entail: A Plain Guide
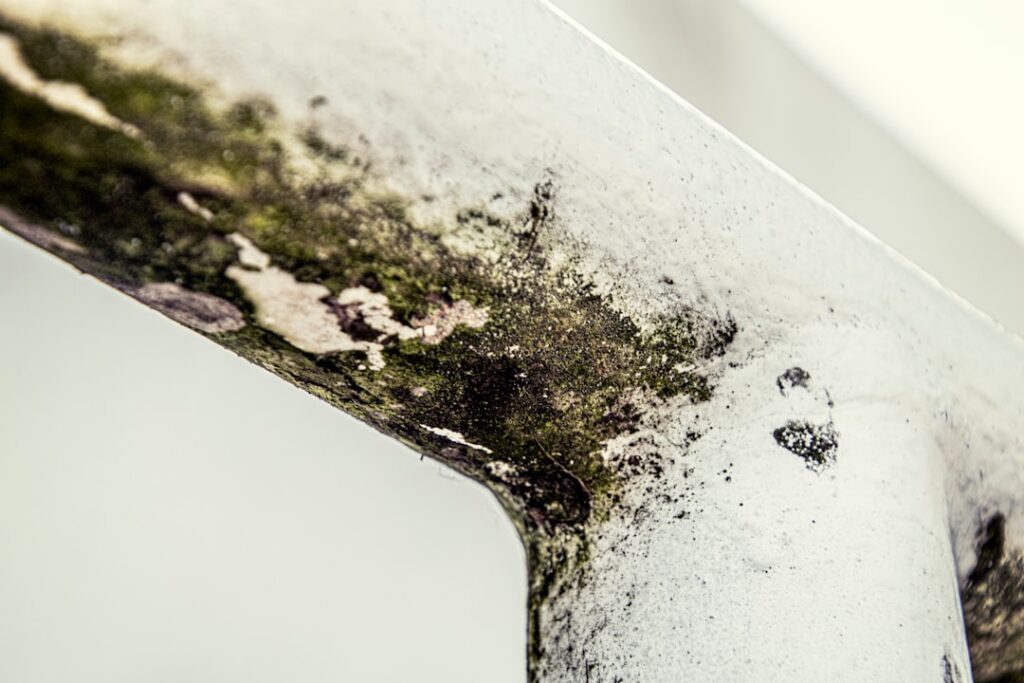
If a contractor has told you your home needs remediation, your next question is probably what that actually means. Mold remediation entails a structured, multi-step process designed to remove mold, clean and restore affected areas, and correct the moisture that allowed growth in the first place. It is more than spraying bleach on a stain. This guide summarizes EPA and CDC guidance current as of 2026 and walks through each step in plain language. It is general information rather than medical advice — consult your physician about symptoms and a licensed professional for remediation decisions.
Part of our Mold Removal & Remediation guide — start there for the full picture →
Is this mold, asbestos, or water damage? Get a free instant screen
Upload a clear photo of the suspect area. You'll get an instant AI screening opinion and what to do next. This is screening guidance, not a professional determination.
Screening guidance only. AI can be wrong. Confirm asbestos, mold type, or lead with lab testing or a licensed professional before acting.
What Does Mold Remediation Entail?
At its core, mold remediation entails returning an indoor space to normal, healthy fungal conditions and preventing recurrence. The process generally includes assessing the extent and source of the mold, containing the work area, removing contaminated materials, cleaning salvageable surfaces, drying the space, correcting the moisture source, and verifying success. Each step matters; skipping any one tends to leave a problem that comes back.
Remediation is distinct from simple cleaning because it addresses both the visible mold and the conditions that produced it. The EPA emphasizes that mold is a moisture problem first, so a remediation that ignores the water source is incomplete. For a complementary view of the workflow, our guide on how mold remediation works covers the same process from a slightly different angle.
Step One: Assessment and Moisture Detection
Every project should begin with an assessment. The contractor identifies where mold is growing, how extensive it is, and — most importantly — what moisture source is feeding it. Tools include moisture meters that detect dampness behind walls and sometimes thermal cameras that reveal hidden wet spots.
This diagnostic step shapes everything that follows. Finding mold is easy; identifying why it grew is the valuable part. A failed pipe, roof leak, condensation problem, or humid crawl space each calls for a different correction. Without this step, a crew might clean the visible growth while leaving the water source untouched, guaranteeing a repeat.
Step Two: Containment
Once the scope is clear, the work area is contained to prevent spores from spreading during removal. Crews seal the space with plastic sheeting and run HEPA air scrubbers that create negative pressure, drawing air inward so contaminated air cannot drift into clean rooms.
For small jobs the EPA accepts limited precautions, but for substantial contamination, containment is essential. Disturbing mold releases spores, and without containment those spores settle elsewhere and may seed new growth. This step is one of the clearest differences between professional remediation and casual cleaning, and a quote that omits it for a large job should raise questions.
Step Three: Removing Contaminated Materials
With containment in place, crews remove materials that cannot be salvaged. Porous items — saturated drywall, carpet, ceiling tile, and fibrous insulation — generally must be cut out and bagged because mold penetrates them too deeply to clean reliably. The EPA recommends discarding absorbent materials with extensive growth.
Non-porous and semi-porous surfaces like sealed wood, metal, glass, and tile can usually be cleaned and kept. Our guide on what kills mold on drywall explains why surface treatment rarely saves heavily colonized wallboard. The judgment of what to remove versus clean is a key part of what remediation entails.
Step Four: Cleaning and HEPA Vacuuming
Salvageable surfaces are cleaned with detergent and water or antimicrobial agents, then HEPA-vacuumed to capture settled spores. HEPA filtration is important because ordinary vacuums can recirculate fine spores back into the air. Crews work systematically to ensure surfaces are physically cleaned, not merely treated with a chemical.
The EPA notes that the goal is physical removal of mold, since dead mold can still cause allergic reactions. Bleach is not required and is often discouraged for porous materials; thorough cleaning and removal matter more than any particular biocide. This stage transforms a contaminated space back toward normal conditions.
Step Five: Drying the Space
After cleaning, the area must be dried completely. Crews use fans, dehumidifiers, and air movers, monitoring with moisture meters until readings return to normal levels for the materials involved. Drying is not optional — residual moisture invites mold to return quickly, sometimes within days.
This step ties back to the moisture source. If the underlying leak or humidity problem is not also corrected, drying only buys time. Proper remediation pairs thorough drying with a permanent fix to the water source so the space stays dry after the equipment is removed.
Step Six: Correcting the Moisture Source
The defining feature of remediation is correcting the cause. That might mean repairing a plumbing leak, fixing a roof, improving grading and drainage, adding ventilation, encapsulating a crawl space, or installing a dehumidifier. Without this, the EPA is clear that mold will return regardless of how well the cleanup was done.
Sometimes the moisture fix is a separate trade — a plumber or roofer — billed independently from the remediation. Homeowners should confirm who is responsible for the source repair and ensure it is completed before considering the project finished. This is where many incomplete jobs fall short.
Step Seven: Verification and Clearance Testing
Many projects conclude with clearance testing, ideally by an independent party rather than the remediation company. Post-remediation verification confirms that the space has returned to normal fungal conditions through visual inspection, moisture readings, and sometimes air sampling compared against an outdoor baseline.
Clearance is especially valuable during real estate transactions, after significant remediation, or when health concerns are involved. It provides documented assurance that the work succeeded. The mold inspection and testing hub explains how verification fits into the overall process and why independence matters.
What Homeowners Should Do Before the Crew Arrives
A little preparation makes remediation smoother and can lower cost. Before the crew arrives, move valuables, electronics, and furniture out of the work area if you can do so safely without disturbing heavy mold growth. Clear pathways so equipment can be brought in and debris carried out. If the moisture source is an active leak, having it stopped or scheduled for repair keeps the project from stalling.
Document the affected areas with photos for your records and any potential insurance claim. Confirm with the contractor which areas will be contained and whether you and any pets need to relocate temporarily, especially if household members have respiratory sensitivities. Ask how long power, water, or HVAC may be interrupted. These steps protect your belongings, speed the work, and reduce the chance of surprises once containment goes up and the crew begins disturbing the growth.
Signs Remediation Was Done Right
After the work, a few indicators show whether remediation succeeded. The visible mold should be gone, not painted over, and the previously affected materials should be either cleaned or replaced with new material. There should be no lingering musty odor, which often signals remaining hidden growth or trapped moisture. Moisture readings, if you ask for them, should be back to normal for the materials involved.
The strongest confirmation is independent clearance testing showing indoor conditions comparable to outdoors. The moisture source should be demonstrably fixed — the leak repaired, the crawl space encapsulated, or humidity controls in place — because without that, recurrence is a matter of time. A reputable contractor provides documentation of the work, including before-and-after photos and any test results. If mold returns within weeks, it usually means the source was never addressed, which is the single most common reason a remediation that looked complete fails.
When to Hire a Professional
The EPA suggests homeowners can handle mold on hard surfaces under about 10 square feet with detergent, water, and protective gear. Beyond that, or when mold involves HVAC systems, sewage, or persistent moisture, professional remediation is the safer choice. People with asthma, allergies, or weakened immunity should avoid disturbing mold and consult a physician.
Professional remediation entails the full sequence above performed with proper equipment and containment. That structure is what you are paying for, and it is why a qualified contractor’s work lasts while a quick surface cleaning often does not. Understanding each step helps you evaluate whether a proposal is complete before you sign.
Equipment Used in Professional Remediation
Part of what distinguishes remediation from cleaning is the specialized equipment involved. HEPA air scrubbers filter airborne spores and create the negative pressure that keeps contaminated air inside the work zone. Air movers and commercial dehumidifiers dry the space far faster than household fans, and moisture meters and sometimes thermal cameras locate dampness behind surfaces and confirm when drying is complete.
Crews also use HEPA vacuums, which capture fine spores that ordinary vacuums would recirculate, along with personal protective equipment such as N-95 or higher respirators, gloves, and suits. For larger jobs, plastic sheeting and zipper-door systems form the containment barrier. This equipment is a meaningful share of what a remediation contract pays for, and its presence on a job is a sign the work is being done to a professional standard rather than as a casual cleanup.
How Long Remediation Takes
Timelines depend on scope. A small contained project may finish in a day or two, while a moderate room-sized job typically runs three to five days once drying time is included. Larger or multi-room contamination, HVAC involvement, or extensive structural drying can extend to a week or more. Drying is frequently the rate-limiting step, since equipment must run until materials reach normal moisture levels.
Several factors lengthen a project. Hidden damage found when walls are opened expands the scope. High ambient humidity slows drying. A separate trade may be needed to repair the moisture source, pausing the work until that fix is done. Homeowners should build flexibility into the schedule and confirm the contractor verifies dryness before closing walls, rather than rushing to meet a deadline at the cost of a lasting result.
Costs and What They Cover
While this guide focuses on the process, understanding the cost structure helps you evaluate proposals. Small jobs may run a few hundred dollars, mid-size room projects commonly fall between $1,500 and $4,500, and extensive contamination can exceed $10,000. Professional per-square-foot rates typically range from $10 to $25 for the affected area.
The price reflects the full sequence: assessment, containment, removal, cleaning, drying, and verification, plus equipment and disposal. Moisture-source repair and the rebuild of removed materials are often billed separately, sometimes by other trades. Clearance testing adds a few hundred dollars. When you understand what remediation entails step by step, these line items make sense rather than appearing as padding, and you can judge whether a low bid is actually omitting essential work.
Remediation vs. Simple Cleaning
Homeowners sometimes wonder why they cannot just wipe mold away themselves and skip the formal process. The answer comes down to scale and method. Simple cleaning is appropriate for small hard-surface growth under about 10 square feet, where the EPA allows detergent-and-water cleanup with protective gear. There is no containment, no material removal, and no clearance testing because the risk of spreading spores is low.
Remediation entails the full structured process precisely because larger or hidden contamination behaves differently. Disturbing a substantial colony without containment scatters spores throughout the home; cleaning a surface while colonized drywall remains behind it leaves the problem in place; skipping drying invites a fast return. The added steps are not bureaucratic — each addresses a specific way that casual cleaning fails on a bigger job. Understanding this helps homeowners judge when a quick wipe-down suffices and when the situation genuinely calls for the containment, removal, and verification that define professional remediation.
References
- Mold Cleanup in Your Home — U.S. Environmental Protection Agency
- About Mold and Your Health — Centers for Disease Control and Prevention
- A Brief Guide to Mold, Moisture and Your Home — U.S. Environmental Protection Agency
Frequently asked questions
What are the main steps of mold remediation?
Assessment and moisture detection, containment, removal of contaminated materials, cleaning and HEPA vacuuming, drying, correcting the moisture source, and verification. Skipping any step tends to leave a problem that returns.
Does mold remediation include fixing the leak?
Correcting the moisture source is essential to true remediation, but it may be performed by a separate trade and billed independently. Confirm who handles the source repair before considering the job complete.
Is bleach used in mold remediation?
Not necessarily. The EPA emphasizes physical removal of mold over any particular biocide, and bleach is often discouraged for porous materials. Thorough cleaning and removal matter more than the chemical used.
Do I need clearance testing after remediation?
It is recommended for significant jobs, real estate transactions, or health concerns. Independent clearance testing confirms the space returned to normal fungal conditions and provides documented assurance the work succeeded.
If you want an independent review of a remediation proposal before committing, Front Range homeowners can get in touch through our contact page to connect with a vetted local inspector.