Mold Remediation Removal: How the Process Works
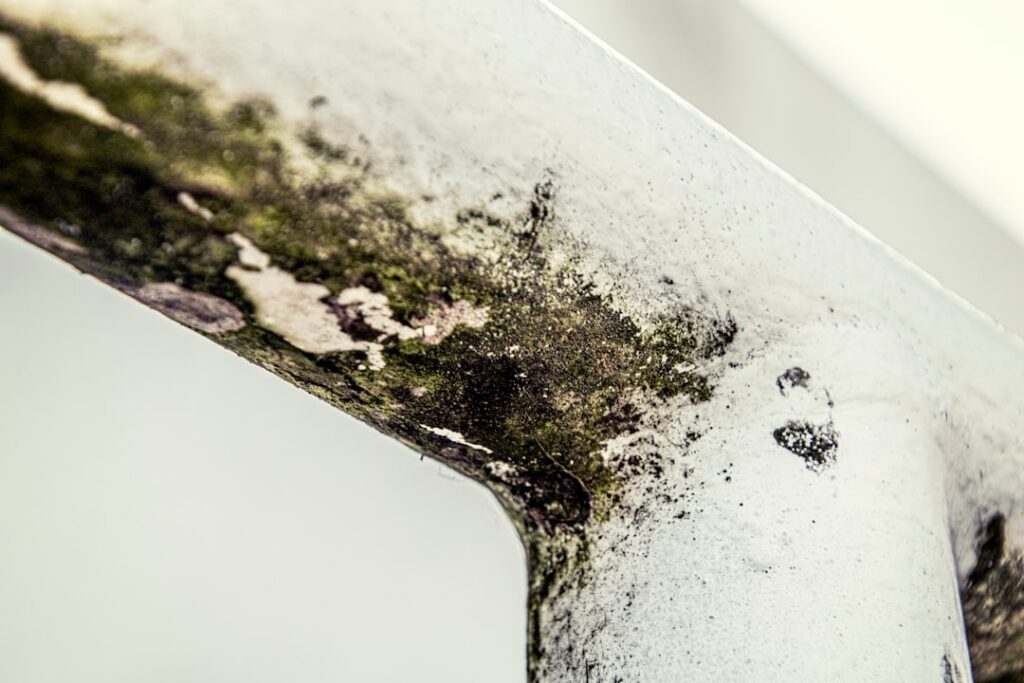
When a mold problem outgrows a spray bottle, homeowners enter the world of professional mold remediation removal — a structured process that does far more than scrub a wall. Done correctly, it isolates the contamination, strips out unsalvageable materials, cleans what remains, and verifies the air is clean before anyone moves back in. Understanding the sequence helps you judge whether a contractor is following accepted standards or cutting corners. This guide summarizes EPA and CDC guidance current as of 2026; consult a physician for symptoms and a certified professional for testing and remediation decisions.
Is this mold, asbestos, or water damage? Get a free instant screen
Upload a clear photo of the suspect area. You'll get an instant AI screening opinion and what to do next. This is screening guidance, not a professional determination.
Screening guidance only. AI can be wrong. Confirm asbestos, mold type, or lead with lab testing or a licensed professional before acting.
What does mold remediation removal involve?
Mold remediation removal is the controlled elimination of mold-contaminated materials combined with cleaning and drying of the affected space. The EPA and industry standards describe a consistent arc: assess the extent and find the moisture source, contain the area to stop spore spread, remove porous materials that cannot be cleaned, HEPA-vacuum and clean salvageable surfaces, dry everything thoroughly, and confirm success. “Remediation” is the broad project; “removal” is the demolition step where moldy drywall, insulation, and carpet leave the building.
The distinction between cleaning and removal matters. Hard, non-porous surfaces get cleaned and kept. Porous materials with real growth get removed and discarded because no treatment reliably reaches mold rooted inside them. A good crew sorts materials into those two buckets early.
Step one: assessment and moisture source
Every legitimate project begins by finding why the mold grew. Remediation that skips this step is destined to repeat. Technicians use moisture meters, thermal imaging, and sometimes air or surface sampling to map the extent of growth and trace the water — a roof leak, plumbing failure, foundation seepage, or chronic humidity. The CDC and EPA both emphasize that moisture control is the foundation of any durable fix.
For homeowners deciding whether they even need this level of service, the broader mold inspection and testing hub explains how assessment and testing feed into a removal plan. A clear scope before work begins also protects you from open-ended billing.
Step two: containment
Containment is what separates professional removal from a homeowner with a fan. Removing moldy materials releases a burst of spores, and without isolation those spores settle throughout the home, creating new colonies wherever moisture later appears. Crews build containment using:
- Plastic barriers sealing the work area from clean spaces.
- Negative air pressure created by air scrubbers exhausting outdoors, so air flows into the containment rather than out.
- Sealed HVAC vents to keep spores out of the duct system.
- Decontamination zones where workers remove protective gear.
The larger or more contaminated the area, the more elaborate the containment. A small bathroom may need a simple barrier; a flooded basement needs full negative-pressure enclosure.
Step three: removal of contaminated materials
This is the demolition phase. Workers cut out moldy drywall — typically at least a foot beyond visible growth — and bag insulation, carpet, padding, and ceiling tile. Materials are misted first to suppress airborne spores, then double-bagged and removed through the decontamination route, not carried openly through the house. Solid wood framing is usually salvageable through cleaning rather than removal, provided it remains structurally sound.
Costs scale with the volume of material removed and the difficulty of access. Basement projects, where mold often spreads across framing and finished walls, sit at the higher end. Our breakdown of basement mold removal cost shows how square footage and material type drive the final number.
Step four: cleaning and HEPA filtration
After removal, every remaining surface in the containment gets cleaned. Crews HEPA-vacuum surfaces to capture settled spores, then damp-wipe with detergent or an antimicrobial. Air scrubbers with HEPA filters run throughout to pull spores out of the air. This stage targets the invisible contamination that removal alone leaves behind — the spores that settled on framing, subfloor, and fixtures during demolition.
HEPA filtration is central because it captures particles down to 0.3 microns, well within the size range of mold spores. A standard shop vacuum or box-store filter does not, which is why DIY removal often spreads the problem.
What HEPA filtration actually captures
HEPA filters are defined by their ability to capture at least 99.97% of particles at 0.3 microns, the size that is hardest to trap. Mold spores generally range from roughly 1 to 30 microns, well within reach, which is why HEPA air scrubbers and vacuums are standard in professional work. A household shop vacuum or a standard furnace filter does not meet this standard and will pass spores straight through its exhaust, effectively spreading the contamination it was meant to capture. This single equipment difference explains much of why DIY removal so often makes a mold problem worse rather than better.
Step five: drying and moisture correction
Mold returns wherever moisture returns, so drying is non-negotiable. Crews run dehumidifiers and air movers until materials read dry, verified with moisture meters rather than touch. The EPA’s general target is to dry wet materials within 24–48 hours of any water event to prevent growth; the same urgency applies after removal.
Critically, the original water source must be repaired — by the remediation crew, a plumber, or a foundation contractor — before the space is rebuilt. Replacing drywall over an unrepaired leak guarantees a repeat project. In Colorado, common sources include foundation drainage problems, swamp-cooler condensation, and ice-dam leaks.
Step six: clearance verification
The final step closes the loop. After cleaning and drying, an independent assessor often performs a visual inspection and clearance air sampling, comparing indoor spore counts to an outdoor baseline. Passing clearance confirms the removal worked before reconstruction begins. Reputable contractors welcome third-party clearance because it documents that the job met standard.
The role of an independent assessor
On larger projects, the cleanest arrangement separates the party that diagnoses from the party that cleans. An independent industrial hygienist or assessor writes a remediation protocol — defining the scope, containment requirements, and clearance criteria — that the contractor then follows. Because the assessor does not profit from the cleanup, the protocol reflects what the building actually needs rather than what generates the most billable work. The same independent assessor performs the final clearance, closing the loop without conflict of interest. For homeowner-scale jobs this formality may be overkill, but for extensive contamination, insurance claims, or real-estate disputes it protects everyone involved and produces documentation that holds up.
Common mistakes that compromise a project
Even well-meaning remediation fails when key steps are skipped. The recurring errors:
- Skipping moisture repair: rebuilding over an unaddressed leak guarantees recurrence and is the single most common cause of repeat projects.
- Inadequate containment: removing materials without negative pressure spreads spores to clean areas.
- Cutting too tight: removing drywall only to the visible edge of growth leaves rooted material behind.
- Painting over instead of removing: sealing mold with paint or “mold-resistant” primer hides it without killing it.
- No clearance verification: declaring success by appearance alone, with no objective confirmation.
A homeowner reviewing a contractor’s scope can use this list as a checklist. A bid that omits any of these is not a bargain; it is a deferred expense.
How long does it take and what does it cost?
Timelines depend on scope. A small, contained job may finish in one to three days; extensive contamination with structural drying can run a week or more. Reconstruction — new drywall, paint, flooring — adds time on top. For a realistic schedule, our guide on how long mold remediation takes breaks down each phase.
Costs vary widely with size, materials, and access. Industry estimates commonly place residential remediation in the low hundreds for a tiny spot to several thousand dollars for whole-room or basement projects. Get itemized scopes from at least two contractors, and be wary of any quote that omits containment, moisture repair, or clearance.
Several factors drive the figure up. Hard-to-reach areas — crawlspaces, attics, behind built-in cabinetry — add labor. Contamination that has spread into the HVAC system requires duct cleaning on top of the room work. Structural drying with commercial dehumidifiers and air movers adds daily equipment rental. And reconstruction — new drywall, insulation, paint, flooring — is a separate line item that often rivals the remediation itself. When comparing bids, confirm whether reconstruction is included or quoted separately, because a low remediation number that excludes rebuild can end up costing more overall.
Does insurance cover it?
Coverage depends on the cause. Homeowner policies commonly cover mold remediation when it results from a sudden, covered event — a burst pipe or a covered roof leak — but typically exclude mold caused by long-term neglect, deferred maintenance, or flooding (which requires separate flood insurance). Many policies also cap mold-related payouts at a set dollar limit regardless of the actual cost. Document the water event with photos and dates, report it promptly, and read the mold provisions in your policy before assuming coverage. A remediation contractor experienced with insurance claims can help structure the scope and documentation, though the coverage decision rests with the insurer.
How to read a remediation scope of work
The scope document is where a good project is won or lost, and homeowners can evaluate it even without technical training. A complete scope names the affected areas and square footage, describes the containment to be built and the air-filtration equipment to be used, lists exactly which materials will be removed versus cleaned, specifies the drying method and the moisture target, identifies who will repair the moisture source, and defines how success will be verified. Vague language — “treat affected areas,” “address mold as needed” — is a warning sign, because it leaves the contractor to decide scope after you have signed. Insist on specifics, and compare scopes line by line rather than comparing only the bottom-line price.
Questions to ask before signing
A short set of questions separates a thorough contractor from a careless one: How will you contain the work area and what filtration will you use? Which materials are you removing and why? Who is fixing the water source, and is that in this quote or separate? Will there be independent clearance testing? What certifications and insurance do you carry? A contractor who answers these clearly and in writing is demonstrating the discipline the job requires. One who brushes them off is telling you how the work will go.
Reconstruction and preventing recurrence
Remediation ends and reconstruction begins only after the space passes clearance and the moisture source is repaired. Rebuilding with mold-resistant materials — paperless gypsum board, mold-resistant primer, and moisture-tolerant insulation in damp areas — raises the wall’s resistance for the future. The reconstruction phase is a separate scope and cost from remediation, and homeowners should confirm whether a contractor’s quote includes it. Skipping straight to new drywall before clearance, or before the leak is fixed, undoes the entire project. Recurrence prevention also extends to ongoing habits: keeping indoor humidity below 50%, venting bathrooms and kitchens outdoors, and addressing foundation drainage. The remediation removes the existing contamination; these measures keep the rebuilt space from becoming the next problem.
References
- Mold Remediation in Schools and Commercial Buildings — U.S. Environmental Protection Agency
- Mold Cleanup in Your Home — U.S. Environmental Protection Agency
- About Mold and Your Health — Centers for Disease Control and Prevention
- Mold and Dampness — American Lung Association
If you are facing a mold problem too large to clean yourself, a vetted Front Range remediation professional can scope the removal properly — reach out through our contact page for a connection.