Moisture and Mold Remediation: A Homeowner Guide
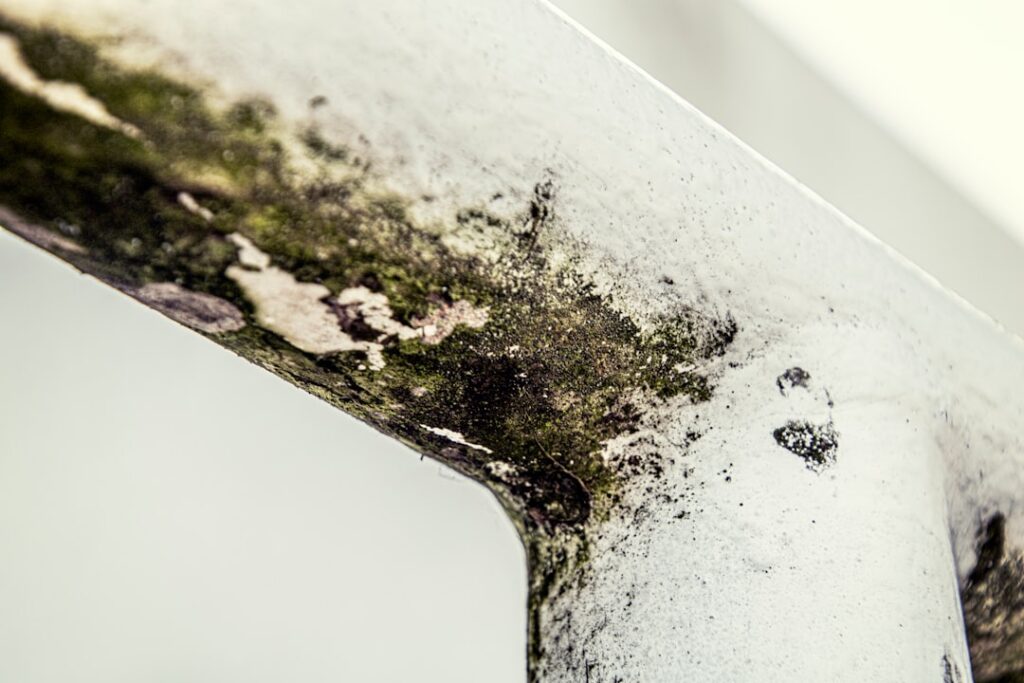
Most failed cleanups share one cause: someone removed the mold but never fixed the water. Effective moisture and mold remediation treats the moisture as the disease and the visible growth as the symptom. Stop the water, dry the structure, then remove the contamination, and the colony does not return. This guide lays out that sequence in plain language. It summarizes EPA and CDC remediation guidance current as of 2026; for health symptoms consult a physician, and for large or hidden contamination, bring in a qualified professional rather than tackling it alone.
Is this mold, asbestos, or water damage? Get a free instant screen
Upload a clear photo of the suspect area. You'll get an instant AI screening opinion and what to do next. This is screening guidance, not a professional determination.
Screening guidance only. AI can be wrong. Confirm asbestos, mold type, or lead with lab testing or a licensed professional before acting.
Why Moisture Comes First in Remediation
Mold cannot grow without moisture, so the moisture source is the root cause and the only durable fix. The EPA is blunt about sequencing: identify and correct the water problem before or alongside cleanup. Scrub a wall, repaint it, and ignore the leak behind it, and the colony reappears within weeks. Find the source first, whether it is a roof penetration, a plumbing drip, condensation, or groundwater intrusion, and the rest of the work actually holds.
Step One: Locate and Fix the Water Source
Trace the water before touching the mold. Common sources include roof and flashing leaks, supply or drain plumbing, failing window seals, condensation on cold surfaces, and below-grade seepage. A moisture meter helps confirm where materials are wet behind finishes. Along the Front Range, ice dams in winter and finished basements below grade are frequent offenders even in a dry climate. The detail on how moisture creates mold damage in a house shows how a single ignored leak escalates into structural problems.
Confirming the Repair Held
After the repair, re-check moisture readings over several days, especially after rain or heavy use. Materials should dry toward normal. If readings stay elevated, the source was not fully resolved, and cleaning would be premature.
Step Two: Contain the Work Area
Containment keeps spores from spreading to clean parts of the house during removal. For larger jobs, professionals use plastic sheeting and negative air pressure with HEPA filtration so disturbed spores exhaust outdoors rather than drift down a hallway. For small DIY cleanups, closing doors, covering vents, and turning off the HVAC reduce cross-contamination. The EPA scales containment to the size of the job, with bigger areas requiring more rigorous isolation.
Step Three: Remove and Clean
Hard, nonporous surfaces such as tile, glass, and finished wood can usually be cleaned with detergent and water, then dried thoroughly. Porous materials that are saturated and visibly moldy, including drywall, carpet, ceiling tile, and insulation, often must be removed and discarded because mold grows into the material where surface cleaning cannot reach. The EPA does not recommend routine bleach use for most household mold cleanup; soap and water plus drying is the baseline. The companion guide on cleaning mold safely covers technique and protective gear.
When the Job Exceeds DIY
The EPA suggests professional remediation once affected areas exceed roughly 10 square feet, when mold is inside HVAC systems, when contaminated water was involved, or when occupants have health concerns. Professionals follow recognized standards, document the work, and verify drying with instruments.
Step Four: Dry Thoroughly
Drying is where many homeowners stop too soon. Wet materials must reach normal moisture content, which can take days with fans, dehumidifiers, and air movement. Verify with a meter rather than by touch. Residual moisture left in wall cavities or under flooring simply restarts the cycle, undoing the cleanup.
Step Five: Control Humidity to Prevent Recurrence
The long-term defense is keeping indoor relative humidity below 60 percent, ideally 30 to 50 percent. Run bathroom and kitchen exhaust fans, vent the dryer outside, use a dehumidifier in damp basements, and address condensation on windows and pipes. A cheap hygrometer confirms you are actually in range. This single habit prevents most recurrences and is the backbone of keeping mold out of a house for good.
Verifying the Remediation Worked
For significant jobs, post-remediation verification confirms the area is dry, visibly clean, and free of musty odor, sometimes backed by clearance air sampling against an outdoor control. Verification matters most when health or a transaction is involved. The pillar overview of mold inspection and remediation for homeowners explains how clearance fits into the full process.
Personal Protection During Cleanup
Disturbing mold releases spores, so even small DIY jobs warrant basic protection. The EPA recommends gloves, eye protection without ventilation holes, and an N95 respirator for limited cleanups to reduce inhalation of spores stirred up during scrubbing or removal. Old clothing that can be washed or discarded afterward keeps spores from spreading to other rooms. For larger or more contaminated jobs, the protective requirements increase, which is part of why the EPA shifts those jobs to trained professionals who use fitted respirators and proper containment. Protecting the person doing the work is not optional, even on a job that looks minor.
Common Moisture Sources by Location
Moisture has favorite entry points. Roofs leak at flashing, valleys, and around penetrations like vents and chimneys. Plumbing fails at supply connections, drain joints, and aging water heaters. Bathrooms generate steam that condenses on cold surfaces, while kitchens add humidity from cooking and dishwashing. Basements take on water through foundation cracks, failed sump pumps, and below-grade walls during wet seasons. Windows condense when warm indoor air meets cold glass. Matching the location of growth to the likeliest moisture source speeds the diagnosis, since mold near a ceiling points up toward the roof while mold along a baseboard points toward groundwater or a low leak.
The Cost of Skipping a Step
Each step in remediation exists because skipping it causes a predictable failure. Skip the moisture fix, and the colony returns. Skip containment, and spores spread to clean rooms during removal. Skip thorough drying, and residual moisture restarts growth inside the wall. Skip verification, and a hidden pocket goes unnoticed until it spreads again. Homeowners tempted to cut corners on a visible patch often pay more on the second round, when the problem has grown and trust in the fix is gone. The sequence is not bureaucratic; each stage protects the work of the others.
When Insurance May Be Involved
Whether a homeowner’s policy covers mold remediation depends heavily on the cause. Sudden, accidental water events such as a burst pipe are more likely to be covered, while damage from long-term neglected leaks or chronic humidity is frequently excluded. Documentation makes the difference: dated photos, the source of water, and a professional assessment support a claim far better than memory. Reviewing the policy before assuming coverage avoids surprises, and an independent assessor’s report carries more weight with an insurer than a remediation contractor’s estimate alone.
Tools That Make Remediation Easier
A few tools turn a guess into a measurement. A moisture meter confirms whether materials are actually wet and whether they have dried, removing the temptation to call a wall dry by touch alone. A hygrometer tracks indoor humidity so you know prevention is working. Fans and a dehumidifier accelerate drying, and a HEPA vacuum captures fine debris during cleanup rather than redistributing it. For larger jobs, professionals add thermal imaging to spot hidden moisture and air movers to dry cavities. Homeowners do not need every tool, but a moisture meter and a hygrometer are inexpensive and prevent the most common remediation mistake, stopping before the structure is truly dry.
The Difference Between Cleaning and Remediation
Wiping a small spot of mold off a tile is cleaning; remediation is a structured process for a real contamination problem. Remediation includes finding the moisture source, containing the area, removing affected materials, cleaning what can be saved, drying thoroughly, and verifying the result. Treating a genuine contamination as a quick wipe-down is the classic way a problem returns and grows. Understanding which situation you face, a minor surface nuisance versus an established colony fed by ongoing moisture, determines whether a cloth and detergent suffice or whether the full sequence, possibly with a professional, is warranted.
What Happens If You Only Remove the Mold
Removing growth while leaving the water source is the single most common remediation failure. The visible mold disappears, the room looks fixed, and within weeks the colony returns on the same wall because the moisture never stopped. Worse, repainting or sealing over the area can trap dampness and accelerate hidden growth behind the finish. This is why every authoritative source sequences the work the same way: moisture first, then removal. A homeowner who internalizes that order saves the cost and frustration of a second remediation that the first one should have prevented.
Maintaining the Space After Remediation
A successful remediation needs maintenance to stay successful. Keep monitoring humidity with a hygrometer, run exhaust fans consistently, and re-check the repaired moisture source after heavy rain or seasonal changes. Watch the remediated area for any return of staining or odor, which would signal the source was not fully resolved. Treating the cleanup as the start of an ongoing habit rather than a finished event is what keeps mold from coming back, and it ties remediation directly into the broader practice of keeping mold out of a house over the long run.
Handling Contents and Belongings
Remediation is not only about the building; the contents of a space matter too. Hard, washable items can usually be cleaned and dried, while heavily contaminated porous belongings, soaked cardboard, moldy upholstered furniture, water-damaged paper, may need to be discarded. Items of value can sometimes be saved by specialists, but the decision weighs the cost of restoration against replacement. Moving belongings out of a wet area early, before mold spreads to them, preserves more of them. Sorting contents into clean, cleanable, and discard categories keeps the remediation organized and prevents reintroducing mold on a salvaged item after the structure is fixed.
Front Range Moisture Challenges
Colorado’s Front Range presents its own remediation context. The dry climate helps materials dry faster once a source is fixed, which is an advantage, but it also lulls homeowners into underestimating moisture problems until they are advanced. Below-grade basements across Denver-area counties hold dampness, winter humidifiers can overshoot, and spring snowmelt and ice dams drive water into walls. A remediation here still follows the universal sequence, but the moisture sources skew toward basements, foundations, and seasonal events rather than the constant high humidity of wetter regions. Recognizing the local pattern helps target the source-finding step that makes remediation last.
Knowing When the Job Is Truly Finished
Remediation feels done when the visible mold is gone, but completion is more demanding than appearance. A finished job means the moisture source is corrected, affected materials are removed or properly cleaned, everything has dried to normal moisture content verified by meter, no musty odor remains, and for significant jobs, clearance sampling confirms airborne spores are back in line with the outdoor baseline. Stopping at the visible-clean stage is the trap that leads to recurrence. Treating these criteria as the real finish line, rather than the absence of obvious growth, is what separates a durable remediation from one that quietly fails within weeks.
References
- Mold Cleanup in Your Home — U.S. Environmental Protection Agency
- Mold Remediation Guide — U.S. Environmental Protection Agency
- Mold Cleanup and Remediation — Centers for Disease Control and Prevention
For Front Range homeowners facing a moisture and mold problem, reach out via our contact page to connect with a vetted inspector who can confirm the source before remediation begins.