Mold Remediation: What Homeowners Need to Know
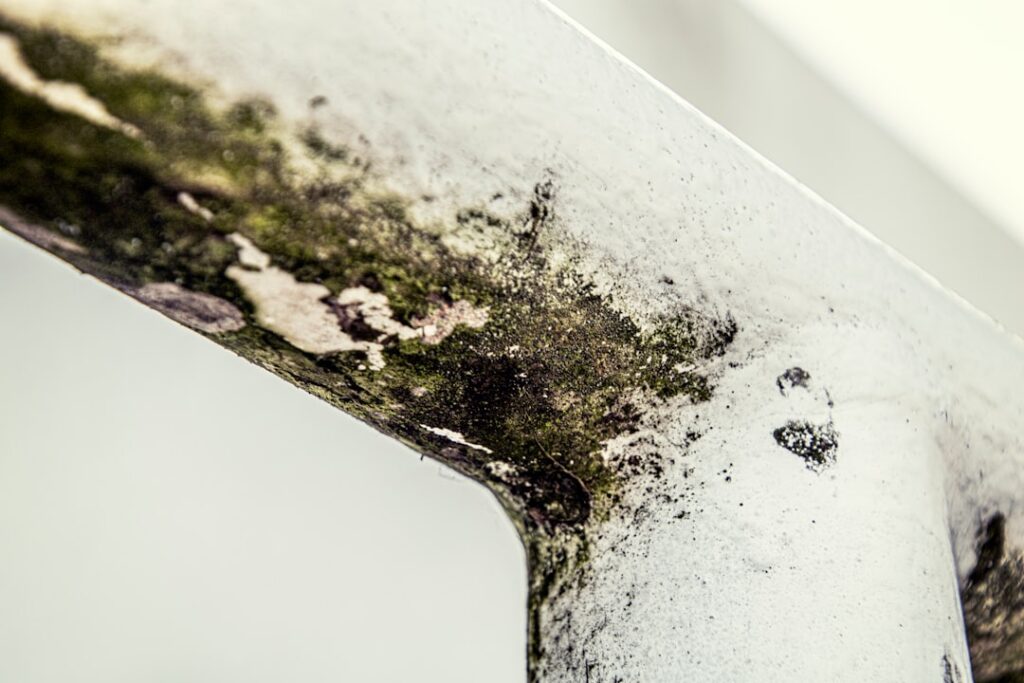
Mold remediation is the structured process of removing mold growth, controlling the moisture that caused it, and cleaning affected surfaces so the problem does not return. It is more than spraying bleach on a stain. Done correctly, it follows containment, removal, drying, and verification steps that mirror professional industry standards. This guide summarizes EPA and CDC guidance current as of 2026; consult a certified professional for testing and removal decisions, and see your physician if you have health concerns. Homeowners along Colorado’s Front Range, from Denver to El Paso County, face mold most often after basement flooding, roof leaks, or swamp-cooler condensation.
Is this mold, asbestos, or water damage? Get a free instant screen
Upload a clear photo of the suspect area. You'll get an instant AI screening opinion and what to do next. This is screening guidance, not a professional determination.
Screening guidance only. AI can be wrong. Confirm asbestos, mold type, or lead with lab testing or a licensed professional before acting.
What Does Mold Remediation Actually Involve?
Remediation describes the full cleanup workflow, not just wiping a surface. The EPA breaks it into assessing the moisture source, containing the work area, removing or cleaning contaminated materials, drying everything thoroughly, and confirming the job worked. Porous materials like drywall and carpet padding usually get discarded because spores embed deep in the fibers. Hard, non-porous surfaces such as tile, glass, and finished wood can often be cleaned and saved.
The goal is permanent. If moisture returns, mold returns within 24 to 48 hours. That is why a credible remediation plan always pairs cleanup with a fix for the water problem.
Remediation vs. Removal: Is There a Difference?
The two words are often used interchangeably, but professionals draw a line. “Removal” implies you can eliminate every spore, which is impossible because mold spores exist naturally in all indoor and outdoor air. “Remediation” is the honest term: it means returning indoor mold to normal, background levels and stopping active growth. Our companion overview of how mold removal works for homeowners walks through the cleanup side in more detail.
When Can You Handle It Yourself?
The EPA’s rule of thumb is the 10-square-foot threshold. If the moldy area is smaller than roughly a 3-by-3-foot patch, most homeowners can clean it safely with proper protection. Larger areas, sewage involvement, or mold inside HVAC systems call for a professional. Hidden growth behind walls or under flooring also pushes the job out of DIY range.
Protective Gear for Small Jobs
Wear an N95 respirator, nitrile gloves, and eye protection without vents. Open windows for ventilation, but seal doorways to other rooms so spores do not drift. Bag debris before carrying it through the house.
The Containment Step
Containment keeps spores from spreading during the messy removal phase. For modest jobs, that means closing doors and taping plastic over vents. For larger projects, remediation crews build polyethylene barriers and run a negative-air machine fitted with a HEPA filter, so air flows into the work zone rather than out of it. This single step separates a clean job from one that contaminates the rest of the house.
Source Removal and Cleaning
Workers cut out and bag porous materials, then HEPA-vacuum and damp-wipe the remaining surfaces. The EPA specifically discourages relying on biocides and bleach as a first response, because dead mold can still trigger allergic reactions and bleach does little on porous materials. Physical removal of the mold and the material it grew on matters more than any spray. Identifying the leak or humidity problem is part of this stage; our guide to finding the source of mold in a house covers the detective work.
Drying the Structure
After removal, the affected cavity must be dried below the point where mold can regrow. Remediators use commercial dehumidifiers and air movers, and they verify dryness with moisture meters rather than guessing. Building materials should read close to their normal dry baseline before any rebuilding begins. In Colorado’s dry climate this can happen faster than in humid states, but trapped moisture behind vapor barriers still lingers.
Clearance Testing: Did It Work?
Independent clearance testing closes the loop. A third party inspects visually and may collect air samples to compare indoor spore counts against outdoor baselines. Using a separate company for testing avoids the conflict of interest that comes when the remediator grades its own homework. Passing clearance is what lets you confidently rebuild walls and reinstall flooring.
What Does Mold Remediation Cost?
Pricing varies widely by the size of the affected area, the materials involved, and whether structural drying is needed. Small bathroom jobs land at the low end, while whole-basement or attic projects climb quickly. Insurance sometimes covers remediation when the underlying water damage is sudden and accidental, like a burst pipe, but rarely covers long-term seepage or neglected maintenance. For a tier-by-tier breakdown, our analysis of what mold remediation costs in 2026 lays out the ranges.
Preventing a Repeat Problem
Remediation fails when the water source is ignored. Keep indoor humidity below 60 percent, ideally 30 to 50 percent, per CDC guidance. Fix roof and plumbing leaks promptly, direct gutter downspouts away from the foundation, and add exhaust fans in bathrooms and kitchens. Front Range basements benefit from sealed sump pits and graded landscaping that pushes snowmelt away from the home.
How Mold Gets Into a Home in the First Place
Understanding the entry points helps remediation stick. Mold spores are always present in the air; they only colonize when they land on a damp surface with something to eat. Cellulose-rich materials, paper-faced drywall, wood, cardboard, and dust, all qualify. The trigger is almost always water: a slow plumbing drip under a sink, condensation on an uninsulated pipe, snowmelt wicking through a foundation crack, or humid air with nowhere to go. On the Front Range, the dry outdoor climate fools homeowners into thinking mold is rare, yet sealed modern homes trap interior moisture from cooking, showering, and swamp coolers. That trapped moisture is what feeds basement and bathroom colonies.
The Role of an Inspection Before Remediation
A proper remediation plan starts with an inspection, not a quote. An inspector maps the extent of growth, identifies the moisture source with meters and sometimes thermal imaging, and distinguishes surface staining from structural involvement. This matters because the scope drives the price and the safety protocol. Skipping the inspection and jumping straight to demolition risks both missing hidden growth and tearing out materials that could have been cleaned. A documented inspection also gives you leverage when comparing contractor bids, since each firm is then pricing the same defined problem rather than guessing.
Common Mistakes Homeowners Make
The biggest error is treating the stain and ignoring the water. Painting over mold, even with mold-resistant paint, traps it and delays the inevitable. A second mistake is disturbing a large colony without containment, which spreads spores throughout the home and turns a one-room problem into a whole-house one. A third is relying on bleach to make a stain disappear, mistaking a lightened color for a solved problem. Finally, many homeowners rebuild before the cavity is fully dry, sealing moisture inside the wall where mold quietly resumes.
What Happens After Clearance
Once clearance testing passes, the rebuild begins: new drywall, insulation, flooring, and paint replace what was removed. Keep all documentation, the inspection report, scope of work, invoices, and clearance results, in a single file. This paperwork supports insurance claims and, just as importantly, satisfies resale disclosure obligations. Buyers and their inspectors look favorably on a documented, professionally remediated problem and skeptically on a vague history. A clean paper trail turns a past mold issue from a red flag into evidence of responsible ownership.
Timeline and What to Expect
Most residential remediation runs one to five days of active work, plus a day or two for clearance testing before rebuilding. Containment setup and removal happen first, drying takes the longest stretch, and verification closes the project. Larger jobs with structural drying or reconstruction extend further. Ask your contractor for a phased schedule up front so you know when containment goes up, when drying equipment runs, and when you can expect clearance. A firm that cannot give you a timeline has not scoped the job carefully.
Remediation and Your Insurance Policy
Whether insurance helps depends on the cause and your policy language. Sudden, accidental water damage, a burst supply line or an overflowing appliance, is more likely covered, while gradual seepage, deferred maintenance, and long-standing humidity problems are commonly excluded. Some policies cap mold coverage at a set dollar amount regardless of cause. Read your declarations page, document the moisture source with photos, and keep itemized invoices. A clear record of a sudden covered event strengthens a claim far more than a vague account after the fact.
Choosing Between Remediation Firms
When you collect bids, compare scope rather than headline price. Each estimate should spell out containment, removal, drying, and verification; a cheaper quote that quietly omits clearance testing is not a bargain. Favor the firm that inspects thoroughly and explains its plan over the one that quotes fastest. Confirm certifications and insurance, and ask for recent local references you can verify. Our breakdown of what mold remediation costs helps you judge whether a bid is reasonable for the defined work.
When to Call a Professional
Hire a certified remediation firm when the affected area exceeds 10 square feet, when mold follows sewage or major flooding, when occupants have asthma or compromised immune systems, or when growth keeps coming back. Look for technicians certified through recognized industry programs, ask for a written scope of work, and insist on independent clearance testing. A reputable firm explains its containment plan before starting, not after. Get more than one bid, and favor the contractor who inspects thoroughly over the one who quotes fastest.
Remediation in Older Front Range Homes
Older homes carry extra wrinkles. Houses built before the late 1970s may contain asbestos in popcorn ceilings, floor tile, or pipe insulation, and lead in old paint, both of which require their own handling if disturbed during mold removal. Disturbing these materials without proper precautions creates a second hazard on top of the mold. If your home predates 1978 and remediation involves cutting into suspect materials, have them assessed first. A remediation firm experienced with older Denver-area housing will flag these risks before tearing anything out.
How Remediation Differs From a DIY Cleanup
A homeowner wiping a small moldy spot and a professional remediating a flooded basement are doing fundamentally different work. DIY cleanup addresses surface mold under about 10 square feet on materials you can fully clean and dry. Professional remediation adds engineered containment, negative-air machines, structural drying with monitored moisture readings, and independent verification. The gap is not just equipment but process: a documented chain from assessment to clearance. Knowing which level your problem requires keeps you from under-treating a serious job or over-paying for a minor one.
Questions to Ask a Remediation Contractor
Before hiring, ask how the firm will contain the work area, what drying equipment it uses, and how it will identify and fix the moisture source. Ask whether it recommends independent clearance testing and how it documents the job. Ask about certifications, insurance, and recent local references. A contractor who answers these clearly and welcomes verification is the one to trust. Vague reassurance, pressure to decide immediately, or reluctance to put the scope in writing are all reasons to keep looking.
References
- Mold Cleanup in Your Home — U.S. Environmental Protection Agency
- About Mold and Health — Centers for Disease Control and Prevention
- Mold Remediation Guidance — U.S. Environmental Protection Agency
- Mold Inspection Standards — InterNACHI
If you’re in the Denver metro or Front Range and want a vetted inspector to assess mold before you commit to remediation, reach out through our contact page. For the full picture on testing and inspection, start with our plain-language mold inspection hub.