Mold Remediation and Removal: What to Know
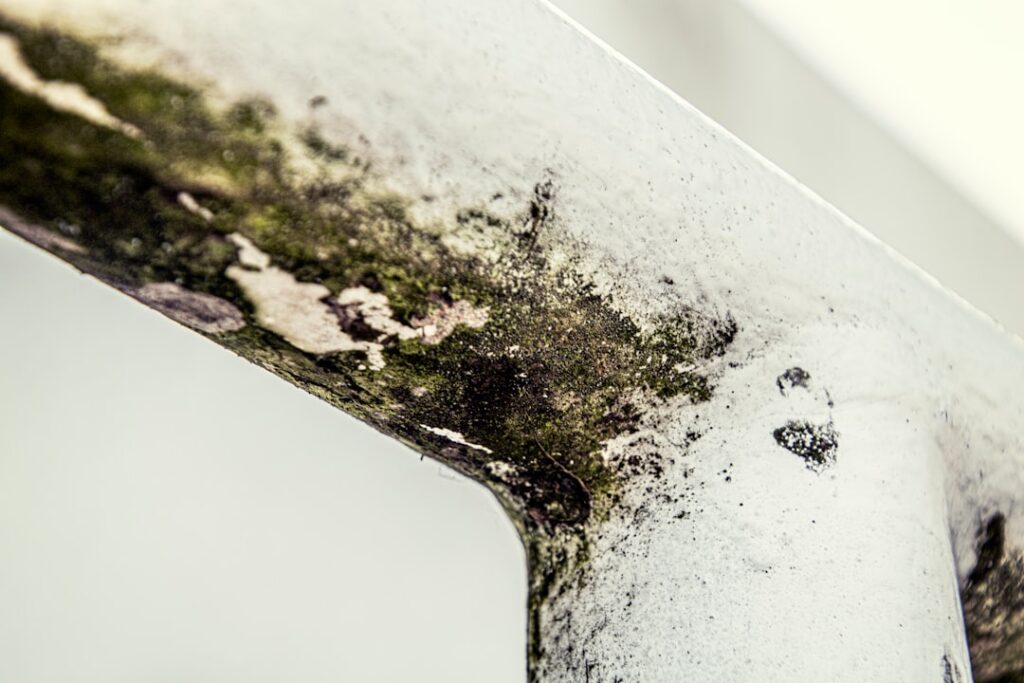
The phrases get used interchangeably, but mold remediation and removal describe related ideas with an important distinction. Removal suggests taking mold away; remediation describes the broader process of returning a space to normal, healthy conditions and preventing recurrence. Understanding both helps homeowners read estimates, ask the right questions, and avoid paying for a surface fix that leaves the real problem in place. This guide summarizes EPA and CDC guidance current as of 2026. It is general information rather than medical advice — consult your physician about symptoms and a licensed professional for cleanup decisions.
Part of our Mold Removal & Remediation guide — start there for the full picture →
Is this mold, asbestos, or water damage? Get a free instant screen
Upload a clear photo of the suspect area. You'll get an instant AI screening opinion and what to do next. This is screening guidance, not a professional determination.
Screening guidance only. AI can be wrong. Confirm asbestos, mold type, or lead with lab testing or a licensed professional before acting.
What Is the Difference Between Mold Remediation and Removal?
Mold removal refers to physically taking mold-contaminated material or growth out of a space. Remediation is the larger process that includes assessment, containment, removal, cleaning, moisture-source correction, and verification. In practice, total mold removal is impossible: mold spores exist everywhere in the air, indoors and out, and no realistic cleanup eliminates them entirely.
That is why professionals and the EPA favor “remediation.” The realistic goal is to return indoor mold to normal background levels and fix the moisture that allowed an outbreak, not to achieve a sterile, spore-free home. Any company promising 100 percent mold removal is overselling. A credible contractor focuses on remediation, which is why understanding how mold remediation works matters more than chasing the word “removal.”
The Remediation and Removal Process
A complete project follows a logical order. First comes assessment: identifying the extent of growth and, critically, the moisture source. Next is containment, where the work area is isolated with plastic sheeting and negative air pressure so spores do not spread to clean parts of the home.
Removal follows — porous materials such as saturated drywall, carpet, and insulation are cut out and bagged, while salvageable hard surfaces are cleaned. The space is HEPA-vacuumed and dried until moisture readings normalize. Then the moisture source is corrected, and many projects close with independent clearance testing to confirm the work succeeded.
When Material Must Be Removed vs. Cleaned
A key judgment in any project is what gets removed and what can be cleaned. Non-porous surfaces like glass, metal, and sealed tile can usually be cleaned and kept. Semi-porous materials such as wood may be cleaned if growth is shallow but removed if it has penetrated deeply.
Porous materials are the problem. Drywall, ceiling tile, carpet, and fibrous insulation that have been colonized generally cannot be reliably cleaned and must be removed and replaced. The EPA notes that absorbent materials with extensive mold should be discarded. Our guide on what kills mold on drywall explains why surface treatment alone rarely saves heavily affected wallboard.
What Mold Remediation and Removal Cost
Costs depend on the size and location of the affected area. Small jobs under about 10 square feet may run a few hundred dollars or be handled by the homeowner. Mid-size projects covering a room commonly fall between $1,500 and $4,500, while extensive contamination, HVAC involvement, or structural drying can exceed $10,000. Per-square-foot rates for professional work typically range from $10 to $25.
Material removal and rebuild add to the total when porous materials must be replaced. Testing before and after the work is usually billed separately, around $300 to $600 each. Always request an itemized estimate; our overview of home mold remediation cost walks through the line items so you can compare bids.
Containment: Why It Matters
Containment is the step that distinguishes professional remediation from casual cleaning. Disturbing mold releases spores into the air, and without containment those spores settle throughout the home, potentially seeding new growth and exposing occupants. Crews seal the work area with plastic sheeting and run HEPA air scrubbers that create negative pressure, drawing air inward so contaminated air cannot escape.
For small jobs the EPA accepts limited precautions, but for anything substantial, containment is essential. A removal quote that skips containment for a large job is a red flag. The cost of proper containment is part of what you pay for when hiring a qualified remediation company rather than a general cleaner.
Health and Safety During Removal
The CDC and EPA report that mold exposure can cause nasal congestion, throat irritation, coughing, and wheezing, with greater effects for people who have asthma, allergies, or weakened immune systems. Disturbing mold during removal increases airborne spores temporarily, which is why protective equipment and containment matter.
Professional crews wear respirators, gloves, and eye protection. Homeowners attempting small jobs should do the same and ventilate to the outside, not into the rest of the house. If you have a respiratory condition or compromised immunity, the CDC recommends avoiding the work entirely and consulting a physician. Health considerations often tip the decision toward hiring a professional.
Personal Protective Equipment and Safety
Whether a professional crew or a homeowner handles removal, protective equipment is non-negotiable. The EPA recommends at minimum an N-95 respirator, gloves, and eye protection without vents for any mold work. For larger jobs, crews step up to half- or full-face respirators with appropriate cartridges and disposable coveralls that prevent spores from clinging to clothing and spreading.
Beyond gear, safe removal means working methodically: misting moldy materials lightly before removal can reduce airborne spores, bagging debris inside the containment, and HEPA-vacuuming as you go rather than at the end. Ventilation should exhaust to the outside, never into other rooms. People with asthma, allergies, or weakened immune systems should not perform removal themselves, per CDC guidance, and should leave the area during professional work. Treating the safety steps as seriously as the cleanup itself is what prevents a localized problem from becoming a whole-home contamination during the very process meant to fix it.
What It Costs and Why
Costs scale with the size and location of the affected area. Small jobs may run a few hundred dollars, mid-size room projects commonly fall between $1,500 and $4,500, and extensive contamination can exceed $10,000. Professional per-square-foot rates typically range from $10 to $25 for the affected area, with the spread driven by accessibility and how much porous material needs replacing.
The price reflects the full sequence rather than just wiping a surface: assessment, containment, removal, cleaning, drying, and verification, plus equipment rental and disposal fees. Moisture-source repair and the rebuild of removed materials are frequently billed separately, sometimes by other trades such as plumbers or drywall contractors. Clearance testing adds a few hundred dollars. When a bid comes in dramatically lower than competitors, it usually omits one of these elements — most often containment or the source repair — which is why an itemized estimate and two or three comparison bids protect you from paying twice for an incomplete first attempt.
How to Hire for Remediation and Removal
Many states do not license mold contractors, so vetting is important. Look for companies that follow EPA remediation guidance, carry liability insurance, and provide a written scope naming the moisture source, containment plan, and disposal method. IICRC or InterNACHI certification indicates trained personnel.
Collect at least two or three written estimates and be cautious of bids far below the others, which often exclude containment or rebuild. Ask whether the company recommends independent clearance testing rather than verifying its own work. The mold inspection and testing hub lists the questions worth asking before you sign.
Preventing Mold From Returning After Removal
Because total removal of spores is impossible, prevention is the part of remediation that lasts. The CDC and EPA recommend keeping indoor relative humidity below 50 percent, venting bathrooms and kitchens outside, repairing leaks quickly, and using dehumidifiers in basements and crawl spaces.
Maintain gutters and grading to move water away from the foundation, and service HVAC systems so condensate drains function. After any water event, dry materials within 24 to 48 hours and discard saturated porous items. Sustained moisture control is what keeps remediated areas clean, since mold cannot regrow without the water that fed it in the first place.
What Happens During Drying and Verification
Two steps that homeowners often overlook determine whether removal lasts: drying and verification. After contaminated materials are out and surfaces are cleaned, crews dry the space with air movers and dehumidifiers, monitoring with moisture meters until readings match normal levels for the materials present. Skipping or rushing this step is a leading cause of recurrence, because residual moisture lets mold return within days.
Verification closes the loop. On significant jobs, an independent party performs clearance testing — a visual inspection, moisture readings, and sometimes air sampling compared to an outdoor baseline — to confirm the space returned to normal fungal conditions. Independence matters here, since a company verifying its own work has an incentive to declare success. Clearance documentation is especially valuable during real estate transactions or when health concerns prompted the project in the first place.
Timeline and What Affects It
A small, contained removal can finish in a day or two, while a moderate room-sized project typically runs three to five days including drying. Larger or multi-room contamination, HVAC involvement, or extensive structural drying can stretch to a week or more. Drying time is frequently the rate-limiting factor, since equipment must run until materials reach normal moisture levels.
Several factors lengthen the timeline. Hidden damage discovered when walls are opened expands the scope mid-project. High ambient humidity slows drying. The need for a separate trade to repair the moisture source — a plumber or roofer — can pause work until that fix is complete. Homeowners should build schedule flexibility into a removal project and confirm the contractor will verify dryness before closing walls, rather than rushing to finish on an artificial deadline.
Common Remediation Mistakes to Avoid
Several recurring errors undermine removal projects. The most common is cleaning the surface without fixing the moisture source, which guarantees the mold returns. Another is painting or sealing over mold instead of removing it; encapsulation products do not substitute for physical removal of colonized material. Disturbing mold without containment spreads spores throughout the home, sometimes creating new problem areas.
Using bleach on porous materials in the belief it solves the problem is another misstep, since the EPA emphasizes physical removal over chemical killing. Finally, declaring a job done without drying verification leaves moisture that invites regrowth. Avoiding these mistakes — whether you hire out or tackle a small job yourself — is what separates a durable result from one that reappears within months. When in doubt about scope, a professional assessment clarifies whether removal is within DIY range or needs a crew.
The Rebuild After Removal
Once contaminated materials are out and the space is clean and dry, the rebuild restores the home. This phase replaces what was removed: new drywall hung, taped, and textured; fresh insulation; new flooring or trim; and paint. The rebuild is often handled by a separate trade or general contractor and billed apart from the remediation, which is why estimates that cover only removal can understate the true cost of getting a room back to normal.
Timing matters here. Reconstruction should not begin until the area is verified dry and, ideally, until clearance testing confirms normal conditions, since closing up a still-damp cavity simply traps the problem. Choosing moisture-resistant materials during the rebuild — paperless drywall in wet areas, closed-cell insulation below grade — reduces the chance of a repeat. Homeowners should clarify early whether the remediation company also handles the rebuild or whether they need to line up a separate contractor, so the project moves smoothly from removal to a finished, restored space.
References
- Mold Cleanup in Your Home — U.S. Environmental Protection Agency
- About Mold and Your Health — Centers for Disease Control and Prevention
- A Brief Guide to Mold, Moisture and Your Home — U.S. Environmental Protection Agency
Frequently asked questions
What's the difference between mold removal and remediation?
Removal is physically taking mold or contaminated material out, while remediation is the broader process of assessing, containing, removing, cleaning, fixing moisture, and verifying. Total spore removal is impossible, so professionals focus on remediation.
Can all moldy materials be cleaned instead of removed?
No. Non-porous surfaces can usually be cleaned, but porous materials like saturated drywall, carpet, and insulation must be removed and replaced because growth penetrates too deeply to clean reliably.
How much does mold remediation and removal cost?
Small jobs may run a few hundred dollars, mid-size room projects $1,500 to $4,500, and extensive contamination over $10,000. Professional per-square-foot rates typically run $10 to $25, with testing billed separately.
Is containment really necessary?
For substantial jobs, yes. Disturbing mold releases spores that settle throughout the home without containment. Crews seal the area and run HEPA scrubbers under negative pressure to keep contaminated air from spreading.
If you want an independent assessment before committing to a remediation contract, Front Range homeowners can reach out through our contact page to connect with a vetted local inspector.