Vented vs Encapsulated Crawl Space: Pros, Cons and Cost
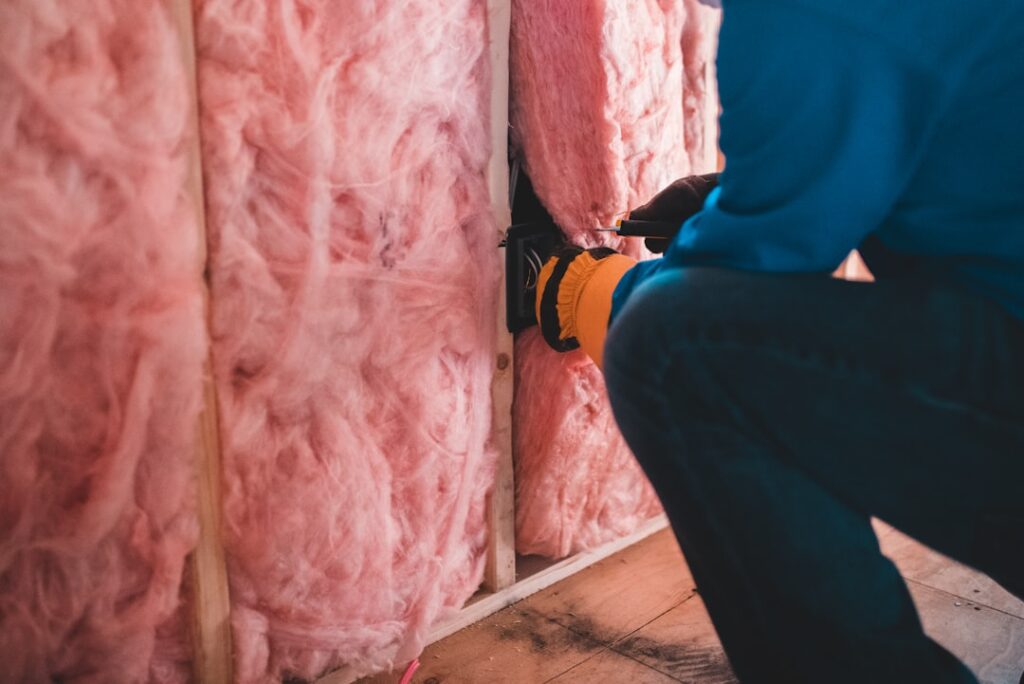
For most of the last century, crawl spaces were built with vents in the foundation walls on the theory that moving outside air through the crawl would keep it dry. Over the past few decades, building scientists and many builders have moved toward the opposite idea: close the crawl off, cover the ground and walls with a sealed liner, and dry the space from inside. Both approaches are still common on the Front Range, and homeowners comparing contractor quotes often hear strong opinions on each side. This guide compares the two on moisture, energy, cost, radon and safety, with attention to Colorado’s dry climate. It draws on ENERGY STAR, EPA and ASHI material available in 2026 plus general building practice, and it is general education rather than a design for a specific house.
Part of our Crawl Space & Attic Guide guide — start there for the full picture →
Vented vs Encapsulated Crawl Space: The Core Difference
The difference comes down to one question: is the crawl outside the house or inside it?
A vented crawl space is treated as outdoors. Openings in the foundation walls let outside air move through the space. The thermal boundary sits at the floor above, so insulation goes between the floor joists. Pipes and ducts in the crawl are on the cold side of that boundary.
An encapsulated crawl space (also called a sealed, closed or conditioned crawl) is treated as part of the house. The vents are closed or sealed. A continuous vapor barrier covers the ground and usually runs up the foundation walls, with seams taped and edges fastened and sealed. The foundation walls and rim joists are insulated instead of the floor. Then the crawl is kept dry by mechanical means, typically a small amount of conditioned supply air from the home’s HVAC system or a dedicated dehumidifier.
Neither one is automatically right. A well-built vented crawl in a dry location can perform acceptably for decades. A poorly executed encapsulation, with an unsealed liner, no plan for removing moisture, or an unaddressed water leak, can perform worse than the vented crawl it replaced. The quality of execution and the specific house matter as much as the choice itself. For the wider picture of crawl space systems, see the crawl space insulation guide.
How a Traditional Vented Crawl Works
In a vented crawl, the foundation walls have screened openings, usually near the top of the wall, spaced around the perimeter. The idea is that air moving through the crawl carries away moisture that rises from the soil. Many vented crawls also have a plastic sheet on the ground to cut down soil moisture, and some have vent covers or dampers that owners close in winter. The guides to crawl space vents and crawl space vent covers explain the hardware and seasonal practices.
Insulation in a vented crawl goes between the floor joists, held tight to the subfloor with supports, so the floor becomes the line between heated and unheated space. The details, including support methods and common failures, are in the guide to floor joist insulation in a crawl space.
Where vented crawls run into trouble
- Humid outside air. In humid climates, warm summer air entering a cool crawl can reach its dew point on cold surfaces, so ventilation adds moisture instead of removing it. This is the main reason the industry shifted in the humid Southeast.
- Cold pipes and ducts. Water lines and ducts below the floor insulation are exposed to near-outdoor temperatures, which means freeze risk and heat loss.
- Air leakage. Air moves from the crawl into the house through gaps around plumbing, wiring and ducts, carrying whatever is in the crawl air with it.
- Sagging insulation. Floor batts absorb moisture, lose support and fall over time.
- Pests. Vents with damaged screens give rodents and insects an entry point.
How an Encapsulated Crawl Works
Encapsulation is a system, not a single product. The pieces work together, and leaving one out tends to undermine the rest.
Vapor barrier on the floor and walls
A heavy polyethylene or reinforced liner covers the entire ground surface, overlaps at seams that are taped, wraps around piers, and typically runs up the foundation walls, where it is mechanically fastened and sealed. The goal is to stop soil moisture from evaporating into the crawl air. The guide to crawl space vapor barrier installation covers thickness, seams and termination details.
Vents closed and air sealed
Foundation vents are sealed shut, typically with rigid foam cut to fit and sealed in place. The rim joist area and any gaps to the outdoors are air sealed. ENERGY STAR lists the area between rim joists and under the sill plate as a common place for air leaks in basements and crawlspaces.
Wall insulation
Insulation moves from the floor to the foundation walls and rim. ENERGY STAR’s retrofit table, based on the 2021 International Energy Conservation Code, lists R15 insulative sheathing or R19 batts for basement or crawlspace walls in climate zones 4C and 5 through 8, which includes much of the Front Range. Rigid foam board and closed-cell spray foam are the usual choices on concrete walls, and exposed foam often needs a fire-rated covering or a code-recognized exception.
Conditioning or dehumidification
Once the crawl is sealed, moisture that does get in, through the walls, from plumbing, from the house or from construction moisture, needs somewhere to go. Common approaches include a small conditioned air supply from the HVAC system, sometimes paired with a return or exhaust path, or a dedicated crawl space dehumidifier with a humidistat. Which method fits depends on the HVAC system, the size of the crawl and local code. The guide to crawl space dehumidifiers covers that option in detail.
A sealed crawl should be monitored. A simple hygrometer placed in the crawl makes it easy to check relative humidity over time. EPA’s guidance on mold and moisture recommends keeping indoor humidity below 60 percent, ideally between 30 and 50 percent, and many owners use that range as a general reference for the crawl too.
Side-by-Side Comparison
The table below summarizes the trade-offs. Individual houses can differ, especially where drainage or appliances are unusual.
| Factor | Vented | Encapsulated |
|---|---|---|
| Crawl treated as | Outdoors | Part of the house |
| Vents | Open, sometimes closed seasonally | Sealed shut |
| Ground cover | Optional plastic sheet, often loose | Continuous, taped liner on floor and usually walls |
| Insulation location | Between floor joists | Foundation walls and rim joists |
| Moisture control | Relies on outside air and ground cover | Relies on the sealed liner plus conditioning or a dehumidifier |
| Pipes and ducts | On the cold side; need their own insulation | Inside the warmer envelope |
| Floors above | Comfort depends on floor insulation quality | Generally warmer because the crawl stays closer to indoor temperature |
| Upfront cost | Lower | Higher |
| Ongoing cost | Little, unless insulation fails | Electricity for a dehumidifier or conditioning; periodic checks |
| Radon | Ventilation may dilute crawl radon; levels can still be elevated | Closing vents may change radon levels; testing before and after is prudent |
| Combustion appliances | Often draw combustion air from the vented crawl | Need a professional review of combustion air and venting before sealing |
| Pests | Vents and loose batts invite nesting | Fewer openings; liner makes droppings easier to see |
| Inspection access | Simple | Liner must not be damaged by foot traffic; repair tears |
Pros and Cons of Each Approach
Vented crawl: pros
- Lowest upfront cost and familiar to almost every contractor
- No mechanical system to maintain or pay to run
- Combustion appliances that rely on crawl air are less likely to be affected
- Can work acceptably in dry locations with good drainage
Vented crawl: cons
- Pipes and ducts sit in cold air, raising freeze risk and energy loss
- Floor insulation tends to sag, absorb moisture and attract rodents
- Air from the crawl leaks into the living space through floor penetrations
- Comfort in rooms above is often worse in winter
Encapsulated crawl: pros
- Better control over crawl humidity when the system is designed and maintained well
- Pipes and ducts stay inside the warmer envelope
- Warmer floors and fewer drafts in rooms above
- Cleaner, more usable space for storage and service access
Encapsulated crawl: cons
- Higher upfront cost and more steps that must be done right
- Ongoing electricity and maintenance for a dehumidifier or conditioning
- Can trap moisture if a water problem is not fixed first, or if the dehumidifier fails unnoticed
- Requires attention to radon and fuel-burning appliances
Cost: What Drives the Price Gap
Encapsulation costs more upfront, often substantially more, because it bundles several jobs: drainage corrections, a heavy liner on floor and walls, sealing vents and rim, wall insulation, and a dehumidifier or HVAC modification. Factors that move the price include crawl square footage and wall height, liner thickness, whether old insulation and debris have to come out, whether a sump or drain is needed, access and clearance, and the moisture-control equipment chosen.
A vented crawl can be improved for much less, for example by adding or repairing a ground cover, re-supporting floor batts, sealing floor penetrations, and insulating pipes and ducts. The comparison is not always “cheap vented” versus “expensive sealed,” because a neglected vented crawl may also need substantial cleanup before it performs well. Ranges and what is typically included are in the guide to crawl space encapsulation cost.
When comparing bids, confirm the liner thickness and how seams and walls are finished, how vents are sealed, what insulation goes on the walls, how the crawl will be dried, whether drainage is included, and what the warranty covers.
Colorado’s Dry Climate: Does Encapsulation Still Make Sense?
Much of the research behind the shift to sealed crawls came from humid parts of the country, where outside air entering a crawl in summer is a major moisture source. The Front Range is different. Outdoor humidity is generally low for much of the year, and summer air entering a crawl here is less likely to cause condensation than in the Southeast.
That does not settle the question, but it changes the emphasis. On the Front Range, crawl moisture problems are often driven by water from the ground, roof runoff, irrigation and plumbing leaks rather than by humid outdoor air. Expansive clay soils in parts of the metro area can also make drainage around foundations particularly important. A vented crawl in a dry, well-drained lot may perform reasonably well here, while one with poor grading may stay damp regardless of ventilation.
The cold side of the climate matters too. Winter nights below freezing make cold pipes and ducts in a vented crawl a real concern, which is an argument for sealing. Sealed crawls in dry climates may need less dehumidification than in humid regions, but conditions vary by house and by season, so the plan should be based on measurements rather than assumptions. A season of humidity readings with a hygrometer, before and after any change, is a practical way to see what a specific crawl actually needs. The guide to crawl space moisture control covers how to track and fix moisture sources.
Radon and Combustion Safety
These two issues are where an encapsulation project most needs professional input.
Radon
Colorado is known for elevated radon in many areas, and crawl spaces are a pathway for soil gas to enter a home. Sealing a crawl changes airflow, so it may change radon levels in the living space. EPA’s Citizen’s Guide to Radon recommends testing homes and fixing them if the level is 4 picocuries per liter (pCi/L) or higher, notes that levels below 4 pCi/L still pose a risk, and advises that because major renovations can change radon levels, the home should be tested again after the work is completed. ENERGY STAR similarly suggests testing for radon, and mitigating if needed, before sealing a home in a high radon area.
A practical approach is to test before the project, then test again after it is complete. EPA’s guide notes that radon reduction systems similar to those used in basements can be installed in homes with crawl spaces, so a sealed crawl and radon mitigation can be designed together. The guide to radon levels in a basement explains testing and how to read results.
Combustion appliances
Some homes have a furnace or water heater in or near the crawl that draws combustion air from it. ENERGY STAR notes that sealing can, in some cases, cause naturally venting combustion appliances to backdraft gases into the home, and it recommends having oil and gas appliances tested for proper drafting before and after sealing. Closing vents around a fuel-burning appliance without a professional review of combustion air and venting is not a do-it-yourself decision. A qualified HVAC contractor should evaluate the setup and any changes needed. Working carbon monoxide alarms in the home are a sensible precaution either way.
Converting a Vented Crawl: Typical Sequence and Common Mistakes
Owners who decide to seal an existing vented crawl usually go through a similar sequence. The order matters, because each step depends on the one before it.
- Baseline readings. Record crawl humidity for a few weeks and run a radon test in the lowest lived-in level so there is something to compare against later.
- Water first. Correct grading, extend downspouts, adjust irrigation, repair plumbing leaks and, where water collects, add drainage or a sump.
- Clean out. Remove debris, wet or contaminated floor insulation and anything that will sit under the liner.
- Appliance review. Have a qualified HVAC contractor evaluate any fuel-burning equipment that draws air from the crawl.
- Seal openings. Close foundation vents and air seal the rim joist and sill plate.
- Install the liner. Cover the ground, tape seams, wrap piers, and run the liner up the walls with a fastened, sealed top edge.
- Insulate the walls. Add foam or other approved insulation to the foundation walls and rim.
- Add drying. Install the dehumidifier or conditioned air supply, with a planned condensate drain if a dehumidifier is used.
- Verify. Re-test radon after the work and keep watching humidity through at least one full year of seasons.
The mistakes inspectors and contractors see most often follow from skipping one of those steps. Common ones include closing vents but leaving a loose, untaped ground sheet; sealing a crawl that still takes on water after storms; leaving old floor batts in place where they block inspection of the framing; installing a dehumidifier that drains onto the liner; and never checking whether the dehumidifier is still running. A sealed crawl with a failed dehumidifier can quietly become damper than the vented crawl it replaced, which is why ongoing monitoring is part of the design rather than an optional extra.
What an Inspector Looks At
Under the ASHI Standard of Practice, a home inspector is required to inspect insulation and vapor retarders in unfinished spaces and the ventilation of foundation areas, and to describe the insulation and vapor retarders present. The standard says the inspector is not required to disturb insulation or to enter crawlspaces with less than 24 inches of vertical clearance or an access opening smaller than 16 by 24 inches, and it lists humidifiers and dehumidifiers among items the inspector is not required to inspect.
So a report on a sealed crawl may describe the liner and wall insulation without evaluating the dehumidifier’s performance. Buyers looking at an encapsulated crawl can ask the seller for installation records, warranty details and any humidity logs. Inspection findings worth following up include torn or loose liner, standing water on top of the liner, open vents in a supposedly sealed crawl, and floor batts that were left in place in a sealed crawl.
Choosing Between Them
A few questions usually point toward the better fit:
- Are there pipes and ducts in the crawl? If so, sealing brings them inside, which is a strong argument for encapsulation in a cold winter climate.
- Is there a water problem? Fix it first either way. Encapsulating over active water is a common and expensive mistake.
- Are there fuel-burning appliances in the crawl? If so, budget for a professional review before sealing.
- What do radon tests show? Plan mitigation and sealing together if levels are elevated.
- Is the floor insulation already in good condition and the crawl dry? Improving a working vented crawl may be the more cost-effective step.
- Is there a budget for ongoing operation? A sealed crawl relies on a dehumidifier or conditioning that runs for years.
For owners still weighing whether the crawl needs insulation at all, the guide do you need insulation in a crawl space covers that decision. More crawl space topics are collected in the crawl space hub.
References
- ENERGY STAR. Basement and Crawlspace Air Sealing and Insulating Project
- ENERGY STAR. Recommended Home Insulation R-Values
- U.S. EPA. A Brief Guide to Mold, Moisture and Your Home
- U.S. EPA. A Citizen’s Guide to Radon (2016)
- American Society of Home Inspectors. ASHI Standard of Practice for Home Inspection
Frequently asked questions
Is an encapsulated crawl space better than a vented one?
Not automatically. A well-executed sealed crawl usually controls moisture better and keeps pipes and ducts warmer, but it costs more and needs a dehumidifier or conditioning. A dry, well-built vented crawl can still perform acceptably.
Does Colorado's dry climate make encapsulation unnecessary?
Not necessarily. Humid outside air is less of a concern here, but ground water, drainage problems, cold pipes and ducts still affect crawls. Humidity readings over a season help show what a specific crawl needs.
Can crawl space vents simply be closed?
Closing vents without a ground liner, air sealing and a way to remove moisture can make a crawl damper. It can also affect fuel-burning appliances and radon, so it should be part of a planned project.
Should radon be tested before encapsulating a crawl space?
Yes. EPA advises testing again after major renovations because they can change radon levels, and ENERGY STAR suggests testing before sealing in high radon areas. Testing before and after gives a clear comparison.
Does a home inspector check a crawl space dehumidifier?
Under the ASHI Standard of Practice, dehumidifiers are among items the inspector is not required to inspect. The inspector does inspect and describe insulation, vapor retarders and foundation ventilation.
Weighing a sealed crawl against fixing up the vented one on a Front Range home? Reach out through our contact page and we can help you find a qualified local inspector to assess moisture, radon and the crawl itself before you commit.