Floor Joist Insulation in a Crawl Space: How-To Guide
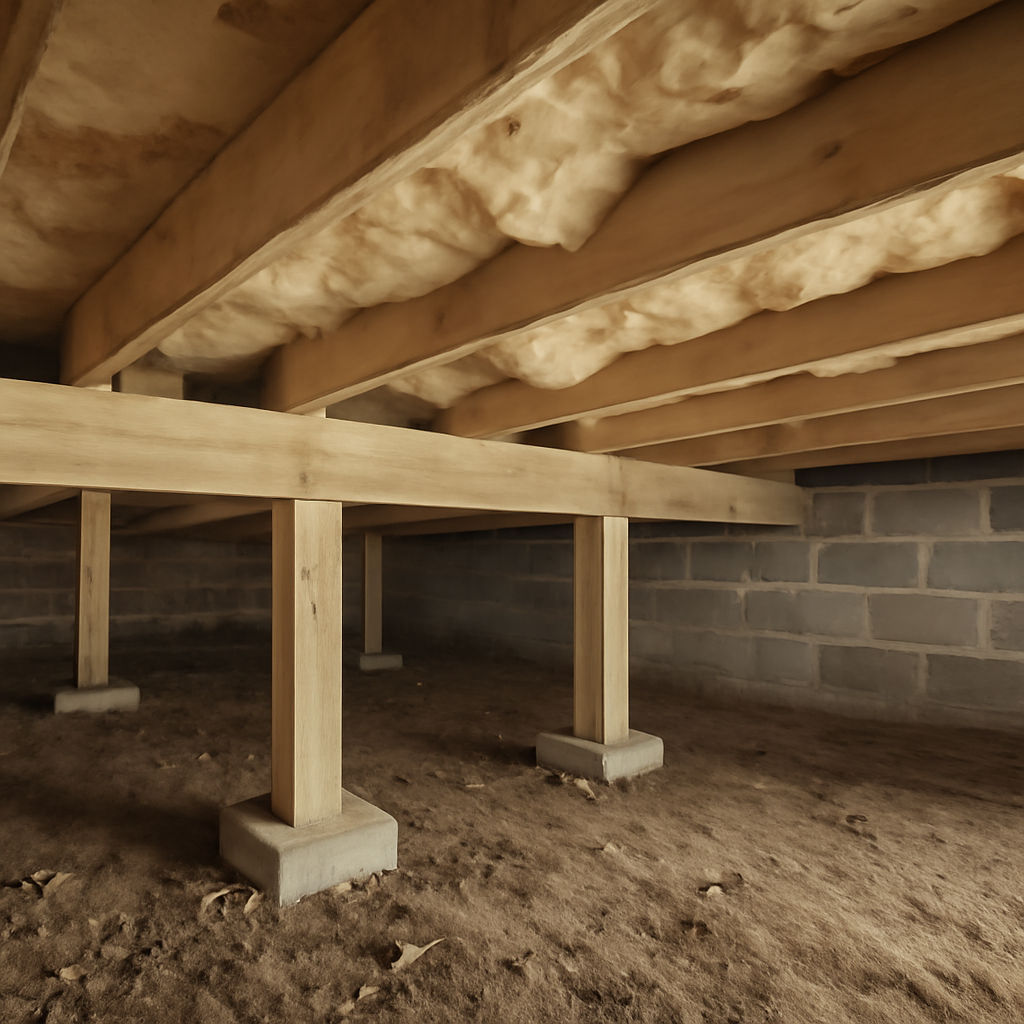
Insulating between the floor joists is the classic approach for a vented crawl space, and done well it keeps the floors above warmer and the energy bills lower. Done poorly, it sags, gaps, and quietly wastes money. Getting floor joist insulation crawl space work right comes down to a handful of details: choosing the right material, hitting the recommended R-value, facing the batts the correct direction, supporting them so they never fall, and air-sealing the perimeter. This guide walks through each one and flags the mistakes that undo an otherwise solid job.
Part of our Crawl Space & Attic Guide guide — start there for the full picture →
How to insulate between floor joists in a crawl space
In a vented crawl space, insulation goes into the cavities between the floor joists, pressed up against the underside of the subfloor. The goal is to create a continuous thermal layer directly beneath the living space, so the floor stays warm while the crawl space itself stays close to outdoor temperature. This is different from an encapsulated crawl space, where insulation goes on the foundation walls instead. If you are unsure which approach your home should use, the crawl space insulation guide lays out the difference and how to decide.
The work is well within a careful homeowner’s reach, but it depends on the crawl space being dry. Wet framing or standing water means the moisture problem comes first; insulation installed over dampness traps it against the wood and fails. Assuming the space is dry, the sequence is: choose the material, cut and fit the batts, face them correctly, support them, and air-seal the rim. The full step-by-step installation is covered in our guide on how to install insulation in a crawl space, and this article focuses on the joist-specific details.
Choosing the material
Faced fiberglass batts are the most common choice for floor joists, sized to standard joist spacing of 16 or 24 inches on center. Mineral wool, also called rock wool or rockwool, is a denser alternative that resists moisture and fire better and holds its shape well, though it costs more. Both come in widths that friction-fit into standard bays.
The key is matching the batt to the actual cavity. Measure the joist spacing and depth before buying, because a batt that is too narrow leaves gaps and one that is too wide gets compressed. Compression is the enemy of performance, since insulation works by trapping still air, and crushing it squeezes that air out. Buy the width and thickness that fills the bay snugly at its rated loft, not more.
Hitting the right R-value
R-value measures resistance to heat flow, and the target depends on climate. The Department of Energy publishes recommended insulation levels by region, with colder zones calling for higher floor R-values than mild ones. Common floor recommendations fall in a broad range depending on the zone, so check the guidance for your area rather than assuming a single number.
Joist depth sets a practical ceiling on how much batt fits. A 2×8 joist bay holds less insulation than a 2×10 or 2×12. If the recommended R-value will not fit in the available depth, options include a higher-density product or, for some homes, reconsidering whether wall insulation in an encapsulated design would serve better. The point is to get as close to the recommended value as the framing allows without crushing the batt to make it fit.
Which way should the facing point?
Facing direction is the detail that trips up the most people, and getting it wrong can trap moisture in the floor. The vapor-retarder facing, the paper or foil side, should face toward the conditioned, heated space. For floor-joist insulation in a crawl space, that means the facing points up, toward the warm subfloor and the living area above, not down toward the cold crawl space.
The reasoning is about condensation. The facing is meant to slow warm, moist interior air from reaching a cold surface where it would condense. Placing it against the warm side keeps moisture from being driven into the batt from the living space. Installing a facing upside down, toward the crawl space, can trap moisture inside the insulation. Because facing direction depends on your climate and assembly, it is worth confirming against our dedicated explainer on which way insulation should face in a crawl space before you commit a whole floor to one orientation.
Supporting the batts so they never fall
Gravity is the biggest long-term threat to floor-joist insulation. Friction alone will not hold a batt against the subfloor for long; it sags, opens gaps, and eventually drops. Proper support is what makes the difference between insulation that lasts and insulation that ends up on the crawl-space floor.
The two common methods are support rods and wire. Insulation support rods, sometimes called lightning rods or tiger teeth, are stiff spring-steel wires cut slightly longer than the joist spacing and wedged across the bay every 12 to 24 inches. They bow slightly and press up on the batt. The alternative is stringing insulation-support wire in a zigzag between staples on the joist bottoms, or stapling up wire netting or house wrap to cradle the batts. Either way, aim for continuous contact with the subfloor and no drooping sections.
Space the supports closely enough that the batt cannot belly down between them. Under-supporting is a common cause of eventual sag, so err toward more rods rather than fewer, especially with heavier mineral wool.
Air-sealing the perimeter
Insulation slows heat, but it does not stop air. The rim joist band, where the floor framing meets the foundation, is a major air-leakage path, and insulating the joist bays without sealing the rim leaves a gap in the thermal envelope. Cut rigid foam to fit each rim-joist bay and seal the edges with caulk or spray foam, or apply spray foam directly. Seal around any penetrations, pipes, wires, and ducts, that pass through the floor as well. The Department of Energy stresses that air sealing and insulation work together, and skipping the rim undercuts the batts you just installed.
Common floor-joist insulation mistakes
A few errors show up repeatedly and are worth naming so you can avoid them.
Compressing the batts
Stuffing an oversized batt into a bay or crushing it with wiring destroys R-value. Fit the batt to the cavity so it fills without being squeezed, and cut neatly around obstructions rather than forcing the material.
Leaving gaps
Batts that do not reach the ends of the bay, or that leave slivers of open cavity around pipes and blocking, create cold spots and air paths. Cut pieces to fill every corner, and split batts around wiring rather than compressing over it.
Facing the wrong way
As above, the facing belongs toward the warm side, up against the subfloor. An upside-down facing can trap moisture in the assembly.
Under-supporting
Too few rods or none at all guarantees eventual sag. Support every bay adequately from the start; rehanging fallen insulation later is far more miserable than doing it right the first time.
Ignoring moisture and the rim
Insulating a damp crawl space or skipping the rim-joist air seal are both ways to waste an otherwise good installation. Handle the water first and seal the perimeter, and the floor insulation will actually deliver what it promises.
Fiberglass versus mineral wool for floor joists
The two dominant batt materials behave differently in a crawl space, and the choice affects both performance and longevity. Fiberglass is the familiar pink or yellow batt: inexpensive, widely available, light, and easy to cut. It is the default for most floor-joist jobs and performs well as long as it stays dry and supported.
Mineral wool, also sold as rock wool or rockwool, is denser and stiffer. It holds its shape better between joists, resists sagging, tolerates incidental moisture more gracefully, and offers better fire resistance. Those advantages come at a higher price and a bit more weight. In a crawl space that has struggled with dampness or where sag has been a recurring problem, the extra rigidity and moisture tolerance of mineral wool can justify the cost. In a dry, easy space, fiberglass usually offers the better value. Neither material substitutes for fixing moisture, but between the two, mineral wool is the more forgiving choice in a marginal environment.
A third option, less common for retrofits, is having the joist bays filled with spray foam, which air-seals and insulates in one step but costs considerably more and is a contractor job. For most homeowners re-insulating between joists, the real decision is fiberglass versus mineral wool, weighed against budget and how dry the space stays.
Measuring and buying the right amount
Buying insulation without measuring first leads to wasted material and mismatched batts. Start by confirming the joist spacing, which is the on-center distance between joists, typically 16 or 24 inches. Batts are sold in widths to match, so this determines which product friction-fits without gaps or compression.
Next, measure the joist depth, since a 2×8 bay holds a thinner batt than a 2×10 or 2×12. The depth sets the maximum R-value you can install without crushing the material. Then calculate the total square footage of floor above the crawl space to estimate how many batts or rolls to buy, and add a margin for cutoffs and mistakes. Note the linear feet of rim joist separately, because that perimeter needs rigid foam and sealant rather than batts.
It also pays to plan around obstacles before buying. Cross-bracing, plumbing, wiring, and ductwork all interrupt clean joist bays and require cutting and fitting the batts around them. Knowing where those obstacles sit helps you buy a little extra and avoid the temptation to compress insulation over a pipe instead of splitting it neatly. A short measuring session up front makes the installation itself faster and cleaner, and it keeps you from stopping mid-job to buy more material.
When floor-joist insulation is not the right approach
Insulating between the floor joists suits a vented crawl space, but it is not always the best answer. If the crawl space is chronically damp, houses ductwork or plumbing that would be exposed to freezing in an unheated space, or sits in a humid climate where venting pulls in moisture, sealing and insulating the walls instead may serve the home better. In an encapsulated design the floor joists are left uninsulated and the foundation walls carry the insulation, which brings the crawl space into the home’s thermal envelope.
Signs that floor-joist insulation keeps failing, batts that repeatedly grow damp, pipes that freeze despite insulated floors, or a space that stays humid no matter the season, are worth taking as a hint that the whole strategy may need rethinking rather than another round of batts. Deciding between insulating the floor and sealing the space is a bigger question than material choice, and it belongs in the planning stage before you commit. For homeowners weighing that fork, the broader comparison lives in the pillar guide linked above.
Maintaining floor-joist insulation over time
Insulation installed between floor joists is not entirely maintenance-free, largely because gravity and moisture keep working against it. A periodic look under the house, especially after a wet season, catches problems while they are small. Check that batts are still pressed to the subfloor and have not begun to droop, that no support rods have popped loose, and that nothing has slipped out of a bay entirely.
Look, too, for the warning signs that moisture is creeping in: damp or discolored facing, a musty smell, rust on the support wires, or any dark staining on the wood above. Catching a rehung batt or a slipped support early is a five-minute fix. Catching a moisture problem early can save the framing from rot. The insulation you installed will keep delivering lower bills and warmer floors for years, but only if the occasional check makes sure it is still doing its job rather than quietly sagging into the crawl space.
If a bay does fail, resist the urge to simply stuff the fallen batt back up and move on. Ask why it dropped. A single failed rod is a quick reinstall, but a batt heavy with absorbed moisture is telling you the space got wet, and that underlying cause deserves attention before the replacement meets the same fate. Reading the failure rather than just fixing it is what keeps the floor insulation working for the long haul.
References
- ENERGY STAR: Seal and Insulate — U.S. Environmental Protection Agency (ENERGY STAR)
- Synthetic Mineral Fibers and PPE — Occupational Safety and Health Administration
Frequently asked questions
Which way should floor joist insulation face in a crawl space?
The vapor-retarder facing should point up, toward the warm subfloor and heated space above, not down toward the cold crawl space. The facing slows interior moisture from reaching a cold surface, so it belongs on the warm side of the assembly to avoid trapping moisture in the batt.
How do I keep floor joist insulation from falling down?
Use insulation support rods wedged across each bay every 12 to 24 inches, or staple support wire or netting to the joist bottoms. Friction alone will not hold batts against the subfloor long term. Support every bay so the insulation stays in full contact and never sags.
What R-value do I need for crawl space floor insulation?
It depends on your climate zone, with colder regions requiring higher values. Check the Department of Energy's recommended levels for your area. Joist depth limits how much fits, so match the batt to the recommendation without compressing it, since compression reduces the actual R-value.
Can I insulate crawl space floor joists myself?
Yes, if the crawl space is dry and the material is not a suspect older product. Wear a respirator, goggles, gloves, and long sleeves for the fiberglass. Fix any moisture first, fit batts without compressing them, support every bay, and air-seal the rim joists.
If the joist bays are hard to reach, the batts keep sagging, or you are not sure the crawl space is dry enough to insulate, a local crawl-space or insulation pro can save you a lot of grief. You can connect with a vetted specialist through our contact page.