Crawl Space Vapor Barrier Installation: Steps and Cost
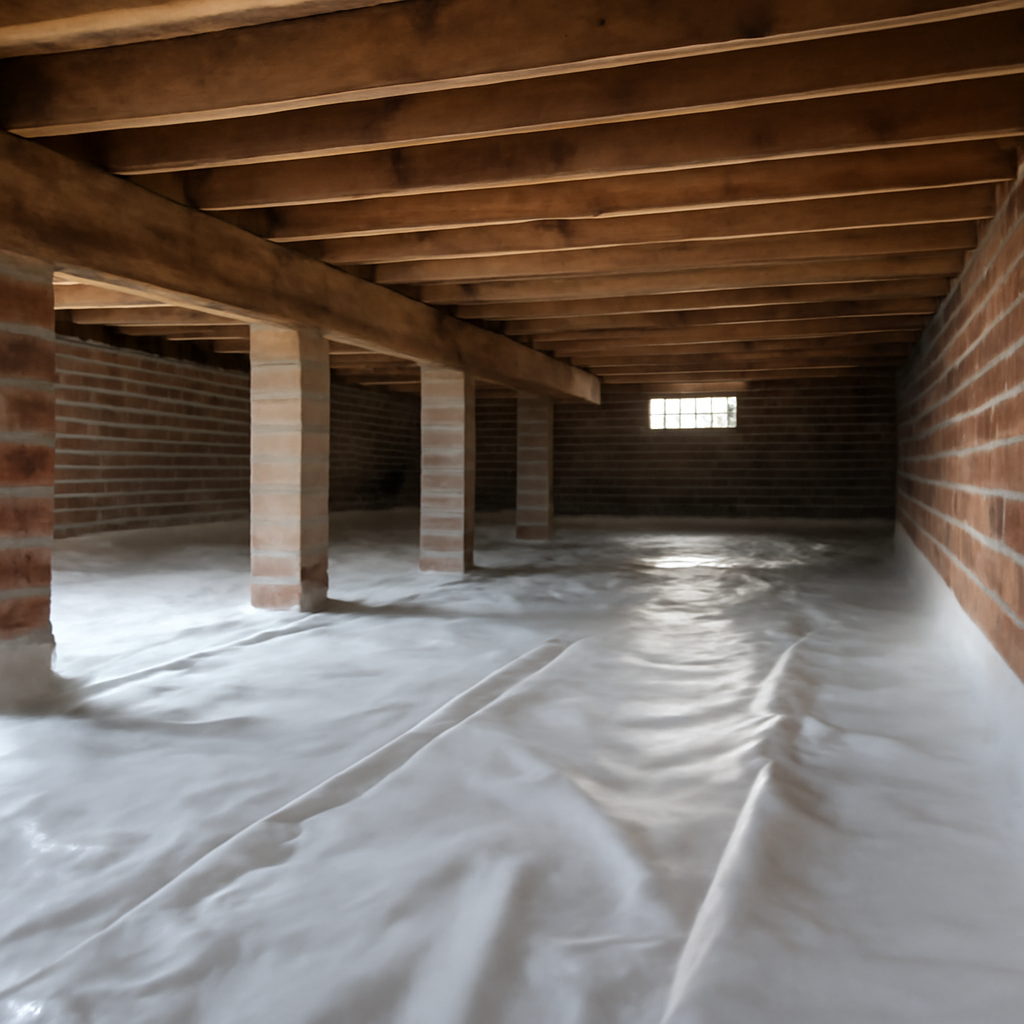
A plastic sheet on a dirt floor sounds like the simplest home improvement imaginable. In practice, a crawl space vapor barrier installation succeeds or fails on details: how well the ground is prepared, how far the seams overlap, how the liner meets the foundation walls and how carefully it wraps each pier. Done well, the barrier slows ground moisture from evaporating into the crawl space, protects wood framing and gives a cleaner surface for future service visits. Done poorly, it can trap water, tear within a year or leave gaps that let moisture and soil gas through. This guide covers the installation sequence, material choices, common mistakes and what the job costs whether you do it yourself or hire it out. It summarizes EPA guidance on moisture, mold and radon current as of 2026; for health concerns consult a physician, and for radon or mold testing decisions a certified professional. Costs are industry ranges that vary by market.
Part of our Crawl Space & Attic Guide guide — start there for the full picture →
How a Crawl Space Vapor Barrier Is Installed
Most professional crawl space vapor barrier installation follows the same basic sequence: clear and grade the floor, fix any water entry, lay the liner with generous overlaps, tape every seam, run the liner up the foundation walls and fasten it, wrap and seal each pier and penetration, then inspect for gaps. A full encapsulation adds vent sealing, wall insulation and humidity control on top of that sequence.
For a typical 1,000-square-foot crawl space with decent clearance, a two-person crew can often finish a ground cover in a day and a full wall-to-wall liner in one to three days. A homeowner working alone should plan on several weekends.
Tools and materials checklist
- Polyethylene liner rolls sized to the floor area plus 10 to 20 percent for overlaps and wall runs
- Seam tape rated for polyethylene, typically 4 inches wide
- Butyl or double-sided sealing tape and polyurethane sealant for wall and pier terminations
- Mechanical fasteners such as plastic push pins, termination bar or masonry anchors
- Utility knife with spare blades, tape measure, chalk line and marker
- Rake, shovel and contractor bags for debris
- Knee pads, headlamp, gloves, safety glasses and a properly fitted respirator
Step-by-Step Installation
Step 1: Inspect and fix water problems first
Look for standing water, wet soil, efflorescence on walls, water lines on piers and active plumbing leaks. A vapor barrier controls evaporation from damp soil; it is not designed to handle flowing water. If water pools after storms, address gutters, downspouts and grading outside, or plan interior drainage before any plastic goes down. The guide to crawl space waterproofing explains those options.
Check also for mold on joists and subfloor, rot in sill plates and pest activity. Those problems are easier to fix before the floor is covered.
Step 2: Clear debris and grade the floor
Remove rocks, wood scraps, old plastic, form boards and anything sharp. Rake high spots and fill low ones so the floor is reasonably smooth and sloped toward any drain or sump. Wood debris left under a liner can feed fungi and attract termites, so remove it rather than burying it.
Step 3: Plan the layout
Measure the space and decide which direction the rolls will run. Running sheets perpendicular to the slope, with the uphill sheet overlapping the downhill one, helps any water that gets on top shed toward the low point rather than under a seam. Sketch where piers, posts and plumbing penetrations fall so you can cut fewer awkward pieces.
Step 4: Lay the floor sheets with generous overlap
Unroll the first sheet along a wall, leaving enough material to run up the foundation. Overlap adjacent sheets by at least 6 inches; many installers use 12 inches for added margin. Keep the liner snug to the ground without stretching it tight, since a little slack prevents tears when someone kneels on it.
Step 5: Tape every seam
Wipe the overlap clean and dry, then apply seam tape along the full length. Press it firmly. On thicker liners, some installers add a bead of sealant between the layers before taping. Untaped seams are the single most common shortcut and allow moisture and soil gas to bypass the barrier.
Step 6: Run the liner up the walls and fasten it
In a basic vented crawl space, the ground cover may stop a short distance up the wall. In an encapsulation, the liner usually runs most or all of the way up the foundation wall, often stopping a few inches below the sill plate so termite inspectors can still see the top of the wall. Attach it with double-sided butyl tape or sealant along the top edge, then secure it mechanically with termination bar or plastic fasteners every 12 to 24 inches. Tape and fasteners together hold better than either alone.
Step 7: Wrap piers, posts and penetrations
Cut the liner so it wraps each pier and runs up several inches to a foot, then seal it with tape or sealant. Plumbing pipes, ducts, electrical conduit and sump basins all need the same treatment. Pre-made pier boots can speed the process. Every gap here is a small hole in the barrier.
Step 8: Seal vents and the access, if encapsulating
If the plan is a sealed crawl space, close the foundation vents, air-seal the rim joist and install a tight access door. Do not seal vents without a humidity control plan, either a dehumidifier or conditioned air, because a closed crawl space with no moisture management can become damper than a vented one.
Step 9: Inspect and monitor
Walk the finished liner with a light, looking for punctures, loose tape and gaps at walls and piers. Patch with liner scraps and tape. Placing an inexpensive humidity logger in the crawl space for a few weeks shows whether the work is holding relative humidity in a reasonable range, generally below about 60 percent.
Choosing Vapor Barrier Materials
Material choice affects durability, ease of installation and cost. The main variables are thickness, reinforcement and whether the product is designed for radon resistance.
| Liner type | Typical use | Pros | Cons |
|---|---|---|---|
| 6-mil polyethylene | Basic ground cover in vented crawl spaces | Inexpensive, widely available | Tears easily, short service life with foot traffic |
| 10 to 12-mil reinforced | Most DIY and mid-range encapsulation | Good balance of durability and cost | Heavier to handle than 6 mil |
| 15 to 20-mil reinforced | Premium encapsulation, storage areas | Highly puncture resistant, longer warranties | Costs more, harder to cut and fold around piers |
| White or light-colored liners | Encapsulation | Brighter space, easier inspection | Usually priced higher |
Many building codes accept 6-mil polyethylene as the minimum ground cover for vented crawl spaces, and the International Residential Code includes provisions for unvented crawl spaces that require a continuous vapor retarder with lapped and sealed seams. Local codes and amendments vary, so check with your building department before relying on a minimum. For how the liner fits with insulation choices, see the explainer on crawl space vapor barriers and insulation.
The Colorado radon angle
Colorado has high average indoor radon levels, and crawl spaces with open soil let soil gas reach the living space. If a radon test comes back at or above EPA’s 4 pCi/L action level, the vapor barrier can double as the membrane for a sub-membrane depressurization system, in which a fan pulls air from beneath the sealed liner and vents it above the roof. That only works if seams, walls and piers are sealed well, so tell the installer up front if radon mitigation is planned. A liner by itself does not reliably lower radon; retest after any work.
Vented Ground Cover vs Sealed Crawl Space Installation
Before buying materials, decide which kind of crawl space you are building, because the installation details differ.
Vented crawl space with a ground cover
In a traditional vented crawl space, the foundation vents stay open and the vapor barrier covers the soil to cut down on evaporation. Floor insulation sits between the joists above. The liner may run only a short distance up the walls, and seams still need overlap, though some codes allow lapped seams without full sealing in this configuration. This approach is common in older Front Range homes and is often the lowest-cost option. It makes sense when the crawl space is dry and the main goal is reducing ground moisture and dust.
Sealed or unvented crawl space
In a sealed crawl space, vents are closed, the liner covers the floor and runs up the walls, seams are sealed, the walls are insulated and humidity is managed with a dehumidifier or a small supply of conditioned air. The crawl space effectively becomes part of the home’s conditioned volume. Installation takes longer and costs more, and the liner work must be more thorough because it now acts as the primary moisture and air barrier at the ground. For a deeper comparison, see the guide to vented vs encapsulated crawl spaces.
Maintaining the barrier after installation
A vapor barrier is low maintenance, not zero maintenance. Check it each spring and fall with a flashlight, looking for torn spots, lifted tape at walls and piers, and any water on top of the liner. Ask plumbers, electricians and HVAC technicians to report damage when they work in the space, and keep a few liner scraps and a roll of tape on hand for patches. Water found on top of the liner after a storm points to a drainage problem that needs attention, not just a patch.
Common Vapor Barrier Installation Mistakes
- Covering active water. Plastic over a wet floor traps water on top or underneath. Fix drainage first.
- Skipping seam tape. Loose overlaps shift and let moisture through.
- Stopping the liner at the base of the wall. Moisture moves through foundation walls too. In encapsulation the wall coverage matters.
- Covering the top of the foundation wall entirely. Leaving a small inspection gap below the sill plate allows termite inspectors to look for mud tubes.
- Sealing vents with no humidity plan. A closed crawl space needs a dehumidifier or conditioned air in most climates.
- Leaving wood debris under the plastic. It can rot and attract insects.
- Pulling the liner drum-tight. Tight plastic tears at the first knee or toolbox.
- Burying ductwork or utility lines. Keep service access in mind.
- Ignoring mold already present. A liner does not clean existing growth on framing.
Cost to Install a Vapor Barrier in a Crawl Space
The cost to install a vapor barrier in a crawl space varies widely depending on whether the job is a simple ground cover or part of a full encapsulation. The ranges below are industry estimates and will vary by region, access and contractor.
| Scope | DIY materials (1,000 sq ft) | Professional (1,000 sq ft) |
|---|---|---|
| 6-mil ground cover only | About $200 to $500 | About $1,000 to $2,500 |
| 10 to 12-mil floor and wall liner | About $800 to $2,000 | About $2,500 to $5,500 |
| 15 to 20-mil floor and wall liner | About $1,500 to $3,500 | About $3,500 to $7,500 |
| Full encapsulation with dehumidifier | About $2,500 to $5,000 | About $5,500 to $10,500+ |
Per square foot, professional vapor barrier installation is often quoted between roughly $1 and $4 for a liner, rising toward $3 to $7 when it is part of full encapsulation. For a fuller picture of encapsulation pricing, including drainage and radon add-ons, see the crawl space encapsulation cost guide.
What raises or lowers the price
- Clearance: crawl spaces under about 24 inches slow the work and may carry a premium.
- Number of piers and penetrations: each one takes time to wrap and seal.
- Debris removal and old insulation: hauling out batts and junk adds labor and disposal fees.
- Wall coverage: floor-only is cheaper than floor plus walls.
- Liner grade and brand: branded reinforced liners with long warranties cost more.
- Add-ons: vent sealing, rim joist sealing, insulated doors, dehumidifiers and drainage.
DIY or hire a pro?
A homeowner with a dry crawl space, comfortable clearance and patience can install a respectable ground cover and save most of the labor cost. The material savings shrink as the scope grows, because professionals buy commercial liner at better prices and finish faster. Professional installation is the safer choice when water enters the space, mold is present, clearance is tight, the barrier will serve as a radon membrane or a transferable warranty matters for resale.
Crawl spaces also carry safety risks: exposed wiring, sharp nails, rodent droppings, and in older homes, pipe or duct insulation that could contain asbestos. Wear protective gear and stop if you find damaged insulation of unknown material.
A Worked Example: DIY Ground Cover in Colorado Springs
Consider an 850-square-foot vented crawl space under a 1980s home in Colorado Springs with about 30 inches of clearance, a dry dirt floor, twelve concrete piers and old torn 4-mil plastic. The owner’s goal is a durable floor that makes furnace and plumbing visits cleaner, plus readiness for a possible radon system later.
- 12-mil reinforced liner, about 1,050 sq ft with overlaps: a few hundred dollars to about $1,000 depending on brand
- Seam tape, butyl tape and sealant: roughly $100 to $250
- Fasteners and termination bar: roughly $50 to $150
- Disposal of old plastic and debris: under $100
Over two weekends, the owner clears debris, lays sheets with 12-inch overlaps, tapes every seam, runs the liner up the walls to a few inches below the sill and wraps each pier. Total spend is roughly $600 to $1,500, compared with professional quotes for the same scope that might run $2,500 to $4,500. A follow-up radon test then tells the owner whether to call a mitigation contractor, who can tie into the already-sealed liner.
Questions to Ask a Vapor Barrier Contractor
- What thickness and brand of liner will you use, and is it reinforced?
- How much overlap do you use, and are all seams taped?
- How far up the walls will the liner run, and how is it fastened?
- How will you seal piers, posts and plumbing penetrations?
- Will you leave a termite inspection gap below the sill plate?
- Is any drainage or grading work included?
- Can the liner serve as a radon membrane if needed later?
- What warranty applies, and does it transfer to a new owner?
The crawl space insulation pillar page collects related guides on materials, insulation and moisture so you can compare a contractor’s plan against common practice.
References
- A Brief Guide to Mold, Moisture and Your Home — U.S. Environmental Protection Agency
- Mold Course Chapter 2: Moisture and Mold Prevention — U.S. Environmental Protection Agency
- Radon-Resistant Construction Basics and Techniques — U.S. Environmental Protection Agency
- Radon — American Lung Association
Frequently asked questions
How thick should a crawl space vapor barrier be?
Six-mil polyethylene is a common code minimum for ground covers in vented crawl spaces. For durability, many installers recommend 10 to 12-mil reinforced liners, and 15 to 20 mil for full encapsulation or crawl spaces used for storage.
How much does it cost to install a vapor barrier in a crawl space?
Industry estimates put professional installation at roughly $1 to $4 per square foot for a liner, or about $3 to $7 as part of full encapsulation. DIY materials for 1,000 square feet often run a few hundred to about $2,000 depending on thickness. Prices vary by market and access.
How much should vapor barrier seams overlap?
Overlap adjacent sheets by at least 6 inches, and many installers use 12 inches. Every seam should be taped with a polyethylene-rated tape so the sheets cannot shift or let moisture through.
Should a vapor barrier go up the crawl space walls?
In an encapsulated crawl space, the liner normally runs up the foundation walls and is sealed and fastened, often stopping a few inches below the sill plate to leave a termite inspection gap. In a basic vented crawl space, a floor-only ground cover with a short wall turn-up is sometimes used.
Can a crawl space vapor barrier reduce radon?
A sealed liner helps, but on its own it does not reliably lower radon. When paired with a fan that pulls soil gas from under the liner, called sub-membrane depressurization, radon levels typically drop. Test before and after the work.
If you live along the Colorado Front Range and want a qualified inspector to look at your crawl space before you buy materials or sign a contract, contact us here and we will help you connect with a vetted local professional.