Crawl Space Dehumidifier Installation Guide
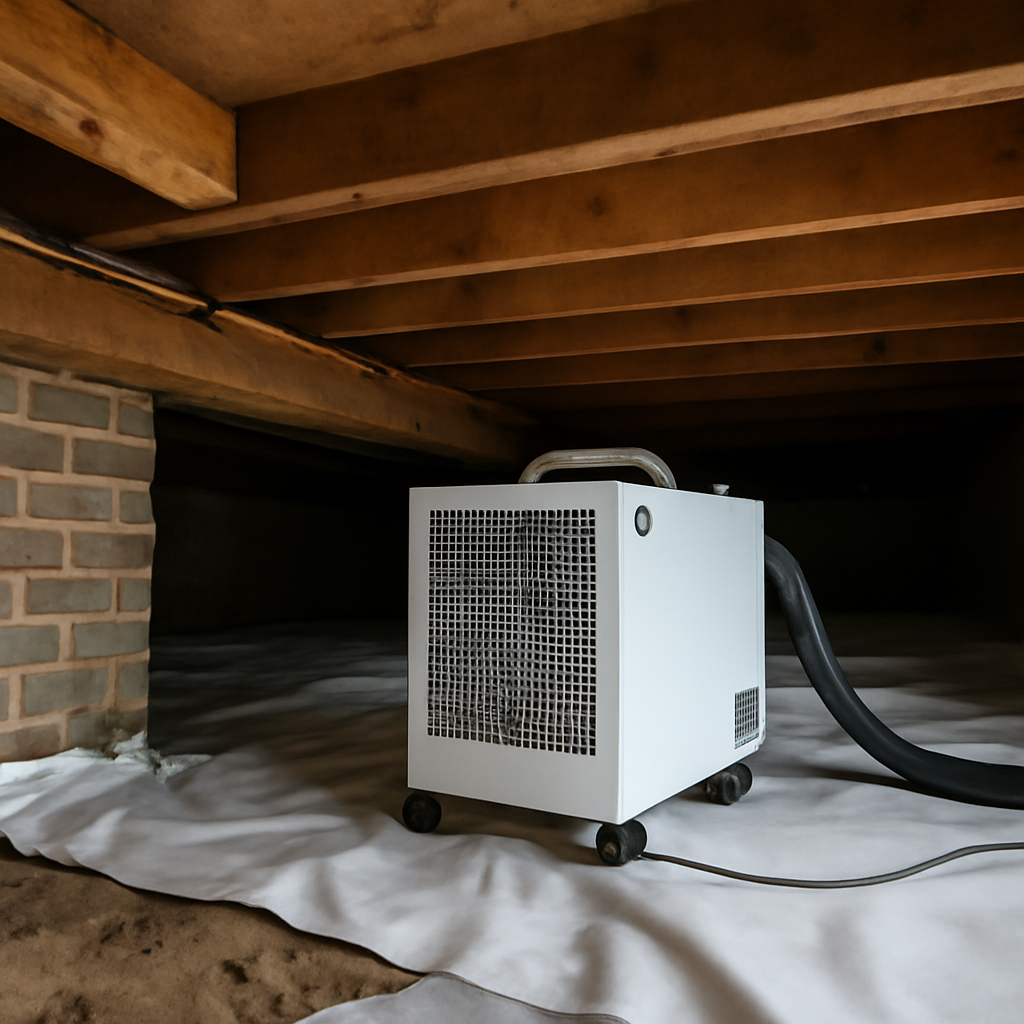
Buying the right dehumidifier is only half the job. How you set it up under the house decides whether it quietly protects your framing for years or fails within a season. Proper crawl space dehumidifier installation handles four things well: placement, drainage, electrical supply, and the sealed environment the unit is meant to maintain. This guide summarizes EPA and CDC guidance on indoor moisture and mold current as of 2026 and is not a substitute for a licensed electrician or a certified mold professional. The steps and pitfalls below help Front Range homeowners understand what a correct installation involves and where the work crosses into professional territory.
Dealing with mold or water damage? Talk to a remediation pro now.
📞 Call (833) 723-1134How a Crawl Space Dehumidifier Is Installed
At a high level, installation means positioning the unit so it can dry the whole space, draining the condensate it produces, supplying dedicated power, and confirming it can hold the target humidity. Each step has details that determine long-term success.
The EPA recommends keeping relative humidity below about 60 percent to discourage mold, and a well-installed unit holds the space comfortably under that. A dehumidifier that is set up poorly, with a stalled drain or a stagnant air pocket, may run constantly while still letting mold develop in a far corner. Before installing anything, it helps to understand why the space gets damp, which our guide to crawl space mold lays out in plain terms.
Installation is best understood as the final step in a sequence rather than a standalone project. The space has to be ready to be kept dry before a dehumidifier can keep it dry. Skipping the preparation and dropping a unit into a wet, unsealed, debris-filled crawl space is the single most common reason installations disappoint. The appliance ends up fighting conditions it was never meant to overcome, runs constantly, and still loses ground in the corners.
A well-planned installation also considers access and serviceability from the start. Crawl spaces are awkward to work in, and a unit placed where its filter cannot be reached, or where the drain line cannot be inspected, becomes neglected. Thinking through how the unit will be maintained over years, not just how it goes in on day one, separates a setup that lasts from one that quietly fails within a season or two.
Step 1: Prepare the Space First
Installation should follow moisture control, not precede it. If the crawl space has standing water, active leaks, or a missing vapor barrier, those problems come first. A dehumidifier cannot keep up with water actively entering the space.
Most successful installations pair the unit with a sealed vapor barrier on the floor and, ideally, full encapsulation. A sealed space is dramatically easier to dehumidify because the unit maintains a closed environment instead of fighting humid outdoor air entering through vents. Clear debris, confirm the ground is covered, and address grading or gutter issues that send water toward the foundation. If existing mold is present, remediation should happen before the dehumidifier becomes the maintenance tool, as described in our mold inspection hub.
Step 2: Placement and Air Distribution
Position matters more in a low, divided crawl space than in an open basement. Place the unit centrally, or use the manufacturer’s ducting kit to push dry air toward distant corners and pull from across the space. Stagnant pockets are where mold tends to begin, so even air movement is the goal.
Many crawl space units are designed to hang from the floor joists or sit on a raised stand, keeping them off the ground and out of any pooling water. Leave clearance around the intake and exhaust so airflow is not choked. Follow the manufacturer’s spec sheet for minimum clearances, because a unit jammed against a foundation wall cannot circulate properly.
Step 3: Drainage Done Right
Condensate management is the most common point of failure. A dehumidifier produces a steady stream of water that has to go somewhere reliable.
Gravity Drainage
If there is a sump pit, floor drain, or exterior low point below the unit, a gravity line can carry water away. The line must slope continuously downhill with no sags where water can pool and clog or freeze.
Condensate Pump
When the drain point sits above the unit, a condensate pump lifts the water up and out. Pumps need their own power and a clear discharge route. A dedicated crawl space dehumidifier with a built-in pump simplifies this by integrating the lift into the appliance. Whichever method you use, test the drain before walking away, since a blocked line will fill the space with the very moisture you are trying to remove.
Step 4: Power and Controls
Crawl space dehumidifiers draw meaningful current and should run on an appropriate, often dedicated, circuit. Damp environments raise the stakes on electrical safety, so GFCI protection and proper, code-compliant wiring are essential. This is the step most homeowners should hand to a licensed electrician rather than improvise with extension cords, which are not a safe permanent supply in a wet location.
Once powered, set the target humidity, typically 50 to 55 percent, and confirm the unit cycles correctly. Many models include a built-in humidistat or a remote sensor so you can monitor performance without crawling under the house. Note the filter location, because routine cleaning keeps the unit efficient.
Step 5: Verify and Commission the System
Installation is not finished when the unit powers on. The final step is verification, confirming the system actually holds the target humidity and that every component works as intended. Set the humidistat to the target, then check back over the following days to confirm the space reaches and maintains 50 to 55 percent rather than hovering higher.
Test the drainage under real conditions. Pour water into the condensate reservoir or run the unit long enough to produce condensate, and watch the full drain path. Confirm a gravity line carries water away without pooling, or that a pump cycles and discharges to its endpoint without backing up. A drain that looks fine when dry can reveal a sag, kink, or clog only once water is moving through it.
Document the setup for future reference. Note the unit model, the filter type and location, the drain route, and the humidity setpoint. This record makes maintenance straightforward and helps any future inspector or buyer understand the system. A monitored crawl space, ideally with a remote humidity readout, lets a homeowner confirm performance without crawling under the house every few weeks.
Common Mistakes and When to Call a Pro
The recurring errors are predictable: skipping moisture control before installing, running a drain line uphill, relying on an extension cord, leaving the unit in a corner with no ducting, and forgetting maintenance. Any one of these can make a capable unit underperform.
Installation crosses into professional territory when it involves new electrical circuits, encapsulation, sump or drainage construction, or an existing mold problem. A certified inspector or contractor can confirm the space is ready, size the unit correctly, and verify the install holds humidity. Front Range homeowners with tight, low, or previously wet crawl spaces are usually better served coordinating the work rather than tackling every part alone.
There is also a sensible middle path. A homeowner comfortable with the physical work might handle placement, ducting, and routine setup, while bringing in a licensed electrician for the dedicated circuit and GFCI protection. Damp locations and permanent appliance wiring are precisely where electrical shortcuts cause real danger, so this is one boundary worth respecting even for confident do-it-yourselfers.
Finally, remember that the installation is only as good as the moisture work that precedes it. If the assessment turns up active leaks, standing water, or existing mold, those issues belong to the remediation phase, and the dehumidifier install should follow rather than mask them. A professional can sequence the whole effort so the unit is commissioned into a space that is genuinely ready to stay dry, which is the outcome that makes the investment worthwhile.
Ducted Versus Free-Standing Installations
Crawl spaces are rarely a single open rectangle. Foundation walls, piers, and bulkheads divide them into compartments, and air does not flow freely between sections. That geometry shapes the installation choice between a free-standing unit and a ducted setup.
A free-standing dehumidifier sits in one spot and treats the air around it. In a small, relatively open space this can be enough. In a larger or divided crawl space, though, distant compartments stay humid while the area near the unit dries, leaving stagnant pockets where mold can start. A ducted installation addresses this by using the manufacturer’s duct kit to draw air from one part of the space and discharge dry air to another, distributing the effect more evenly.
Deciding between the two depends on the layout. Map the compartments and airflow paths before installing, and consider ducting whenever the space is large, low, or heavily divided. A correctly ducted unit can dry a complex crawl space that a single free-standing unit would leave with damp corners, and it often does so more efficiently because the air it treats circulates rather than stagnating.
Integrating the Dehumidifier With Other Moisture Controls
A dehumidifier rarely works alone. Its installation should integrate with the broader moisture-control system, because the unit maintains conditions that other measures establish. The vapor barrier over the soil blocks ground moisture, which dramatically reduces the load the dehumidifier carries. Sealed vents and encapsulation close off humid outdoor air. Exterior drainage, gutters, downspout extensions, and proper grading keep liquid water away from the foundation in the first place.
Installing a dehumidifier without these companions often disappoints, because the unit ends up compensating for problems it was never meant to solve. The Department of Energy frames moisture control as a whole-system concern, and a crawl space is a good example: the barrier, the sealing, the drainage, and the dehumidifier each handle part of the job. A thoughtful installation confirms the other pieces are in place, or plans for them, so the dehumidifier is the final maintenance layer over a space that is already managed.
For Front Range homes facing seasonal snowmelt and monsoon moisture, this integrated view is especially important. A unit asked to overcome poor grading and an open dirt floor during a wet spring will lose, while the same unit in a sealed, well-drained space holds humidity comfortably year-round. Planning the install as part of the system, not as a standalone fix, is what delivers a dry crawl space that stays that way.
Key Takeaways for Homeowners
A crawl space dehumidifier installation succeeds or fails on four things: preparation, placement, drainage, and power. Prepare the space first by controlling moisture and sealing the ground, because a unit dropped into a wet, unsealed crawl space fights conditions it was never meant to overcome. Pairing the install with a vapor barrier or full encapsulation is what lets the dehumidifier hold the target humidity efficiently.
Placement and drainage are where homeowners most often go wrong. Center the unit or duct it so dry air reaches every compartment, and route the condensate through a continuously sloped gravity line or a condensate pump to an approved discharge point. Test the full drain path under real conditions before walking away, since a stalled drain fills the space with the moisture you are trying to remove.
Power and verification round out the job. New circuits and GFCI protection in a damp location belong to a licensed electrician, and the system should be commissioned by confirming it holds 50 to 55 percent humidity. Installation also crosses into professional territory when encapsulation, drainage construction, or existing mold are involved. For Front Range homeowners, coordinating the work as part of a complete moisture-control system delivers a crawl space that stays dry for the long run.
References
- Mold Cleanup in Your Home — U.S. Environmental Protection Agency
- Moisture Control — U.S. Department of Energy
- About Mold and Dampness — Centers for Disease Control and Prevention
- Crawlspace Inspection Guidance — International Association of Certified Home Inspectors
If you want a crawl space dehumidifier installed the right way the first time, get in touch through our contact page to connect with a qualified Front Range professional who can prep, size, and verify the setup.
Dehumidifiers for damp basements
Holding relative humidity under ~50% is the single most effective way to keep mold from taking hold in a basement or crawlspace.
| Product | Why | Buy |
|---|---|---|
 hOmeLabs 4,500 sq ft hOmeLabs 4,500 sq ft | Popular large-basement unit. | Amazon — $174.99 |
 Frigidaire High-Humidity Frigidaire High-Humidity | Continuous-drain option. | Amazon — $287.01 |