Rim Joist Insulation: Materials, Air Sealing and Cost
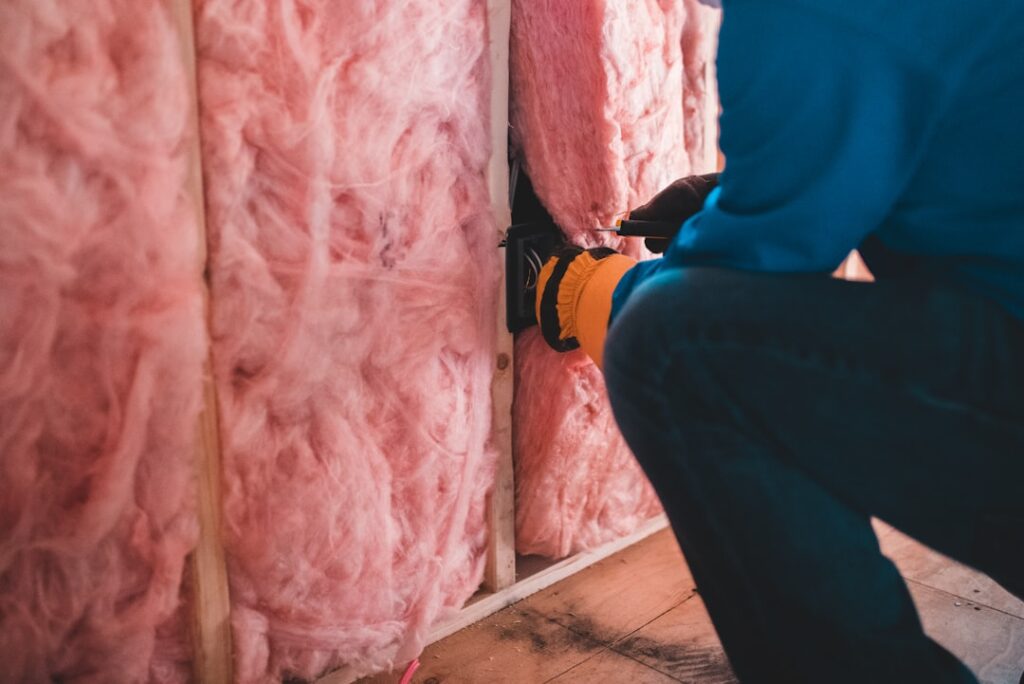
Walk into an unfinished Front Range basement in January and run a hand along the top of the foundation wall. Where the wood framing sits on the concrete, the air is often noticeably colder, and on a windy day you may feel a draft. That strip of framing is the rim joist, and in many houses it is one of the leakiest, least insulated parts of the entire building envelope. Good rim joist insulation is a relatively small project with an outsized effect on comfort, drafts and heating bills. This guide explains what the rim joist is, why it leaks so much air and heat, which materials work (and which commonly fail), how moisture and fire codes shape the choice, and what homeowners can expect to pay for DIY or professional work. It summarizes ENERGY STAR and EPA guidance and general building-science practice current as of 2026; local code requirements should always be confirmed with your building department.
Part of our Crawl Space & Attic Guide guide — start there for the full picture →
What Rim Joist Insulation Is and Why It Matters
Rim joist insulation is insulation and air sealing installed against the band of lumber that runs around the perimeter of a floor system, directly on top of the foundation wall. The goal is to stop outside air from leaking in through the gaps around that framing and to slow heat loss through the thin wood itself. In most homes with a basement or crawl space, the best-performing approach combines an airtight seal with continuous insulation, usually closed-cell spray foam or rigid foam board sealed at every edge.
The rim joist (also called the band joist, rim board or header joist) is the outermost board that caps the ends of the floor joists. It sits on the sill plate, which in turn is bolted to the top of the foundation. On a typical house, that means a ring of 2×10 or 2×12 lumber, roughly nine to eleven inches tall, wrapping the entire perimeter of the basement or crawl space ceiling.
Why does such a small area matter? Three reasons stand out:
- It is full of joints. The sill plate meets uneven concrete, the rim meets the sill, the subfloor meets the rim, and every joist bay creates more seams. Each joint is a potential air path.
- It is thin. An inch and a half of lumber has very little insulating value, roughly R-1.5 to R-2 by itself, compared with R-13 or more in a typical framed wall cavity.
- It is penetrated. Dryer vents, hose bibs, gas lines, electrical service entries, air conditioning line sets and cable runs often pass straight through the rim, and the holes around them are rarely sealed well.
Because the rim sits at the bottom of the house, it also plays a role in the stack effect. Warm air rises and escapes through the attic in winter, and replacement air gets pulled in low. Leaky rim joists are one of the main places that cold make-up air enters, which is why sealing them often makes upstairs rooms feel less drafty, not just the basement. ENERGY STAR’s home sealing guidance specifically calls out the basement rim joist as a priority air-sealing location.
How to Tell Your Rim Joists Need Attention
In an unfinished basement or crawl space, the rim joist is easy to inspect. Look up at the top of the foundation wall between the floor joists. Common findings include:
- Bare wood with daylight or cobwebs moving in the draft along the sill plate.
- Loose fiberglass batts stuffed into the joist bays, often sagging, gray or black-streaked where air has been filtering through them.
- Frost or water droplets on the wood or nails during a cold snap, a sign that humid indoor air is reaching a cold surface.
- Dark staining, soft wood, or mold growth on the rim or sill plate.
- Insect frass, mouse droppings or nesting material, since gaps that leak air also admit pests.
During a home energy audit, a blower door depressurizes the house so leaks become obvious with a smoke pencil or an infrared camera. The rim joist area often lights up as a cold band on the thermal image. If you are planning broader upgrades, a home energy audit can show how the rim compares with attic and duct leakage so you can prioritize spending.
Material Options for Rim Joist Insulation
There is no single right product, but the options are well understood. What they share is a priority on air sealing first and insulation second. Any material that lets air move through it or around it will underperform, no matter what R-value is printed on the label.
Closed-Cell Spray Foam
Closed-cell spray polyurethane foam is widely regarded as the most effective single-step approach. Sprayed directly onto the rim, sill plate and the edges of the subfloor, it expands to fill irregular gaps and cures into a rigid, airtight layer. It typically provides roughly R-6 to R-7 per inch, so two to three inches can deliver R-13 to R-20 in a single pass. At those thicknesses it also acts as a vapor retarder, which helps keep humid indoor air from reaching the cold wood.
The downsides are cost, the need for trained installers with protective equipment, and an off-gassing period during which occupants are usually told to stay out of the house. Small two-component DIY kits exist, but they are tricky to apply evenly and can be expensive per board foot. For a deeper comparison of foam types, see our guide to open vs closed cell spray foam. Open-cell foam is generally not recommended for rim joists because it is vapor-permeable and can let moisture reach the cold wood behind it.
Cut-and-Cobble Rigid Foam
Cut-and-cobble is the most popular DIY method. Rigid foam board, usually extruded polystyrene (XPS), polyisocyanurate (polyiso) or expanded polystyrene (EPS), is cut to fit snugly inside each joist bay against the rim. The edges are then sealed to the framing with a can of low-expansion spray foam or a compatible sealant, so the board becomes an air barrier rather than just a filler.
Two inches of XPS gives roughly R-10, and two inches of foil-faced polyiso can be in the R-12 to R-13 range depending on the product. Many installers seal the sill plate joint and any penetrations with canned foam first, then install the board, then foam all four edges. Done carefully, the result performs very well. Done sloppily, with gaps around the edges, it can trap moist air against the rim and cause the same condensation problems it was meant to prevent.
The trade-off is labor. A basement with 150 to 200 feet of perimeter may have well over a hundred joist bays, each needing a custom-cut piece. Bays that run parallel to the rim, wiring and pipes all slow things down.
Mineral Wool Plus Air Sealing
Mineral wool (stone wool) batts are noncombustible, moisture-tolerant and easier to cut tightly than fiberglass. On their own they do not stop air, so they are typically used after the rim has been air sealed with canned foam or caulk, or behind a layer of rigid foam. Some builders use a hybrid: one inch of rigid foam sealed to the rim for air and vapor control, then mineral wool in front of it for added R-value. This combination can be attractive where fire performance is a concern.
Why Plain Fiberglass Batts Underperform
Fiberglass batts pushed into the joist bays are the most common rim treatment in older homes and the most common failure. Fiberglass slows heat flow only when air is not moving through it. At the rim, air leaks through the sill plate gaps and straight through the batt, carrying heat away and leaving dirty streaks where the fibers filter out dust.
The bigger issue is moisture. Warm, humid indoor air can pass through the loose fiberglass and contact the cold rim board behind it. When the wood surface is below the dew point, water condenses on it. The batt then holds that moisture against the wood, out of sight. Over several winters that can lead to mold, rot and rusted fasteners. Building scientists often find wet, darkened rim joists behind faced fiberglass, especially when the kraft facing was installed toward the wrong side. If fiberglass is already in place, removing it and air sealing the rim before choosing a better insulation strategy is usually the right call.
Moisture, Condensation and Vapor Control
Most rim joist problems are moisture problems. The physics is simple: in winter the rim board is near the outdoor temperature, and indoor air carries water vapor. If that air reaches the wood, water condenses. Preventing that contact is the main job of the insulation system.
Air-impermeable insulation, meaning closed-cell foam or sealed rigid board, solves this by keeping the inside surface of the insulation warm and blocking the air that carries moisture. EPA’s moisture control guidance for buildings stresses the same principle across the envelope: control air leakage and keep surfaces where moisture could condense above the dew point.
A few practical points help:
- Fix bulk water first. If the sill plate is wet from outside, from poor grading, missing gutters, siding flashing problems or a high water table, insulating will not fix it and may hide the damage. Check exterior drainage before you insulate.
- Inspect the wood. Probe the sill and rim with a screwdriver. Soft or punky wood needs repair before it is covered.
- Avoid double vapor barriers. Do not add plastic sheeting over closed-cell foam or foil-faced board. The goal is one well-placed vapor control layer.
- Manage basement humidity. A dehumidifier in damp basements reduces the moisture load the rim area sees year-round.
Crawl spaces deserve special attention, because their moisture conditions depend on whether they are vented or sealed. In an encapsulated crawl space, the rim joist is usually insulated and sealed along with the foundation walls. Our crawl space hub and the guide to spray foam insulation in crawl spaces cover how the rim fits into the larger crawl space strategy.
Fire Code Considerations for Exposed Foam
Foam plastic insulation is combustible, and model building codes generally require it to be separated from the living space by an approved thermal barrier, such as half-inch gypsum board, or in some locations an ignition barrier. The International Residential Code includes provisions specific to foam at rim joists and band joists, and in some cases allows limited thicknesses of foam there without an additional covering. Basements and crawl spaces may be treated differently, and some spray foam and rigid board products are tested and listed for exposed use or with an intumescent coating.
Because the details depend on the code edition your jurisdiction has adopted, the specific product’s listing, the foam thickness and whether the space is used for storage or occupied, homeowners should confirm requirements with the local building department before leaving foam exposed. Many Front Range jurisdictions, including Denver, Aurora, Colorado Springs and Boulder County, adopt versions of the International Codes with local amendments. When in doubt, mineral wool, a code-listed coating, or a covering of drywall over the foam are common ways to satisfy the requirement. Foil facings on polyiso do not automatically count as a thermal barrier.
DIY vs Professional Installation
Rim joist insulation is one of the more approachable energy projects for a handy homeowner, as long as the area is accessible and dry.
When DIY Makes Sense
- The basement or crawl space is unfinished with clear access to most joist bays.
- The rim and sill are dry and structurally sound.
- You are comfortable working overhead with a utility knife, a foam gun and protective gear for several weekends.
- You plan to use cut-and-cobble rigid foam or a hybrid with mineral wool.
When to Hire a Pro
- The space is a tight crawl space, or access is limited by ductwork, plumbing and wiring.
- You want closed-cell spray foam installed at full thickness in one visit.
- There are signs of moisture damage, mold or rot that need evaluation and repair first.
- The rim work is part of a larger crawl space encapsulation or basement finishing project.
For professional spray foam, ask whether the crew has manufacturer or industry training, what thickness they will apply, how they will handle the thermal barrier requirement, and how long occupants should stay out after application. Get the re-occupancy time in writing.
How Much Rim Joist Insulation Costs
Costs vary widely with house size, access, material and local labor rates, so the figures below are rough planning ranges rather than quotes.
- DIY cut-and-cobble: materials for a typical basement perimeter, including foam board and several cans of sealant, often run a few hundred dollars, sometimes more for thicker polyiso or larger homes. The main cost is time.
- DIY spray foam kits: two-component kits sized for a basement perimeter can cost several hundred to over a thousand dollars, depending on coverage and thickness.
- Professional closed-cell spray foam: many homeowners see quotes in roughly the $1,000 to $3,000 range for a typical basement rim, with larger homes, difficult crawl spaces or added thermal-barrier coatings pushing higher. Some contractors price by board foot and have a minimum trip charge.
- Professional rigid foam installation: often similar to or somewhat less than spray foam when labor is factored in, since cut-and-cobble is labor-intensive.
- Repairs: replacing rotted sill plate or rim sections is separate and can add significantly to the total.
Utility rebates and federal energy tax credits for air sealing and insulation have been available in recent years. Eligibility rules change, so check current programs from your utility, such as Xcel Energy or Colorado Springs Utilities, before you buy materials. For whole-house planning, the crawl space encapsulation cost guide and our crawl space insulation pillar put rim work in context with other below-grade upgrades.
What Home Buyers and Inspectors Should Look For
For buyers, the rim joist is a quick but revealing area to check during a home inspection. A standard inspection includes the visible structure and insulation in accessible basements and crawl spaces, and inspectors often note missing insulation, moisture staining, wood decay and pest activity at the sill. Items worth asking about:
- Is the rim insulated, and with what? Bare wood or loose fiberglass suggests an easy improvement.
- Is there staining, efflorescence or mold on or below the sill plate?
- Are penetrations for dryer vents, hose bibs and gas lines sealed?
- If foam is present, is it left exposed in a way that may need a thermal barrier?
- Are anchor bolts and sill plate in good condition, with no signs of rot or termite damage?
Rim joist upgrades are rarely a deal-breaker, but moisture damage hidden behind old insulation can be. If the inspector sees signs of water at the rim, it is worth investigating the exterior drainage, siding and flashing before closing.
Whatever the material, the sequence is the same: fix water issues, remove old batts, air seal every joint and penetration, insulate, then cover foam as code requires. Pairing the rim with attic insulation and air sealing at the top of the house tackles both ends of the stack effect, which is usually where the biggest comfort gains come from.
References
- Seal and Insulate with ENERGY STAR — ENERGY STAR
- Recommended Home Insulation R-Values — ENERGY STAR
- Moisture Control Guidance for Building Design, Construction and Maintenance — U.S. Environmental Protection Agency
- International Codes (I-Codes) — International Code Council
Frequently asked questions
What is the best insulation for rim joists?
Closed-cell spray foam and rigid foam board sealed at every edge are generally considered the best options because they both insulate and stop air leakage. Mineral wool can work well when the rim is air sealed first. Plain fiberglass batts tend to underperform because air and moisture move through them.
Can I use fiberglass batts on my rim joist?
Fiberglass alone is not recommended. Air leaks through it, and humid indoor air can condense on the cold rim board behind the batt, leading to mold or rot. If fiberglass is used at all, the rim should be air sealed first and covered with an air-impermeable layer.
Does rim joist spray foam need to be covered?
Model codes generally require foam plastic insulation to be separated from living space by a thermal or ignition barrier, though the codes include specific allowances for rim joists. Requirements depend on the code edition, product listing and foam thickness, so check with your local building department.
How much does it cost to insulate rim joists?
DIY rigid foam projects often cost a few hundred dollars in materials. Professional closed-cell spray foam for a typical basement rim commonly falls around $1,000 to $3,000, with larger homes, difficult access or required coatings costing more.
Will insulating rim joists reduce drafts upstairs?
Often, yes. Leaky rim joists let cold air into the bottom of the house as warm air escapes through the attic. Sealing the rim reduces that inflow, which can make floors and upper rooms feel less drafty, especially when paired with attic air sealing.
Found damp wood, old fiberglass or daylight at the top of your foundation wall? Reach out to our team and we can connect you with a Front Range inspector who can check the rim, sill plate and crawl space before you insulate.