Deck Joist: Spans, Hangers, Rot and Sistering
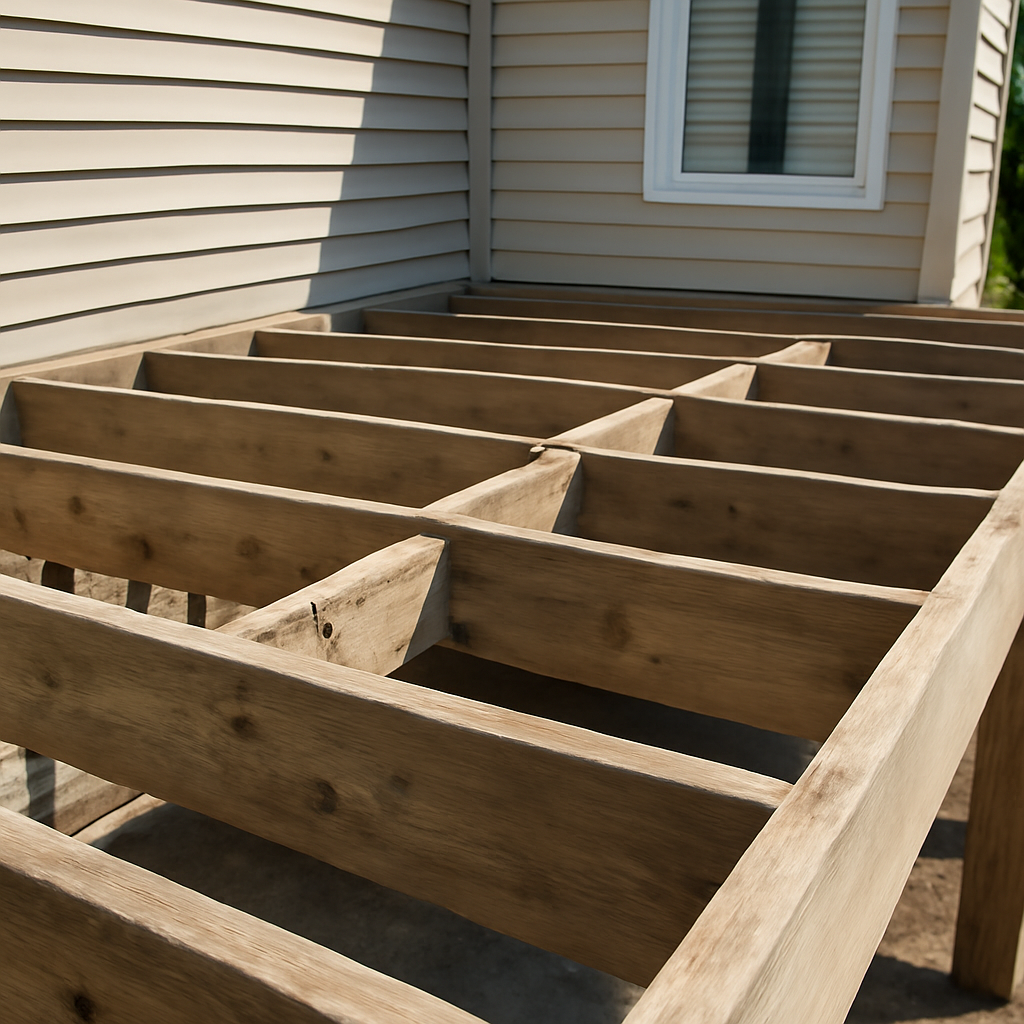
Deck boards get the attention, but the joists underneath do the work. Each deck joist carries a strip of deck surface and passes that load to a beam on one end and, on most attached decks, to a ledger board bolted to the house on the other. When joists are undersized, spaced too far apart, poorly connected or rotting, the deck feels bouncy, boards loosen and, in the worst cases, the structure can fail. Many deck collapses are traced not to the boards or even the joists themselves, but to the connections: the hangers, fasteners and especially the ledger attachment to the house. This guide explains how joist size and span relate, what proper hangers and fasteners look like, why the ledger is the critical connection, how water and rot attack joists, when sistering works, how railings tie into the rim, what inspectors look for and general 2026 repair costs.
Part of our Structure & Exterior guide — start there for the full picture →
Building or repairing a deck? Talk to a local deck builder.
📞 Call (888) 268-1507What a Deck Joist Does
A deck joist is a horizontal framing member, usually a 2×6, 2×8, 2×10 or 2×12 set on edge, that runs beneath the decking and supports it. Joists sit side by side at a regular spacing, commonly 12 or 16 inches on center, and span from a ledger or beam to another beam. Around the perimeter, rim joists (also called band joists) tie the ends together and often support the railing posts.
Several framing members work together:
- Ledger: a board fastened to the house that supports one end of the joists on an attached deck.
- Beam: a heavier member, often doubled or tripled lumber, that carries joists and rests on posts.
- Posts and footings: carry beam loads to the ground. Our deck footings guide covers that part of the structure.
- Blocking: short pieces between joists that stiffen the frame and give solid backing at board seams and railing posts.
A problem anywhere in this chain affects the joists. A sagging beam lets joists drop. A loose ledger lets the whole house end of the deck pull away.
Joist Sizes and Spans: How They Relate
Joist span is the distance a joist covers between supports. Allowable span depends on several factors at once:
- Joist depth: deeper joists span farther. A 2×10 can span considerably more than a 2×6.
- Spacing: joists set closer together each carry less load and can span farther.
- Wood species and grade: different species and grades have different strength values.
- Design loads: live load for people and furniture, snow load in many Colorado jurisdictions, and dead load of the deck itself.
- Wet-service conditions: exterior lumber is typically rated with adjustments for outdoor moisture.
Building codes and prescriptive deck guides adopted by many jurisdictions include span tables that combine these factors. Those tables, along with any local amendments, are the right source for a real project; general rules of thumb circulating online often ignore snow loads, species or wet-service factors. In heavy-snow areas, including many Front Range and foothill jurisdictions, allowable spans may be shorter than tables written for milder climates.
Board material also matters. Many composite and PVC boards require joists at 16 inches on center or closer, and diagonal patterns commonly require 12 inches. Our composite decking guide covers why resurfacing an old wood deck often means adding joists.
Overspanned joists show up as bounce, sag in the middle of the span, boards that loosen and in some cases cracks along the bottom edge. Sag can also be a sign of rot or an overloaded deck, so it is worth investigating rather than ignoring.
Snow, sliding roofs and concentrated loads
Colorado snowfall adds weight that joists must carry. FEMA’s Snow Load Safety Guide explains that snow sliding from a higher roof can pile up on lower roofs such as porch and sunroom roofs, creating a deeper, unbalanced load in the fall zone, and that the impact of sliding snow can itself add force. Decks under roof edges can collect snow the same way, concentrating weight on the outer joists. Hot tubs, large planters and outdoor kitchens are other concentrated loads that typical joist tables do not assume.
Joist Hangers and Correct Fasteners
Where joists meet a ledger or a flush beam, they typically hang in metal joist hangers. Hangers are engineered connectors, and they only perform as rated when installed with the fasteners the manufacturer specifies in every required hole.
Common hanger problems include:
- Missing nails or only a few nails in a hanger with many holes.
- Wrong fasteners, especially drywall screws or ordinary deck screws, which are brittle or too thin for shear loads. Hanger manufacturers specify particular nails or structural connector screws.
- Corroded hangers, since modern copper-based lumber treatments can corrode plain galvanized steel. Manufacturers offer heavier galvanizing or stainless versions rated for treated wood.
- Wrong size, such as a 2×6 hanger on a 2×10 joist.
- Gaps between the joist end and the ledger or beam, so the joist bears only on fasteners.
- Toe-nailed joists with no hangers, common on older decks.
Joists that sit on top of a dropped beam do not need hangers, but they still need a positive connection to the beam, often a hurricane tie or similar connector, to resist uplift and lateral movement.
The Ledger: The Most Critical Connection
On attached decks, the ledger is where many serious failures begin. If the ledger pulls away from the house, the joists lose support at that end and the deck can drop suddenly. Reports of deck collapses frequently describe ledgers attached only with nails, ledgers fastened through siding rather than to the house framing, or ledgers and house rim joists weakened by rot.
Ledger fasteners
Current prescriptive deck guides generally call for ledgers to be attached to the house rim joist or band with through-bolts or lag screws in a staggered pattern specified by the code or guide, sometimes with proprietary structural screws approved for ledger use. Nails alone are not considered adequate for ledger attachment in modern codes. Some jurisdictions also require lateral load connectors that tie the deck joists through the rim to the house floor framing, reducing the chance of the deck pulling away under load.
Flashing
Water is the other half of ledger failure. Without proper flashing, rain and snowmelt run down the siding, collect behind the ledger and rot both the ledger and the house rim joist, sometimes for years before anyone notices. Typical practice includes removing siding where the ledger attaches, installing flashing that laps over the ledger and under the house’s water-resistive barrier, and sometimes using spacers to let water drain between the ledger and the house. Interior signs of ledger leaks include staining or rot at the basement or crawl space rim joist behind the deck.
Warning signs at the ledger
Ledger trouble often shows before a failure. Look for a visible gap between the ledger and the house, joists that have dropped slightly at the house end, rust streaks below ledger bolts, soft or darkened wood along the ledger’s bottom edge, and caulk smeared along the top of the ledger in place of real flashing. Inside the house, water stains on the rim joist or subfloor directly behind the deck are a strong clue. Any of these is a reason to have the connection evaluated rather than simply adding more fasteners.
Ledgers that cannot be attached
Some house walls are not suitable for ledger attachment, such as brick veneer, cantilevered floor framing or certain engineered rim boards. In those cases, a freestanding deck with its own beam and footings near the house is a common alternative.
Joist Tape and Keeping Water Out
Even pressure-treated joists can rot. Treated lumber resists decay, but water that drains through board gaps sits on the tops of joists, fastener holes let it into the wood, and cut ends expose untreated cores. Joist tape, a butyl or similar self-adhesive membrane applied to the tops of joists, beams and ledgers before decking goes on, sheds water and seals around fasteners. It has become common practice, particularly under composite decking, where owners expect the surface to last decades and the frame needs to keep up.
Other water-management steps include sealing cut ends of treated lumber with end-cut preservative, using doubled joists or blocking where boards butt so water does not collect in one narrow seam, keeping debris out of board gaps and maintaining clearance and ventilation beneath low decks.
Rot at the Ledger, Cantilevers and Joist Ends
Rot tends to concentrate in predictable places:
- At the ledger, from missing or failed flashing.
- At joist ends in hangers, where water collects in the hanger seat.
- On cantilevers, where joists extend past a beam. Cantilevered ends are exposed to weather on top, the end grain and sometimes from below, and railing posts are often attached there.
- Along the tops of joists under board seams.
- At the rim joist where railing posts are bolted, since bolt holes let water in.
Probing with an awl or flathead screwdriver is the usual field test: sound wood resists and splinters, decayed wood gives easily and crumbles. Localized decay can sometimes be cut out and reinforced; widespread decay usually means replacement. Our wood rot repair guide covers the options in more detail.
On decks built before about 2004, joists may be CCA-treated lumber. The EPA notes that chromated arsenical-treated wood was used in residential decks before manufacturers voluntarily stopped homeowner-use production in December 2003. It advises wearing goggles and a dust mask when sawing such wood, washing hands after handling it and not burning it.
Sistering Damaged or Undersized Joists
Sistering means fastening a new joist alongside an existing one, usually full length and bearing on the same supports, to restore strength. It can address a cracked joist, localized damage or a slightly undersized member. It is not a cure for widespread rot, because the decayed joist will keep decaying and can spread moisture to the new wood. It also does not fix a failing ledger or hanger.
Good sistering practice generally includes bearing the new member on the beam or in a new hanger, using a structural fastening pattern of bolts, structural screws or nails as specified, and treating or drying the existing joist where possible. Our sistering joists guide explains when the method is appropriate and how it is typically done.
Railings Attached to the Rim Joist
Guard posts are often bolted to the outside of the rim joist. The post acts as a lever: a person leaning on the top rail can generate significant force at the bolts, which tries to pull the rim joist away from the deck joists. Without blocking or tension ties connecting the rim back into the joists, the rim can rotate and the railing can loosen even if the post bolts are tight.
Signs of trouble include railings that wobble, posts that have split around bolts and rim joists that twist outward. Notched posts, lag screws instead of through-bolts and rot at the post base or rim compound the problem. See our deck railing guide for guard heights, baluster spacing and post connections.
A Simple Seasonal Joist Check for Homeowners
Owners do not need special tools to catch many joist problems early. Once or twice a year, often in spring after snowmelt and again in fall before the first storms, a quick walk-through helps:
- Walk the deck slowly and note spots that feel bouncy, soft or sloped.
- From below, where safe, look along the joists for sag, cracks, dark stains and fungal growth.
- Check each visible hanger for rust, missing nails and joists that have shifted in the seat.
- Probe the ledger, cantilevered ends and rim joist with a screwdriver.
- Push firmly on every railing post and note any that move.
- Clear leaves and debris from board gaps and from beneath the deck.
Writing down what was found, with a few photos, makes it easier to tell whether a sag or gap is getting worse from one season to the next. Changes over time are often more telling than a single observation.
What Inspectors Look For in Deck Joists
The American Society of Home Inspectors’ Standard of Practice lists attached and adjacent decks, balconies, steps, porches and their railings among the exterior items inspected. It also says inspectors are not required to provide engineering analysis or offer an opinion on the adequacy of structural systems. During a home inspection, where the underside is accessible, an inspector will typically note:
- How the ledger is attached and whether flashing is visible.
- Missing, wrong or corroded hangers and fasteners.
- Visible rot, sag, cracking or prior repairs.
- Cantilever lengths that look excessive and post-to-beam connections.
- Railing stability and rim joist condition.
A dedicated deck inspection or an engineer’s evaluation goes further when concerns arise. Anyone crawling under or working on an elevated deck should be cautious; OSHA notes that falls are among the most common causes of serious work-related injuries and deaths, and its construction rules call for fall protection at six feet, a reminder that ladder and edge work on second-story decks carries real risk.
What Deck Joist Repairs Cost
Costs depend on access, deck height, how many members are affected and whether decking must come up. These are general 2026 estimates:
- Replacing or adding hangers and fasteners on an accessible deck can run from a few hundred dollars to around $1,000 or more.
- Sistering a few joists often costs a few hundred to a couple thousand dollars, more if boards must be removed.
- Ledger replacement with flashing commonly runs from roughly $1,500 to $5,000 or more, and can grow if the house rim joist is rotted.
- Reframing a deck while reusing footings can approach the cost of a new deck.
Structural repairs often require a permit. For help choosing someone to evaluate a deck, see the home inspector hiring guide and the structure and exterior hub.
References
- ASHI Standard of Practice for Home Inspections — American Society of Home Inspectors
- Snow Load Safety Guide (FEMA P-957) — Federal Emergency Management Agency
- Chromated Arsenicals (CCA) — U.S. Environmental Protection Agency
- Fall Protection — Occupational Safety and Health Administration
Frequently asked questions
How far can a deck joist span?
It depends on joist size, spacing, species and grade, and the design live and snow loads the local code requires. Span tables in the adopted code or a prescriptive deck guide are the right source, and heavy-snow Colorado jurisdictions may allow shorter spans than mild climates.
What screws should be used in joist hangers?
Only the nails or structural connector screws the hanger manufacturer specifies, in every required hole. Drywall screws and ordinary deck screws are not appropriate, and hangers and fasteners should be rated for use with treated lumber.
Why is the deck ledger so important?
The ledger supports one end of the joists on an attached deck. If it is nailed only, fastened through siding or rotted from missing flashing, it can pull away from the house and the deck can drop. Bolted or approved-screw attachment and good flashing are key.
Is joist tape worth it?
Many builders consider it inexpensive insurance. The membrane sheds water off joist tops and seals around fasteners, which slows decay, especially under long-life composite decking where the frame needs to last as long as the boards.
Can rotted deck joists be sistered?
Sistering can restore strength to a cracked or locally damaged joist, but it does not fix widespread rot, failing hangers or a bad ledger. Decayed wood should usually be removed, and the new member should bear fully on the beam or a proper hanger.
Bouncy deck, rusty hangers or a ledger you cannot see behind? Reach out to connect with a Front Range inspector who can check the framing before you buy, sell or rebuild.