Water Heater Leaking: Causes, Fixes and When to Replace
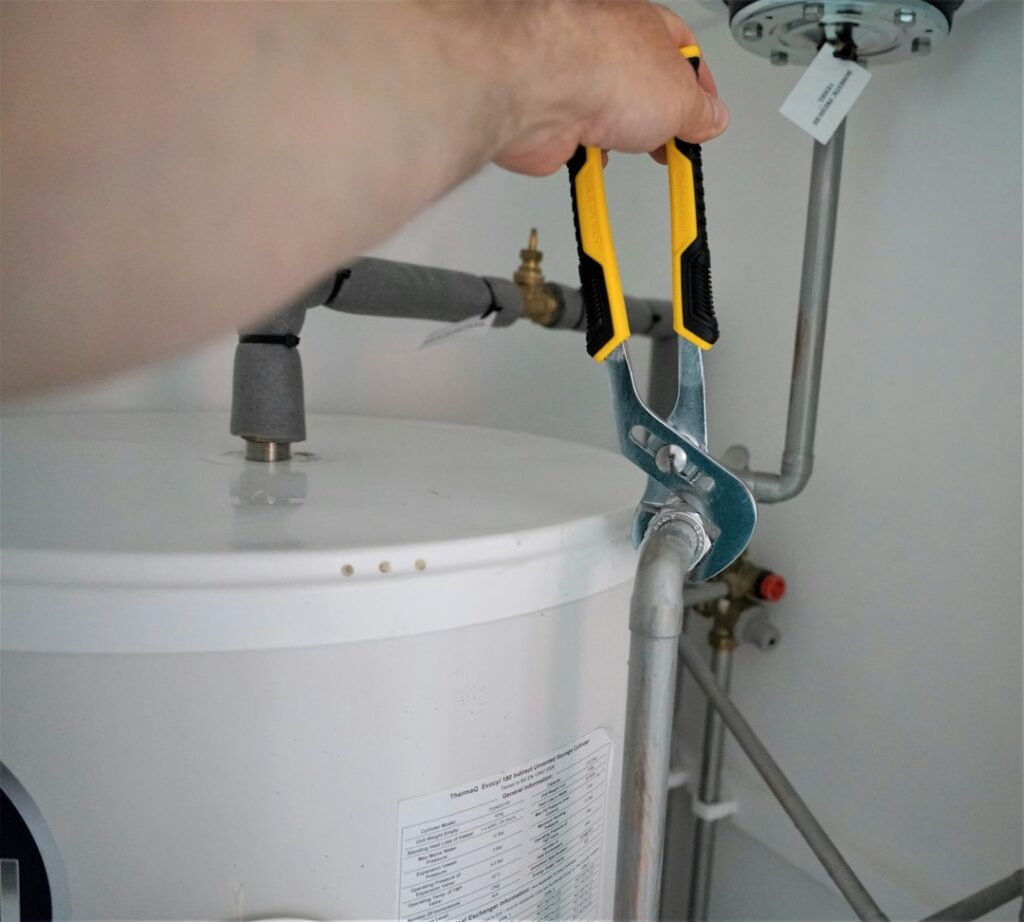
A puddle beside the tank is one of the most common plumbing surprises in a basement or garage, and it is rarely something to ignore for long. A water heater leaking from a loose fitting can be a quick, inexpensive fix. The same puddle coming from a rusted-through tank means the heater is at the end of its life, and the leak usually gets worse, not better. The challenge for homeowners is telling the two apart quickly and safely. This guide walks through what to do in the first few minutes, how to trace a leak to its source, which problems are worth repairing, why the temperature and pressure relief valve must never be plugged, how drain pans and leak sensors limit damage, and what repairs and replacements tend to cost. Costs mentioned here are general 2026 ranges and vary by home, region and contractor, so treat them as a starting point for quotes rather than firm prices.
Part of our Plumbing & Water guide — start there for the full picture →
Water Heater Leaking? What to Do First
If you find water around a tank-style water heater, make the area safe before you start investigating. Hot water, electricity and gas all meet at this appliance, so a few minutes of caution matters more than finding the cause right away.
- Watch for scalding water. Tank water is often set between 120°F and 140°F or higher. Do not reach under a spraying fitting or open the drain valve without protecting your hands and face. The U.S. Consumer Product Safety Commission notes that water at 140°F can cause third-degree burns in about six seconds of exposure.
- Turn off the energy source. For an electric heater, switch off the dedicated breaker at the panel. For a gas heater, turn the gas control knob to “off” or “pilot,” or close the gas shutoff valve on the supply line. If you smell gas at any point, leave the house and call the gas utility from outside.
- Shut off the cold water supply. Most tanks have a shutoff valve on the cold inlet pipe at the top. Closing it stops the tank from refilling, which limits how much water can escape. If that valve is stuck or itself leaking, close the main water shutoff for the house.
- Protect the surroundings. Move stored boxes, rugs and anything absorbent away from the tank. Start drying the floor with towels or a wet vacuum.
- Note what you see. Before wiping everything dry, look at where the water appears to be coming from. A photo helps if you end up calling a plumber or filing an insurance claim.
Once the water is off and the heater is de-energized, the immediate risk is under control. Now you can work out whether the leak is a minor connection problem or a failing tank.
Finding the Source of the Leak
Water usually travels before it drips, so the puddle is not always directly under the leak. Dry the tank and the fittings with a towel, then check each likely source from the top down. A flashlight and a dry paper towel pressed against each joint make small drips easier to spot.
Temperature and Pressure (T&P) Relief Valve and Discharge Pipe
The T&P valve sits on the top or upper side of the tank, with a discharge pipe running down toward the floor. Water dripping from the end of that pipe means the valve is opening, or not sealing fully. That can happen because the valve has worn out, because sediment is keeping it from seating, or because the valve is doing its job and relieving excess temperature or pressure. High household water pressure and a missing or failed thermal expansion tank are frequent culprits in homes with a closed plumbing system. A simple water pressure test at a hose bib tells you whether incoming pressure is pushing the valve and stressing the tank. Many plumbers treat static pressure above about 80 psi as a reason to look at the pressure-reducing valve, but local codes and fixture specs govern the exact target.
Drain Valve at the Bottom
The drain valve near the base of the tank is used for flushing sediment. Plastic drain valves on many residential tanks can crack, or the washer can wear and let water seep from the spout. Tightening the cap or hand-closing the valve fully sometimes stops a slow drip. A valve that leaks around its threads where it enters the tank is a different matter, because it may involve corrosion at the tank opening.
Inlet and Outlet Connections
The cold inlet and hot outlet pipes at the top of the tank connect through nipples, dielectric unions or flexible water connectors. These joints can loosen, corrode or develop pinhole leaks, and water running down the side of the tank from above often starts here. Look for green or white crusty deposits, rust streaks and damp insulation around the jacket top. Flexible connectors with visible corrosion or kinks are cheap to replace.
Condensation, Not a Leak
Gas water heaters can produce condensation when cold water fills the tank and the burner fires, especially after heavy hot-water use or on a newly installed unit. The droplets can hiss on the burner and collect underneath, which looks like a leak. Condensation usually tapers off once the tank reaches temperature. If water keeps appearing after the tank is fully heated and you have ruled out the fittings, look harder at the tank itself.
Leaking From the Bottom of the Tank
Water seeping from under the tank, from beneath the burner area on a gas model, or from behind the access panels on an electric model often points to the inner steel tank failing. Sediment and corrosion attack the bottom of the tank first, and once the steel has rusted through, there is no reliable repair. Rust-colored water at hot taps, rust on the tank seams and a heater well into its second decade all strengthen that conclusion.
On electric models, check the heating element gaskets behind the upper and lower access panels before assuming the tank has failed. A seeping element gasket can be replaced, though it requires draining the tank and working near live electrical terminals unless the breaker is off.
Repairable Leak or Time to Replace?
The location of the leak largely decides the answer. Leaks at external, replaceable parts are worth fixing on a heater that is otherwise in reasonable shape. Leaks from the tank body are not.
| Leak source | Typical outcome | Notes |
|---|---|---|
| Loose inlet or outlet fitting | Repair | Tighten or replace connector; often a small DIY or plumber job |
| Flexible water connector | Repair | Replace with a new rated connector |
| Drain valve drip | Repair | Cap the outlet or replace the valve after draining |
| T&P valve dripping | Repair and diagnose | Replace valve and check pressure and expansion tank |
| Element gasket (electric) | Repair | Drain, replace gasket or element |
| Tank body or bottom seep | Replace heater | Corroded steel cannot be reliably patched |
Age matters too. A tank heater that is 10 to 15 years old with a minor fitting leak may still warrant a repair, but it is worth asking whether that money would be better spent toward a new unit, especially if hot water has become rusty or the burner area shows corrosion. The full cost picture, including tank versus tankless options and installation extras, is covered in our water heater replacement cost guide. ENERGY STAR suggests planning a replacement before it becomes an emergency, since higher-efficiency models may need to be ordered and can take longer to install.
A leak is also a reasonable moment to rethink hot-water needs. Homes that regularly run out of hot water, or owners who want to free up floor space, sometimes compare a tankless water heater with a like-for-like tank. Tankless units have higher upfront costs and gas line or venting requirements, so the comparison works best with real quotes in hand.
T&P Valve Safety: Never Plug or Cap It
A dripping relief valve is annoying, and some homeowners are tempted to cap the discharge pipe or replace the valve with a plug. That is dangerous. The T&P valve is the safety device that keeps a tank from overheating and building pressure to the point of rupture if a thermostat or gas control fails. With the valve disabled, a malfunction can turn the tank into a pressure vessel with nowhere to release energy.
Signs that point toward a T&P problem rather than a tank problem include:
- Water dripping only from the end of the discharge pipe.
- Drips that increase after heavy hot-water use or overnight, when pressure can creep up.
- A relief valve that has not been tested or replaced in many years.
- Very high water temperature at the tap.
The right response is to diagnose why the valve is discharging. That may mean replacing the valve, lowering the thermostat, installing or recharging a thermal expansion tank, or repairing a failed pressure-reducing valve. The discharge pipe itself should run to an approved location, generally terminating close to the floor or a drain, without being threaded, capped or reduced in size. Local plumbing codes based on the International Code Council’s model codes set the exact requirements, so a licensed plumber should handle valve replacement if you are unsure.
Lowering the tank temperature can also reduce scald risk. The CPSC recommends that consumers consider setting water heaters to 120°F, which it notes reduces or eliminates the risk of most tap-water scald injuries while also saving energy.
Drain Pans, Leak Sensors and Damage Prevention
Most water heater leaks start small. The damage they cause depends on how long they go unnoticed and where the heater sits. A tank in an unfinished garage on a slab may simply leave a stain. A tank in a finished basement utility closet, an attic, or a closet next to carpet can soak drywall, flooring and framing before anyone sees the water.
Drain Pans
A drain pan under the tank catches slow drips and directs them to a drain line or at least keeps them contained. Pans are often required by code when a water heater is installed where a leak would damage the building, such as in an attic or above finished space. A pan without a drain line will not stop a major tank failure, but it buys time and makes small leaks visible sooner. Pans are usually installed when a heater is replaced, since the tank has to be lifted to place one.
Leak Sensors and Automatic Shutoff Valves
Battery-powered water sensors placed on the floor next to the tank sound an alarm or send a phone notification when they get wet. Some systems pair a sensor with a motorized valve on the cold inlet that closes automatically. These are inexpensive compared with the cost of drying out a finished basement. Our leak detector picks include standalone alarms and smart sensors that work well beside a water heater, washing machine or sump pit.
The U.S. EPA’s WaterSense program also encourages homeowners to check fittings and pipes for water on their exterior surfaces and to use leak detection devices, since household leaks waste a significant amount of water nationwide each year.
Water Damage and Mold After a Leak
A water heater leak is a water-damage event, even if the heater itself is cheap to repair. The EPA advises drying water-damaged areas and items within 24 to 48 hours to prevent mold growth, and stresses that the key to mold control is moisture control. Practical steps after a leak include:
- Removing standing water promptly with a wet vacuum.
- Pulling up wet carpet pad, which rarely dries fully in place.
- Running fans and a dehumidifier in the space until materials are dry.
- Checking the bottom edge of drywall, baseboards and wood framing near the tank.
- Watching for musty odors in the following weeks.
When water has wicked into drywall or under finished flooring, or the leak ran for days before discovery, professional drying is often worth the cost. Our guide to water damage restoration and mold risk explains what a restoration company does and how to judge whether drying was complete. If visible growth or a lingering musty smell shows up later, a mold inspection can help sort out how far it spread.
Insurance coverage varies by policy. Many homeowners policies treat sudden, accidental discharge differently from damage caused by a slow, long-running leak or lack of maintenance. Document the scene, keep the failed parts if possible and call your insurer early if damage is significant.
What Water Heater Leak Repairs Typically Cost
Prices vary widely by region, access and whether work happens after hours. The ranges below are rough 2026 estimates for the Denver metro and Front Range and similar markets, not quotes.
- Tightening fittings or replacing a flexible connector: often under $50 in parts for a DIY job; a plumber’s service call commonly runs roughly $150 to $350.
- Drain valve replacement: roughly $100 to $300 installed, depending on whether the tank must be fully drained.
- T&P valve replacement: roughly $150 to $350 installed; more if a thermal expansion tank or pressure-reducing valve is also needed.
- Electric element or gasket replacement: roughly $200 to $400 installed.
- Full tank replacement: commonly in the low thousands of dollars installed for a standard tank, with tankless conversions and code upgrades costing more. See the replacement cost guide linked above for detail.
Emergency or weekend service calls can add a premium. When the tank is already leaking from the body, getting two or three quotes for replacement is usually better value than paying for a diagnostic visit that will reach the same conclusion.
When to Call a Plumber or Inspector
Call a licensed plumber when the tank body is leaking, when the T&P valve keeps discharging, when you smell gas, or when the leak involves gas piping, venting or electrical connections. Venting problems on gas heaters can create carbon monoxide hazards, so any sign of scorch marks at the draft hood, rust at the vent connector or backdrafting deserves professional attention.
A home inspection is also a good time to catch a heater that is close to failure. The ASHI Standard of Practice lists water heating equipment among the plumbing components inspectors examine, and requires them to describe the heater’s energy source. A detailed water heater inspection typically looks at age, rust, the T&P valve and discharge pipe, venting, gas connections and signs of past leaks. For buyers, that information helps decide whether to negotiate a credit for replacement. Our guide to hiring a home inspector covers what a standard inspection includes and how to choose someone qualified.
Afterward, a little routine maintenance helps prevent the next leak. Annual or periodic flushing reduces sediment, as described in our water heater flush guide, and checking the sacrificial anode can extend tank life, as covered in the anode rod replacement guide.
References
- Avoiding Tap Water Scalds — U.S. Consumer Product Safety Commission
- A Brief Guide to Mold, Moisture and Your Home — U.S. Environmental Protection Agency
- Fix a Leak Week: Checking for Household Leaks — U.S. EPA WaterSense
- High Efficiency Gas Storage Water Heaters: Buying Guidance — ENERGY STAR
- ASHI Standard of Practice for Home Inspections — American Society of Home Inspectors
Frequently asked questions
Is a leaking water heater dangerous?
It can be. Hot water can scald, leaks near electrical components create shock risk, and a relief valve that discharges repeatedly may signal excess pressure or temperature. Turn off power or gas and the cold water supply, then find the source before using the heater again.
Why is my water heater leaking from the bottom?
Water at the base can come from the drain valve, condensation on a gas model, an element gasket on an electric model, or the tank itself. If you rule out the drain valve and fittings and water still seeps from beneath the tank, the inner tank has likely corroded through and the heater needs replacing.
Can I still use a water heater that is leaking?
A small drip from a loose fitting may not stop you from using hot water briefly, but it should be fixed promptly. A leak from the tank body usually worsens, so shut the heater down and plan a replacement rather than waiting for a larger failure.
Should the T&P valve drip water?
Occasional discharge means the valve opened to relieve temperature or pressure, and frequent dripping deserves a diagnosis. Check water pressure and the expansion tank, and replace a worn valve. Never cap or plug the valve or its discharge pipe, because it is a critical safety device.
How much does it cost to fix a leaking water heater?
Simple fitting or connector repairs can cost little more than a service call, often a few hundred dollars or less. Valve and element repairs typically run a few hundred dollars installed. A leaking tank body means replacement, which commonly costs in the low thousands for a standard tank.
Buying a Front Range home with an aging water heater, or found a puddle you cannot explain? Get in touch with us and we can connect you with a qualified local inspector who can check the heater, its venting and the surrounding area for past water damage.