Water Heater Flush: How to Drain Sediment Safely

Every tank-style water heater collects sediment. Minerals that come in with the water settle at the bottom of the tank, and over the years that layer can rumble, waste energy and shorten the life of the heater. A periodic water heater flush is the standard maintenance answer: connect a hose, drain some or all of the tank, and rinse the loose material out. The job is within reach of many homeowners, but it involves scalding water, gas or high-voltage electrical controls and a drain valve that may not cooperate on an older tank. This guide explains why sediment forms, walks through a safe flush for gas and electric heaters, covers how often to do it, and explains when flushing a neglected tank can do more harm than good. Any costs mentioned are general 2026 estimates that vary by home and contractor.
Part of our Plumbing & Water guide — start there for the full picture →
Plumbing problem? Talk to a local plumber now.
📞 Call (877) 637-1527Should You Flush Your Water Heater?
For most tank water heaters, yes. Flushing removes loose sediment from the bottom of the tank, which helps the heater transfer heat efficiently, reduces popping and rumbling noises, and can help a drain valve and relief valve keep working. Many manufacturers recommend draining or flushing on a regular schedule, often about once a year, and a few recommend more frequent flushing in hard-water areas. Your heater’s owner’s manual, usually also available on the manufacturer’s website using the model number on the rating plate, is the authority for your specific unit.
There are two important exceptions. A tank that has never been flushed in ten or more years may have a hardened sediment layer and a brittle drain valve, and opening it can create a leak you cannot stop. Tankless water heaters do not hold standing water the same way and are maintained with a descaling procedure, not a tank flush. Both are covered below.
Why Sediment Builds Up in a Water Heater
Water that contains dissolved calcium and magnesium, generally described as hard water, leaves some of those minerals behind when it is heated. In a tank heater, the minerals precipitate and sink to the bottom, where they mix with flakes of scale from the tank walls, debris from the water supply and bits of a corroding anode rod.
On a gas water heater, the burner sits directly below the tank bottom. Sediment acts like insulation between the flame and the water, so the burner has to run longer to heat the same amount of water. Water trapped under the sediment can flash into steam, which causes the familiar popping or rumbling sound. Over time, localized overheating can stress the steel and the glass lining at the bottom of the tank.
On an electric water heater, the lower heating element sits inside the tank, a few inches above the bottom. As sediment builds up, it can bury the lower element. That shortens element life and can contribute to slower recovery and lukewarm water.
Hard Water Along the Front Range
Water hardness varies a lot by source. Many Front Range utilities draw from mountain snowmelt, which tends to be relatively soft to moderately hard, while some communities and private wells supplied by groundwater can be considerably harder. Your water provider’s annual water quality report usually lists hardness, often in grains per gallon or milligrams per liter. A simple test kit gives a quick reading too. If your water is on the harder end, sediment accumulates faster and a water softener with hard water testing first may be worth evaluating. Softened water reduces scale, though it can affect how quickly an anode rod is consumed.
Best Water Heaters: our top 3 picks
| Product | Best for | Key features | Price | Buy |
|---|---|---|---|---|
| Rheem PROE50 M2 RH95 | Best overall whole-house tank |
| $851.54as of Nov 19, 2026 10:00 am GMT+0000 | Buy now →Check current price |
| Rheem RTG 7.0 Indoor | Indoor gas tankless upgrade |
| $653.00as of Nov 19, 2026 2:00 pm GMT+0000 | Buy now →Check current price |
| Rheem RTEX-24 | All-electric home, no venting |
| $545.71as of Nov 19, 2026 2:00 pm GMT+0000 | Buy now →Check current price |


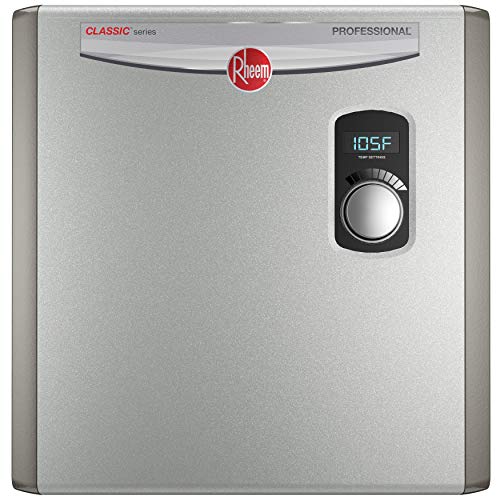
Prices are Amazon’s listed prices as of the time shown and change often; check Amazon for today’s price. As an Amazon Associate we earn from qualifying purchases.
Step-by-Step Water Heater Flush for Gas and Electric Tanks
Read the manufacturer’s instructions before starting, since valve locations and lighting procedures differ. Set aside one to two hours, and plan the flush for a time when nobody needs hot water.
What You Need
- A standard garden hose long enough to reach a floor drain, utility sink, sump or the outdoors.
- Work gloves and safety glasses.
- A flat-head screwdriver or wide coin if the drain valve has a slotted stem.
- A bucket for checking water clarity.
- Optional: a replacement brass drain valve and thread sealant if the existing plastic valve is suspect.
Step 1: Turn Off the Energy Source
Electric: switch off the water heater’s breaker at the panel. Never let an electric heater operate with a partially empty tank, because an exposed element can burn out within seconds when powered.
Gas: turn the gas control valve to “pilot” or “off,” following the label on the heater. Turning the burner off is enough for a flush; you do not need to close the gas supply valve unless the manufacturer says so or you are doing other work. On power-vent and electronic-ignition models, also unplug or switch off the unit’s electrical supply.
Step 2: Let the Water Cool, or Plan for Hot Water
Tank water at normal settings can cause serious burns. The U.S. Consumer Product Safety Commission notes that most adults suffer third-degree burns after about six seconds of exposure to 140°F water. Some homeowners let the tank cool for several hours or overnight with the energy source off. If you drain hot, keep hands and face away from the valve and hose outlet, and make sure the hose discharges somewhere it cannot splash people, pets or plants.
Step 3: Connect the Hose to a Safe Drain
Screw the hose onto the drain valve at the bottom of the tank and run it to a floor drain, laundry sink, or outdoors below the level of the valve so gravity can do the work. Check local rules before draining onto landscaping or into storm drains. A standard rubber garden hose can soften with very hot water, so a cooled tank is easier on the equipment as well.
Step 4: Close the Cold Supply and Open a Hot Tap
Close the cold water shutoff valve on the inlet pipe at the top of the heater. Then open a hot water faucet somewhere in the house, ideally a tub spout or a sink on a floor above. This lets air into the plumbing so the tank drains freely instead of holding a vacuum.
Step 5: Open the Drain Valve
Open the drain valve slowly. Water should begin flowing through the hose. If nothing comes out, sediment may be clogging the valve opening. Briefly opening the cold supply a little can sometimes push the blockage clear. Do not force a stuck valve with excessive pressure; that is how older plastic valves crack.
Step 6: Flush With Fresh Water
Once the tank is drained, or mostly drained, open the cold supply valve with the drain still open. Fresh water will stir up the sediment and carry more of it out. Run water into the bucket every few minutes to check clarity. Repeat the drain-and-stir cycle until the water runs clear or close to it. A partial flush, opening the drain for a few minutes while cold water flows in, is a lighter version some manufacturers suggest for routine maintenance.
Step 7: Close Up and Refill
Close the drain valve and disconnect the hose. Keep the hot water faucet open, and open the cold supply fully. When water flows steadily from the open hot faucet without sputtering air, the tank is full. Close the faucet.
Step 8: Restore Power or Gas
Electric: only after the tank is completely full, turn the breaker back on. Gas: turn the control valve back to “on” and relight the pilot if required, following the instructions on the heater label. Check the drain valve for drips over the next hour and again the next day.
The EPA’s WaterSense program suggests examining pipe fittings for water on the outside of the pipe as a basic leak check, and the same habit applies here. Run a dry paper towel around the drain valve, the cold inlet connection and the relief valve outlet after the tank has reheated. Heat expands metal and gaskets slightly, so a fitting that was dry when cold can weep once the tank is back at temperature. Catching that within a day is far easier than discovering a stained floor a month later.
While you are at the tank, consider checking the temperature setting. The CPSC recommends that consumers consider a setting of 120°F to reduce the risk of tap-water scalds.
How Often to Flush a Water Heater
A common recommendation is once a year for a standard tank. That interval is a starting point rather than a rule. Factors that justify more frequent flushing include:
- Hard water or a private well with high mineral content.
- A household that uses a large volume of hot water.
- Audible popping or rumbling, which indicates sediment is already present.
- A gas heater with a burner that seems to run longer than it used to.
Homes with softened water or naturally soft water may get away with longer intervals. Follow the manufacturer’s guidance first, since some warranty terms reference routine maintenance. Keeping a simple log, with the date, how cloudy the water was and how long it took to run clear, makes it easier to judge whether the interval is right.
A flush is also a natural time to schedule other checks. Testing the temperature and pressure relief valve and inspecting the sacrificial anode are often done during the same visit. Our water heater anode rod guide explains how to tell whether that rod needs replacing.
When Not to Flush an Old or Neglected Tank
Flushing is preventive maintenance. On a heater that has gone a decade or more without it, the calculation changes. Some plumbers advise caution, or skipping a full flush altogether, on old, never-maintained tanks for several reasons:
- The drain valve may fail. Plastic drain valves become brittle with age and heat. Opening one for the first time in years can crack the stem or leave it unable to close fully, turning maintenance into a leak.
- Sediment can block the valve open. Grit lodged in the valve seat can prevent it from sealing after the flush.
- Hardened scale may not come out. Thick, cemented sediment often does not move with a garden-hose flush, so the benefit is small.
- Disturbing sediment can expose weak spots. Sediment sometimes sits over areas of the tank bottom that have already corroded. Some technicians believe a flush can reveal a pinhole leak that was already developing.
If the heater is past roughly 10 to 12 years old and has never been serviced, it may be wiser to have a plumber assess it, replace the drain valve with a full-port brass valve if the tank is still sound, or start budgeting for replacement. Our guide to water heater replacement cost outlines what a new tank or tankless unit tends to run. ENERGY STAR encourages planning a water heater replacement ahead of time rather than in an emergency, which gives time to compare efficient models.
If an old drain valve does start leaking after a flush, put a hose cap or brass cap on the outlet as a temporary stopgap and call a plumber. Our water heater leaking guide covers how to tell a valve leak from a tank failure.
Tankless Water Heaters: Descaling Is Different
A tankless heater does not store water, so there is no tank bottom for sediment to settle in. Instead, scale forms inside the heat exchanger, where minerals deposit on hot surfaces. Manufacturers typically call for periodic descaling: isolating the unit with service valves, connecting a small pump and hoses, and circulating a descaling solution, often a manufacturer-approved product or white vinegar, through the heat exchanger for a set period. Inlet water filter screens also need cleaning.
Many tankless units display an error code or reduced flow when scale builds up. The interval depends heavily on hardness, and some installers recommend a scale-prevention cartridge in hard-water areas. For the details on tankless pros, cons and maintenance, see our tankless water heater guide.
Signs the Flush Helped, or That the Problem Is Bigger
After a successful flush, homeowners commonly notice that rumbling or popping is quieter or gone, the water from the drain eventually ran clear, and hot water recovers a bit faster. Those are signs that loose sediment was the main issue.
Warning signs that point beyond sediment include:
- Rusty or brown hot water that persists after the flush, which can indicate a corroding tank or a spent anode.
- Rotten-egg odor from hot water only, which is often linked to the anode rod and bacteria in the tank.
- Water at the base of the tank that does not come from the drain valve.
- Noise that does not change at all, suggesting hardened scale the flush could not move.
- A dripping relief valve, which may point to high pressure. A household water pressure test is a quick first check.
- Inadequate hot water on an electric heater, which can mean a failed element or thermostat.
Any of these deserve a closer look by a plumber or during a professional water heater inspection. Inspectors following the ASHI Standard of Practice inspect water heating equipment as part of the plumbing system and describe the energy source, which gives buyers a baseline for the heater’s condition. If you are purchasing a home, our home inspector hiring guide explains what to expect from that visit.
DIY Flush or Hire a Plumber?
A routine flush on a heater that has been maintained is a reasonable do-it-yourself job for many homeowners. Hiring a plumber makes more sense when the drain valve is stuck, the heater is in a tight closet or attic, the unit is a power-vent or condensing model with complex controls, or the tank is old enough that a failed valve would be a real risk. Professional water heater maintenance visits that include a flush, anode check and relief valve test are commonly priced at roughly $100 to $300 depending on the market and what is included. Some plumbing companies bundle it into an annual service plan.
Either way, keep a record of each flush. That history is useful when a heater needs warranty service and when a home goes on the market.
References
- Avoiding Tap Water Scalds — U.S. Consumer Product Safety Commission
- High Efficiency Gas Storage Water Heaters: Buying Guidance — ENERGY STAR
- ASHI Standard of Practice for Home Inspections — American Society of Home Inspectors
- Fix a Leak Week: Checking for Household Leaks — U.S. EPA WaterSense
Frequently asked questions
How often should you flush a water heater?
Many manufacturers suggest about once a year for a tank water heater, with more frequent flushing in hard-water homes or where the heater makes popping noises. Check your owner's manual, since the manufacturer's recommendation takes priority.
Is it bad to flush an old water heater?
It can be risky on a tank that has gone many years without maintenance. The drain valve may crack or fail to close, and hardened sediment may not drain anyway. Consider having a plumber assess an old, neglected tank before attempting a full flush.
Do I need to turn off the gas to flush a water heater?
Turning the gas control to pilot or off stops the burner from firing during the flush, which is usually enough. Follow the instructions on the heater label. For electric heaters, always turn off the breaker and only restore power after the tank is completely full.
Why is my water heater popping or rumbling?
Popping usually means sediment has built up on the tank bottom and water trapped beneath it is boiling into steam bubbles. A flush often reduces the noise. If the noise continues after flushing, the sediment may be hardened or the tank may be aging.
Can I flush a tankless water heater the same way?
No. Tankless units are descaled by circulating a descaling solution through the heat exchanger with a small pump, using the unit's service valves. Follow the manufacturer's procedure, and clean the inlet filter screen at the same time.
Want a second opinion on an older water heater before you buy or sell along the Front Range? Reach out through our contact page and we can put you in touch with a vetted local inspector.