Toilet Leaking at Base? Causes and How to Fix It
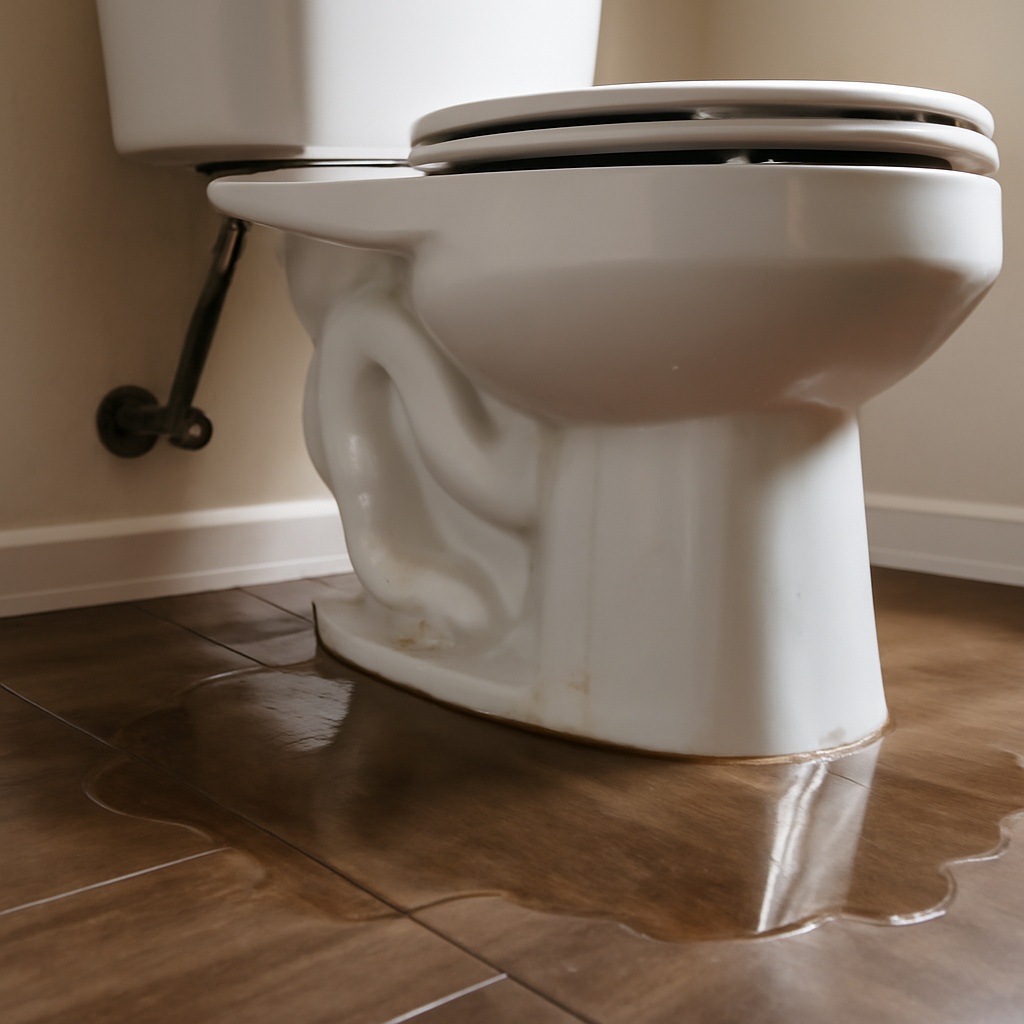
Water pooling around the bottom of a toilet is easy to dismiss as a splash or a bit of condensation. Sometimes that is all it is. Other times, a toilet leaking at base level is a sign that the wax ring has failed and wastewater has been seeping into the subfloor every time the toilet flushes. The difference matters: one problem needs a towel and better ventilation, the other can rot floor framing, stain the ceiling below and create conditions for mold. This guide explains how to trace the water to its source, how a wax ring replacement works, what a rocking toilet and a damaged flange mean, how to check the floor for hidden damage, and what repairs typically cost. Cost ranges are general 2026 estimates that vary by home and contractor, so use them as a starting point for quotes. Because leaking wastewater can be unsanitary, wear gloves during any inspection or cleanup.
Part of our Plumbing & Water guide — start there for the full picture →
Plumbing problem? Talk to a local plumber now.
📞 Call (877) 637-1527Why Is My Toilet Leaking at the Base?
A toilet that leaks at the floor usually has one of four causes. Working through them in order, from easiest to hardest to fix, is the fastest way to a diagnosis.
- Condensation (“sweating”). Cold water in the tank chills the porcelain. In a humid bathroom, moisture condenses on the outside of the tank and bowl and drips onto the floor. This is common in summer and after long showers.
- Supply line or shutoff valve. The flexible line that feeds the tank, its compression nut, or the shutoff valve at the wall can drip. Water then runs down the line and collects near the base.
- Tank-to-bowl connection. On two-piece toilets, a rubber gasket and bolts join the tank to the bowl. Worn gaskets or loose bolts let water escape each time the tank empties.
- Failed wax ring or flange. The wax ring seals the toilet outlet to the drain flange in the floor. When the seal breaks, water and waste can seep out from under the toilet, most often during and just after a flush.
The first three are generally clean water and relatively simple to address. The fourth involves wastewater and, if it has gone on for a while, possible damage underneath. A cracked bowl or tank is a less common fifth cause; porcelain cracks may be hairline and visible only when the surface is dry.
How to Diagnose the Source Step by Step
Start by drying everything. Wipe the floor, the base of the toilet, the supply line, the tank and the underside of the tank with a dry towel. Then watch where water reappears first.
Check for Sweating
If droplets form evenly across the outside of the tank and bowl, especially on humid days, condensation is the likely cause. Running the bathroom exhaust fan during and after showers, keeping the room warmer, or installing an insulated tank liner can help. The EPA’s moisture guidance notes that condensation on windows, walls or pipes can be a sign of high indoor humidity and recommends drying the surface and reducing the moisture source quickly, advising that indoor relative humidity stay below 60 percent and ideally between 30 and 50 percent.
Check the Supply Line and Valve
Run a dry tissue along the supply line, around the compression nut at the valve and around the fill valve connection under the tank. A damp spot points to the leak. Hand-tightening or a gentle quarter turn with a wrench sometimes stops a drip, but overtightening plastic nuts can crack them. Braided stainless supply lines are inexpensive, and many plumbers recommend replacing an old or kinked line rather than adjusting it.
Use the Food-Coloring Test for Tank Leaks
The EPA’s WaterSense program suggests a simple dye test: put a few drops of food coloring in the toilet tank and wait about 10 minutes without flushing. If color shows up in the bowl, the flapper is leaking internally. That kind of leak wastes water silently but does not put water on the floor. To test for an external tank leak, add coloring and watch the tank bolts and the tank-to-bowl joint from below with a flashlight. Colored water dripping from those points confirms a gasket or bolt problem. Flush after the test so the dye does not stain the porcelain.
Look for Cracks in the Porcelain
A hairline crack in the tank or bowl can weep slowly enough to look like condensation. Dry the fixture completely, then shine a flashlight across the porcelain at a low angle, paying attention to the back of the bowl, the area around the bolt holes and the underside of the tank. A thin line that stays damp after the rest of the surface dries is a warning sign. Epoxy patches are sometimes sold for this, but a cracked tank or bowl under constant water pressure can fail suddenly, so replacement is usually the safer choice.
Watch the Base During a Flush
If the supply line and tank are dry, flush and watch the floor where the toilet meets it. Water that seeps out from under the base during or right after a flush strongly suggests a failed wax seal. Other clues include a persistent sewer odor, discolored or soft flooring around the toilet, grout that keeps darkening, and a toilet that rocks when you sit on it. If there is a room below, check the ceiling for stains under the toilet location.
Best Toilet Wax Rings: our top 3 picks
| Product | Best for | Key features | Price | Buy |
|---|---|---|---|---|
| Oatey 31190 Heavy Duty | Classic wax ring, standard flange |
| $6.50as of Nov 18, 2026 3:18 am GMT+0000 | Buy now →Check current price |
| Korky 6000BP WaxFree | Wax-free, repositionable seal |
| $12.49as of Nov 18, 2026 3:18 am GMT+0000 | Buy now →Check current price |
| Danco 10879 Perfect Seal | Hybrid seal with no-cut bolts |
| $15.71as of Nov 18, 2026 3:18 am GMT+0000 | Buy now →Check current price |


Prices are Amazon’s listed prices as of the time shown and change often; check Amazon for today’s price. As an Amazon Associate we earn from qualifying purchases.
Replacing a Wax Ring: The Process and Safety Notes
Replacing a wax ring is one of the more approachable plumbing repairs, but it involves lifting a heavy, awkward fixture and handling wastewater. Toilets commonly weigh 60 to 120 pounds or more, and porcelain can crack if it is dropped or tightened unevenly. If you have back problems, cannot lift safely, or suspect floor damage, hiring a plumber is reasonable.
The general steps look like this:
- Shut off the water at the valve behind the toilet and flush to empty the tank. Sponge or wet-vac the remaining water from the tank and bowl.
- Disconnect the supply line and keep a towel underneath for drips.
- Remove the caps and nuts on the closet bolts at the base. Corroded nuts may need penetrating oil or a small hacksaw.
- Lift the toilet straight up, ideally with a helper, and set it on cardboard or an old towel on its side.
- Scrape off the old wax from the flange and the toilet horn with a putty knife. Plug the drain opening with a rag to block sewer gas, and remember to remove it before reinstalling.
- Inspect the flange and floor. Look for a cracked or broken flange, rusted metal rings, missing bolt slots, and soft or dark subflooring.
- Install the new seal. Use a standard or extra-thick wax ring, or a wax-free foam or rubber seal, chosen to match the flange height relative to the finished floor.
- Set the toilet straight down onto the bolts, press it evenly into place, then tighten the nuts alternately and gently until the toilet is firm.
- Reconnect the water, let the tank fill, and flush several times while watching for leaks.
Once a toilet has been set, lifting it again breaks the wax seal, so a new ring is needed any time the toilet comes off. Some installers caulk around the base for appearance and stability, while others leave a small gap at the back so a future leak shows up rather than spreading unseen. Local practice and code requirements vary, so follow your plumber’s recommendation or local rules.
Rocking Toilets and Flange Repair
A toilet that moves when someone sits on it is more than an annoyance. Repeated rocking can squash and break the wax seal, which leads straight back to a leak at the base. Rocking usually comes from one of three issues: loose closet bolts, an uneven floor, or a flange that is broken or sits at the wrong height.
If the bolts are simply loose, snugging them carefully may stop the movement, though a seal that has already been compressed out of shape may need replacing. For an uneven floor, plastic toilet shims slipped under the base can stabilize the fixture. Shims are a fix for a level problem, not for a rotted subfloor.
A cracked or broken flange often needs a repair ring or a replacement flange. Metal repair rings and spanner flanges screw over a damaged flange without cutting the drain pipe. When a new floor raised the finished height above the flange, a flange extender or a thicker seal may be needed so the toilet can seal properly. Replacing the flange entirely can mean cutting into the drain and, in some homes, working through a finished ceiling below. That is typically plumber territory.
Subfloor Rot, Mold Risk and Checking for Hidden Damage
A slow wax ring leak is easy to miss because the water spreads under the flooring before it shows. Over months, plywood or OSB subflooring can soften, delaminate and rot around the flange. Vinyl may bubble or lift, tile grout may crack, and the ceiling below may stain. Wastewater also brings an odor that lingers even after cleaning.
Simple checks can reveal trouble. Press firmly on the floor around the toilet with your hand or foot and feel for spongy spots. Look at the ceiling directly below. A pin or pinless moisture meter gives a better picture by comparing readings near the toilet with readings elsewhere in the room; our moisture meter category covers meters suited to flooring checks. Elevated readings around the base, especially after a flush, point to an ongoing leak.
Moisture under a floor also creates conditions for mold. The EPA’s guidance on mold and moisture explains that the key to mold control is moisture control, and that wet materials dried within 24 to 48 hours usually will not grow mold. A leak that has continued for weeks is past that window. If the subfloor is stained, soft or smells musty after the toilet is lifted, plan for drying, possible removal of damaged material, and repair before the toilet goes back. Our guide to water damage restoration explains what professional drying involves. Dark rings inside the bowl are a different issue from hidden subfloor growth; the article on black mold in a toilet explains what those stains usually are and how to clean them.
Toilet leaks are also something home inspectors routinely look for. The ASHI Standard of Practice directs inspectors to inspect interior water supply and distribution systems and drain, waste and vent systems, including fixtures. During a typical inspection that might mean flushing toilets, checking for movement and noting staining or soft flooring. For buyers, our home inspector hiring guide explains what a standard inspection covers and when a plumbing specialist or sewer scope makes sense.
Running Toilets, Water Waste and Pressure
A toilet leaking at the base wastes some water, but an internal leak from a worn flapper can waste far more, quietly. The EPA’s WaterSense program notes that toilets are the main source of water use in the home, accounting for nearly 30 percent of indoor consumption, and that a worn flapper can cause a toilet to run or silently leak thousands of gallons a year. WaterSense recommends checking flappers periodically and replacing them at least every five years.
If you are replacing an old toilet anyway, WaterSense labeled models use 1.28 gallons per flush or less, compared with the 1.6-gallon federal standard and up to 6 gallons in some older fixtures. Some local utilities offer rebates on labeled toilets.
High household water pressure can also stress fill valves, supply lines and connectors, contributing to recurring drips. If several fixtures leak or valves fail repeatedly, measure the pressure. The guide to testing your home’s water pressure shows how to do it with an inexpensive gauge and when a pressure-reducing valve may be worth checking.
Preventing Future Leaks Around the Toilet
Once the toilet is dry and sealed, a few habits help keep it that way. Check the base for movement every few months and snug the closet bolts gently if the toilet starts to shift. Replace plastic or rubber supply lines that are older than the manufacturer’s suggested service life, and swap any line that shows bulging, kinks or corrosion at the nuts. Exercise the shutoff valve behind the toilet once or twice a year so it will close when you need it; old multi-turn valves often seize and may be worth replacing with a quarter-turn valve during other work.
Inexpensive water sensors placed behind the toilet can sound an alarm or send a phone alert when they detect water on the floor. They will not catch a slow seep under the flooring, but they are useful for supply-line failures and overflows, especially in upstairs bathrooms and in homes that sit empty during travel. Our leak detector category lists a range of options.
Finally, keep bathroom humidity in check with an exhaust fan that actually vents outdoors, and clean up spills and overflows promptly rather than letting water sit against grout lines and baseboards.
Costs and When to Call a Plumber
Costs vary with the cause, access and any damage found. As rough 2026 ranges:
- Supply line or flapper: parts often cost under $25; a plumber’s visit may run roughly $100 to $250 depending on the market.
- Wax ring replacement: the seal itself is inexpensive; professional reset commonly falls in the low hundreds of dollars.
- Flange repair or replacement: often a few hundred dollars, more if the drain or ceiling below must be opened.
- Subfloor repair: can run from several hundred to a few thousand dollars, depending on how much flooring and framing must be replaced.
- New toilet installed: commonly a few hundred dollars to over $1,000, depending on the fixture.
Call a licensed plumber if the floor is soft, the flange is broken, the leak returns after a new seal, water appears in the ceiling below, or you see sewage backing up anywhere in the house. Repeated backups or slow drains can indicate a problem farther down the drain line that a new wax ring will not fix.
References
- Fix a Leak Week: Food-Coloring Test and Toilet Flapper Leaks — U.S. EPA WaterSense
- Residential Toilets: Flush Facts and WaterSense Savings — U.S. EPA WaterSense
- A Brief Guide to Mold, Moisture and Your Home — U.S. Environmental Protection Agency
- ASHI Standard of Practice for Home Inspections — American Society of Home Inspectors
Frequently asked questions
Is it safe to use a toilet that is leaking at the base?
If the leak comes from a failed wax ring, each flush can push wastewater under the floor, so limit use until it is repaired. Condensation or a small supply-line drip is less urgent but still worth fixing promptly.
How do I know if the wax ring is bad?
Common signs include water seeping from under the base during or after a flush, a sewer odor, a toilet that rocks, and stained or soft flooring around the base. Ruling out condensation, the supply line and the tank bolts first helps confirm it.
Should I caulk around the base of a toilet?
Caulk can improve appearance and stability, and some local codes call for it. Many installers leave a small gap at the back so any future leak becomes visible. Caulk never fixes a failed wax ring.
How long does a toilet wax ring last?
A wax ring can last for many years if the toilet stays firmly anchored. Rocking, a damaged flange or lifting the toilet breaks the seal, and any time the toilet is removed a new ring should be installed.
Can a leaking toilet cause mold?
Yes. A slow leak under the floor can keep subflooring damp long enough for mold to grow. The EPA notes that materials dried within 24 to 48 hours usually will not grow mold, so longer leaks deserve a closer look.
Found soft flooring around a toilet in a home you are buying or selling? Reach out through our contact page and we can put you in touch with a vetted Front Range inspector who can check fixtures, flooring and the ceiling below for hidden leak damage.