Toilet Installation: Wax Rings, Rocking Toilets and Leaks
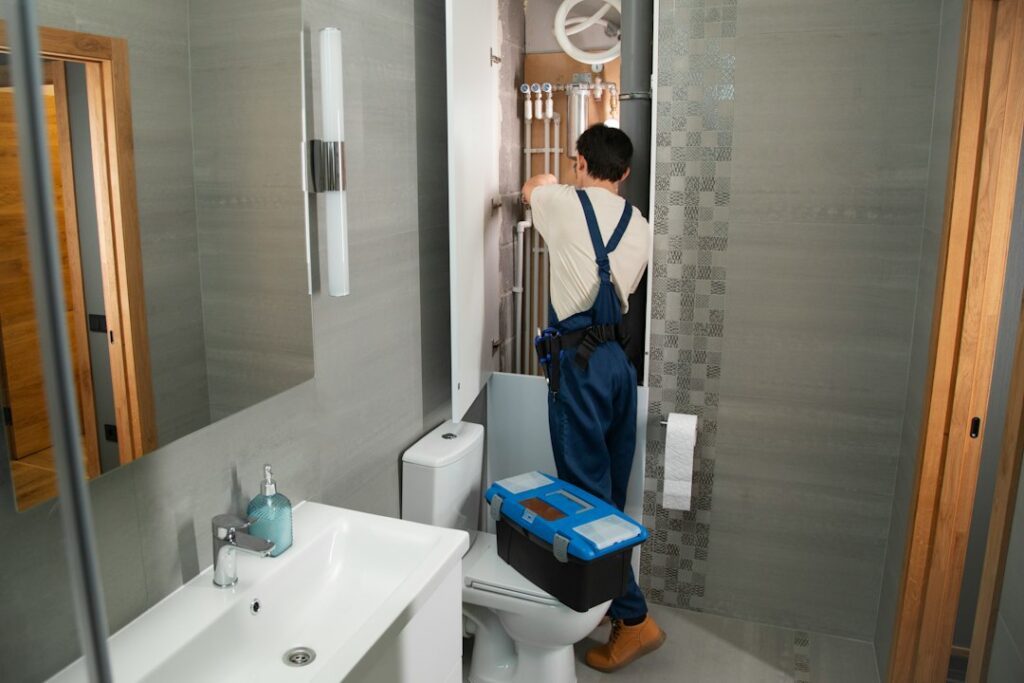
Setting a toilet looks like one of the simpler plumbing jobs in a house: lift the old one off, put a new seal on the flange, lower the new bowl and tighten two bolts. In practice, many of the toilet problems that show up months later trace back to small mistakes made during that half hour, from a rough-in measurement that was never checked to bolts tightened until the china cracked. A toilet that rocks, weeps at the base or runs between flushes can also damage the subfloor and let sewer gas into the room. This guide walks through each part of a toilet installation, the choices between wax and wax-free seals, how to deal with uneven floors, the supply connection, the caulking debate, water-efficient models, leak testing, bidet seats and hedged cost ranges for Front Range homeowners.
Part of our Plumbing & Water guide — start there for the full picture →
Plumbing problem? Talk to a local plumber now.
📞 Call (877) 637-1527Measure the Rough-In Before Buying
The rough-in is the distance from the finished wall behind the toilet to the center of the drain flange, usually measured to the center of the closet bolts. The most common residential rough-in in the United States is 12 inches, but 10-inch and 14-inch rough-ins are found in some homes, particularly older ones and bathrooms that were reconfigured during a remodel.
Measure from the finished wall surface, not the baseboard, to the center of the bolts. A toilet made for a 12-inch rough-in installed on a 10-inch rough-in will not fit against the wall, while one installed on a 14-inch rough-in will leave an awkward gap behind the tank. Some toilet models are sold with an offset or adjustable outlet to suit nonstandard rough-ins.
Other Measurements Worth Checking
- Side clearance: the distance from the center of the toilet to side walls, vanities or tubs. Local codes set minimum clearances, and a tight space can make an elongated bowl uncomfortable.
- Front clearance: the space in front of the bowl to a door, vanity or wall.
- Supply valve location: whether the existing stop valve will clear the new tank and bowl shape, especially with skirted toilets that hide the trapway.
- Bowl shape and height: round versus elongated, and standard versus comfort or chair height, both affect fit and accessibility.
Inspect the Flange and Floor First
Once the old toilet is off, the flange and the subfloor around it are exposed for the first time in years. This is the best moment to fix problems that would otherwise undermine the new installation. Look for broken bolt slots, a flange that sits well below the finished floor, a flange that is loose, and wood around the drain opening that is dark or soft.
A cracked or low flange can usually be repaired with a repair ring, spacer kit or replacement, and our guide to the toilet flange covers those options in detail. Soft wood needs attention before the new toilet goes down; our guide to subfloor repair explains what that involves. Scrape the old wax completely off the flange so the new seal sits on a clean surface, and stuff a rag in the drain opening while working to block sewer gas and keep tools from falling in. Remember to remove the rag before setting the toilet.
Best Toilets: our top 3 picks
| Product | Best for | Key features | Price | Buy |
|---|---|---|---|---|
| Gerber Maxwell Crest | Best overall two-piece |
| $259.00as of Nov 19, 2026 2:17 pm GMT+0000 | Buy now →Check current price |
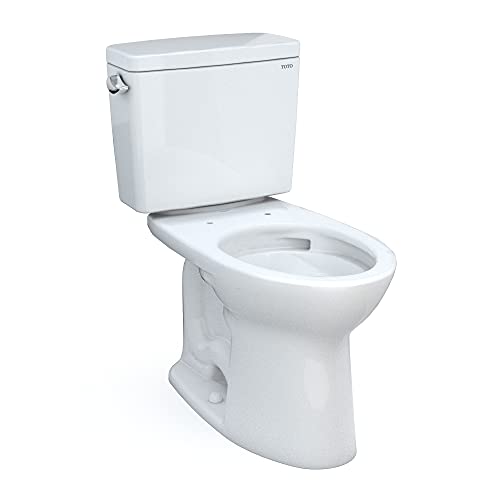
| TOTO Drake CST776CSFG | Low-pressure homes |
| $271.98as of Nov 19, 2026 2:17 pm GMT+0000 | Buy now →Check current price |
| Casta Diva CD-W001 | Lowest water use |
| $225.14as of Nov 19, 2026 2:17 pm GMT+0000 | Buy now →Check current price |


Prices are Amazon’s listed prices as of the time shown and change often; check Amazon for today’s price. As an Amazon Associate we earn from qualifying purchases.
Wax Rings vs Wax-Free Seals
The seal between the toilet outlet and the flange is what keeps water and sewer gas from escaping. Two broad types are used.
Wax Rings
The traditional wax ring has been used for generations and remains inexpensive and widely trusted. Wax rings come in standard and extra-thick versions, and some include a plastic or rubber horn that guides waste into the drain. Wax compresses as the toilet is set, filling irregularities in the flange and toilet outlet. The trade-off is that wax is a one-time seal: if the toilet is lifted or shifted after setting, the ring should generally be replaced. Wax can also be harder to compress in a cold room, and it may not seal reliably if the flange is far below the floor.
Wax-Free Seals
Wax-free seals use foam, rubber or other flexible materials, sometimes with a sleeve that extends into the drain pipe. Many are designed to accommodate a range of flange heights and can tolerate repositioning the toilet during setting. They are typically more expensive and some installers find certain designs less forgiving with damaged or unusual flanges. Both wax and wax-free seals can work well when the flange is sound and set at the right height; the seal is not a substitute for repairing a broken or loose flange.
Setting and Bolting the Toilet Without Cracking It
With the flange clean and the new closet bolts in place, the toilet is ready to set. The process typically looks like this:
- Place the seal on the toilet outlet or the flange, following the seal manufacturer’s instructions.
- Lift the bowl and lower it straight down over the closet bolts, guiding the bolts through the holes in the base.
- Press down firmly with body weight, rocking gently if the instructions allow, until the base rests on the floor.
- Install washers and nuts on the closet bolts and tighten them alternately, a little at a time on each side.
- Stop as soon as the toilet is firm and does not move. Vitreous china is hard but brittle, and overtightening the nuts is a common way to crack a new base.
- Trim excess bolt length with a hacksaw or by snapping off breakaway bolts, then install the bolt caps.
For two-piece toilets, the tank is attached to the bowl with tank bolts and a gasket. The same principle applies: tighten evenly and gradually until the tank is snug and level, without forcing it. Our guide to toilet tank repair covers tank bolts, gaskets and internal parts if the tank starts to drip after installation.
Shims for Uneven Floors
Older floors and tile are rarely perfectly flat. If the toilet rocks after it is set, the answer is not more torque on the bolts. Plastic toilet shims slipped under the base at the low points stop the movement without stressing the china. Once the toilet is solid, the excess shim material can be trimmed flush and hidden with caulk or grout. A toilet that still rocks after shimming may be sitting on a high flange or a damaged floor, which needs correction before the seal is compromised.
Supply Line and Stop Valve
The toilet’s fill valve is fed by a supply line from a stop valve, usually located on the wall or floor behind and to the left of the toilet. Most modern installations use a braided stainless steel supply line sized for the toilet fill valve. Old solid chrome or plastic lines may have hardened or cracked with age and are often replaced during a new installation.
The stop valve itself deserves attention. Multi-turn valves that have not been operated in years may not close fully or may begin to drip at the stem once turned. Many plumbers recommend replacing an old stop valve with a quarter-turn valve while the toilet is out. Before any of this work, it helps to know where the house’s main water shut-off valve is located, in case the fixture stop fails or a fitting leaks during the job.
Supply connections should be hand-tight plus a small additional turn at the fill valve, since the plastic threads on many fill valves are easy to strip or crack. Overtightening a plastic coupling nut is a known cause of sudden supply line failures.
To Caulk or Not to Caulk the Base
Whether to run a bead of caulk around a toilet base is one of the more debated questions in residential plumbing. Many plumbing codes and installation practices call for or recommend sealing the base to the floor, and many manufacturers’ instructions do as well. Arguments for caulking include preventing mop water and splashes from seeping under the base, where they can create odors and stain or damage the floor, and adding a little lateral stability.
The main argument against a full seal is that it can hide a slow leak at the wax ring, letting water rot the subfloor before anyone notices. A common compromise is to caulk around the front and sides but leave a small gap at the back, so leaking water has a path to show itself. Local requirements and the toilet manufacturer’s instructions should guide the decision. If water ever appears around the base, our guide to a toilet leaking at the base walks through tracing the source.
WaterSense Toilets and Flush Volume
Choosing a new toilet is also a chance to reduce water use. EPA’s WaterSense program states that design improvements have allowed toilets to use 1.28 gallons per flush or less while still providing equal or superior performance, which it describes as 20 percent less water than the current federal standard of 1.6 gallons per flush. WaterSense labeled toilets are independently certified to meet EPA’s criteria for both performance and efficiency.
The same EPA page notes that older, inefficient toilets can use as much as 6 gallons per flush and that the low-flow toilets of the 1990s were sometimes associated with performance issues such as double flushing. EPA reports that WaterSense performance criteria have since been adopted into the national plumbing standard. Dual-flush models add a reduced-flush mode for liquid waste. Local utilities in some areas offer rebates on WaterSense labeled toilets, so checking with the water provider before buying is worthwhile.
Testing for Leaks After Installation
After the toilet is set and the supply is connected, open the stop valve slowly and let the tank fill. Check the supply connections, the tank-to-bowl bolts and the base for drips. Flush several times and look again, using a dry paper towel around the base and under the tank to reveal small amounts of moisture.
The Dye Test
An internal leak from the tank into the bowl wastes water silently. EPA’s Fix a Leak Week guidance suggests placing a few drops of food coloring in the toilet tank; if any color shows up in the bowl after 10 minutes, there is a leak. EPA also advises flushing immediately after the test to avoid staining the tank. A new toilet should pass this test. If it does not, the flapper may be misaligned or the fill valve may be set too high, sending water into the overflow tube. Our guide to a toilet that keeps running explains how to adjust the fill level and chain.
Check the base again a day or two later. A slow seal leak may take several flushes to show, and catching it early prevents damage to the subfloor. Also confirm the toilet flushes completely and drains without gurgling; a sluggish flush on a new toilet may point to a partial blockage downstream, which our guide to a clogged toilet covers.
Bidet Seats and Electrical Needs
Many homeowners add a bidet seat at the same time as a new toilet. Non-electric bidet attachments connect to the water supply with a T-fitting at the stop valve and need no power. Electric bidet seats with heated water, warm seats or dryers need a receptacle near the toilet, which in many older bathrooms means adding one.
Because bathroom receptacles are near water, ground-fault protection is commonly required for them under electrical codes. A bidet seat that stops working may simply have tripped a GFCI device elsewhere on the circuit; our guide to a GFCI outlet not working covers resetting and troubleshooting. Our guide to bidet installation explains seat compatibility with bowl shapes, the T-valve connection and placement of a new receptacle.
What a Home Inspector Checks
The American Society of Home Inspectors (ASHI) Standard of Practice calls for inspectors to inspect interior water supply and distribution systems, including fixtures and faucets, and interior drain, waste and vent systems, including fixtures. For toilets, that typically includes flushing each one, checking whether it is secure to the floor, looking for water at the base or supply, noting a running toilet and checking for cracked tanks or bowls. Inspectors usually cannot see the flange or wax ring, so findings like a loose toilet or soft floor are typically reported for evaluation by a plumber.
Toilet Installation Costs
Costs depend on the toilet, the region and what the installer finds under the old one. These rough figures are for planning, not quotes:
- Toilet: basic models often start around a couple of hundred dollars; mid-range WaterSense models commonly cost a few hundred; one-piece, skirted or smart toilets can cost considerably more.
- Labor for a like-for-like replacement: commonly in the range of roughly $150 to $400 for a plumber or handyperson, depending on the market.
- New stop valve and supply line: often a modest add-on when done during the installation.
- Flange repair or replacement: adds parts and labor, with cast iron typically costing more.
- Subfloor repair: can add several hundred dollars or more if rot is found.
- New receptacle for an electric bidet seat: commonly a few hundred dollars for an electrician, depending on wiring access.
Our guide to bathroom remodel cost puts a toilet swap in context with larger bathroom projects.
Toilets in Front Range Home Purchases
A newly installed toilet in a house that is for sale can be a good sign or a cosmetic fix over a deeper problem. Fresh caulk around the base of a toilet that sits on a soft floor, or a new toilet paired with a patched ceiling below, deserves a closer look. Buyers can ask when the toilet was replaced and whether the flange or subfloor was repaired at the time. For more on choosing an inspector and what to ask about bathroom plumbing, see our guide to hiring a home inspector and the plumbing and water hub.
More Questions About Toilet Installation
How long does it take to install a toilet?
A straightforward toilet installation usually takes a plumber one to two hours, and a first-time DIYer three to four hours. That window covers removing the old toilet, scraping the old wax off the flange, setting the new seal and bowl, bolting it down, mounting the tank, and connecting the supply line.
Time grows when problems turn up under the old toilet: a broken flange, a soft subfloor, a seized shutoff valve, or a rough-in that does not match the new fixture. Plan to let caulk cure before heavy use if the base will be caulked, and check for leaks after the first few flushes.
Can you install a toilet yourself without a plumber?
Yes, homeowners can install a toilet themselves in most areas when it is a like-for-like replacement on an existing drain and supply. The work needs basic hand tools, a new wax ring or wax-free seal, closet bolts, and a supply line, plus a helper or careful lifting, since a bowl can weigh 50 to 70 pounds.
Call a plumber when the flange is broken or below the finished floor, the subfloor is soft, the shutoff valve will not close, or the drain must be moved. Relocating a drain or adding a new bathroom usually needs a permit and may need a licensed plumber under local rules.
How long should you wait to use a toilet after installing it?
A newly installed toilet can usually be used right away when it is set on a wax ring or wax-free seal and no caulk was applied. The seal compresses when the bowl is bolted down, so it does not need cure time.
If the base was caulked, most silicone or latex caulks need roughly 24 hours to cure, and some labels specify longer. The toilet can still be flushed during that time as long as nobody rocks the bowl. Before regular use, flush several times and check the base, the tank bolts and the supply connection for drips.
Do you need a permit to replace a toilet?
A permit is usually not required to replace a toilet in the same location with a similar fixture, but rules vary by city and county. Most jurisdictions treat a fixture swap as minor repair work.
Permits are more likely when the work moves the drain, changes the drain size, adds a toilet where none existed, or is part of a larger bathroom remodel. Some areas also require new toilets to meet low-flow standards, which most models sold today already do. Check with the local building department before starting any job that changes plumbing rather than just swapping the fixture.
References
- Residential Toilets — U.S. EPA WaterSense
- Fix a Leak Week — U.S. EPA WaterSense
- ASHI Standard of Practice for Home Inspections — American Society of Home Inspectors
Frequently asked questions
What is the standard rough-in for a toilet?
The most common residential rough-in is 12 inches from the finished wall to the center of the closet bolts, but 10-inch and 14-inch rough-ins exist. Measure before buying a new toilet so it fits the existing drain.
Is a wax ring or a wax-free seal better?
Both can work well on a sound flange set at the right height. Wax rings are inexpensive and proven but should be replaced if the toilet is lifted; wax-free seals cost more but often tolerate repositioning and a range of flange heights.
Why does my new toilet rock?
An uneven floor, a flange that sits too high or a damaged subfloor can all make a toilet rock. Use plastic shims under the base rather than overtightening the bolts, which can crack the china or the flange.
Should I caulk around the base of my toilet?
Many plumbing codes, installation practices and manufacturers call for sealing the base. Some installers leave a small gap at the back so a seal leak can show itself. Follow local requirements and the toilet manufacturer's instructions.
How do I test a new toilet for leaks?
Check the supply connection, tank bolts and base after several flushes, and do a dye test by adding food coloring to the tank. EPA guidance says color appearing in the bowl after 10 minutes indicates a leak.
Should you replace the closet bolts when installing a new toilet?
Yes, installing new closet bolts with a new toilet is standard practice. Old bolts are often corroded, bent or too short for the new bowl, and a new set is inexpensive. Many toilets and wax-ring kits include bolts. Brass or stainless bolts resist rust better than plain steel in damp bathrooms.
Can a toilet be installed on top of tile or vinyl flooring?
Yes, a toilet is normally installed on top of the finished floor, whether tile, vinyl or wood. The closet flange should sit level with or slightly above the finished floor surface. If new flooring raised the floor height, a flange extender or spacer ring may be needed so the seal compresses properly.
What is the hardest part of installing a toilet?
Lowering the bowl straight onto the wax ring without shifting it is usually the hardest part of installing a toilet. The bowl is heavy and the seal deforms if the bowl slides or is lifted and reset. Aligning the bolt holes over the closet bolts before lowering, ideally with a helper, makes the step easier.
Closing on a Front Range home and want the toilets, supply valves and bathroom floors checked by a professional? Send us a message through our contact page and we can help you line up an inspection.