Toilet Supply Lines: Braided Hoses, Failures, and Replacement
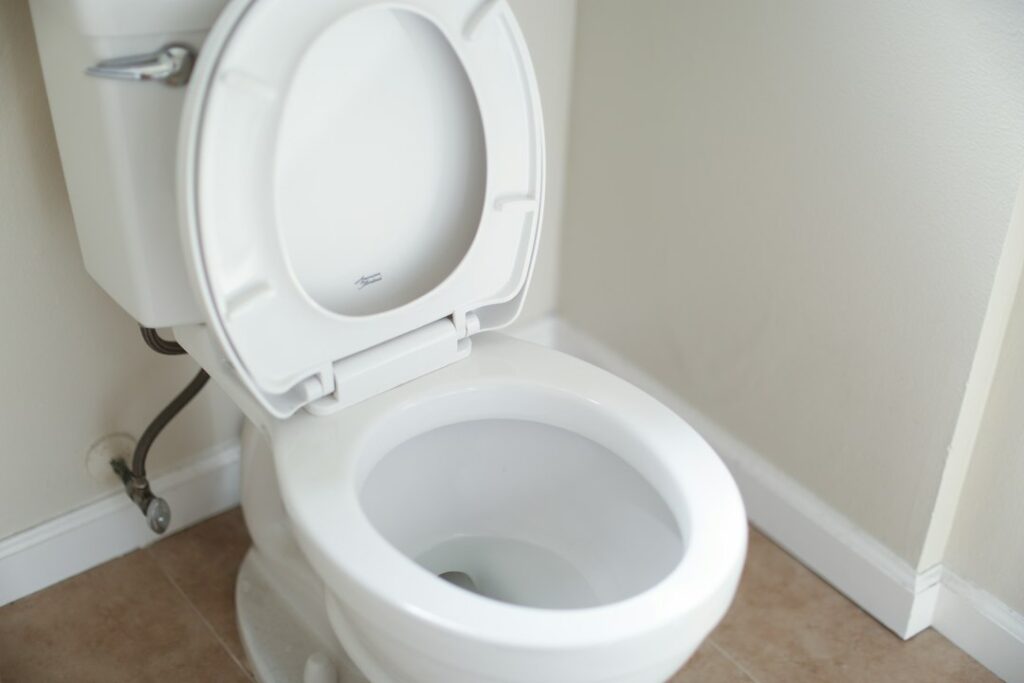
Behind nearly every toilet is a short flexible connector, usually 12 to 20 inches long, that runs from the shutoff valve on the wall or floor up to the bottom of the tank. It is easy to forget because it never does anything visible. Yet that connector sits under constant household water pressure all day, every day, and when it fails it can release water at full flow until someone notices. A toilet supply line that bursts while a family is at work or away on vacation can soak a bathroom floor, the subfloor and the ceiling below. This guide covers the common types of supply lines, how and why they fail, how to install them without creating a new leak, how they relate to the other parts of a toilet, and what replacement typically costs.
Part of our Plumbing & Water guide — start there for the full picture →
What a Toilet Supply Line Is and Why It Matters
The supply line (also called a supply connector, supply tube or riser) connects the fixture shutoff to the toilet’s fill valve. At the bottom of the tank, a threaded shank from the fill valve pokes through the tank, and the supply line’s upper coupling nut threads onto it. At the bottom, a compression or threaded nut connects to the outlet of the shutoff valve.
Unlike drain pipes, which only carry water when a fixture is used, the supply line is pressurized continuously. Municipal water pressure in many Front Range neighborhoods commonly falls somewhere in the range of 40 to 80 psi, and some homes on hillsides or near the bottom of a pressure zone see more unless a pressure-reducing valve is working. That steady pressure is why a small weakness in a connector can become a sudden failure.
Most toilet connectors are sized with a 3/8-inch compression fitting at the valve end and a 7/8-inch ballcock-style nut at the toilet end, but older valves and some imported fixtures differ, so it is worth checking both ends before buying a replacement.
Types of Toilet Supply Lines
Braided stainless steel
The most common modern connector is a flexible polymer hose wrapped in a woven stainless steel jacket. The braid protects the inner hose from abrasion and limits bulging. Braided lines are easy to install, tolerate a bit of misalignment between valve and tank, and come in a range of lengths. They are not indestructible: the inner hose can age, the braid can corrode in damp locations or where cleaning chemicals drip onto it, and the end fittings are the usual weak point. Quality varies widely among brands, and the end fittings, especially the toilet-end nut, deserve attention.
Vinyl and plain polymer tubes
Older and budget installations sometimes use clear or white vinyl tubing with plastic or metal nuts. Unreinforced vinyl can soften, stiffen, discolor and split with age, heat and pressure. Many plumbers and inspectors treat plain vinyl connectors as an upgrade candidate even when they are not visibly leaking.
Rigid and semi-rigid chrome copper
Chrome-plated copper risers, often bent to shape and secured with a compression ferrule, were standard for decades and are still found in older homes and in installations where appearance matters. They are durable when undisturbed, but they can kink if bent too tightly during installation, and the compression connection at the valve can weep if it has been disturbed. Corrosion at the joints shows up as green or white crust.
Corrugated and PEX-style connectors
Some connectors use corrugated stainless steel tubing or PEX. These are less common for toilets but show up in some new construction. If the home has PEX distribution piping, our PEX pipe guide explains how that system differs from copper and what inspectors note.
How Toilet Supply Lines Fail
Most supply line failures fall into a handful of patterns.
Cracked plastic coupling nuts
The toilet-end nut on many connectors is plastic. Plastic nuts are designed to be hand-tightened. When someone uses a wrench and overtightens one, the nut can develop a hairline crack that holds for months or years and then splits completely. Cracked nuts are among the most commonly reported causes of sudden toilet supply failures, and they often fail without any prior dripping.
Corrosion
Braided jackets and metal nuts can corrode where they stay damp, where a slow drip from the tank or valve keeps them wet, or where bleach and toilet bowl cleaners are stored under or near the toilet. Rust staining on the braid, a frayed or broken strand, or crusty deposits at the fittings are all reasons to replace the line.
Kinking and strain
A line that is too long gets looped or bent sharply, which stresses the inner hose. A line that is too short pulls on both connections. Lines that get bumped by a mop, a plunger or a foot every day are under repeated stress.
Age
Inner hoses and rubber washers break down over time. Manufacturers’ recommendations vary; some warranties and some insurers suggest replacing flexible connectors on a schedule, commonly somewhere around every five to ten years, and sooner if the line shows any wear. A line of unknown age in a home being purchased is a reasonable thing to replace as routine maintenance, since a new connector is inexpensive.
Pressure
Excessive household water pressure accelerates wear on every connector in the house. If pressure is high or the pressure-reducing valve has failed, replacing connectors without addressing pressure only resets the clock.
Warning signs worth acting on
Supply lines rarely announce a failure, but a few visible clues are worth acting on promptly:
- Moisture, mineral crust or a white chalky ring around either nut.
- Rust spots, discoloration or broken strands in a braided jacket.
- A vinyl tube that looks cloudy, yellowed or stiff, or that has a visible bulge.
- A connector stretched tight between valve and tank, or bent into a sharp loop.
- Water staining on the floor or baseboard behind the toilet, or on the ceiling of the room below.
- A plastic nut with a visible seam, hairline crack or tool marks from a wrench.
When choosing a replacement, a line with a metal toilet-end nut or a reinforced plastic nut, a clearly marked length and a reputable brand is a sensible default. Some connectors also include a built-in flow-limiting device designed to stop water if the hose ruptures, which can add a layer of protection in second-floor bathrooms.
Installation: Hand-Tight Versus Overtightening
Installing a supply line is one of the simpler plumbing tasks, but it has two common mistakes: tightening the plastic toilet-end nut with a wrench, and tightening metal compression nuts so hard that the fitting or valve is damaged.
General guidance from connector manufacturers is to tighten plastic toilet-end nuts by hand and then, if any, only a small additional turn as the instructions specify. Metal nuts at the valve end are usually tightened by hand and then snugged with a wrench, again following the package directions. More force does not equal a better seal; the rubber washer or cone inside the nut makes the seal.
A typical replacement sequence:
- Close the fixture shutoff and flush to empty the tank. Hold a towel or small bucket under the connections.
- Unthread the old line at both ends and check the valve outlet and fill valve shank for damage or debris.
- Choose a line long enough to reach without strain but short enough to avoid tight loops.
- Thread both nuts by hand, keeping them square to avoid cross-threading.
- Tighten per the instructions, then open the valve slowly and check both ends with a dry tissue over the next several minutes and again the next day.
The shutoff valve is the other half of this connection. Older multi-turn valves often seize or leak at the stem when finally used, and opening or closing one can start a drip that was not there before. Many plumbers replace an old valve at the same time as the connector. Our angle stop valve guide covers multi-turn versus quarter-turn valves and what to do if the valve will not close.
Related Toilet Parts That Fail Alongside It
A toilet has several wear parts, and a homeowner working on one often discovers another.
- Fill valve. The supply line feeds the fill valve, which refills the tank. A worn fill valve can hiss, run constantly or overflow into the overflow tube. See our toilet fill valve guide.
- Flapper. The flapper seals the bottom of the tank. EPA WaterSense notes that old or worn-out flappers can cause leaks and that the flapper should be checked periodically and replaced at least every five years. Our toilet flapper guide walks through replacement.
- Tank bolts. On two-piece toilets, tank-to-bowl bolts and their washers can corrode and drip. A drip near the back of the bowl is easily mistaken for a supply line leak. Our toilet tank bolts guide explains how to tell.
- Wax ring. Water at the base of the toilet, especially after flushing, may come from a failed wax ring rather than the supply line. See toilet wax ring.
Tracing a leak to the right part saves time. A supply line leak drips from the connector or valve and is present whether or not the toilet has been flushed. A wax ring leak tends to show up at the base after use. Tank bolt leaks drip from the underside of the tank near the bolts.
Checking for Leaks and Preventing Water Damage
EPA’s WaterSense program estimates that the average household’s leaks can account for more than 9,300 gallons of water wasted every year (its Statistics and Facts page puts the figure at about 180 gallons per week, or 9,400 gallons a year), and its Fix a Leak Week materials list worn toilet flappers and other leaking valves among the common types of household leaks. Those figures describe the slow-drip problem. A burst supply line is a different kind of risk: a sudden flood rather than wasted water.
WaterSense suggests a few simple checks that also help catch toilet issues:
- Dye test. Add a few drops of food coloring to the tank. If color shows up in the bowl after 10 minutes, the toilet is leaking internally, usually at the flapper.
- Meter check. Read the water meter before and after a two-hour period when no water is being used. Any change points to a leak somewhere in the house.
- Visual checks. Look for water on the outside of pipes and fittings.
For the supply line itself, a quick monthly look under each toilet is worthwhile: dry connections, no rust on the braid, no bulging, no cracks visible on the plastic nut.
Leak sensors and automatic shutoffs
EPA’s WaterSense materials note that leak detection and flow monitoring devices can help identify leaks or alert homeowners to irregular water use, reducing water waste and damage caused by leaks. Battery-powered puck sensors placed on the floor behind each toilet are inexpensive and can send an alert to a phone. Whole-house flow monitors with automatic shutoff valves go further by closing the main when they detect abnormal flow. Our water leak detector guide compares the options.
Know where the main shutoff is
When a supply line bursts, the fixture shutoff is the fastest fix, but if that valve is seized or the area is flooded, the main shutoff is the backup. The ASHI Standard of Practice directs home inspectors to describe the location of main water and fuel shut-off valves, which is one reason it appears in most inspection reports. Our main water shut-off valve guide covers how to find and test it.
Dry out quickly
If a line does leak, speed matters. EPA’s guidance on moisture and mold notes that if wet or damp materials are dried within 24 to 48 hours after a leak or spill, in most cases mold will not grow. Wet subfloor and drywall below a bathroom may need fans, dehumidifiers or professional drying.
Washer hoses: the same class of risk
Toilet supply lines and washing machine hoses share the same profile: flexible, pressurized all the time, often out of sight, and capable of flooding when they fail. Rubber washer hoses in particular are a known failure point. The ASHI Standard of Practice lists clothes washing machine connections among the items inspectors are not required to inspect, so homeowners should not assume an inspection covered them. Our washer hoses guide covers braided replacements and shutoff options.
What Inspectors Note and What It Costs
During a home inspection, an inspector operating fixtures will typically look at each toilet’s supply connection and valve and note visible leaks, corrosion, unreinforced vinyl connectors, cracked plastic nuts, or valves that appear corroded. Inspectors generally do not operate fixture shutoff valves, since an old valve can start leaking when turned. Those notes are maintenance items in most cases, but they are inexpensive to address before a failure.
The plumbing and water hub brings together guides on supply piping, valves and leak prevention, and the hiring process section explains what a standard inspection includes.
Typical costs
Costs vary with region, brand and whether the valve also needs replacing. Rough ranges commonly seen:
- Supply line only (DIY): a braided stainless toilet connector often costs roughly $5 to $20 at a hardware store, with premium connectors featuring metal nuts or burst-resistant designs at the upper end.
- Supply line plus quarter-turn valve (DIY): parts commonly run perhaps $15 to $40, though valve replacement may require cutting or soldering depending on the pipe.
- Plumber visit: many plumbers charge a service call or minimum fee, so replacing a single supply line might cost somewhere around $100 to $250 including the trip, with valve replacement adding to that. Doing all toilets and fixture connectors in one visit spreads the trip charge.
- Leak sensors: basic battery sensors often cost tens of dollars each; whole-house automatic shutoff systems usually run several hundred dollars or more installed.
Water damage from a failed connector is far more expensive than any of these, which is the strongest argument for treating supply lines as scheduled maintenance rather than waiting for a leak. All figures are estimates; local quotes are the reliable guide.
References
- Fix a Leak Week — U.S. Environmental Protection Agency, WaterSense
- WaterSense Statistics and Facts — U.S. Environmental Protection Agency
- A Brief Guide to Mold, Moisture and Your Home — U.S. Environmental Protection Agency
- ASHI Standard of Practice for Home Inspections — American Society of Home Inspectors
Frequently asked questions
How often should a toilet supply line be replaced?
Recommendations vary by manufacturer, but many sources suggest replacing flexible connectors roughly every five to ten years, and immediately if the braid is rusted, the hose bulges or the plastic nut shows cracks. Replacing lines of unknown age after buying a home is inexpensive insurance.
Should a toilet supply line be hand-tight?
Plastic toilet-end nuts are generally meant to be hand-tightened, with at most a small extra turn if the instructions allow. Overtightening with a wrench is a common cause of cracked nuts that later split without warning.
Are braided stainless supply lines better than vinyl?
Braided stainless connectors resist abrasion and bulging better than plain vinyl, which can harden and split with age. Braided lines still wear out, so quality end fittings and periodic replacement matter.
Why is water leaking at the base of the toilet instead of the supply line?
Water at the base after flushing usually points to the wax ring or tank bolts rather than the supply line. A supply leak drips from the connector or valve whether or not the toilet has been used.
Do home inspectors check toilet supply lines?
Inspectors typically look at visible supply connections and note leaks, corrosion or outdated connectors, but they usually do not operate fixture shutoff valves. Our contact page can connect you with an inspector who reviews plumbing fixtures in detail.
Unsure how old the supply lines and valves in a home are? Get in touch here and we can connect you with a Front Range inspector who looks at fixture connections, valves and signs of past leaks.