Toilet Tank Repair: Running Toilets, Flappers and Fill Valves
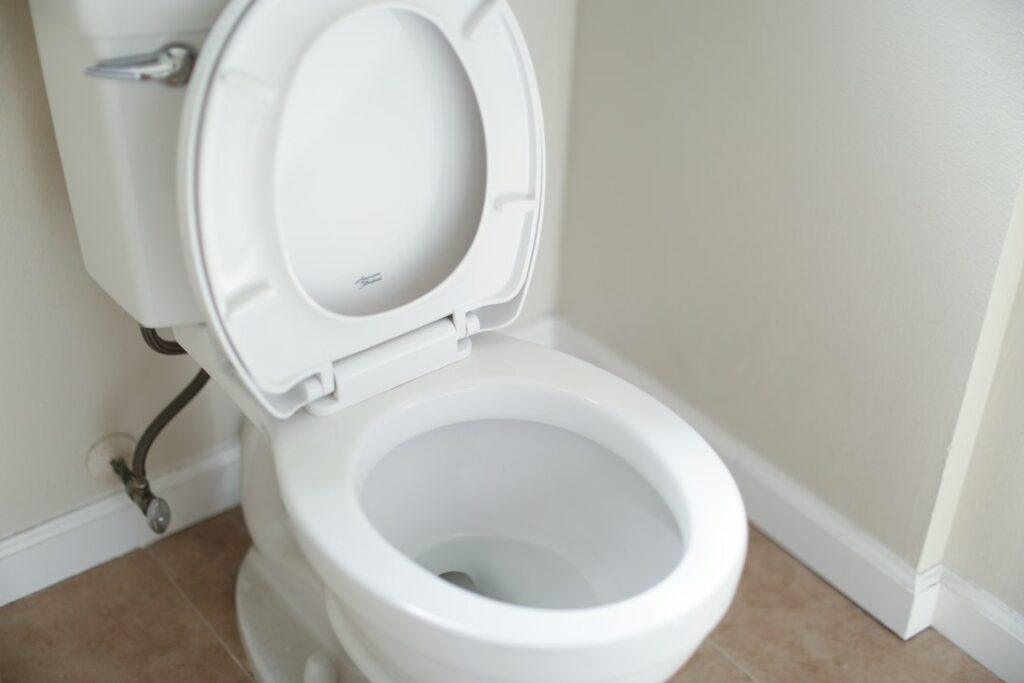
A toilet that hisses, refills on its own in the middle of the night, or keeps running after every flush is wasting water around the clock, and the fix is usually inside the tank. Most toilet tank repairs involve a handful of inexpensive parts: the flapper, the lift chain, the fill valve and its float, and the overflow tube. Homeowners can handle many of these jobs with a sponge, a towel and an adjustable wrench, while cracked tanks, corroded supply valves and leaks between the tank and bowl sometimes call for a plumber or a full toilet replacement. This guide explains how a tank works, how to diagnose a running toilet, how to use the EPA dye test to catch silent leaks, how to replace a flapper and fill valve, and what repairs typically cost. Cost ranges are general industry estimates, not quotes, and local prices along the Front Range vary.
Part of our Plumbing & Water guide — start there for the full picture →
What Usually Causes a Running Toilet?
When a toilet runs, water is escaping from the tank into the bowl faster than it should, and the fill valve keeps topping the tank back up. In most homes the leak traces to one of four places.
- A worn or warped flapper. The rubber flapper at the bottom of the tank seals the flush valve opening. Over time the rubber hardens, warps or picks up mineral deposits, and water seeps past it. The EPA WaterSense program identifies old or worn-out flappers as a common cause of toilet leaks.
- A chain that is too short, too long or tangled. A tight chain holds the flapper slightly open. A long chain can get trapped under the flapper and stop it from seating.
- A fill valve set too high. If the float lets the water rise above the top of the overflow tube, water spills into the tube and down into the bowl continuously.
- A failing fill valve. Worn seals or debris inside the valve can keep it from shutting off fully, so it hisses or trickles even when the water level looks normal.
A cracked overflow tube or a corroded flush valve seat can also cause a constant run, though these are less common. The quickest way to narrow down the cause is to take the tank lid off, flush, and watch the parts move through a full cycle.
How a Toilet Tank Works
Understanding the flush cycle makes troubleshooting far easier. When the handle is pressed, it lifts an arm that pulls the chain and raises the flapper. Water in the tank rushes through the flush valve opening into the bowl, which pushes waste through the trapway and into the drain. As the tank empties, the flapper drops back onto the valve seat and seals it.
Meanwhile, the fill valve senses the falling water level, either through a float cup that slides on the valve shaft or through an older float ball on a horizontal arm. It opens and refills the tank. A small refill tube clipped to the overflow tube sends a stream of water down into the bowl so the bowl refills to its normal level. When the float rises to its set height, the fill valve closes.
The overflow tube is a safety feature. If the fill valve fails to shut off, excess water drains through the tube into the bowl rather than spilling onto the floor. That is why a stuck fill valve shows up as a running toilet and not as a flood.
The Dye Test for Silent Toilet Leaks
Not every leaking flapper makes noise. Some let a small, steady trickle into the bowl that never triggers an audible refill until hours later. The EPA’s Fix a Leak Week guidance describes a simple check: put a few drops of food coloring in the toilet tank, and if any color shows up in the bowl after 10 minutes, the toilet has a leak. EPA also advises flushing right after the test so the dye does not stain the tank.
A few practical tips help the test give a clear answer:
- Do not use the toilet during the waiting period, and make sure no one else does.
- Use a dark color, such as blue or green, so faint traces in the bowl are easy to spot.
- If color appears in the bowl, the flapper or flush valve seat is the likely culprit. If the bowl stays clear but the tank still refills on its own, check the water level against the overflow tube.
- Repeat the test after any repair to confirm the seal.
EPA’s same page suggests a whole-house check as well: read the water meter before and after a two-hour period when no water is used, and if the reading changes, there is probably a leak somewhere. That is a useful follow-up if the toilet passes the dye test but water bills remain high. The leak detector category covers sensors that can alert homeowners to water where it should not be.
How to Replace a Toilet Flapper Step by Step
Flapper replacement is the most common of all toilet tank repairs. EPA WaterSense notes that flappers can wear out and recommends checking them periodically and replacing them at least every five years. The part is inexpensive, and the job usually takes well under an hour.
- Identify the right flapper. Check the size of the flush valve opening (2-inch or 3-inch are the common sizes) and, ideally, the toilet’s brand and model number, which is often stamped inside the tank behind the water line. Some toilets use proprietary canister-style seals rather than a hinged flapper.
- Shut off the water. Turn the supply stop valve behind the toilet clockwise until it stops. If it will not turn or it drips, see the note below on stop valves.
- Drain the tank. Flush and hold the handle down to empty as much water as possible. Sponge out the rest.
- Remove the old flapper. Unhook the chain from the trip lever. Slide the flapper ears off the pegs on the overflow tube, or slip the ring off the tube if it is a ring-style flapper.
- Clean the valve seat. Wipe the flush valve seat with a cloth or a non-scratch pad to remove mineral buildup, which can prevent even a new flapper from sealing.
- Install the new flapper. Attach it to the pegs or ring and center it over the opening.
- Set the chain length. Connect the chain so it has a small amount of slack, often described as about half an inch, when the flapper is closed. Trim excess chain so it cannot get pinched under the flapper.
- Restore water and test. Turn the supply back on, let the tank fill, flush several times, and run the dye test again.
Many replacement flappers have an adjustable dial or float that controls how long they stay open. If the toilet seems to flush weakly after the swap, the setting may need to be adjusted to match the bowl. Follow the instructions on the package.
How to Adjust or Replace a Fill Valve
If the dye test passes but water keeps trickling into the overflow tube, start with the water level. Most tanks have a fill line marked on the inside wall, or the manufacturer specifies a level about an inch below the top of the overflow tube. On a modern float-cup valve, the height is adjusted by turning a screw or sliding a clip on the float rod. On an older ball-float valve, the arm is adjusted with a screw at the valve or, on very old models, by gently bending the arm.
If the valve hisses, refills slowly, or will not shut off at any setting, replacement is usually more reliable than trying to rebuild it. Universal fill valves fit most standard toilets and adjust to different tank heights.
- Shut off the water, flush, and sponge the tank dry.
- Place a towel or shallow pan under the tank to catch drips, then disconnect the supply line from the threaded shank under the tank.
- Unscrew the plastic locknut holding the old valve and lift the valve out.
- Adjust the new valve’s height to suit the tank, insert it with its cone washer seated, and hand-tighten the locknut from below, plus a small additional turn. Overtightening can crack a porcelain tank.
- Clip the refill tube to the overflow tube so its end sits above the water line, rather than pushed down inside the tube where it can siphon water.
- Reconnect the supply line, turn on the water, check for drips under the tank, and set the float to the correct water level.
This is also a good moment to look at the supply line. Old braided lines and rigid chrome risers can fail without warning, and many plumbers recommend replacing a line that shows corrosion, kinks or bulging.
A Note on Stop Valves
Older multi-turn stop valves behind toilets sometimes seize or begin to drip from the stem once they are finally turned. If the valve will not close, the main water shutoff can isolate the house while the toilet is serviced. A plumber can replace a failing stop valve with a quarter-turn valve, which is a common add-on to a toilet repair visit.
Leaks Between the Tank and Bowl, and Cracked Tanks
Not all toilet water on the floor comes from the base. On a two-piece toilet, the tank sits on the bowl with a large rubber gasket and is held down by two or three bolts with rubber washers. When the gasket compresses and hardens over years of use, or the bolt washers fail, water can drip from under the tank each time the toilet flushes. Signs include drips from the bolt heads under the rear of the bowl, water pooling behind the toilet after flushing, or rust on the bolts.
Replacing the tank-to-bowl gasket and bolt kit is a moderate DIY job: the tank must be drained, disconnected and lifted off. Tighten the new bolts evenly and gradually, alternating sides, until the tank is snug and level. If the water appears around the base rather than under the tank, the wax ring or the floor flange may be the issue instead; the guide to a toilet leaking at the base walks through that diagnosis.
Cracked tanks are a different problem. A crack below the water line will leak, sometimes slowly at first, and porcelain repairs with epoxy are generally regarded as temporary at best. Hairline cracks above the water line may be cosmetic, but a crack that weeps water usually means a new tank or a new toilet. Matching tanks for older or discontinued models can be hard to find, which often tips the decision toward replacing the whole fixture.
Hidden leaks around toilets can damage subfloors and ceilings below over time. If a stain has appeared on the ceiling under a bathroom or the floor feels soft near the toilet, the moisture may have been present for a while. The water damage restoration guide explains how drying and repair are typically handled.
Repair or Replace? WaterSense Toilets
A toilet that needs repeated repairs, has a cracked tank or bowl, or dates from an era of high-volume flushing may be a better candidate for replacement than for another round of parts. EPA’s WaterSense residential toilets page notes that older, inefficient toilets can use as much as 6 gallons per flush and that WaterSense labeled toilets use 1.28 gallons per flush or less, which EPA describes as 20 percent less water than the current federal standard of 1.6 gallons per flush.
EPA also states that WaterSense labeled toilets are independently certified to meet criteria for both performance and efficiency, and that the performance problems associated with some 1990s low-flow toilets, such as double flushing, prompted the program’s performance testing. For buyers worried that a low-water toilet will clog, that certification is the relevant safeguard. Some Front Range water utilities have offered rebates on WaterSense labeled toilets in the past; checking the local utility’s current programs before buying is worthwhile.
Signs that replacement deserves serious consideration:
- A crack in the tank or bowl that weeps water.
- Repeated clogging with a toilet from the late 1990s or earlier.
- Proprietary parts that are discontinued or hard to source.
- Rocking on the floor combined with damaged flooring, since the toilet has to come up anyway.
Homes on septic systems have an extra reason to fix running toilets promptly. EPA’s septic care guidance encourages efficient water use because too much water entering the system can reduce the time the tank has to treat waste and may flood the drainfield.
What Toilet Tank Repairs Typically Cost
Costs vary with the part, the toilet model, local labor rates and whether other problems turn up once the plumber is on site. The figures below are broad industry estimates for planning purposes only.
- DIY flapper: often in the range of a few dollars to roughly $20 or $25, depending on the type and whether it is a brand-specific part.
- DIY fill valve: commonly somewhere around $10 to $35 for a universal valve.
- Tank-to-bowl gasket and bolt kit: often under $30 for the parts.
- Plumber service call for a running toilet: frequently a few hundred dollars once trip charges and labor are included, and more on evenings, weekends or holidays.
- Toilet replacement, installed: varies widely with the fixture chosen, but commonly several hundred dollars or more including labor, wax ring and supply line.
When hiring, ask whether the quote is flat-rate or hourly, whether it includes parts, and whether it covers replacing a seized stop valve if one is found.
When to Call a Plumber
A plumber is the better choice when the stop valve will not close, when the toilet is a proprietary model with hard-to-find parts, when the tank or bowl is cracked, or when a leak has already reached the floor or the ceiling below. Water appearing at the base after repairs inside the tank are done also points toward a wax ring or flange problem that requires pulling the toilet.
During a home purchase, a general home inspector evaluates the plumbing system visually. The ASHI Standard of Practice directs inspectors to inspect interior water supply and distribution systems, including fixtures and faucets, and interior drain, waste and vent systems, including fixtures, and to describe the location of the main water shutoff valve. Inspectors commonly flush toilets and note running tanks, loose bowls and visible leaks, but they do not disassemble fixtures. A note in the report about a running toilet is usually a minor repair item, while evidence of long-term leaks around the base may warrant further evaluation. For more on how buyers choose and schedule an inspector, see the home inspector hiring guide. If the toilet also drains slowly or clogs often, the companion guide on a clogged toilet covers safe ways to clear it.
References
- Fix a Leak Week: Checking for Leaks and Toilet Leaks — U.S. Environmental Protection Agency WaterSense
- WaterSense Residential Toilets — U.S. Environmental Protection Agency
- How to Care for Your Septic System — U.S. Environmental Protection Agency
- ASHI Standard of Practice for Home Inspections — American Society of Home Inspectors
Frequently asked questions
Why does my toilet keep running after I flush?
The most common causes are a worn flapper that no longer seals, a chain that holds the flapper open or gets caught under it, or a fill valve set so high that water spills into the overflow tube. Remove the tank lid and watch a full flush cycle to see which part is misbehaving.
How do I check for a silent toilet leak?
EPA suggests putting a few drops of food coloring in the tank and waiting 10 minutes without flushing. If color appears in the bowl, water is leaking past the flapper or valve seat. Flush afterward so the dye does not stain the tank.
How often should a toilet flapper be replaced?
EPA WaterSense recommends checking flappers periodically and replacing them at least every five years, because the rubber can wear out and leak. Hard water and some tank cleaning tablets can shorten flapper life.
How much do toilet tank repairs cost?
As rough estimates, DIY parts such as a flapper or fill valve often cost from a few dollars to about $35. A plumber's visit for a running toilet commonly runs a few hundred dollars once labor and trip charges are included, and more after hours. Get a written quote.
Can a cracked toilet tank be repaired?
Epoxy patches on porcelain are generally considered temporary. A crack below the water line that weeps water usually means replacing the tank or the whole toilet, especially if a matching tank is hard to find.
Buying a home and wondering what the bathrooms are hiding? Get in touch with our team and we can point you toward a qualified Front Range inspector who will check fixtures, supply valves and signs of past leaks.