Roof Sheathing: Plywood vs OSB, Rot, Sag and Replacement
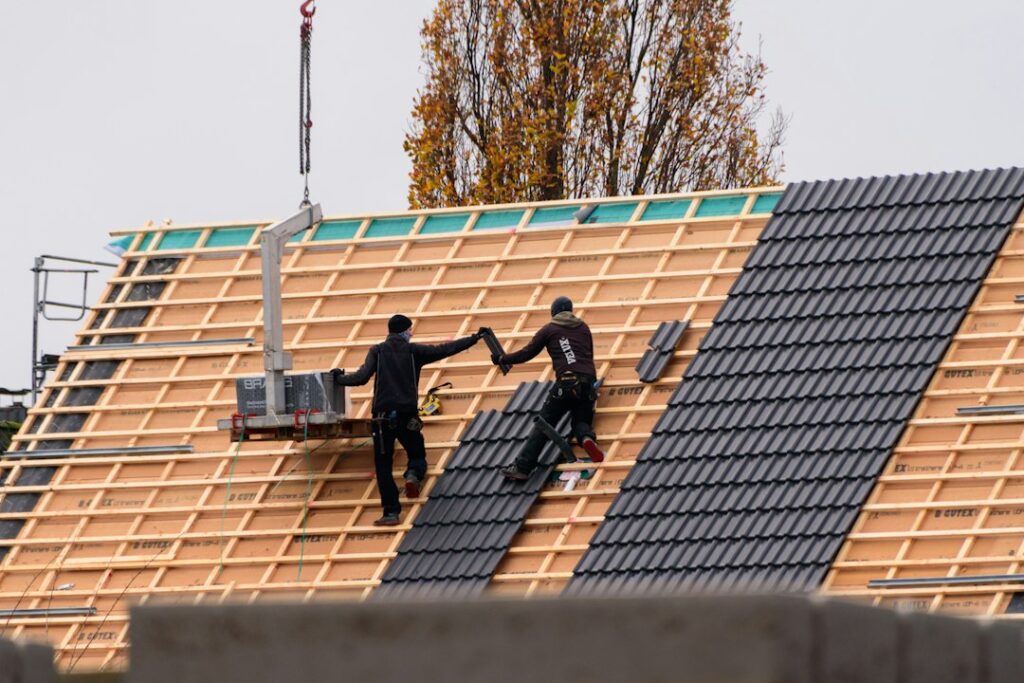
Between the rafters and the shingles sits a layer most homeowners never see: the roof sheathing, also called the roof deck. It is the structural surface that every shingle nail holds onto and that carries snow, wind and the weight of roofers walking across it. When roof sheathing is sound, nobody thinks about it. When it sags, delaminates or rots, the roof above it cannot perform properly, no matter how good the shingles are. This guide explains what sheathing does, how plywood and OSB compare, the spacing and clip details that matter, how older homes with board decking differ, the common causes of damage, what a home inspector can see from the attic, and how sheathing replacement is typically handled and priced during a reroof.
Part of our Structure & Exterior guide — start there for the full picture →
What Roof Sheathing Does
Roof sheathing is a continuous layer of structural panels or boards fastened across the top of the rafters or trusses. It serves several purposes at once:
- A nailing base. Shingles, underlayment, flashing and drip edge all need something solid to fasten to. Shingle wind resistance depends on nails gripping the deck.
- Load distribution. Snow, wind uplift and foot traffic are spread across the framing instead of resting on a single rafter.
- Structural bracing. Properly nailed sheathing ties the roof framing together into a diaphragm that helps resist racking from wind and other lateral forces.
- A flat, continuous surface. Shingles lie flat only when the deck under them is flat. Humps, dips and gaps telegraph through.
On the Colorado Front Range, those loads are real. Heavy, wet spring snow can sit on a roof for days, and chinook winds can gust hard along the foothills. The roof snow load guide explains how snow weight is estimated and when it becomes a concern.
Plywood vs OSB Roof Sheathing
Most modern roofs are sheathed with one of two panel products. Both are accepted by building codes when rated for roof use and installed correctly, and both appear on Front Range homes of every age since the 1980s.
Plywood
Plywood is made from thin wood veneers glued together with the grain of each layer running perpendicular to the one beside it. That cross-lamination makes it strong and dimensionally stable. Roof sheathing plywood is commonly 1/2 inch, 15/32 inch or 5/8 inch thick, depending on rafter spacing, expected loads and local code.
When plywood gets wet, it tends to swell less at the edges than OSB and dries out relatively well. Repeated wetting, however, can cause the veneers to separate, called delamination, and long-term moisture leads to rot just as it does in any wood product.
Oriented Strand Board (OSB)
OSB is made from wood strands arranged in layers, oriented in alternating directions and bonded with resin under heat and pressure. It is generally less expensive than plywood and is now the most common roof sheathing on new construction. Panels are uniform, without the knots and voids sometimes found in plywood.
OSB’s weakness is edge swelling. When panel edges absorb water, they can swell and stay swollen even after drying, creating ridges that show through shingles. OSB also tends to dry more slowly than plywood once it is saturated. Many OSB panels designed for roofs include water-resistant edge sealing or an integrated weather-resistant overlay to limit that problem.
Which Is Better?
Both can provide decades of service when kept dry. Plywood is often preferred where leaks or condensation are a concern, while OSB offers consistent quality at a lower price. In practice, attic ventilation, air sealing and roof maintenance usually have more influence on sheathing life than the choice between the two.
Spacing, Clips and Installation Details
Wood panels expand and contract with changes in moisture. Panel manufacturers commonly call for a small gap, often about 1/8 inch, between panel edges and ends so that sheets can expand without buckling. Panels installed tight against each other can push up into ridges along the seams when they absorb moisture.
Edges that fall between rafters need support. Many roofs use metal panel clips, often called H-clips, which slip onto the edges of adjacent sheets midway between rafters. They help keep the edges aligned under load and also maintain the expansion gap. Some installers use tongue-and-groove panels or blocking instead. Missing clips can let edges deflect separately, producing a visible line along the roof.
Panels are normally installed with the long dimension running across the rafters, staggered so the end joints do not line up in a continuous seam. Nail type, spacing and edge distance are specified by code and by the panel manufacturer, with closer spacing at panel edges than in the field. Underdriven or missed nails, often called shiners when they miss the rafter, can work loose and rust in the attic.
Spaced Board Decking on Older Homes
Many homes built before the 1960s, and some older Front Range farmhouses and bungalows, have roof decks made from individual boards rather than panels. Some were laid edge to edge as solid decking. Others were spaced with gaps between the boards, a style called skip sheathing or spaced sheathing, which was designed for wood shingles or shakes that needed air circulation underneath.
Spaced board decking is not a suitable base for asphalt shingles on its own, because the gaps leave shingles and nails unsupported. When an older home with wood shakes is converted to asphalt, roofers typically either fill the gaps with additional boards or install new panel sheathing over the existing boards. Solid board decks can sometimes be reused if the boards are sound, but cupped, split or rotted boards need replacement.
From the attic, spaced boards are easy to spot: daylight or underlayment shows through the gaps. If an older home already has asphalt shingles over spaced boards without a new layer of sheathing, that is worth noting during an inspection.
Common Roof Sheathing Problems
Almost every sheathing problem traces back to moisture, inadequate support or installation shortcuts.
Sagging Between Rafters
Sag shows up as a wavy roofline or dips between rafters that are visible from the street, especially in low-angle light. Common causes include sheathing that is too thin for the rafter spacing, missing panel clips, panels weakened by moisture, or an extra layer of shingles adding weight. Sagging that follows the rafter lines can also point to a framing problem rather than a sheathing one, which is a different and potentially more serious issue.
Delamination and Edge Swelling
Repeated wetting can cause plywood veneers to separate and OSB edges to swell. Both reduce stiffness and nail holding. Swollen OSB seams often appear as raised lines through the shingles, sometimes in a grid pattern matching the panel layout.
Rot From Roof Leaks
A leak at flashing, a valley, a vent boot or a damaged shingle lets water reach the deck. A slow leak can wet the same area again and again without ever showing on a ceiling, especially if insulation absorbs it. Over time the wood softens and loses strength. The roof leak guide explains how to trace water from a stain back to its source, which is the first step before replacing any sheathing.
Rot From Condensation
Leaks are not the only source of moisture. In winter, warm, humid indoor air can escape into the attic through gaps around light fixtures, attic hatches, plumbing stacks and top plates. When it reaches cold sheathing, the moisture condenses or frosts on the underside of the deck. As temperatures rise, that frost melts and drips, sometimes mistaken for a roof leak. Repeated cycles can stain and eventually degrade the sheathing.
The same warm air that causes condensation also melts snow on the roof surface, which can refreeze at the eaves into ice dams and push water under the shingles onto the deck. The ice dams guide covers how air sealing, insulation and ventilation work together to prevent them, and the attic ventilation guide explains how intake and exhaust vents remove moisture from the attic. Bathroom fans, kitchen exhaust and dryer vents that discharge into the attic instead of outdoors are common contributors.
EPA’s moisture control guidance for building design, construction and maintenance treats roof and ceiling assemblies as one of the areas where moisture control needs attention, alongside site drainage, foundations, walls, plumbing and HVAC. Sheathing damage is often a symptom of a larger moisture problem rather than an isolated defect.
Mold on Sheathing
Dark staining or fuzzy growth on the underside of the deck, often heaviest on the north-facing slope where the sheathing stays coldest, may indicate mold. The EPA’s brief guide to mold and moisture notes that the key to mold control is moisture control, lists roof materials as a possible location of hidden mold due to roof leaks or insufficient insulation, and advises drying wet materials within 24 to 48 hours to prevent mold growth in most cases. Cleaning mold off sheathing without fixing the moisture source usually means it returns.
What an Inspector Sees From the Attic
The ASHI Standard of Practice directs a home inspector to inspect structural components and to describe the roof structure, the methods used to inspect attics, and the ventilation of attics. It does not require the inspector to traverse attic load-bearing components that are concealed by insulation, so inspectors often view the attic from the access opening or from walkable areas when the framing is buried under insulation.
From the attic, an inspector may note:
- Water stains, dark streaks or blackened areas on the sheathing.
- Rusty nail tips or frost on nails in cold weather, both signs of condensation.
- Daylight around penetrations, at gaps between boards or where sheathing is missing.
- Delaminated plywood or swollen OSB edges.
- Visible sag between rafters or deflected panel edges without clips.
- Possible mold growth on the deck.
- Bath or kitchen fans venting into the attic, blocked soffit vents or missing baffles.
- Spaced board decking under asphalt shingles.
On the roof surface, soft or spongy areas underfoot, wavy shingles and raised seam lines can indicate deck problems. Inspectors cannot see through shingles, so the full condition of the deck often is not known until a tear-off. The guide to hiring a home inspector explains what a standard inspection covers, and the structure and exterior hub links related guides on roofs and framing.
Replacing Sheathing During a Reroof
Damaged sheathing is usually replaced as part of a full roof replacement, because the shingles and underlayment have to come off anyway. After tear-off, the roofer walks the deck, looks for soft areas, rot and delamination, and replaces damaged sheets. On older homes with spaced boards, a new layer of panels may go over the whole roof.
Because the extent of damage cannot be known in advance, most roofing contracts handle sheathing as a unit price, such as a set price per 4-by-8-foot sheet replaced, plus an allowance or estimate. Reviewing that line item is worth the time:
- What is the price per sheet, and does it include labor and disposal?
- Will the roofer photograph damaged areas before replacing them?
- Is a full redeck priced separately if most sheets are bad?
- Which thickness and product will be used, and will panel clips be installed?
As a rough guide, replacing individual sheets during a reroof often runs somewhere around $70 to $150 per sheet installed, and a full redeck on a typical house may add several thousand dollars to the job. Those ranges vary by region, roof pitch, access and lumber prices. The roof replacement cost guide explains how sheathing allowances fit into the overall quote.
Isolated repairs outside of a reroof are possible but more involved: the roofer removes shingles over the area, cuts out damaged sheathing back to the rafter centers, installs new panels and reinstalls underlayment and shingles. Small repairs may cost a few hundred dollars to over $1,000, and matching older shingles can be difficult.
Replacing sheathing without addressing the cause of the damage is a short-term fix. If condensation caused the rot, air sealing, insulation and ventilation corrections should be part of the project. If a leak caused it, the flashing or valley detail needs to be corrected. The roof underlayment guide covers the layer that goes directly over new sheathing.
Upgrades to Consider While the Deck Is Exposed
A tear-off is the only time the entire deck is open, which makes it a practical moment to address details that are hard to reach later. Not every upgrade suits every home, and a roofer or local building department can say what applies, but these are common discussion points on Front Range reroofs:
- Re-nailing existing sheathing. On older roofs, sheathing nails may be sparse or have missed the framing. Adding fasteners to meet current spacing can improve the deck’s resistance to wind uplift at modest cost while the surface is bare.
- Ridge vent openings. Installing a ridge vent requires cutting a slot in the sheathing along the ridge. Pairing that with clear soffit intake helps the attic dry out. The roof vent types guide compares ridge, box and gable vents.
- Ice-and-water membrane coverage. Extending self-adhered membrane farther up from the eaves, and in valleys and around penetrations, gives the new deck more protection when meltwater backs up under the shingles.
- Panel clips and gaps. Where panels are replaced, confirming that clips and expansion gaps are included can prevent edge ridging later.
- Radiant barrier sheathing. Some panels come with a reflective foil face meant to reduce attic heat gain. Benefits are usually largest in hot climates and vary with how the attic is insulated and ventilated.
Asking for photos of the bare deck, before and after repairs, gives the homeowner a record of what was found and replaced. That record can also help with a future sale, since buyers and their inspectors cannot see under the new shingles.
Safety and When to Call a Pro
Walking on a roof with weak sheathing is dangerous, and attics present their own hazards: exposed nails, unfloored joists and ceilings that will not support a person stepping between framing members. OSHA requires fall protection at elevations of six feet in the construction industry. Homeowners are not covered by workplace rules, but the risk of a fall is the same, and soft decking increases it.
Homeowners can safely do some checking from the attic hatch with a flashlight, ideally on a cold morning when frost or damp sheathing is most visible, and after heavy rain or snowmelt. Signs of active water, widespread staining, sag or suspected mold justify a roofer or inspector’s evaluation.
References
- ASHI Standard of Practice for Home Inspections — American Society of Home Inspectors
- A Brief Guide to Mold, Moisture and Your Home — U.S. Environmental Protection Agency
- Moisture Control Guidance for Building Design, Construction and Maintenance — U.S. Environmental Protection Agency
- Fall Protection Overview — Occupational Safety and Health Administration
Frequently asked questions
Is plywood or OSB better for roof sheathing?
Both are accepted by building codes when rated for roof use. Plywood tends to handle wetting and drying somewhat better, while OSB is less expensive and more uniform. Keeping the deck dry through good ventilation, air sealing and roof maintenance matters more than the choice between them.
How do I know if my roof sheathing is bad?
Signs include sagging or wavy rooflines, soft spots underfoot, raised seams through the shingles, and stains, rot, delamination or mold on the underside of the deck seen from the attic. The full condition is often confirmed only during a tear-off.
What causes frost or moisture on the underside of roof sheathing?
Usually warm, humid indoor air leaking into a cold attic and condensing on the deck. Bathroom or kitchen fans venting into the attic, gaps around fixtures and hatches, and poor attic ventilation are common contributors.
How much does it cost to replace roof sheathing?
During a reroof, individual sheets are often priced around $70 to $150 each installed, and a full redeck may add several thousand dollars. Prices vary with region, roof pitch, access and lumber costs.
What are H-clips on roof sheathing?
H-clips are small metal clips placed on panel edges between rafters. They help adjacent sheets share loads, keep edges aligned and maintain the expansion gap between panels.
Seeing stains or frost on the underside of your roof deck before closing on a home? Contact us and we can point you toward a Front Range inspector who checks attics as carefully as roofs.