Ice Dams: Why They Form, Damage Risks and Prevention
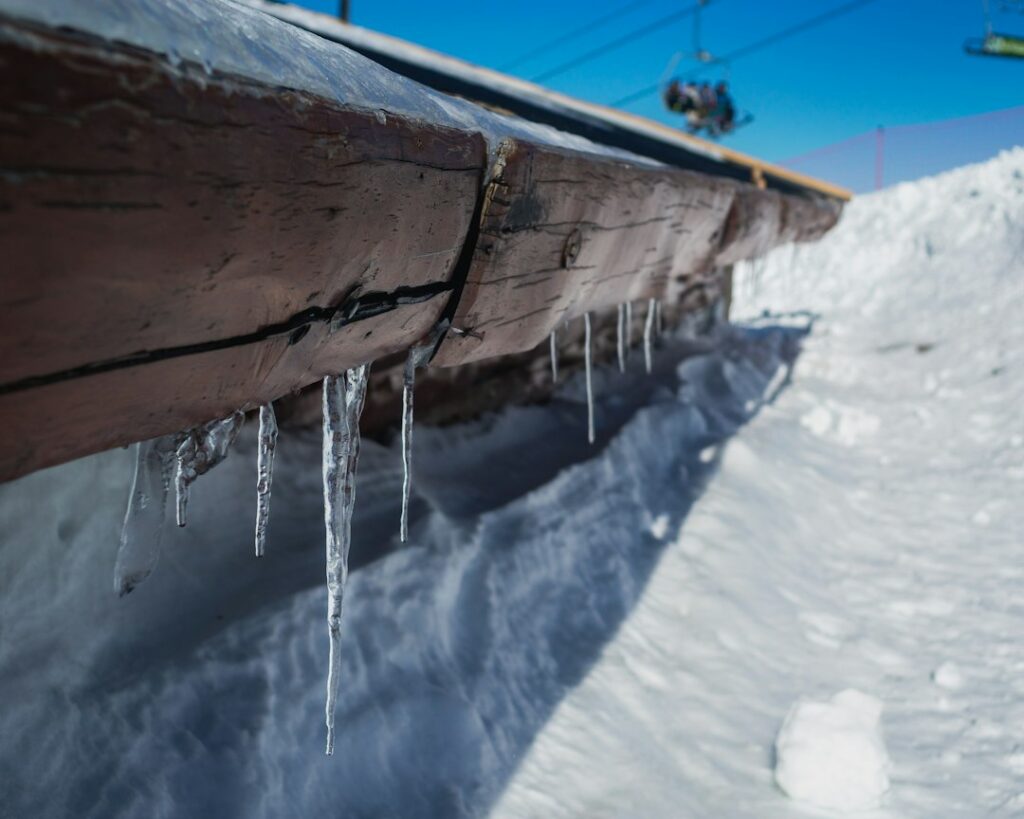
After a big Front Range snowstorm, a row of thick icicles along the gutters can look picturesque. On many houses it is actually a warning sign. That ice is often the visible edge of a ridge of frozen water sitting on the roof’s lower edge, backing up meltwater behind it and pushing it under shingles. Ice dams are one of the most common winter roof problems in snowy climates, and they are almost always a symptom of something happening inside the house rather than a roofing defect on its own. This guide explains how they form, what damage they cause, why Colorado’s freeze-thaw weather makes them so common, how to prevent them for the long term, and how to deal with an existing dam without hurting yourself or the roof. It draws on ENERGY STAR air-sealing and insulation guidance and building-science practice current as of 2026.
Part of our Crawl Space & Attic Guide guide — start there for the full picture →
What Ice Dams Are and Why They Form
An ice dam is a ridge of ice that forms at the eaves of a sloped roof and prevents melting snow from draining off. Water pools behind the ridge, and because shingles are designed to shed water downhill rather than hold back standing water, that pooled water can work its way under the shingles and into the roof deck, walls and ceilings below.
The cause is uneven roof temperature. Warm air from the living space leaks into the attic through gaps around light fixtures, plumbing stacks, attic hatches, top plates and duct penetrations. Heat also conducts through thin or patchy insulation. That warmth raises the temperature of the roof deck over the main part of the attic above freezing, even when the outdoor air is well below freezing. Snow on that warm section melts from underneath, and the water runs downhill under the snow blanket.
When the water reaches the eaves, it hits the part of the roof that overhangs the exterior wall. That overhang has no heated space below it, so it stays as cold as the outside air. The water refreezes there. Each cycle of melting and refreezing adds another layer to the ridge, and the dam grows taller, trapping more water behind it.
The recipe, in short, is three ingredients at once: snow on the roof, a warm upper roof from heat loss, and a cold lower edge. Remove the heat loss and the whole roof stays cold enough that snow either stays frozen or melts evenly from the sun, which is why prevention focuses on the attic, not the gutters.
Why Ice Dams Are Common Along the Front Range
Colorado’s Front Range has a particular pattern that encourages ice dams. Storms can drop heavy, wet snow, and then sunny days follow quickly with strong high-altitude sun, while nights stay well below freezing. That daily freeze-thaw swing gives melting snow plenty of chances to refreeze at the eaves. Homes at higher elevations in Jefferson, Douglas, Boulder and El Paso counties, and mountain properties to the west, see longer snow cover and colder nights, which raises the risk further.
Housing stock matters too. Many older homes in Denver, Lakewood and Aurora were built with modest attic insulation and few air barriers, and some have had additions or finished spaces that created complicated rooflines. Story-and-a-half homes with sloped ceilings, low-slope sections, and valleys where two roof planes meet are especially prone, because heat escapes through tight cavities and snow collects in the valleys.
Mechanical equipment in the attic adds to the problem. Furnaces, air handlers and ductwork located above the ceiling, which is common in some ranch-style and newer tract homes, can leak heat directly into the attic all winter. Recessed lighting installed through insulated ceilings is another frequent source. When a roof shows a clear pattern of melted snow above certain rooms while the rest of the roof stays white, that pattern is often a map of where heat is escaping.
Gutters also play a role, though not the one people often assume. Gutters do not cause ice dams, but a gutter full of ice extends the cold edge and gives the dam something to anchor to. North-facing roof slopes that stay shaded can hold snow longer, while south-facing slopes may melt faster and push water toward still-frozen eaves.
Damage Ice Dams Can Cause
The damage from an ice dam is mostly water damage, and much of it is hidden until spring.
Roof Leaks and Ceiling Stains
Water backed up under shingles can soak the roof sheathing and drip onto the top of exterior walls. Homeowners often first notice brown stains on ceilings near exterior walls, peeling paint at the top of a wall, or water dripping around window frames during a thaw. Because the water enters at the eaves, leaks often appear in rooms along the perimeter rather than in the middle of the house. If you are trying to trace a winter leak, our sibling guide to roof leak repair and finding the source walks through how water travels before it shows up indoors.
Wet Insulation and Wall Cavities
Insulation that gets wet loses much of its effectiveness. Wet fiberglass compresses and mats down, and wet cellulose can settle and clump. That creates even more heat loss in the same area, which can make the next ice dam worse. Water that runs into wall cavities can soak insulation and framing where it cannot easily dry.
Attic Mold and Wood Decay
Repeated wetting of roof sheathing, rafters and insulation creates conditions for mold growth and, over time, wood decay. The EPA’s guidance is that the key to mold control is moisture control, and that wet building materials should be dried quickly. Attic leaks are often discovered late, after mold has already started on the underside of the roof deck. Our guide to attic mold removal covers what to do if growth is already present. Escaping warm, moist indoor air also condenses on cold roof sheathing, which adds to the moisture load even without a leak.
Gutters, Fascia and Safety Hazards
Heavy ice can pull gutters away from fascia boards, damage downspouts, and loosen shingles at the edge of the roof. Large icicles and ice sheets that break loose are a falling hazard over doorways, walkways and driveways, and ice buildup can add significant load to roof edges and overhangs.
How to Prevent Ice Dams: Air Sealing and Insulation First
The long-term fix is to keep the roof deck cold and evenly cold. That means stopping heat from reaching the attic in the first place. ENERGY STAR’s seal-and-insulate guidance emphasizes sealing air leaks before adding insulation, because insulation alone does not stop air movement, and air leakage carries a large share of the heat that warms attics.
Step 1: Air Seal the Attic Floor
Common air leaks between the living space and the attic include:
- Gaps around recessed can lights, especially older non-airtight fixtures
- Openings around plumbing vent stacks and electrical wires
- Unsealed attic hatches and pull-down stairs
- Open chases around chimneys and flues (sealed with fire-rated materials and proper clearances)
- Top plates of interior walls, and dropped soffits over kitchens and bathrooms
- Bathroom exhaust fans that vent into the attic instead of outdoors
- Leaky ductwork running through the attic
Sealing these with caulk, spray foam, rigid foam and weatherstripping is often one of the most cost-effective energy improvements in an older house, and it directly targets the heat that causes ice dams. Combustion appliance venting and clearances around flues need care, so homeowners who are not comfortable working around them should hire a contractor or energy auditor.
Step 2: Bring Insulation Up to Recommended Levels
Once air leaks are sealed, adding insulation reduces conductive heat loss through the attic floor. ENERGY STAR publishes recommended insulation levels by climate zone, and much of the Colorado Front Range falls in zones where recommended attic levels are substantially higher than what many older homes have. Our guide to attic insulation types, R-values and costs explains how to evaluate what you have and what to add. Pay special attention to the area right above exterior walls at the eaves, where insulation is often thin because space is tight.
Step 3: Keep Ventilation Working
In a vented attic, outside air enters at the soffits and exits near the ridge, which helps keep the roof deck closer to the outdoor temperature and carries away moisture. Ventilation helps, but it cannot compensate for major air leaks. Common problems include soffit vents blocked by insulation, missing baffles at the eaves, or too little exhaust venting. Insulation baffles that hold insulation back from the soffit vents let air flow while still allowing full insulation depth over the wall plate.
Step 4: Address Roofing Details at Replacement Time
When a roof is replaced, building codes in cold climates commonly require an ice barrier, a self-adhering waterproof membrane, along the eaves extending inside the exterior wall line. The International Residential Code includes this requirement for areas with a history of ice forming at the eaves, and local jurisdictions adopt and amend it. An ice barrier does not prevent ice dams, but it limits leaks when water backs up. Ask your roofer what the local code calls for and confirm it is included in the bid.
Where Heat Cables Fit
Self-regulating heat cables, sometimes called roof de-icing cables, are installed in a zigzag along the eaves and in gutters and downspouts. They create channels for meltwater to drain. Heat cables can be a useful stopgap for problem areas that are hard to fix, such as a complicated valley or a low-slope section, but they use electricity, need to be installed to the manufacturer’s instructions and electrical code, and do not address the heat loss that causes the problem. They work best as a supplement to air sealing and insulation, not a replacement for it.
How to Remove an Existing Ice Dam Safely
When a dam is already leaking into the house, the goal is to create a drainage path without damaging the roof or getting hurt.
- Do not chop or hack at the ice. Hammers, chisels, axes and ice picks easily puncture or tear shingles and can damage gutters. The repair bill can exceed the cost of the leak you were trying to stop.
- Stay off icy roofs. Walking on a snow- or ice-covered roof is extremely dangerous. Ladders on frozen ground are also a fall risk.
- Use a roof rake from the ground. A long-handled roof rake can pull the first several feet of snow off the lower roof after a storm, which removes the fuel for new meltwater. Pull gently to avoid scraping shingles, and watch for overhead power lines.
- Make a melt channel. Some homeowners place a calcium chloride ice melter inside a tube of fabric across the dam to melt a channel. Avoid rock salt, which can damage roofing, gutters and plants below.
- Consider professional steam removal. Many roofing and snow-removal companies use low-pressure steam equipment to cut channels or remove dams without damaging shingles. This is generally the safest and most effective option for a large dam.
Inside the house, catch dripping water with buckets and towels, move belongings away from wet areas, and take photos for documentation. If water is coming through a light fixture or near electrical outlets, shut off power to that circuit and keep away. Once the leak stops, dry affected materials as quickly as possible. The EPA recommends drying water-damaged materials within 24 to 48 hours to reduce the chance of mold growth.
Checking Your Attic After Winter
Once the weather turns, a careful attic check can show whether ice dams caused hidden damage and where heat is escaping. Look for:
- Water stains or dark spots on roof sheathing, especially near the eaves
- Frost or rusted nail tips on the underside of the roof, which can signal moist air leaking into the attic
- Matted, compressed or discolored insulation
- Discoloration on rafters or visible mold growth
- Daylight through soffit vents (good) or vents blocked by insulation (a problem)
- Bath fans or dryer ducts terminating in the attic
A professional energy audit with a blower door test can pinpoint attic air leaks that are hard to see, and a thermal camera can show warm spots on the roof or ceiling during cold weather. A home inspector will typically note evidence of past leaks, insulation conditions and ventilation issues during a standard inspection, which is useful for buyers evaluating a house in spring or summer, when ice dams are long gone but their marks remain.
Ice Dams and Crawl Spaces: Same Building-Science Logic
Ice dams are an attic problem, but the same idea applies to the whole building envelope: control air leaks and moisture first, then insulate. Our crawl space and insulation hub applies that logic to the lower half of the house, where cold floors and moisture problems follow similar rules. Homes with both a leaky attic and a leaky crawl space can see the stack effect pull cold air in at the bottom and push warm air out at the top, which makes ice dams more likely.
Cost Expectations for Ice Dam Fixes
Costs vary widely depending on the house and the scope of work, so treat the following as a rough framework rather than quotes:
- Roof rake: an inexpensive tool, typically well under $100.
- Professional steam removal: usually billed by the hour, often several hundred dollars or more for a single visit depending on the size of the dam and access.
- Heat cables: materials and professional installation commonly run a few hundred to a couple thousand dollars depending on the length of eaves and whether gutters and downspouts are included, plus ongoing electricity costs.
- Air sealing and insulation upgrades: often in the range of one to a few thousand dollars for a typical attic, depending on access and how much insulation is added. Utility rebates or tax credits may offset part of the cost.
- Leak repair: drywall, paint, insulation replacement and mold remediation are separate and can vary widely.
The air sealing and insulation work is the only item on that list that addresses the cause, and it also lowers heating bills, which is why it is usually the best investment.
References
- Seal and Insulate with ENERGY STAR — ENERGY STAR
- Recommended Home Insulation R-Values — ENERGY STAR
- A Brief Guide to Mold, Moisture and Your Home — U.S. Environmental Protection Agency
- International Codes (I-Codes) — International Code Council
Frequently asked questions
What causes ice dams on a roof?
Ice dams form when heat escaping from the living space warms the upper roof deck, melting snow from underneath. The meltwater runs down to the colder eaves, refreezes and builds a ridge that traps more water behind it. Air leaks and thin attic insulation are the usual culprits.
Are ice dams covered by homeowners insurance?
Many policies cover sudden interior water damage from an ice dam leak, while excluding the cost of preventing ice dams or fixing wear and maintenance issues. Coverage varies by policy and insurer, so review your policy and document damage with photos before contacting your agent.
Do heat cables stop ice dams?
Heat cables can create drainage channels and reduce ice buildup in problem areas, but they do not fix the heat loss that causes ice dams. They are best treated as a supplement or stopgap while air sealing and insulation improvements are made.
Should I chip ice dams off my roof?
No. Chipping or hacking at ice can damage shingles, gutters and flashing, and climbing on an icy roof is dangerous. Use a roof rake from the ground to remove snow, or hire a professional who uses low-pressure steam to remove the ice safely.
Can ice dams cause mold?
Yes. Water that leaks into the attic, walls or ceilings can wet insulation, sheathing and framing, and mold can grow if those materials stay damp. Dry wet materials within 24 to 48 hours and check the attic after winter for stains or growth.
Seeing ceiling stains after a thaw, or buying a Front Range home with icicle history along the eaves? Contact us and we can connect you with a local inspector who can check the attic, insulation and roof edges for hidden damage.