Wet Crawl Space Insulation: Moisture Problems, Fixes
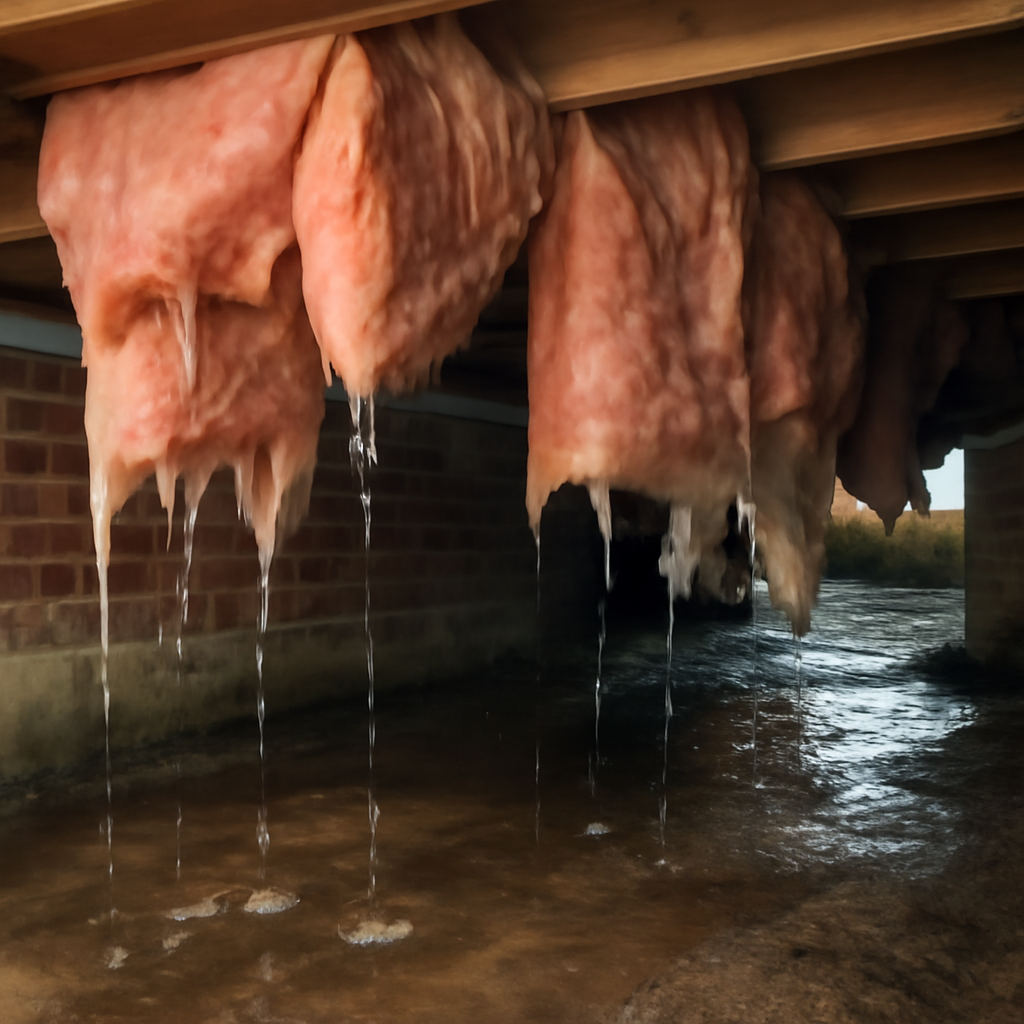
Insulation in a damp crawl space does not just underperform, it can make the problem worse. Wet fiberglass loses its R-value, sags off the joists, and holds moisture against wood framing where mold takes hold. Anyone dealing with wet crawl space insulation faces a sequencing decision that most homeowners get backward: the moisture has to be fixed first, before a single new batt or foam board goes in. This guide explains why water destroys insulation, how the dampness feeds mold, and the drainage, vapor-barrier, and dehumidification steps that come before insulating. It summarizes EPA and CDC guidance on mold and moisture and is not medical advice; consult a physician about symptoms and a certified professional about testing.
Part of our Crawl Space & Attic Guide guide — start there for the full picture →
Why moisture destroys crawl space insulation
Insulation works by trapping still air in millions of tiny pockets, and that trapped air is what slows heat from moving through it. Water ruins the trick. When fiberglass gets wet, the pockets fill, the air is displaced, and the material’s insulating value collapses. Damp fiberglass can lose the large majority of its rated R-value, which means a crawl space that looks insulated is effectively bare from an energy standpoint.
The damage compounds over time. Wet batts grow heavy, pull away from the fasteners, and droop off the floor joists, leaving gaps that let even more cold air through. The paper or foil facing degrades. Worse, saturated insulation acts like a sponge pressed against the wood subfloor and framing, holding moisture in constant contact with materials that need to dry out. Wood that stays above roughly 20 percent moisture content for extended periods is prime territory for mold and, eventually, rot.
This is why installing insulation in a wet crawl space is throwing money at the wrong problem. New batts placed over damp soil or against sweating walls simply repeat the failure. They will absorb the same moisture, sag the same way, and trap the same dampness against the framing. Fixing the water first is not optional; it is the only path to insulation that lasts.
How a wet crawl space breeds mold
Mold needs three things: organic material to eat, oxygen, and moisture. A crawl space supplies the first two abundantly through wood joists, subfloor, cardboard, and the paper facing on insulation. Moisture is the only variable a homeowner controls, and a wet crawl space hands mold the one ingredient it cannot get on its own.
The EPA is direct on this point: control moisture and you control mold. Once relative humidity in the enclosed space climbs and surfaces stay damp, colonies can establish within a day or two on the right materials. Because a crawl space is dark, still, and rarely visited, growth often spreads for months before anyone notices. The connection between dampness and biological growth is the core reason crawl-space moisture is worth taking seriously, and it is covered in depth in our guide to mold and humidity.
A brief health caution is warranted. Indoor mold can trigger allergy symptoms, congestion, coughing, and worsened asthma in sensitive people, and public-health agencies recommend removing visible growth regardless of type. This is general guidance, not medical advice. Anyone experiencing symptoms should speak with a physician, and large or water-damage-related growth belongs to a professional. When mold has already spread across framing or into materials, the cleanup process is its own project, outlined in our guide to water damage and mold remediation.
Fix the moisture first: the correct order
Before any insulation goes back in, the water has to stop coming in and the space has to dry out. The fixes stack in a rough order, from bulk water down to residual humidity.
1. Redirect surface water and fix grading
Most crawl-space water starts outside. Soil that slopes toward the foundation, downspouts that empty next to the wall, and clogged gutters all funnel rain and snowmelt into the ground beside the house, where it seeps into the crawl space. Grading the soil to fall away from the foundation and extending downspouts several feet from the wall solves a surprising share of chronic dampness before anyone touches the interior.
2. Address drainage and standing water
If water still enters or pools, the space may need interior drainage. That can mean a perimeter drain, a sump pit with a pump, or grading corrections to a low spot inside the footprint. Standing water must be gone and the source stopped before the next steps make sense, because a vapor barrier controls vapor, not a puddle.
3. Install a ground vapor barrier
Bare soil releases moisture continuously, even when it looks dry. A continuous polyethylene ground cover, lapped at the seams and run up the walls, cuts off that supply. This is the single most effective step for a dirt-floor crawl space and is required by code in most jurisdictions.
4. Control the remaining humidity
Even a dry-looking crawl space holds humid air. In a sealed or encapsulated crawl space, a dedicated crawl-space dehumidifier keeps relative humidity in a safe range, generally below about 60 percent and ideally near 50. In a vented crawl space, outdoor air exchange plays that role, though venting works better in some climates than others. Either way, drying the air is what finally makes the space ready for insulation that will stay dry.
When the crawl space is finally ready to insulate
The space is ready when the source of water is corrected, the soil is covered, and the framing reads dry on a moisture meter over several visits, not just one dry day. At that point the insulation strategy follows the crawl-space type. A vented crawl space typically gets batts between the floor joists; an encapsulated one gets rigid foam on the walls and rim joists inside the sealed envelope. The choice interacts with the moisture strategy, which is why it comes last rather than first. For the full decision framework, the crawl space insulation hub lays out how moisture control and insulation type fit together.
Removing the old wet insulation is part of this step. Saturated, sagging, or moldy batts should come out and be discarded, not dried and reused, because compressed and contaminated fiberglass rarely recovers its performance and can carry spores. Clearing it also lets the framing dry fully and lets you inspect for hidden rot before the new material hides everything again.
Signs your crawl space insulation is already water-damaged
A few clues tell you the existing insulation has been fighting moisture. Batts that hang loose or lie on the ground have absorbed enough water to break their grip on the joists. Dark staining, a musty smell, or visible fuzz on the paper facing points to mold. Rusty fasteners and support wires suggest chronic humidity. Wood that feels damp or reads high on a meter confirms the framing itself is affected.
Any of these is a signal to stop and address water before reinsulating. The temptation is to swap the ugly batts for new ones and move on, but new insulation in a wet space simply restarts the countdown. The lasting fix always runs in the same direction: water out, space dry, then insulation in.
Where the water is coming from
Diagnosing the moisture source is what makes a fix permanent, and crawl-space water usually arrives by one of a few routes. Naming them helps target the repair instead of treating symptoms.
Surface water and grading
The most common culprit is rain and snowmelt that never drains away from the house. Soil graded toward the foundation, mulch beds that hold water against the wall, and downspouts that discharge at the base of the foundation all push water into the ground beside the crawl space, where it seeps through the wall or up through the floor. Correcting the slope and extending downspouts is cheap and often decisive.
Groundwater and a high water table
In low-lying areas or during wet seasons, the water table can rise to or above the crawl-space floor, pushing water up through the soil. This is the situation that calls for interior drainage and a sump pump, because you cannot regrade your way out of groundwater. A vapor barrier alone will not hold back liquid water under pressure.
Plumbing leaks and condensation
Not all crawl-space water comes from outside. A dripping supply line, a leaking drain, or a sweating cold-water pipe can add moisture continuously. Condensation is its own category: in humid weather, warm outside air entering a vented crawl space hits cool surfaces and pipes and condenses, wetting the space without any leak at all. This counterintuitive effect is one reason venting does not suit every climate.
Vented or sealed: matching the strategy to the climate
Whether a crawl space should breathe outdoor air or be sealed off depends heavily on climate, and getting this choice wrong is a frequent cause of chronic dampness. Traditional vented crawl spaces rely on outdoor air to carry moisture away. That works reasonably well in dry climates, but in hot, humid regions the incoming summer air is often more humid than the crawl space itself, and venting actually pumps moisture in, where it condenses on cool surfaces and feeds mold.
For that reason, many building professionals in humid zones favor sealing and conditioning the crawl space instead of venting it. A sealed, encapsulated crawl space uses a full liner and a dehumidifier to keep the air dry year round, independent of the weather outside. In drier climates a well-ventilated crawl space with a good ground barrier can stay healthy without mechanical drying. The right answer depends on where the home sits, and a strategy borrowed from the wrong climate is a common reason insulation keeps failing. The broader trade-offs between the two approaches are laid out in our comparison of a vented versus encapsulated crawl space.
How to confirm the space is truly dry before reinsulating
Drying a crawl space is not a single event, and one dry-looking afternoon is not proof. Materials that were saturated for months hold moisture deep inside, and the air can rebound as soon as the source returns. The reliable test is a moisture meter used on the framing and subfloor over several visits, ideally spanning different weather. Wood that consistently reads in a safe range, generally below about 15 to 16 percent moisture content, signals the framing has genuinely dried.
Relative humidity in the space is the other number to watch. In a sealed crawl space, a dehumidifier should hold it comfortably below 60 percent, and a hygrometer left in the space confirms it stays there. If readings spike after rain or overnight, the source is not fully controlled and more work is needed before insulation goes back. Reinsulating a space that only looks dry is how homeowners end up doing the whole job twice. Patience here is what makes the difference between a repair that holds and one that fails within a year.
A simple way to build that confidence is to leave inexpensive monitoring in place for a few weeks before committing to new insulation. A hygrometer that logs humidity, checked after a rainstorm and after a warm humid day, tells you whether the space stays dry across the conditions that actually challenge it. Pair that with periodic meter readings on the framing, and a clear picture emerges: either the numbers hold steady in a safe range, or they climb and reveal a source that still needs work. That short waiting period is far cheaper than tearing out a fresh installation that failed because the space was sealed up before it had truly dried.
Why fixing moisture protects more than the insulation
The payoff for solving crawl-space moisture reaches well beyond keeping batts dry. The same dampness that ruins insulation also feeds wood rot in the joists and subfloor, corrodes fasteners and ductwork, and raises humidity in the living space above through the natural stack effect, where air from the crawl space rises into the home. Musty odors, sticky summer air upstairs, and even buckling hardwood floors can trace back to a wet crawl space nobody thinks to check.
Controlling the moisture, then, is not just an insulation decision. It protects the structure, improves the air the household breathes, and removes the conditions that let mold establish in the first place. Viewed that way, the drainage, grading, vapor barrier, and dehumidification steps are the real project, and the insulation is simply the last layer that goes back once the space is finally healthy. Homeowners who keep that order in mind spend their money where it does the most good and avoid the frustrating loop of replacing insulation that keeps failing for the same unaddressed reason.
References
- Mold and Moisture — U.S. Environmental Protection Agency
- About Mold and Dampness in Homes — Centers for Disease Control and Prevention
- ENERGY STAR: Seal and Insulate — U.S. Environmental Protection Agency (ENERGY STAR)
Frequently asked questions
Can I just put new insulation over wet crawl space insulation?
No. New insulation over a wet space will absorb the same moisture, sag, and trap dampness against the framing, restarting the cycle. Fix the water source, dry the space, and remove the old wet insulation before installing anything new.
Does wet insulation cause mold?
It can contribute. Wet insulation holds moisture against wood framing and its paper facing feeds mold directly. Mold needs organic material and moisture, and damp insulation supplies both. Controlling moisture is the accepted way to control mold growth in a crawl space.
How do I dry out a wet crawl space?
Start outside by fixing grading and downspouts, then address any interior drainage or standing water. Cover bare soil with a ground vapor barrier, and use a dehumidifier in a sealed space to keep humidity near 50 percent. Dry the framing before reinsulating.
Is wet crawl space insulation dangerous?
Wet insulation itself is mainly an energy and structural problem, but the mold and rot that dampness enables can affect indoor air and framing. Visible mold should be removed, and anyone with symptoms should consult a physician. Large growth warrants a professional.
A crawl space that keeps getting wet often hides a drainage or grading issue that is hard to diagnose from a hatch. If you would like a local crawl-space or moisture pro to find the source before you reinsulate, you can reach a vetted specialist through our contact page.