Thermal Imaging Camera for Home Inspection: How It’s Used
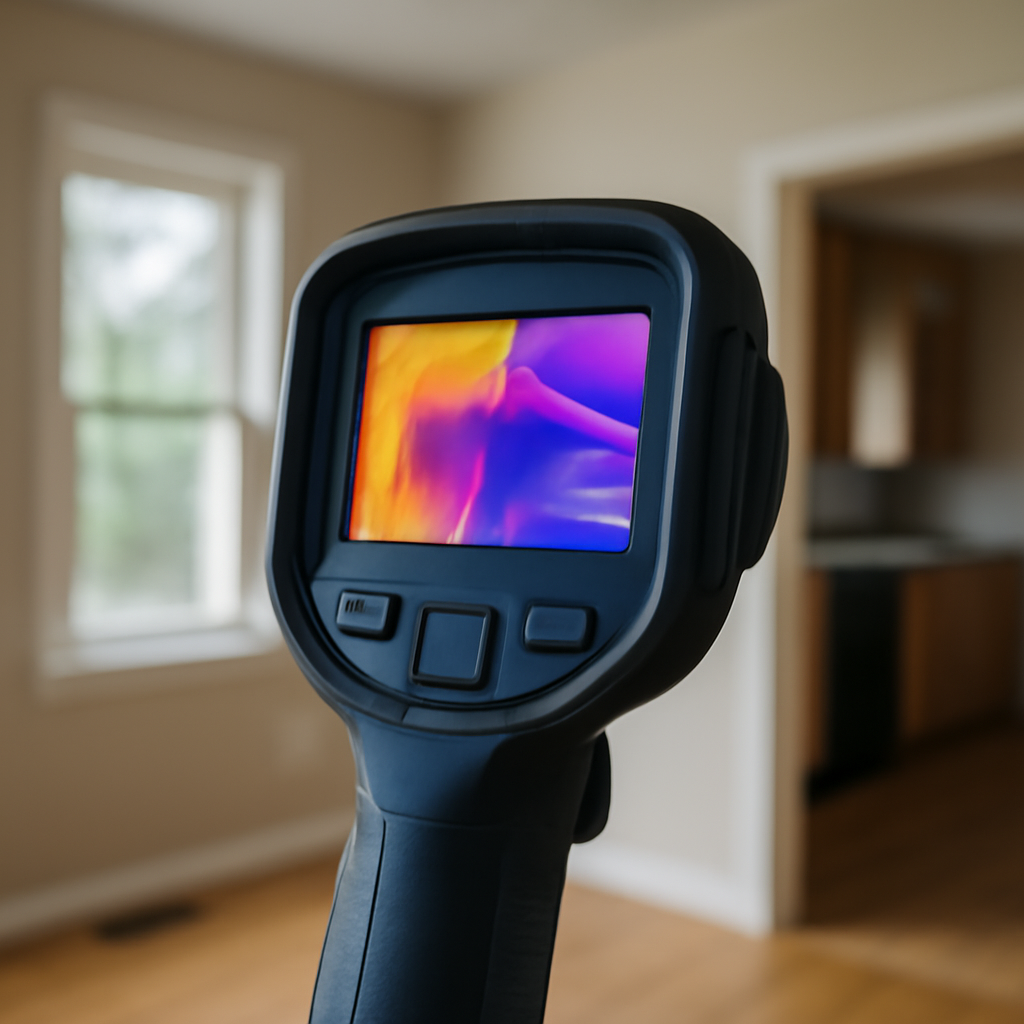
A thermal imaging camera has become a familiar sight on home inspections, but its value lies in how it is used, not in the colorful images it produces. The camera does not see moisture, mold, or studs directly; it sees surface temperature, and a trained inspector interprets those temperature patterns to find problems hidden behind finishes. A thermal imaging camera for home inspection is a diagnostic aid that points to where a problem may be, then prompts a second tool to confirm it.
Part of our Thermal Imaging for Homes guide — start there for the full picture →
What a Thermal Camera Actually Does on an Inspection
A thermal imaging camera detects infrared energy radiating from surfaces and translates it into a visible image where different temperatures appear as different colors. Every object above absolute zero emits infrared energy in proportion to its temperature, and the camera’s sensor, a microbolometer, measures those differences across the scene.
On an inspection, the camera reveals temperature anomalies, spots that are warmer or cooler than their surroundings. Those anomalies are clues. A cool patch on a ceiling may indicate evaporative cooling from moisture; a warm spot at an electrical panel may indicate a loose connection heating up. The camera does not identify the cause; it flags the anomaly so the inspector can investigate. This is why thermal imaging belongs in a kit alongside the moisture meters and other instruments covered in our home inspection tools guide rather than standing alone.
It is worth stating plainly what the camera does not do. It cannot see through walls, cannot detect mold or pests directly, and cannot read moisture as a percentage. It reads surface temperature only, and everything else is inference.
How Inspectors Use Thermal Imaging During an Inspection
The technique is a scan-and-confirm workflow. An inspector walks through the home sweeping the camera across walls, ceilings, floors, and the electrical panel, watching for temperature patterns that break from the expected. When an anomaly appears, the inspector pauses to interpret it in context and then confirms with a second method.
Finding Hidden Moisture
Wet building materials change temperature differently than dry ones, and evaporating moisture cools a surface. A roof leak, plumbing leak, or condensation often shows as a cool, irregularly shaped patch. The inspector then presses a moisture meter to the spot to confirm whether the cool area is actually wet, the pairing described in our overview of the thermal imaging and moisture meter workflow. The camera narrows the search; the meter proves the moisture.
Missing or Damaged Insulation
Gaps in wall or attic insulation let heat pass, so on a cold day a poorly insulated area shows warmer from inside and cooler where insulation is present. The camera maps these patterns quickly across a whole wall, revealing voids, settling, or missing batts that a visual inspection would miss. The DOE recognizes infrared scanning as a method for evaluating building insulation and air leakage.
Air Leaks and Energy Loss
Drafts around windows, doors, outlets, and rim joists appear as streaks of temperature difference, especially during a blower-door test that exaggerates the pressure difference. These patterns help locate where conditioned air escapes.
Electrical Hot Spots
At the electrical panel, an overloaded circuit or a loose connection generates heat. A thermal scan can flag an abnormally warm breaker or lug, prompting an electrician’s follow-up before it becomes a fire risk. This use requires care and training because of the live electrical hazard.
Technique: Getting Reliable Thermal Images
A thermal camera in untrained hands produces pretty pictures and wrong conclusions. Several technique factors separate a useful scan from a misleading one.
Thermal contrast is essential. The camera detects temperature differences, so there must be a temperature difference to detect. A significant gap between indoor and outdoor temperature, often cited as around 18 to 20 degrees Fahrenheit, makes insulation and air-leak patterns visible. On a mild day with little contrast, the same wall reveals nothing, which is a limit, not a clean bill of health.
Emissivity and reflection matter. Shiny surfaces reflect infrared and can read falsely, so inspectors account for surface type. Recent sun exposure, HVAC operation, and even where someone was leaning can leave thermal artifacts. Angle affects readings, and the camera must be allowed to acclimate to the building’s temperature. A skilled inspector controls for these factors and treats every anomaly as a question to confirm, not an answer.
Camera Specs That Affect Inspection Use
While this is not a buyer’s guide, a few specifications shape how useful a camera is on the job. Detector resolution, the number of thermal pixels, determines how much detail the image holds; common inspection cameras range from 160 by 120 up to 320 by 240 or higher, with more pixels resolving smaller anomalies at distance. Thermal sensitivity, expressed as NETD and often quoted around 50 to 60 millikelvin or better, governs how subtle a temperature difference the camera can distinguish, which is exactly what matters for faint moisture or insulation patterns.
A live blended or picture-in-picture mode that overlays the thermal image on a normal photo helps locate anomalies precisely. Temperature range and accuracy specifications matter for electrical work. These are the parameters that distinguish a capable inspection camera from a novelty, and they are why interpretation training matters as much as the hardware.
Limits and When the Camera Is Not Enough
The honest limits define proper use. The camera cannot confirm moisture, only suggest it; the moisture meter does the confirming. It cannot see inside a wall cavity, so when an anomaly demands a look behind the surface, a borescope or exploratory opening is required. It cannot detect mold, only the moisture conditions that may support it.
Conditions can defeat it: insufficient temperature contrast, reflective surfaces, recent sun or HVAC operation, and thick or vented assemblies that hide the temperature signal. A clear thermal image on a low-contrast day does not prove a home is problem-free. For these reasons, trade-association guidance treats infrared as a supplemental, non-invasive screening tool that supports a standard inspection rather than replacing the inspector’s judgment or the confirming instruments. Used that way, scan to find, confirm to prove, a thermal camera meaningfully extends what an inspection can detect.
A Typical Thermal Scan Sequence Through a House
In practice, an inspector works through the home in a deliberate order rather than pointing the camera randomly. The walk-through often starts at the exterior, scanning walls for thermal patterns that hint at missing insulation or moisture, then moves inside. Ceilings below the attic and below upper-floor bathrooms get particular attention because they are common sites for leak-driven moisture. Exterior walls and the floor near them reveal insulation gaps and air leakage.
The inspector then surveys areas around plumbing fixtures, under sinks, around tubs and showers, and along the base of walls where water tends to collect. The electrical panel gets a careful scan for abnormally warm breakers or connections, performed with appropriate caution given the live-circuit hazard. Throughout, the camera is used to flag anomalies, and each anomaly prompts a pause to interpret it in context and confirm it with the moisture meter or other tools. This systematic coverage is what turns the camera from a gadget into a screening method, and pairing it with the floor-level moisture work in our guide to thermal imaging a house shows how the full sweep fits together.
What Thermal Imaging Cannot Replace
It is as important to understand the boundaries of thermal imaging as its uses. The camera does not see moisture, mold, pests, or structural defects directly; it sees only the temperature patterns those conditions sometimes produce. A moisture meter is still required to confirm that a cool patch is actually wet, and a borescope or an exploratory opening is still required to see what lies inside a wall cavity. The camera narrows where to look but rarely closes a case on its own.
This is why infrared findings are typically reported as anomalies warranting further evaluation rather than as definitive defects. An inspector who reports “moisture confirmed by infrared” without a corroborating meter reading is overstating what the tool can establish. The DOE describes thermographic inspection as a way to evaluate insulation and air leakage, and trade-association standards frame infrared as a supplemental, non-invasive aid. The honest framing for any thermal finding is that it is a temperature observation pointing to a possible cause, which a second method then confirms or rules out. Used within those limits, a thermal camera is a powerful screening tool; used beyond them, it produces confident-sounding conclusions that the physics does not support.
Why Operator Skill Matters as Much as the Camera
Two inspectors with identical cameras can produce very different results, because interpretation is the hard part. The hardware captures temperature data; the inspector decides what it means. Distinguishing a genuine moisture anomaly from a cold-air draft, a reflection, a recently sun-warmed wall, or simply where furniture was leaning takes training and experience. The camera offers no judgment of its own.
Skilled operators control the variables: they ensure adequate temperature contrast before drawing conclusions, account for emissivity and reflective surfaces, let the camera acclimate to the building, and adjust the image span and level to make subtle anomalies visible without exaggerating noise. They also know the building science behind what they see, why a cool corner might be a thermal bridge rather than moisture, or why an attic scan reads differently in winter than summer. This is the reason trade organizations encourage specific infrared training for inspectors. The camera extends what an inspection can detect only in the hands of someone who understands both the instrument and the building it is pointed at.
Best Conditions for a Thermal Inspection
Because the camera detects temperature differences, the timing and conditions of a scan strongly affect what it can reveal. The single most important factor is thermal contrast, a meaningful temperature gap between the inside and outside of the building. Insulation gaps, air leaks, and many moisture patterns only become visible when there is enough difference for the camera to register, often cited as around 18 to 20 degrees Fahrenheit between indoors and outdoors.
This makes early morning and the heating or cooling seasons more productive than a mild day with little contrast. A scan on a temperate afternoon may show a uniform wall that hides an insulation void simply because there is no driving temperature difference to expose it. Recent sun exposure can warm exterior walls and mask or mimic anomalies, so inspectors often avoid scanning surfaces that have just been in direct sun. A blower-door test that depressurizes the home exaggerates air leaks for the camera, pulling outside air through gaps that then show as streaks of temperature difference. Understanding these conditions is why a clear thermal image is never treated as proof of a problem-free home; it may simply reflect a day when the camera could not see much. The DOE describes thermographic inspection as most effective under these contrast conditions for exactly this reason.
How Homeowners Should Interpret an Inspector’s Thermal Findings
When a thermal image appears in an inspection report, homeowners benefit from understanding what it does and does not establish. A flagged anomaly is a temperature observation, a cool patch, a warm spot, a streak of air leakage, that points to a possible cause. It is a reason to investigate, not a confirmed defect. A responsible report pairs each significant thermal finding with a corroborating method, such as a moisture-meter reading confirming a cool patch is actually wet, rather than presenting the image alone as conclusive.
Homeowners should be cautious of reports or marketing that overstate what infrared proves, claiming, for instance, that a camera detected mold or saw through a wall. The camera does neither; it reads surface temperature, and everything else is inference confirmed by other tools. Reading thermal findings correctly, as high-value clues that direct further evaluation, lets a homeowner appreciate the camera’s real contribution: it reveals problems that a purely visual inspection would miss, while leaving the confirmation to the moisture meter, the borescope, or the appropriate trade professional. That balanced understanding is what makes thermal imaging a genuine asset on an inspection rather than a source of false confidence in either direction.
References
- Infrared Thermal Imaging Inspection — International Association of Certified Home Inspectors
- ENERGY STAR: Seal and Insulate — U.S. Environmental Protection Agency (ENERGY STAR)
- Standard of Practice — American Society of Home Inspectors
Frequently asked questions
What does a thermal imaging camera detect on a home inspection?
It detects surface temperature differences, not moisture or mold directly. Inspectors read those patterns to find clues to hidden moisture, missing insulation, air leaks, and electrical hot spots, then confirm with a second tool such as a moisture meter.
Can a thermal camera see through walls?
No. It reads only surface temperature. It can reveal patterns caused by what is behind a surface, like a wet area or an insulation gap, but it cannot see into the cavity. Confirming what is behind the wall needs a borescope or an opening.
How do inspectors use thermal imaging to find moisture?
They scan surfaces for cool, irregular patches caused by evaporating moisture, then press a moisture meter to the spot to confirm whether it is actually wet. The camera narrows the search and the meter proves the moisture.
What conditions make a thermal scan unreliable?
Too little temperature contrast between indoors and outdoors, reflective surfaces, recent sun exposure, and HVAC operation can all hide or fake patterns. A clear thermal image on a low-contrast day does not prove a home is problem-free.
Thermal imaging cameras
Infrared cameras reveal hidden moisture, missing insulation, and air leaks. Phone-attachment models are the budget entry point; standalone units have higher resolution.
| Product | Why | Buy |
|---|---|---|
 FLIR ONE Pro (phone) FLIR ONE Pro (phone) | Plugs into iPhone/Android; inspector favorite. | Amazon — $349.00 |
 Topdon TC001 Topdon TC001 | High-res phone module at a low price. | Amazon — $199.99 |
 FLIR C5 Compact FLIR C5 Compact | Standalone pocket camera with Wi-Fi. | Amazon — $611.50 |