Thermal Imaging a House: What It Reveals and How
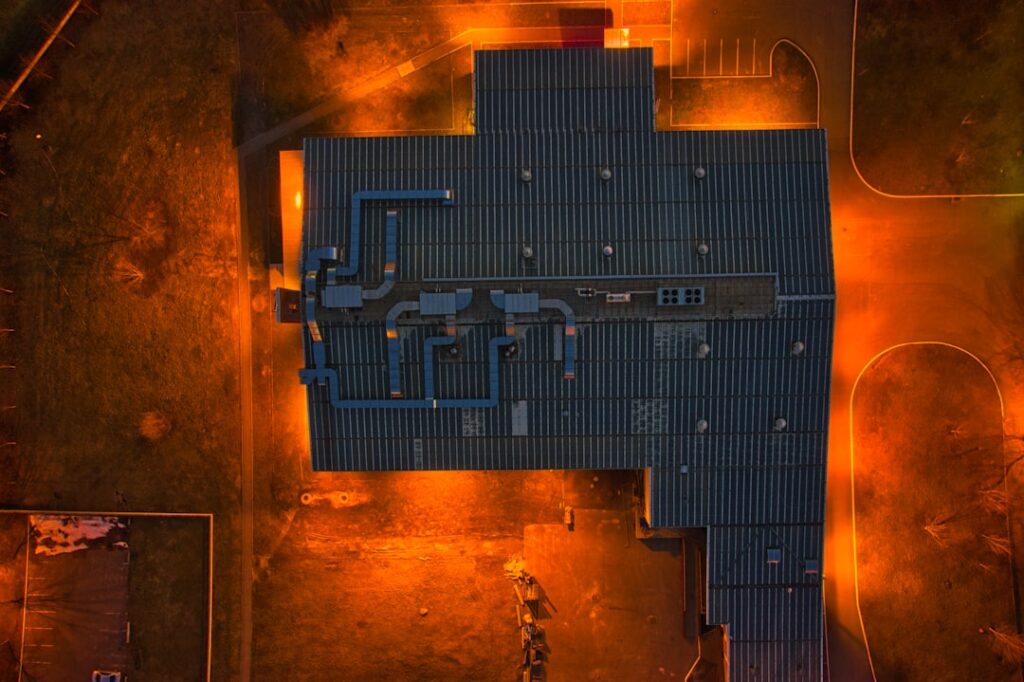
Thermal imaging a house turns invisible temperature differences into a color map that exposes problems a visual inspection misses — missing insulation, air leaks, hidden moisture, and electrical hot spots. An infrared camera does not see through walls; it reads surface temperature, and a trained eye interprets those patterns into actionable findings. Done with the right conditions and equipment, a thermal scan is one of the most informative non-destructive diagnostics available to homeowners and inspectors. This guide draws on Department of Energy and InterNACHI guidance rather than manufacturer claims.
What does thermal imaging of a house show?
An infrared camera detects long-wave heat radiation and displays warmer surfaces in one color range and cooler surfaces in another. On a house, those temperature patterns reveal four main categories of problems. The Department of Energy specifically endorses infrared thermography as part of a thorough home energy assessment because it makes energy loss visible.
- Missing or settled insulation: wall and ceiling cavities lacking insulation transfer heat faster, showing as cooler patches in winter or warmer ones in summer.
- Air leakage: drafts around windows, doors, outlets, and where the wall meets the foundation appear as streaks of intruding outside-temperature air.
- Moisture intrusion: wet materials change temperature through evaporation and conductivity, so a hidden leak often reads as a cool anomaly.
- Electrical and mechanical issues: overheating breakers, loose connections, and overworked motors show as abnormal hot spots.
The scan does not show the cause directly — it shows a temperature anomaly that a knowledgeable person connects to a likely cause. That interpretation step is where thermal imaging earns its value. The broader equipment context lives in our home inspection tools hub.
Finding missing insulation and air leaks
Energy diagnostics are the most common reason to scan a house. In winter, a properly insulated wall holds an even interior surface temperature; gaps, settling, and thermal bridging through framing show as cooler vertical stripes or patches. The camera reveals where insulation was skipped during construction, where it has slumped in a wall cavity, or where attic insulation is thin.
Air leaks show differently — as moving, irregular cold fingers around penetrations rather than the broad patches of an insulation gap. The DOE notes that combining a thermal scan with a blower-door test sharpens the result, because depressurizing the house exaggerates air infiltration and makes leaks unmistakable on the camera. Common leak points include the attic hatch, recessed lights, electrical and plumbing penetrations, rim joists, and around windows. Sealing these is among the most cost-effective energy improvements a homeowner can make, and a scan tells you exactly where to focus.
Detecting hidden moisture with thermal imaging
Moisture detection is where thermal imaging shines for inspection work. Water changes how a surface holds and conducts heat, so a damp area usually reads cooler than the dry material around it due to evaporative cooling. A roof leak tracking down a wall, a plumbing leak under a sink, or moisture wicking up a basement wall can all appear as distinct cool zones before any stain becomes visible.
The crucial caveat: a thermal camera does not detect moisture directly — it detects a temperature pattern consistent with moisture. A cool spot could be a draft, a thermal bridge, or a pipe rather than water. That is why the standard professional workflow pairs the camera with a moisture meter: the camera narrows the search to a square foot, and a moisture meter confirms whether that spot is actually wet. The camera also helps with mold investigation indirectly, by finding the damp conditions that allow growth — though it cannot see or confirm mold itself.
Reading the colors correctly
The colorful image a thermal scan produces is easy to misread, and interpreting it correctly is most of the skill. The colors are not absolute — they map to a temperature range the camera sets automatically based on the scene, so the same blue could mean 50°F in one image and 65°F in another. Always check the temperature scale the camera displays rather than assuming a color means a fixed temperature.
In a winter interior scan, cooler areas (often shown blue, purple, or black) on an interior wall usually indicate heat loss — missing insulation, a thermal bridge through framing, or cold air infiltration. Warmer areas (white, yellow, red) might be a heat source, a warm pipe, or sun-warmed material. But the meaning flips with the season and the surface: in summer with air conditioning running, a warm exterior wall patch may indicate the same insulation gap that read cool in winter. This is why comparing a suspect area against nearby normal surfaces, rather than reacting to a color in isolation, is the core technique. A single bright spot means little until you know what the surrounding baseline looks like and what could explain the difference.
Thermal bridges deserve special mention because they fool beginners. Wall studs, floor joists, and steel framing conduct heat differently than the insulated cavities between them, so a perfectly normal wall shows a regular striped pattern on thermal — cooler lines where the framing is, warmer between. That pattern is expected, not a defect. Mistaking normal framing for a problem is a common error that a little experience, or a professional, prevents.
What thermal imaging cannot do
Understanding the limits prevents costly misreadings. A thermal camera:
- Cannot see through walls. It reads surface temperature only and infers what lies behind.
- Cannot detect mold, gas, or pests directly. It finds the conditions or heat signatures associated with them.
- Is fooled by reflective surfaces. Glass, polished metal, and glossy finishes reflect heat and mislead readings.
- Needs a temperature difference. Without contrast between inside and outside, or between a defect and its surroundings, nothing shows up.
This is why the same camera marketed for spotting people or wildlife — covered in our explainer on human thermal imaging — has firm limits indoors too. The image is only as good as the conditions and the interpretation behind it.
How to thermal image a house effectively
Whether you use a phone attachment or a dedicated camera, technique determines whether the scan is useful:
- Create a temperature differential. For an energy scan, aim for at least a 10–20°F difference between indoor and outdoor temperatures. Early morning or evening in a Front Range winter works well.
- Scan systematically. Move slowly across each wall and ceiling, comparing suspect areas against nearby normal surfaces rather than judging colors in isolation.
- Watch for reflections. Change your angle to confirm a hot or cold spot is real and not a reflection.
- Document anomalies with both thermal and visible-light photos so you can locate them again.
- Confirm before acting. Verify moisture with a meter and electrical findings with a closer look before tearing into a wall.
Equipment matters for detail. A phone attachment screens effectively, but a dedicated camera’s higher resolution and lower NETD reveal subtler differences. For an energy-focused scan, the DOE recommends professional assessors who combine calibrated infrared equipment with blower-door testing and trained analysis.
Detecting electrical and HVAC problems
Beyond the building envelope, a thermal scan of a house reveals problems in its mechanical and electrical systems that would otherwise stay hidden until failure. At the electrical panel, an overloaded circuit, a loose connection, or a failing breaker generates heat through resistance, and that heat shows on a thermal camera as a hot spot brighter than its neighbors. A breaker running noticeably warmer than the others around it warrants a closer look by an electrician, since loose or overheating connections are a fire risk. The scan does not diagnose the cause — it flags the anomaly for a qualified professional to investigate safely, since opening a live panel is not a homeowner task.
HVAC and plumbing systems read clearly too. Supply ducts leaking conditioned air show as temperature streaks where they should be sealed. Radiant floor heating loops appear as warm serpentine lines, useful for confirming a system works or locating a loop before drilling. Hot and cold water supply lines are visible within walls by their temperature, which helps locate a pipe before cutting. A water heater, a recirculation line, or a frozen-prone pipe in an exterior wall all present distinct signatures. For the Front Range, finding which pipes run through cold exterior wall cavities can guide freeze-protection before winter.
Seasonal timing for the best results
When you scan matters as much as how. Insulation and air-leak scans need a temperature differential, so they work best in winter or summer when indoor and outdoor temperatures diverge sharply, ideally by 10 to 20 degrees or more. A mild spring afternoon with little difference between inside and out reveals little. Moisture scans are less season-dependent but benefit from stable conditions, since recent sun on an exterior wall or a just-run appliance can create misleading warm areas. Early morning, before the sun loads the building with heat, is often the cleanest time for an exterior energy scan. Electrical scans are best taken when systems are under normal load, since a hot connection only shows its heat when current is flowing.
When to hire a professional thermographer
A homeowner scan is excellent for screening and for prioritizing DIY air-sealing. Hire a certified professional when the findings are consequential or when you need documentation: a suspected hidden leak before a purchase, an electrical hot spot at the panel, a comprehensive energy audit, or any result feeding a real-estate negotiation. A professional energy audit, which the DOE describes as combining a blower-door test with thermographic scanning and trained analysis, gives a far more complete and actionable picture than a casual scan, and the resulting prioritized list of improvements often pays for the audit through energy savings. InterNACHI offers infrared certification, and a qualified thermographer brings higher-resolution equipment, blower-door integration, moisture-meter confirmation, and the experience to distinguish a true defect from a harmless thermal artifact. The camera shows where heat differs; a professional translates that into what it means and what to do. For purchases and major repairs, that interpretation is what makes a thermal scan worth commissioning rather than guessing from a colorful image.
Equipment options for scanning your own house
Homeowners who want to scan their own house have a spectrum of options matched to how seriously they take the task. The most affordable entry is a smartphone thermal attachment — a FLIR One or Seek module for iPhone, or a USB-C module like a TOPDON or InfiRay for Android — running from about $200 to $550. These screen for insulation gaps, air leaks, and moisture clues effectively, and their companion apps add spot measurement and saved images.
A step up are pocket standalone cameras with their own screens, such as the FLIR C-series, around $400 to $800, which free you from the phone and offer better optics; our guide to the best thermal cameras for home inspections compares the dedicated tier. Professional inspection cameras start above that and climb into the thousands, with higher resolution, lower NETD, and report-grade data. For a one-time need, renting a capable camera or hiring an inspector who owns one often beats buying. The right choice depends on frequency: an occasional draft hunt suits an attachment, while a landlord scanning multiple units or someone renovating an older home over months may justify a dedicated camera. Whatever the tool, the limits are the same — surface temperature only, a temperature differential required, reflective surfaces deceiving — so technique and interpretation matter as much as the hardware. A modest attachment used carefully outperforms an expensive camera used carelessly.
References
- Using Infrared Thermography — U.S. Department of Energy
- Professional Home Energy Audits — U.S. Department of Energy
- Infrared Thermography for Inspectors — International Association of Certified Home Inspectors (InterNACHI)
Thermal imaging cameras
Infrared cameras reveal hidden moisture, missing insulation, and air leaks. Phone-attachment models are the budget entry point; standalone units have higher resolution.
| Product | Why | Buy |
|---|---|---|
 FLIR ONE Pro (phone) FLIR ONE Pro (phone) | Plugs into iPhone/Android; inspector favorite. | Amazon — $349.00 |
 Topdon TC001 Topdon TC001 | High-res phone module at a low price. | Amazon — $199.99 |
 FLIR C5 Compact FLIR C5 Compact | Standalone pocket camera with Wi-Fi. | Amazon — $560.00 |