Best Thermal Camera for Home Inspections: A Guide
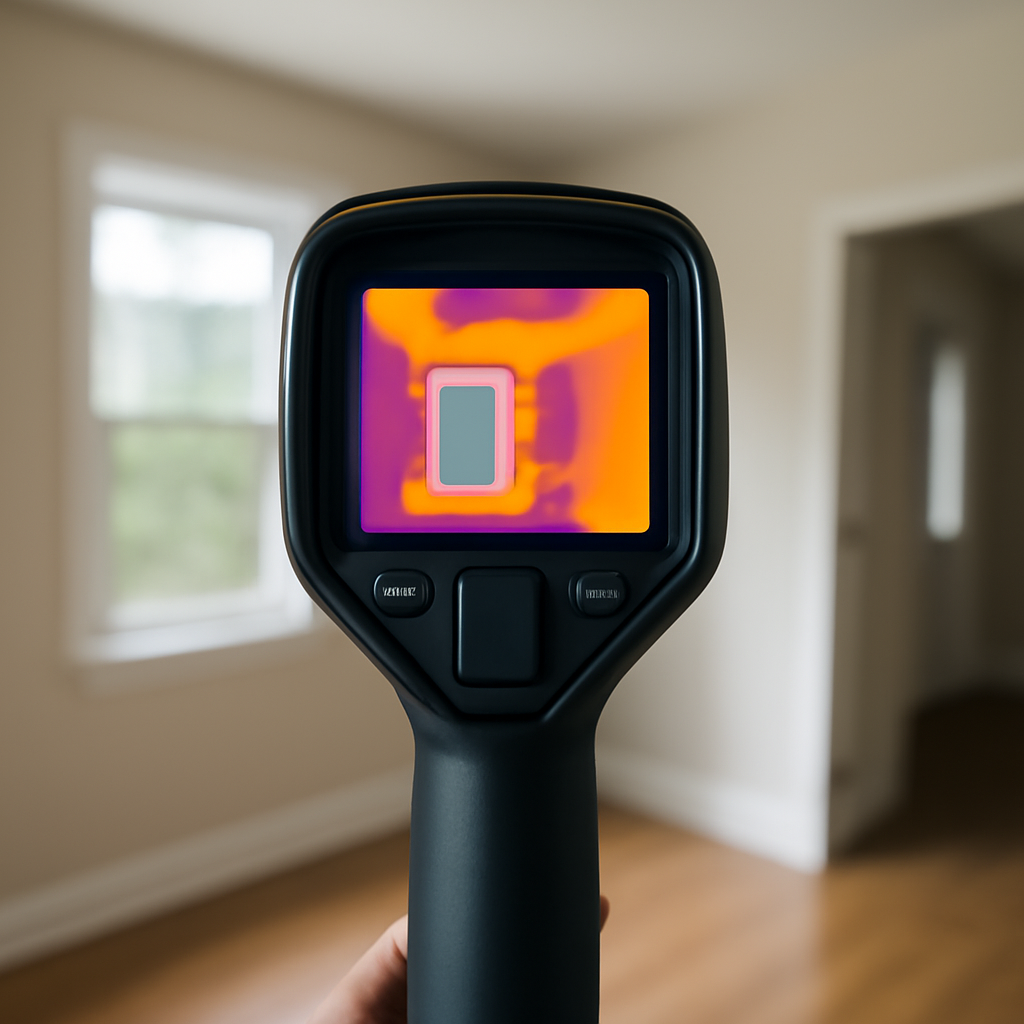
The best thermal camera for home inspections is the one that matches the findings an inspection actually produces: a damp ceiling under a bathroom, a missing insulation batt in an exterior wall, a radiant floor loop that never warms up, a breaker running hotter than its neighbors. Each of those jobs leans on a different feature. Moisture work rewards sensitivity and good presets, insulation work rewards a wide view, and electrical work rewards a high temperature ceiling and clear spot readings. Report-writing ties it together. This guide is organized around those inspection tasks rather than a single “best” camera, with seven picks from current listings and a task-by-task buying guide below.
Part of our Thermal Imaging for Homes guide — start there for the full picture →
As an Amazon Associate we earn from qualifying purchases.
How we compared: we compared 22 current Amazon listings for thermal cameras sold for home and building inspection, 12 standalone handhelds and 10 phone or tablet modules, on what each listing states: native and enhanced resolution, NETD, temperature range, inspection presets, image fusion, report software, battery runtime and warranty. We did not lab-test or handle any of these units. Prices and availability change, so check the current listing before buying.
Quick picks: thermal cameras for home inspections by task
| Pick | Best for | Key spec | Key detail |
|---|---|---|---|
| AccuMEMS GT16S | Guided moisture and insulation scans | 128×128 native, under 50mK | Five presets incl. Moisture; red-box flags |
| TOPDON TC002C Duo | Phone add-on with a large sensor | 256×192 native, 40mK | Universal USB-C; stated 16.4 ft working distance |
| Yukicam YK06 PRO | Fusion images and PDF reports | 96×96 native, under 40mK | Dual-light fusion; only PDF export listed |
| FOXWELL HT280 | Desk-side 2D/3D report analysis | 260×260 enhanced, 50mK | 50°×50° view; tripod support; 8 h battery |
| RISION Magic | App-based spot, line and area reports | 160×120 native, 40mK | 12 palettes; 2-year warranty; no app sign-up |
| TOPDON TC004 Mini | Back-to-back inspections | 128×128 native | 15-hour battery; auto-photo on alarm |
| FLIR One Pro | iPhone users who want guidance | 160×120 native, 480×360 enhanced | In-app inspection guides; 10-year detector warranty |
The seven picks, matched to inspection tasks
1. AccuMEMS GT16S — Best for Guided Moisture and Insulation Scans
Handheld with Moisture, Insulation, Floor Heating, Electrical and Solar presets that auto-flag suspect areas.
Check price on Amazon| Specification | Details |
|---|---|
| Resolution / sensitivity | 128×128 native, processed to 240×240; under 50mK; 25Hz |
| Presets | Moisture, Insulation, Floor Heating, Electrical and Solar Panel modes that set emissivity and thresholds |
| Auto-flagging | Red-box alerts around suspected problem areas in Moisture, Insulation and Floor Heating modes |
| Measurement | -4°F to 1202°F, ±2%; thermal and thermometer modes; adjustable emissivity; high and low alarms |
| Weight / battery | About 0.5 lb; up to 11 hours |
| Storage / warranty | Not stated in listing |
AccuMEMS GT16S — 128×128 native (240×240), <50mK, 5 presets, auto-flagging, -4–1202°F, 0.5 lb, 11 h
The Only Listing With a Dedicated Moisture Preset
Two of the 22 listings describe one-touch inspection presets: this GT16S and the Yukicam YK06 PRO. The Yukicam’s modes cover HVAC, floor heating, water pipes, electrical and pets. The GT16S is the only listing on the shelf with a mode actually named Moisture, and in that mode, plus Insulation and Floor Heating, it draws a red box around areas the algorithm considers suspect.
That matters for newer inspectors or for anyone scanning a large house quickly. Presets set the emissivity and alarm thresholds that a less experienced user tends to leave on defaults. The GT16S also states the highest upper temperature limit on the shelf, 1202°F, which comfortably covers furnace flues and electrical work.
Treat the red box as a prompt, not a finding. The camera still reads only surface temperature, and any flagged area needs a moisture meter. The listing also leaves out storage capacity, field of view and warranty, three details an inspector should confirm before relying on it for reports.
Pros
- Only listing with a named Moisture preset
- Auto-flags suspect areas in three modes
- Highest stated upper limit on the shelf (1202°F)
- Light at about 0.5 lb with 11-hour runtime
Cons
- 128×128 native sensor
- Storage, field of view and warranty not stated
- No report software described
2. TOPDON TC002C Duo — Best Phone Add-On With a Large Sensor
USB-C module for iPhone, iPad and Android with a 256×192 sensor, 40mK sensitivity and 16.4 ft stated working distance.
Check price on Amazon| Specification | Details |
|---|---|
| Compatibility | USB-C phones and tablets on iOS, Android and Windows; not Mac or Android 16 for now, per listing |
| Resolution / sensitivity | 256×192 native, TISR to 512×384; 40mK; 25Hz |
| Measurement | -4°F to 1022°F, ±2°C or 2%; waveform view; custom temperature limits |
| Working distance | Measures from up to 16.4 ft (5 m) |
| Size / weight | 2.8 × 1.7 × 0.55 in; about 30 g per bullets |
| App / support | TopInfrared app; photo and video; US-based customer service |
TOPDON TC002C Duo — USB-C iOS/Android/Windows, 256×192 native (512×384 TISR), 40mK, -4–1022°F, 5 m distance, 30 g
One of Two Phone Modules Here With a 256×192 Sensor, and the Only One Stating a Working Distance
Ten of the 22 listings are phone or tablet modules. Only two state a 256×192 native sensor, this TC002C Duo and the TOPDON TC001 Max. Across the whole shelf just four listings reach that native resolution, and the other two are handhelds that weigh considerably more.
The TC002C Duo is also the only listing that gives a working distance, saying it can measure from up to 16.4 feet. That is useful framing for ceilings, stairwells and exterior walls, where an inspector cannot get close. Its 40mK sensitivity is among the best figures stated by the 16 listings that publish NETD.
What it lacks is the physical side of a handheld: no laser, no built-in screen, no stated drop or IP rating, and it runs off the phone’s battery. Reporting runs through the phone app rather than desktop software. For a sense of how a phone module compares to dedicated FLIR handhelds, see our review of the FLIR E6 Pro.
Pros
- 256×192 native sensor with 40mK sensitivity
- Works on USB-C iPhone, iPad and Android
- Only listing that states a working distance
Cons
- No drop or IP rating stated
- Drains the host phone’s battery
- Not compatible with Mac or Android 16 for now
3. Yukicam YK06 PRO — Best for Fusion Images and PDF Reports
Dual-light fusion handheld with scene presets, under 40mK, 8GB storage and PC software that exports PDF reports.
Check price on Amazon| Specification | Details |
|---|---|
| Resolution / sensitivity | 96×96 native, enhanced to 240×240; under 40mK; 25Hz |
| Imaging | Dual-light fusion of thermal and visible images to show outlet, pipe and duct edges |
| Presets | HVAC, floor heating, water pipe, electrical and pet modes |
| Reporting | 8GB storage; PC analysis software; PDF report export |
| Durability / power | IP54; 6.6 ft drop rating; LED work light; 3200mAh battery (runtime not stated) |
| Range / warranty | Temperature range and warranty not stated in listing |
Yukicam YK06 PRO — 96×96 native (240×240), <40mK, dual-light fusion, 5 presets, 8GB, PDF reports, IP54, LED
The Only Listing That Names PDF Report Export
Eight listings on the shelf describe report generation in some form, through a phone app or PC software. The Yukicam is the only one that names PDF export, the format most inspectors and clients actually exchange. It pairs that with dual-light fusion, which overlays thermal data on a visible image so an outlet cover or duct boot is recognizable in the report.
Fusion matters for client communication. A plain thermal image of a cold corner can look like an abstract blob to a buyer; the same image with visible edges reads as “this corner, above this window.” The Yukicam is one of two listings with inspection presets, alongside the AccuMEMS GT16S.
The weak spots are the sensor and the gaps. A 96×96 native detector is among the smallest here, and the listing gives no temperature range, runtime or warranty. That is a lot to confirm before buying a primary inspection camera.
Pros
- Only listing naming PDF report export
- Dual-light fusion for readable report images
- Under 40mK sensitivity and five presets
Cons
- 96×96 native sensor
- No temperature range stated
- Runtime and warranty not stated
4. FOXWELL HT280 — Best for Desk-Side 2D/3D Report Analysis
2.8-inch handheld with a 50°×50° view, 50mK, tripod support and Windows software for 2D/3D analysis and reports.
Check price on Amazon| Specification | Details |
|---|---|
| Resolution / sensitivity | TISR output of 260×260; native resolution not stated in listing; 50mK; 25Hz |
| Display / view | 2.8-inch 320×240 LCD; 50°×50° field of view |
| Measurement | 14°F to 932°F, ±3.6°F or ±2%; adjustable emissivity and distance; alarms |
| Software / storage | Windows PC software (not Mac) for point, line and area analysis, 2D/3D views and reports; stores over 20,000 images or videos |
| Battery | Up to 8 hours; auto-off at 5, 10, 30 or 60 minutes |
| Durability / mounting | IP54; 6.6 ft drop rating; tripod-compatible (tripod not included) |
FOXWELL HT280 — 260×260 TISR, 50mK, 2.8″ LCD, 50°×50°, 14–932°F, Windows 2D/3D software, 8 h, tripod-ready, IP54
The Only Listing With Both 2D/3D PC Analysis and Tripod Support
Two listings describe Windows software with 2D and 3D thermal views, the HT280 and its sibling FOXWELL RT280. Three listings describe tripod mounting. The HT280 is the only camera in both groups, which suits a slower, more deliberate workflow: set the camera on a tripod facing a suspect wall, capture a sequence and analyze it at the desk.
The square 50°×50° view, shared with one other handheld, is the tallest field of view stated on the shelf, so floor-to-ceiling wall sections fit in frame from a short distance. Eight hours of stated runtime covers a typical inspection day.
Two cautions. The listing never states the native detector resolution, only the 260×260 processed figure; it is one of five listings that omit a native number. And its range starts at 14°F, the only stated lower limit above -4°F on this shelf. That rarely matters for interior work, but exterior scans on a subzero Front Range morning can involve surfaces colder than 14°F.
Pros
- 2D/3D PC analysis with report generation
- Tripod-ready for repeatable captures
- Wide 50°×50° view and 8-hour battery
Cons
- Native resolution not stated in listing
- Range starts at 14°F
- Software is Windows only
5. RISION Magic — Best Phone Module for App-Based Reports
USB-C module with 160×120 sensor, 40mK, phone-camera fusion, 12 palettes and spot, line and area reports in the app.
Check price on Amazon| Specification | Details |
|---|---|
| Compatibility | USB-C iOS, Android and Windows devices; not Mac |
| Resolution / sensitivity | 160×120 native, upscaled to 320×240; 40mK; 25Hz; 52°×39° view |
| Measurement | -4°F to 1112°F, ±3.6°F; adjustable emissivity |
| Imaging | Aligns and fuses the phone’s visible camera with the thermal image |
| App | No registration; thresholds, PIP, spot, line and area analysis reports; real-time graphs; isotherm; 12 palettes |
| Model / warranty | AF01; 2-year warranty; about 0.05 lb |
RISION Magic AF01 — USB-C, 160×120 native (320×240), 40mK, 52°×39°, -4–1112°F, fusion, 12 palettes, 2-yr warranty
The Most Color Palettes on the Shelf, With Area-Based Reports in a Phone App
Palette counts on this shelf run from 5 to 10 on most listings. The RISION states 12, the most of any. More palettes are not a feature for their own sake, but having a high-contrast option for subtle moisture and an iron palette for client-facing images in the same app is practical.
The more useful detail is analysis depth. Spot, line and area measurements with reports, plus isotherm and real-time graphs, put it among the eight listings that describe reporting, and it is one of only three listings on the shelf to mention isotherm at all. It also states a 2-year warranty, longer than the 1 year stated by several competitors, and a 40mK sensitivity figure that is among the best stated on the shelf.
Like every phone module, it depends on the host phone for screen and power, and it states no IP or drop rating. Mac users are out of luck.
Pros
- Spot, line and area reports plus isotherm
- 40mK sensitivity with a 160×120 native sensor
- 2-year warranty; no app account required
Cons
- No IP or drop rating stated
- Relies on phone battery and screen
- No Mac support
6. TOPDON TC004 Mini — Best for Back-to-Back Inspections
Pocket handheld with a 15-hour battery, auto photo capture on alarm, IP54 and a 2-meter drop rating.
Check price on Amazon| Specification | Details |
|---|---|
| Resolution / view | 128×128 native, TISR to 240×240; 40°×30° field of view; 25Hz |
| Measurement | -4°F to 842°F, within ±3.6°F or 2%; hot, cold and center tracking; 5 palettes |
| Alarms / capture | On-screen warning above a preset level that also captures a photo automatically |
| Storage | 512MB, up to 8,000 photos |
| Battery | Up to 15 hours; auto-off at 5, 10 or 20 minutes; cable included, no wall adapter |
| Durability / support | IP54; 2-meter drop rating; lifetime technical support; NETD not stated in listing |
TOPDON TC004 Mini — 128×128 native (240×240 TISR), 40°×30°, -4–842°F, 15 h, auto-capture on alarm, 512MB, IP54
The Longest Stated Battery Life, and the Only Auto-Capture on Alarm
Eight handhelds state a built-in battery runtime, ranging from 4 hours to this camera’s 15, the longest on the shelf. For an inspector running two or three houses in a day across the metro area, that removes the midday charging stop.
It is also the only listing that captures a photo automatically when a temperature alarm trips. Set a high threshold before scanning a panel and the camera documents the hot spot even if the inspector is busy holding a cover or a flashlight.
The compromises are visible in the spec table. A 40°×30° field of view is the narrowest stated, 842°F is a lower ceiling than most handhelds here, and 512MB of storage is small for video. NETD is not stated. It works best as a fast, durable primary for a newer inspector or a backup for a veteran.
Pros
- 15-hour runtime, longest stated
- Auto photo capture when an alarm trips
- IP54 and 2-meter drop rating in a pocket size
Cons
- Narrowest stated field of view
- 512MB storage; no wall charger included
- NETD not stated
7. FLIR One Pro — Best for iPhone Users Who Want Built-In Guidance
USB-C iPhone module with 160×120 sensor, MSX, in-app inspection guides and FLIR's 10-year detector coverage.
Check price on Amazon| Specification | Details |
|---|---|
| Compatibility | iPhone 15 and newer with USB-C |
| Resolution | 160×120 native; Vivid IR upscaling to 480×360; MSX visible-edge overlay |
| Guidance | Step-by-step inspection guides in the FLIR One app for air leaks, moisture and more |
| Accuracy | ±3°C or ±5% within stated ambient and scene conditions |
| Durability | Rated for 1.5-meter drops |
| Model / warranty | 435-0008-03; 2 years on the camera, 10 years on the detector |
FLIR One Pro 435-0008-03 — USB-C iPhone, 160×120 native (480×360), MSX, inspection guides, 1.5 m drop, 2-10 warranty
The Only Listing Pairing Inspection Guides, a 160×120 Sensor and a 10-Year Detector Warranty
Three listings mention built-in inspection guides: the two FLIR One models and the TOPDON TC001 Mini. Of the three, the One Pro has the largest native sensor at 160×120, compared with 96×96 on the TC001 Mini and 80×60 on the standard FLIR One. The two FLIR listings are also the only ones on this shelf with FLIR’s 2-year camera and 10-year detector warranty.
Guides make sense for a newer inspector or an agent who wants a structured approach to finding air leaks and moisture. MSX adds visible outlines to the thermal image, which helps clients read photos in a report.
Its stated accuracy, ±3°C or ±5% under specific conditions, is looser than the ±2°C or 2% many competitors list, and it does not state NETD or a temperature range. More detail on the FLIR app ecosystem is in our guide to FLIR Tools.
Pros
- In-app inspection guides
- 160×120 native sensor with MSX
- 2-year camera, 10-year detector warranty
Cons
- USB-C iPhones only
- Looser stated accuracy than most listings
- No NETD or full temperature range stated
Matching camera features to inspection tasks
Moisture: sensitivity and confirmation
Wet drywall usually reads cooler than dry drywall because evaporation pulls heat from the surface. The difference can be small, which is why NETD matters. Sixteen of the 22 listings state a NETD, and ten of those claim 40mK or better. Presets like the GT16S’s Moisture mode help, but every cool patch still needs a moisture meter. The EPA’s guidance is blunt: the key to mold control is moisture control, and water-damaged materials should be dried within 24 to 48 hours. The CDC adds that mold grows where moisture collects, such as around leaks in roofs, windows and pipes.
Insulation and air leaks: field of view and temperature difference
Missing or settled insulation shows up as a pattern across a wall or ceiling, so a wide field of view lets the inspector see the whole bay layout at once. ENERGY STAR says sealing air leaks and adding insulation can save up to 10% on annual energy bills, and lists drafty rooms, uneven temperatures, high bills and ice dams among common symptoms. A scan only works when indoor and outdoor temperatures differ enough to drive heat through the wall.
Electrical: temperature ceiling and spot readings
Loaded breakers and lugs show up as warm spots. A high upper range, clear hot-spot tracking and a laser or crosshair help. Most listings here reach 1022°F or above, far beyond what a residential panel should produce, so range is rarely the limiting factor. Safety is. OSHA lists electric shock, electrocution, fires and explosions among electrical hazards and points to arc flash when working on energized equipment. Our guide to infrared thermography for electrical inspection covers how inspectors approach panels.
Radiant floors and HVAC
Radiant floors are common in newer Front Range construction and remodels. A thermal camera traces the loop layout as it warms, which shows cold zones and helps locate tubing before anyone drills. Floor-heating presets on the GT16S and Yukicam target this job directly.
Reading listing specs without getting misled
Most listings quote two resolutions. The native figure is what the detector measures; the enhanced figure comes from software processing. Of the 22 listings, 17 state a native figure; three give only a processed figure, and the two AccuMEMS GT14S listings state no resolution at all. When comparing, line up native against native.
Accuracy claims also vary in format. Most listings state ±2°C (±3.6°F) or 2%, while the FLIR One models state ±3°C or ±5% under specific conditions. Temperature accuracy matters less for finding patterns than for documenting a hot breaker, where a specific number goes in the report.
Finally, warranty statements range from none to FLIR’s 2-year camera and 10-year detector coverage, which appears on only the two FLIR listings in this set. For handheld spot readings at a lower price, a digital infrared thermometer remains a reasonable companion tool.
Front Range conditions and timing
Inspections along the Front Range run year-round, but thermal results do not. Cold mornings from November through March give the strongest temperature differences for insulation and air-leak scans. Warm afternoons, especially with sun on a south or west wall, can hide patterns entirely. Experienced inspectors schedule envelope scans early or note in the report that conditions limited the scan.
Colorado’s dry air helps moisture detection in one way, since active evaporation makes wet spots read cooler, and hurts it in another, since intermittent leaks may dry before the inspection. Foothills homes in Conifer, Evergreen and similar areas often have additions and mixed insulation that make thermal patterns harder to read. See our page on thermal imaging inspection in Conifer for local context.
ENERGY STAR also notes that air sealing can trap radon and carbon monoxide indoors and can cause combustion appliances to backdraft. In a radon-prone state, a thermal scan that leads to air sealing should be followed by a radon test and a combustion safety check.
What a DIY camera cannot replace
A thermal camera shows surface temperature. It does not see inside walls, does not detect mold and does not measure moisture. Framing, ductwork, reflections and sun loading all create patterns that look like defects to an untrained eye. A homeowner with a camera can find spots worth asking about; an inspector with training and a moisture meter can tell which ones matter.
The ASHI Standard of Practice describes a standard home inspection as not technically exhaustive and does not require inspectors to identify concealed conditions. Thermal imaging goes past that baseline, which is why it is often offered as an added service. For a broader view of the tools used alongside it, see our home inspection tools guide and the overview of an infrared scan in a home inspection.
If a scan turns up a confirmed wet area, a warm breaker or a large insulation void, the next call is to a qualified inspector or contractor. Front Range buyers and owners can reach out through our contact page to connect with a local inspector who offers thermal imaging.
References
- A Brief Guide to Mold, Moisture and Your Home — U.S. Environmental Protection Agency
- About Mold — Centers for Disease Control and Prevention
- Seal and Insulate with ENERGY STAR — ENERGY STAR
- Identify Problems You Want to Fix — ENERGY STAR
- Electrical Safety Overview — Occupational Safety and Health Administration
- ASHI Standard of Practice for Home Inspections — American Society of Home Inspectors
Frequently asked questions
Which thermal camera features matter most for home inspections?
Native resolution, thermal sensitivity (NETD) and a way to document findings matter most. Presets and fusion images help less experienced users, and a long battery helps on busy days. Match the features to the tasks you do most: moisture, insulation, electrical or radiant floors.
Do inspection presets on a thermal camera actually help?
Presets set emissivity and alarm thresholds suited to a task, which keeps beginners from scanning on poor defaults. Some cameras also flag suspect areas automatically. Flags are prompts, not findings; a moisture meter or further investigation still has to confirm them.
Can a phone thermal camera be used for professional inspections?
Some phone modules carry 256×192 native sensors and 40mK sensitivity, which matches or beats many handhelds. Their limits are physical: no laser, no built-in screen, the phone's battery and usually no drop rating. Many inspectors carry one as a backup.
Does a thermal camera detect mold?
No. It detects surface temperature differences, and moisture is often what creates them. Mold needs moisture to grow, so a thermal camera can point to conditions worth checking, but only sampling or a qualified inspector can address mold itself.
Why do thermal scans work better in winter on the Front Range?
Insulation and air-leak scans need heat moving through the wall, which requires a solid indoor-outdoor temperature difference. Cold Front Range mornings in the heating season provide that. Warm, sunny afternoons can hide patterns.
Buying or selling on the Front Range and want a thermal scan included in the inspection? Reach out through our contact page to connect with a vetted local inspector.
Thermal imaging cameras
Infrared cameras reveal hidden moisture, missing insulation, and air leaks. Phone-attachment models are the budget entry point; standalone units have higher resolution.
| Product | Why | Buy |
|---|---|---|
 FLIR ONE Pro (phone) FLIR ONE Pro (phone) | Plugs into iPhone/Android; inspector favorite. | Amazon — $349.00 |
 Topdon TC001 Topdon TC001 | High-res phone module at a low price. | Amazon — $249.00 |
 FLIR C5 Compact FLIR C5 Compact | Standalone pocket camera with Wi-Fi. | Amazon — $611.50 |