Plaster Wall Repair: Cracks, Loose Plaster and Lath
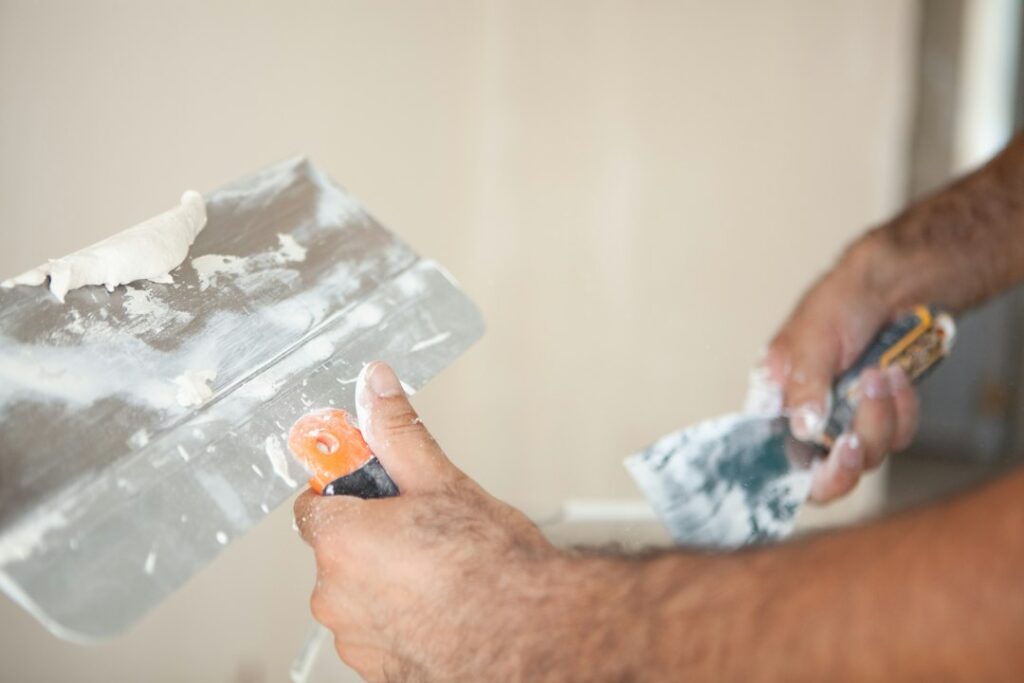
Plaster walls are one of the features that give older homes their character: dense, quiet, slightly irregular surfaces that drywall never quite imitates. They are also prone to a predictable set of problems after many decades of settling, seasonal movement, roof leaks and remodeling. In Denver’s older neighborhoods, in Boulder and Fort Collins bungalows and in Victorian-era houses around Colorado Springs, cracked ceilings and bulging walls are common inspection findings. The good news is that most damage can be addressed without tearing out the wall, as long as the cause is understood first. This guide explains how plaster-and-lath construction works, what different crack patterns suggest, how to reattach loose plaster, when to patch, skim coat or overlay with drywall, and the lead paint and asbestos precautions that apply before anyone sands or demolishes old plaster. It summarizes EPA guidance current as of 2026; testing and abatement decisions belong with certified professionals.
Part of our Structure & Exterior guide — start there for the full picture →
How to Repair Plaster: Start With the Cause
The most reliable way to repair plaster is to identify why it failed, secure anything that is loose, and only then fill and finish the surface. Skipping straight to patching usually means the crack returns within a season or two. The general sequence looks like this:
- Find the cause. Ordinary seasonal movement, structural settlement, a roof or plumbing leak, or vibration from a past remodel each call for different responses.
- Check for hazards. In a home built before 1978, assume painted surfaces may contain lead until tested. Some older plaster, textures and patching compounds may contain asbestos. Both matter before any sanding, cutting or demolition.
- Reattach loose plaster. Sections that have separated from the lath need to be pinned or glued back before any cosmetic work.
- Fill cracks and holes. Use setting-type compounds or patching plaster, often with fiberglass mesh tape across active cracks.
- Finish the surface. Feather the patch, skim coat if the wall is heavily cracked, prime and paint.
Small, stable hairline cracks and nail holes are well within DIY reach. Large bulging areas, ceilings that sag, or plaster damaged by a leak are usually better handled by a plasterer or a contractor experienced with older homes.
Plaster-and-Lath vs Drywall
Before drywall became standard in the mid-twentieth century, interior walls were built by fastening lath to the studs and applying plaster in several coats. Understanding the layers explains most of the failures.
- Wood lath: thin strips of wood nailed horizontally across the studs with small gaps between them. The first plaster coat is pushed through those gaps, where it curls over the back of the lath and hardens into “keys” that lock the plaster to the wall.
- Metal lath: expanded metal mesh, common in later plaster work, curved surfaces and areas such as bathrooms. It grips plaster very well.
- Rock lath (gypsum lath): panels of gypsum board used as a plaster base in many mid-century homes. They look like narrow drywall sheets behind the plaster.
- Plaster coats: traditionally a scratch coat, a brown coat and a thin finish coat. Older plaster often used lime with sand and sometimes animal hair as a binder; later plaster was gypsum-based.
Drywall, by contrast, is a single panel of gypsum between paper faces, screwed to the framing, with taped and finished joints. Repairs to drywall are covered in the guide to drywall repair. Telling the two apart is usually simple: plaster feels harder and colder, sounds solid when tapped, resists pushpins and is often thicker. Looking at the edge of an outlet box or a hole behind a switch plate reveals the layers.
Reading Plaster Cracks
Crack patterns carry information about what is happening behind the surface.
Hairline cracks
Fine, short cracks, often radiating from the corners of doors and windows, usually reflect normal seasonal movement of the framing and are mostly cosmetic. Colorado’s swing between dry winters and more humid summers keeps wood framing moving slightly, which can reopen old hairlines.
Map cracking
A web of fine cracks across a wall or ceiling, sometimes called map or alligator cracking, often points to a weak or failing finish coat or to repeated painting over an old surface. It is usually a candidate for a skim coat rather than individual crack repair.
Long horizontal cracks on ceilings
Cracks that run parallel to the lath, especially with a slight sag, can mean the plaster keys have broken and the ceiling is separating from the lath. This deserves prompt attention because a large section of ceiling plaster is heavy.
Stair-step and diagonal cracks
Cracks that run diagonally from the corners of openings, widen over time, or line up with cracks in exterior masonry can indicate foundation settlement or structural movement. Doors that stick, sloping floors and gaps at trim are related clues. These are worth evaluating before any cosmetic work. The guide to ceiling cracks discusses which patterns tend to be cosmetic and which call for a structural look.
Not every blemish is a crack. Small round bumps on drywall-era patches are often fastener pops, covered in the guide to nail pops in drywall.
Reattaching Loose Plaster
When plaster has separated from its lath, it often feels spongy or flexes when pressed gently with a flat hand, and it may sound hollow when tapped. Bulges, sagging sections of ceiling and cracks that move when pushed are other signs. Plaster in this condition should be secured before patching, and anyone pressing on a sagging ceiling should do so gently, since a weak section can fall.
Plaster washers
Plaster washers, sometimes called plaster buttons, are thin perforated discs used with screws to pull loose plaster back against the lath or framing. The screw passes through the washer and the plaster and into the lath or a stud; tightening it draws the plaster back gently. Washers are typically placed every several inches around a loose area and along cracks, then covered with joint compound or patching plaster during finishing. Overtightening can crack the plaster further, so the goal is snug, not tight.
Adhesive reattachment
For larger areas, specialized plaster adhesive systems use a conditioner and adhesive injected through small drilled holes behind the plaster. The plaster is then pressed back into place and held with temporary screws and washers until the adhesive cures, after which the temporary fasteners are removed and the holes filled. This approach is common in historic restoration because it preserves more of the original material.
Drilling cautions
Drilling holes in painted plaster in an older home disturbs paint and creates dust. In a home built before 1978, that work falls under the lead-safe precautions described below. Drilling also risks hitting wiring and plumbing in the wall cavity, so a stud finder or careful exploration around outlets helps locate obstacles.
Patching, Skim Coating or Drywall Overlay
Once the plaster is secure, the choice of repair method depends on how much of the surface is damaged.
| Approach | Best for | Notes |
|---|---|---|
| Spot patching | Isolated cracks, holes and small missing areas | Setting-type compound or patching plaster; mesh tape over active cracks; feather edges and prime before painting |
| Skim coat | Map cracking, many small cracks or a rough, repeatedly patched surface | A thin layer of plaster or compound over the whole wall after loose areas are secured; skilled work for a smooth result |
| Drywall overlay | Walls or ceilings with widespread damage that is still firmly attached | Thin drywall screwed through the plaster into framing; adds thickness, so trim, outlets and window returns may need adjustment |
| Removal and replacement | Water-damaged, crumbling or detached plaster over large areas | Most disruptive and dusty; lead and asbestos questions must be answered first |
Deep holes are filled in layers, letting each set before the next. Setting-type compounds harden by chemical reaction and shrink less than premixed joint compound, which is why they are usually preferred for the base layers in plaster. Where a large piece of plaster is missing down to the lath, the gap can be filled with a piece of drywall cut to fit and shimmed flush, then finished.
A drywall overlay is often the most cost-effective way to get a flat, uniform ceiling, but it adds depth and weight and hides rather than fixes any loose plaster beneath, so that plaster still needs to be screwed back to the framing first. Where crown molding meets an overlaid ceiling, the trim may need to be reset or replaced; the guide to crown molding installation cost covers that work.
Fixing a stable hairline crack, step by step
For a small crack in plaster that is otherwise firmly attached, a typical DIY repair follows a short routine, assuming lead and asbestos questions have already been answered:
- Press gently on both sides of the crack. If the plaster flexes, reattach it with washers before going further.
- Open the crack slightly with a utility knife or a can opener-style tool into a shallow V, and brush out loose material and dust.
- Dampen the edges lightly so dry old plaster does not pull water out of the new material too quickly.
- Fill with setting-type compound, then embed self-adhesive fiberglass mesh tape over cracks that have moved before.
- Apply two or three thin finish coats, each wider than the last, and smooth with a damp sponge or light hand sanding.
- Prime the patch before painting so it does not show through the finish coat.
A crack that reopens along the same line after a careful repair is a sign of ongoing movement and a reason to look further.
Moisture, Lead Paint and Asbestos Precautions
Moisture as a cause
Water is one of the most common reasons plaster fails. Leaks from roofs, upstairs bathrooms, ice dams and failed exterior caulking soften gypsum plaster, break keys and cause staining and efflorescence. Repairing over damp plaster rarely lasts. A moisture meter helps confirm that a wall has dried and that a leak has truly stopped; the guide to a moisture meter for plaster walls explains how readings differ on plaster versus drywall. Persistent dampness also raises mold questions behind the surface.
Lead paint on old plaster
Plaster walls in pre-1978 homes very often carry many layers of paint, and older layers may contain lead. EPA’s Lead Renovation, Repair and Painting (RRP) Program page notes that approximately three-quarters of the homes in the United States built before 1978 still contain some lead-based paint, and that any renovation, repair or painting project in a pre-1978 home with lead-based paint can easily create dangerous lead dust. Sanding, scraping, drilling and demolition of painted plaster all qualify.
EPA’s RRP Rule requires that anyone paid to perform work that disturbs painted surfaces in pre-1978 homes be certified and use lead-safe work practices. EPA says the rule generally does not apply to homeowners working in their own homes, unless they rent out part of the home, run a childcare center there or buy, renovate and sell homes for profit, and it recommends that homeowners hire a lead-safe certified contractor. For DIY work, EPA’s guidance lists lead-safe practices: determine whether lead-based paint is present, set up safely with plastic sheeting and sealed doors, protect yourself, minimize dust, leave the work area clean, control waste and clean one more time. EPA recommends hiring a certified lead inspector or risk assessor to test surfaces, and says that if the age of the home cannot be determined, it is safest to assume lead-based paint is present. The guides to 1978 lead paint and whether you can paint over lead paint go deeper.
Asbestos in some plaster and textures
Some older plaster, textured finishes and patching materials contained asbestos. EPA notes that asbestos fibers may be released into the air when asbestos-containing material is disturbed during maintenance, repair and remodeling. It lists textured paint and patching compounds used on walls and ceilings among the products that may contain asbestos, and it notes that you generally cannot tell whether a material contains asbestos by looking at it unless it is labeled. EPA advises that material in good condition that will not be disturbed should be left alone, that sampling by a trained and accredited professional is recommended over taking samples yourself, and that repair or removal of more than slightly damaged material, or work that might disturb it, should be done by trained and accredited asbestos professionals. Anyone planning to sand, cut or demolish old plaster should have it tested first. The guide to asbestos in plaster covers what testing involves.
Painting, Costs and the Home Inspection
Patched plaster needs a primer suited to the compound used before finish paint; fresh lime or gypsum patches can flash through paint if they are not sealed. For whole-room work after repairs, the guide to interior painting cost explains how prep, patching and wall condition affect pricing.
Costs for plaster repair vary widely with the extent of damage, ceiling height, the need for lead-safe practices or asbestos testing, and the availability of experienced plasterers, who are fewer than drywall finishers in most Front Range markets. As a general pattern, small crack and hole repairs are modest jobs; reattaching a sagging ceiling, skim coating a room or overlaying with drywall are larger projects; and full removal and replacement, especially with containment for lead or abatement for asbestos, sits at the high end. Itemized estimates that separate testing, reattachment, patching and finishing make bids easier to compare.
During a home purchase, inspectors commonly note cracked or bulging plaster, water stains on ceilings and patterns that suggest settlement. A standard inspection does not test for lead or asbestos, but findings can point a buyer toward those tests. The guide to hiring a home inspector explains what the inspection includes, and the overview of structure and exterior inspections covers the roof, foundation and envelope issues that so often sit behind interior plaster damage.
More Questions About Plaster Wall Repair
Does homeowners insurance cover cracked plaster walls?
Homeowners insurance usually does not cover plaster cracks caused by age, settling, humidity swings or normal wear, but it may cover plaster damage from a sudden covered event such as a burst pipe, a fallen tree or a fire.
Policies generally exclude gradual deterioration and foundation settlement. If water from a sudden leak soaked plaster ceilings or walls, document the damage with photos, stop the water source and contact the insurer promptly. Plaster that sags after a leak can fall, so keep people out of the room. An adjuster may ask for a contractor’s estimate that specifies plaster rather than drywall replacement.
How long does plaster patching compound take to dry?
Setting-type joint compound and patching plaster harden in roughly 5 to 90 minutes depending on the product, but a full plaster repair usually needs a day or more before painting.
Thick fills should be built up in layers, each allowed to set before the next. Traditional lime plaster cures much more slowly, often over several days, and needs moderate humidity to cure properly. Cold rooms and high humidity slow drying. Paint only once the patch is uniformly light in color and hard, and prime it first so the finish coat does not flash or look dull over the repair.
Can I repair plaster walls myself or should I hire a plasterer?
Homeowners can usually handle hairline cracks, small holes and a few loose spots with plaster washers and setting compound; large areas of failed plaster, sagging ceilings and full skim coats are better left to a plasterer.
The deciding factors are area and risk. A sagging ceiling can drop heavy chunks, so it needs to be supported and assessed quickly. Large skim coats take practice to get flat. In homes built before 1978, any sanding or demolition should follow lead-safe practices, and suspected asbestos-containing plaster or texture should be tested by an accredited lab before work begins.
What is the best material for patching old plaster?
Setting-type joint compound (the powder you mix with water) is the most practical patching material for most old plaster repairs because it hardens chemically, shrinks little and bonds well when paired with a bonding agent.
- Bonding agent: brushed on dry old plaster so the new material does not lose its water too fast.
- Fiberglass mesh tape: bridges active cracks before compound goes on.
- Gypsum base-coat plaster: for deep fills over lath.
- Lime plaster: preferred in historic restorations where breathability and compatibility matter.
Premixed lightweight spackle is fine only for tiny dings.
Is it worth saving plaster walls instead of replacing them with drywall?
Saving plaster walls is usually worth it when most of the plaster is still keyed to the lath, because repair costs less, creates far less dust and debris, and keeps the sound-deadening mass of the original walls.
Full tear-out makes more sense when the walls are opened anyway for rewiring or insulation, when large areas have lost their keys, or when water damage has rotted the lath. Tearing out old plaster also raises lead dust and possible asbestos concerns that repair largely avoids. Many owners choose a middle path: repair what is sound and overlay only the worst rooms.
References
- Lead Renovation, Repair and Painting Program — U.S. Environmental Protection Agency
- Lead-Safe Renovations for DIYers — U.S. Environmental Protection Agency
- Learn About Asbestos — U.S. Environmental Protection Agency
- Protect Your Family from Exposures to Asbestos — U.S. Environmental Protection Agency
Frequently asked questions
Can cracked plaster walls be repaired or do they need replacing?
Most cracked plaster can be repaired in place. Loose sections are reattached to the lath with plaster washers or adhesive, then cracks are filled and finished. Replacement is usually reserved for plaster that is water-damaged, crumbling or detached over large areas.
What are plaster washers used for?
Plaster washers are thin perforated discs used with screws to pull loose plaster back against the lath or framing. They are spaced around a loose area, tightened just until snug, and then covered with compound during finishing.
Is it better to skim coat plaster or cover it with drywall?
A skim coat preserves the plaster and suits walls with many small cracks or map cracking. A drywall overlay gives a uniform surface over widespread damage but adds thickness, so trim and outlets may need adjusting. Either way, loose plaster should be secured first.
Do old plaster walls contain lead or asbestos?
Paint on plaster in pre-1978 homes may contain lead, and EPA lists textured paint and patching compounds among products that may contain asbestos. Neither can be identified by sight, so test before sanding, drilling extensively or demolishing old plaster.
Why do plaster cracks keep coming back?
Cracks that return usually reflect ongoing movement, such as seasonal framing shifts, settlement or loose plaster that was patched without being reattached. Securing the plaster and bridging the crack with mesh tape and setting compound helps, and recurring diagonal cracks may warrant a structural evaluation.
Can you hang heavy items on plaster walls?
Plaster walls can hold heavy items when the fastener reaches solid backing: screw into studs, or use toggle bolts sized for plaster and lath. Drill rather than hammer nails, which can crack plaster and break keys. Pre-drill with a masonry or carbide bit and use low drill speed to limit cracking.
Why does plaster crumble when you drill into it?
Plaster crumbles under a drill when the bit is dull, the speed is too high, or hammer mode is engaged, which shatters the brittle surface. Use a sharp carbide or masonry bit at low speed, put painter's tape over the spot, and drill slowly. Crumbling around a large area can also signal old moisture damage.
How do you know if plaster is coming away from the lath?
Plaster that has detached from the lath usually feels spongy or flexes when pressed gently with a flat hand, sounds hollow when tapped, or shows bulges and cracks that open and close. Ceilings that sag in the middle are a warning sign. Mark the loose areas with a pencil and secure them before any patching.
Looking at an older Front Range home with cracked or bulging plaster? Reach out and we can connect you with an inspector who can help sort cosmetic cracks from moisture or structural concerns before you buy.