Drywall Repair: How to Fix Dents, Holes and Cracks (DIY)
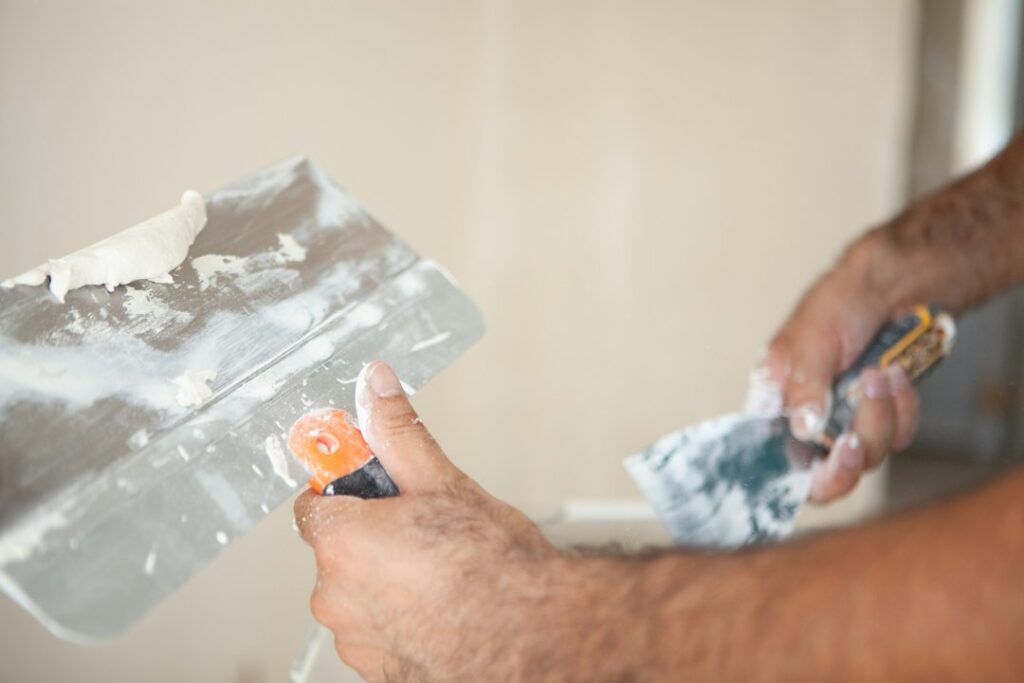
Doorknob holes, popped seams, a dent from moving day, a brown ring under the bathroom: nearly every house needs some drywall repair sooner or later. Most of it is straightforward work that a careful homeowner can handle with joint compound, a few knives and patience. Some of it is a symptom worth investigating first, such as a crack that keeps reopening or a soft, stained section of wall that points to a leak. And in older homes, sanding the wrong patch can stir up asbestos from vintage joint compound or texture. This guide covers small and large holes, seam and corner cracks, when water-damaged drywall should be replaced rather than patched, mold and asbestos precautions, dust control, texture matching and rough costs. Health-related guidance here summarizes EPA material current as of 2026; consult an accredited professional for testing decisions and your physician for any symptoms. Cost figures are general ranges, not quotes.
Part of our Structure & Exterior guide — start there for the full picture →
Drywall Repair Basics: What Kind of Damage Is It?
The right repair depends on what caused the damage and how big it is. A useful first sort:
- Cosmetic surface damage: nail holes, small dents, scuffs and dings. Fill, sand and paint.
- Holes: anything from a doorknob punch to a cut-out for plumbing access. Needs a patch with some kind of backing.
- Cracks: at tape seams, inside corners, or radiating from door and window corners. Often cosmetic, sometimes a sign of movement.
- Water damage: stains, bubbling paint, softness or crumbling. The water source must be fixed first, and the board may need replacement.
Before any repair, ask why the damage happened. A hole from a doorknob needs a door stop. A crack above a door that returns every winter may be seasonal framing movement. A stain needs a dry wall behind it. Fixing the symptom without the cause usually means doing the repair twice.
Tools and Materials for Drywall Repair
A basic repair kit costs less than a single service call and covers most household patches. The essentials:
- Knives: a 4-inch putty knife for filling, plus 6-inch and 10- or 12-inch taping knives for feathering wider coats. A wide knife is the single biggest upgrade for a flat, invisible patch.
- Compound: lightweight spackle for nail holes, premixed all-purpose or lightweight joint compound for most work, and a bag of setting-type compound for deep fills and larger patches.
- Tape and patches: paper tape for seams and corners, self-adhesive fiberglass mesh tape or patches for small holes.
- Cutting tools: a utility knife, a jab saw (drywall saw), and a straightedge or drywall square.
- Fasteners: coarse-thread drywall screws in 1-1/4 and 1-5/8 inch lengths and a drill with a dimpler bit or clutch so screws sit just below the surface without tearing the paper.
- Sanding: a fine sanding sponge, a pole sander or hand sander with 120- to 150-grit screens, and a work light held low against the wall to reveal ridges.
- Finishing: a stain-blocking or drywall primer, the wall paint, and aerosol texture if the wall is textured.
Thin coats are the rule. Three thin coats with drying time between them nearly always look better than one heavy coat, and they sand far more easily.
Best Drywall Sanders: our top 3 picks
| Product | Best for | Key features | Price | Buy |
|---|---|---|---|---|
| WEN DW5084 | Best overall for DIY drywall |
| $154.19as of Nov 18, 2026 3:56 am GMT+0000 | Buy now →Check current price |
| Gioventù SZB-225FV-2 | Ceiling sanding |
| $179.97as of Nov 18, 2026 3:56 am GMT+0000 | Buy now →Check current price |
| KUPERIA KU1Y | Lightest pole sander |
| $210.00as of Nov 18, 2026 3:56 am GMT+0000 | Buy now →Check current price |


Prices are Amazon’s listed prices as of the time shown and change often; check Amazon for today’s price. As an Amazon Associate we earn from qualifying purchases.
Repairing Nail Holes, Dents and Small Holes
Nail Holes and Dents
For picture-hanging holes and shallow dents, a lightweight spackling compound is fast and shrinks very little. Overfill slightly with a putty knife, let it dry, sand lightly flush and spot-prime before painting. Unprimed patches often “flash,” showing a dull or shiny spot through the topcoat.
Deeper dents, such as a furniture corner gouge, may need two thin coats rather than one thick one. Thick fills of ordinary compound tend to shrink and crack as they dry.
Holes Up to About Four Inches
Self-adhesive mesh patches work for small holes. Clean up the edges, apply the patch, then cover it with two or three thin coats of joint compound, feathering each coat a few inches wider than the last. The goal is a gentle hump that disappears under paint, not a ridge.
The traditional “California patch” (also called a butterfly or hot patch) is another option. Cut a piece of drywall a couple of inches larger than the hole on all sides, score and snap away the gypsum core around the edges so the paper face extends like a flange, trim the hole to fit the remaining core, butter the edges with compound, press it in and embed the paper flange. It avoids mesh and works well for holes up to roughly the size of a hand.
Larger Holes and Cut-Outs
Bigger openings need solid backing. Common approaches:
- Square up the hole with a drywall saw, checking for wires and pipes first.
- Screw wood strips or furring behind the opening, or extend the opening to the nearest studs so the new piece can fasten to framing.
- Cut a replacement piece of the same thickness, typically 1/2 inch on walls in most houses, and screw it to the backing.
- Tape the seams with paper or mesh tape, then apply a bedding coat, a fill coat and a finish coat, feathering wider each time.
- Sand between coats, prime the whole patch and paint.
Damaged Outside Corners and Ceilings
Dented or cracked outside corners, common in hallways and on stair walls, usually mean the metal or paper-faced corner bead underneath has been bent. Small dents can be filled; a crushed or loose section should be cut out with a hacksaw and utility knife, replaced with a matching length of new bead, and feathered out with several coats. Ceiling repairs follow the same steps as walls but are harder on the arms and the eyes, so a stable platform and good lighting matter. On ceilings, use screws rather than nails, since ceiling boards carry their own weight plus any insulation laid on top of them.
Setting-type compound (the powder that you mix with water, sold with working times such as 20 or 45 minutes) hardens chemically, shrinks less and is useful for first coats on bigger repairs. Premixed lightweight compound is easier to sand for final coats.
Fixing Cracks at Seams, Corners and Openings
Cracks are the drywall repair that homeowners most often get wrong, because the instinct is to smear compound over the line. That rarely lasts.
Seam and Corner Cracks
Straight cracks along tape joints, or along inside corners where walls meet ceilings, usually mean the tape has lost its bond or the joint is flexing. The durable fix is to cut away loose tape, re-tape with fresh paper tape bedded in compound, and refinish. At inside corners where the wall meets a ceiling, some movement may be ongoing, especially with roof trusses that lift slightly in winter; flexible corner bead or a crown molding attached only to the ceiling or wall can hide that recurring crack.
Cracks from Door and Window Corners
Short diagonal cracks off the corners of doors and windows are common because those corners concentrate stress. Narrow, stable cracks can be routed open slightly, taped and refinished. Cracks that keep widening, that come with doors that stick or no longer latch, or that show one side of the wall out of plane with the other are a different matter. The guide to wall cracks explains how to tell cosmetic patterns from structural warning signs and how to monitor a crack over a few months.
Along the Front Range, expansive clay soils in parts of Douglas, Arapahoe, Jefferson and El Paso counties can push foundations up or let them drop, and the first visible signs are often drywall cracks upstairs. If cracks return after repair or appear alongside sloping floors or gaps at trim, read up on foundation settlement before spending money on cosmetic work. A structural engineer, not a drywall contractor, should judge whether the structure is moving.
Water-Damaged Drywall: Patch or Replace?
Gypsum board tolerates a brief splash, but its paper facing and core lose strength once they stay wet. The U.S. Environmental Protection Agency advises drying water-damaged areas and items within 24 to 48 hours to prevent mold growth, and notes that absorbent or porous materials may have to be thrown away if they become moldy, because mold can fill crevices in those materials and be difficult or impossible to remove completely.
Signs the Drywall Should Be Replaced
- The board is soft, sagging, crumbling or swollen when pressed.
- The paper face is delaminating or blistering.
- There is visible mold growth on the face or a musty odor from the cavity.
- It stayed wet for more than a couple of days, or the water was contaminated, such as sewage or floodwater.
- Insulation behind it is soaked.
When only a stain remains, the board is firm and a moisture meter confirms the area is dry, sealing with a stain-blocking primer and repainting is often enough. When in doubt, cut out the damaged area a little past the visible stain, inspect the cavity, and replace. In basements after a flood, restoration crews commonly remove the lower section of drywall, a practice often called a flood cut, so the wall cavity can dry.
The EPA also advises against painting or caulking over moldy surfaces, noting that paint applied over mold is likely to peel. Clean up and dry first. For hidden growth inside wall cavities, the guide to mold behind drywall covers warning signs and how inspectors check for it, and the overview of water damage restoration explains what professional drying involves and when insurance may be involved. The EPA suggests that a moldy area under about 10 square feet can usually be handled by a homeowner following its guidelines, while larger areas or extensive water damage call for its professional remediation guidance.
Asbestos in Older Joint Compound and Texture
This is the step that is easy to skip and expensive to get wrong. The EPA lists textured paint and patching compounds used on walls and ceilings among the places asbestos may be found. Homes built or remodeled before the 1980s, which includes a large share of houses in established Denver, Aurora, Lakewood and Colorado Springs neighborhoods, may have asbestos in joint compound, wall texture or popcorn ceilings.
Undisturbed, intact material generally poses little risk. Sanding, cutting or scraping it can release fibers. The EPA advises not to saw, sand, scrape or drill materials that may contain asbestos, and recommends that sampling be done by a trained and accredited asbestos professional rather than by homeowners, because sampling done incorrectly can be more hazardous than leaving the material alone.
Practical approach for older homes:
- For a small nail hole, skim-filling without sanding through old compound is low disturbance.
- For anything involving cutting out drywall, sanding old joints or scraping texture, have the material tested first.
- If results come back positive, talk with a licensed abatement contractor about the scope of work.
The guide to what asbestos drywall looks like explains why visual identification is unreliable and what lab testing involves.
Dust Control and Texture Matching
Keeping Dust Contained
Drywall dust from modern compound is a nuisance more than a hazard for most people, but it travels everywhere and clogs HVAC filters. A few habits help:
- Close the room off with plastic sheeting and tape over supply and return vents.
- Use a sanding sponge (damp sanding) for small patches, or a sander connected to a shop vacuum with a fine filter for larger areas.
- Wear a well-fitted dust mask or respirator.
- Clean with a HEPA-filtered vacuum and damp cloths rather than a broom.
- Check or change the furnace filter after a big drywall job.
Matching Wall and Ceiling Texture
Most Colorado tract homes have some texture: orange peel, knockdown or a light skip-trowel finish. A smooth patch in a textured wall stands out under raking light. Aerosol texture cans in orange peel and knockdown patterns work for small areas; practice on scrap cardboard first and apply light coats. Knockdown is applied as splatter and then flattened with a wide knife once it starts to set. For larger areas, a hopper gun and compressor give more control. Prime over the texture, then paint the whole wall section, corner to corner, so the sheen blends.
Drywall Repair Costs
Pricing varies by market, job size and how many trips a contractor needs to make, because joint compound needs drying time between coats. Rough ranges:
| Repair | DIY materials | Professional (rough range) |
|---|---|---|
| Nail holes, small dents | Under $20 | Often bundled into a minimum service charge, roughly $100–$250 |
| Doorknob-size hole | About $15–$40 | Roughly $150–$350 including texture and paint touch-up |
| Large hole or replaced section | About $30–$80 | Roughly $250–$800, depending on size and finish |
| Water-damaged ceiling or wall section | Varies | Often several hundred to a few thousand dollars, plus leak repair and any mold work |
Asbestos testing, abatement, mold remediation and the plumbing or roofing repair behind a water stain are separate costs. Many drywall contractors have trip minimums, so bundling several small repairs into one visit can lower the per-repair price.
When to Call a Professional
DIY is reasonable for small holes, dents and stable hairline cracks in newer homes. Bring in help when:
- Cracks keep reopening, are getting wider, or come with sticking doors or sloping floors.
- There is active moisture, a soft wall or ceiling, or visible mold over a significant area.
- The house predates the 1980s and the work involves sanding, cutting or scraping old compound or texture.
- A ceiling is sagging or bulging, which can be a collapse risk if water is pooling above.
- The repair is large or high, and a seamless finish matters, such as before listing a home.
For buyers, drywall damage is a clue rather than a final answer. Under the American Society of Home Inspectors Standard of Practice, inspectors inspect walls, ceilings and floors but are not required to report cosmetic imperfections that do not affect a component’s function. A good inspector will still call out stains, cracks and patched areas that hint at past leaks or movement. The guide to hiring a home inspector explains what a standard inspection covers, and the page on specialty inspections covers add-ons such as mold or asbestos testing when the drywall raises questions.
References
- A Brief Guide to Mold, Moisture and Your Home — U.S. Environmental Protection Agency
- Mold Cleanup in Your Home — U.S. Environmental Protection Agency
- Learn About Asbestos — U.S. Environmental Protection Agency
- Protect Your Family from Exposures to Asbestos — U.S. Environmental Protection Agency
- ASHI Standard of Practice for Home Inspections — American Society of Home Inspectors
Frequently asked questions
Can I patch drywall myself?
Most small repairs, such as nail holes, dents and holes up to a few inches, are manageable with spackle or joint compound, a mesh patch or a California patch, and some sanding and paint. Larger holes need backing, and repeat cracks or water damage should be investigated before patching.
When should water-damaged drywall be replaced?
Replace drywall that is soft, sagging, crumbling, delaminating or moldy, or that stayed wet for more than a day or two. The EPA notes porous materials may need to be discarded if they become moldy. A firm, dry board with only a stain can often be primed and painted.
Is it safe to sand old drywall compound?
Not without testing in older homes. The EPA lists patching compounds and textured paint among materials that may contain asbestos. In houses built or remodeled before the 1980s, have an accredited professional sample the material before sanding, cutting or scraping.
How much does drywall repair cost?
Small DIY repairs often cost under $40 in materials. Professional repairs commonly range from about $100 to $800 depending on size, texture and paint, and many contractors have a minimum charge. Water damage, mold or asbestos work adds separate costs.
Why do drywall cracks keep coming back?
Recurring cracks usually mean ongoing movement, such as framing shrinkage, seasonal truss movement or foundation settlement. Re-taping helps with joint failures, but cracks that widen or come with sticking doors deserve an evaluation by a structural engineer.
Seeing cracks or stains in a home you are about to buy? Reach out through our contact page and we can connect you with a Front Range inspector who will document what the drywall is telling you about leaks and movement.