Skim Coating Walls: Smoothing Damaged Drywall and Plaster
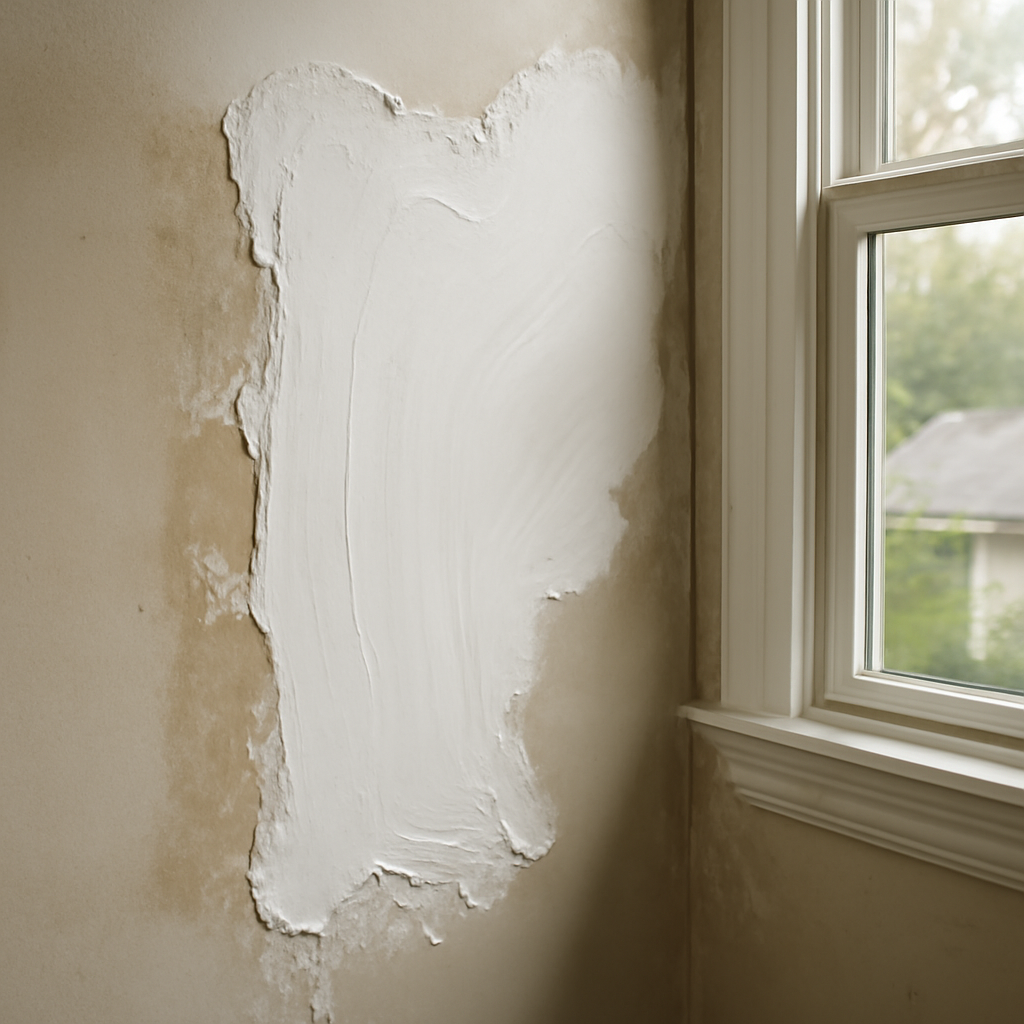
Walls rarely fail all at once. They collect years of nail holes, torn paper from removed wallpaper, patched cracks, uneven texture and old repairs that never quite blended in. A skim coat is the finisher’s answer to that kind of tired surface: one or more thin layers of joint compound or plaster spread across an entire wall or ceiling to create a new, uniform surface that takes paint evenly. It is a common step in remodels and in older homes, but it is not a cure-all. Skim coating hides surface damage; it does not fix loose plaster, structural cracking, active leaks or mold. And in older houses, the sanding involved raises questions about lead paint and asbestos that should be answered before any dust flies. This guide covers what a skim coat is, when it makes sense, how the process generally works, safety checks for older walls, when replacement beats skimming and typical Front Range costs.
Part of our Structure & Exterior guide — start there for the full picture →
What a Skim Coat Is
A skim coat is a thin layer of material, usually drywall joint compound, sometimes veneer plaster, applied over a whole surface rather than just over seams and patches. The goal is to bury surface defects and give the wall or ceiling a consistent texture and porosity so paint looks uniform. Finishers typically apply two or three thin coats, letting each dry, then sand or knock down ridges between coats.
The material choice matters. Ready-mixed all-purpose or lightweight compounds are common for skim work because they spread easily, while setting-type compounds that harden by chemical reaction are often used for filling deeper damage first because they shrink less and set faster. Veneer plaster systems are used by some plasterers over blue board or bonded plaster for a harder surface. Our guide to drywall mud explains the differences between compound types and how each behaves.
Skim coat versus spot patching
Spot patching fills individual holes and cracks, then feathers each patch into the surrounding wall. It is faster and cheaper when damage is limited. The trouble with many patches is that they show through paint: patched areas absorb paint differently, catch light at a low angle and reveal edges. A full skim coat treats the entire surface the same way, which is why it is often chosen for walls that will be painted in an eggshell or satin finish or lit by strong side light from windows.
When a Skim Coat Makes Sense
Skim coating is a good fit for surfaces that are structurally sound but cosmetically rough. Common situations include:
- Damage from wallpaper removal. Torn drywall face paper, adhesive residue and gouges are classic reasons to skim. Torn paper is usually sealed with a primer designed for that purpose before compound goes on, since compound applied directly to exposed gypsum paper can bubble.
- Removing or changing texture. Homeowners updating from heavy knockdown, orange peel or older swirl textures to a smooth finish often skim coat rather than replace drywall.
- Many small repairs. Walls with dozens of anchor holes, patched cracks and dings from years of use.
- Old plaster with fine crazing. Plaster walls with surface checking or spider-web cracks, where the plaster itself is still firmly attached to its lath.
- Poorly finished new drywall. Visible seams, ridges and uneven sheen from a rushed tape-and-finish job.
- Mismatched surfaces after remodeling. Where new drywall meets old plaster or a different texture.
When skimming is the wrong fix
A skim coat bonds to whatever is underneath it. If that substrate is failing, the new surface will fail too. Skim coating is a poor choice, or at least only part of the answer, when:
- Plaster is loose from the lath. Plaster that moves when pressed, sounds hollow or bulges needs to be reattached with plaster washers or adhesive, or removed and replaced. Our guide to plaster wall repair covers those techniques.
- Cracks are active. Cracks that reopen, widen over time or come with sticking doors, sloping floors or foundation cracking may reflect framing or soil movement. Common on expansive clay soils in parts of the Denver metro and Colorado Springs area, such cracks will usually telegraph through a skim coat. Our guide to ceiling cracks explains which patterns warrant a structural evaluation.
- Drywall is water damaged or soft. Wet, crumbling or sagging drywall needs the leak fixed and the damaged material replaced.
- There is mold growth. Discussed below.
- Corners and edges are damaged. Loose or cracked corner bead should be repaired first; see our guide to drywall corner bead.
How Skim Coating Generally Works
Methods vary between finishers, and product instructions should always govern. The overall sequence usually looks like this:
- Assess and test. In older homes, confirm whether paint and compound contain lead or asbestos before any sanding or scraping (see the next section).
- Protect the room. Cover floors, remove or cover furniture, mask trim, outlets and switches, and seal off the work area.
- Repair the substrate. Reattach loose plaster, cut out and replace damaged drywall, fix corner bead and fill deep holes with a setting-type compound.
- Seal problem surfaces. Prime torn paper, glossy paint or stains with a suitable primer so the compound bonds and stains do not bleed through.
- Apply the first coat. Spread thinned compound with a roller or wide knife, then flatten it with a large knife or trowel, working in sections.
- Apply additional coats. After drying, knock down ridges and apply a second, and if needed third, thin coat, often in a different direction.
- Sand and inspect. Sand lightly, check the surface with a work light held at a low angle, and touch up low spots.
- Prime and paint. New compound is porous and generally needs a primer before finish paint for an even sheen.
Skim coating is a skill that rewards practice. Professionals use wide knives, trowels and sometimes spray rigs to get large areas flat quickly, while first-time DIYers often find that keeping the coats thin and even across a full wall takes longer than expected. For a small damaged section rather than a whole wall, our guide to drywall repair may be a better starting point.
Skim coating ceilings
Ceilings are harder than walls. Working overhead is tiring, compound drips, and a ceiling lit by a window at one end shows every ridge. Many Front Range homes built from the 1960s through the 1980s have sprayed “popcorn” or acoustic ceiling texture, and homeowners often want to scrape it off and skim the ceiling smooth. That texture is one of the materials that should be tested for asbestos before it is scraped, wetted or sanded, as discussed below. Ceilings with sagging drywall, nail pops along every joist or water stains also need those conditions addressed before skimming, since a new coat will not hold up a sagging board or stop a leak.
Level 5 finishes
Drywall finishing is commonly described in levels, with Level 5 being the highest: a thin skim coat applied over the entire surface after taping and finishing. It is often specified where walls will receive glossy paint, dark colors or strong side lighting from large windows, conditions where ordinary finishing tends to show seams and texture differences. In that sense, a skim coat is not only a repair technique but also the top tier of new-construction finishing. Buyers comparing new homes may see the term in builder specifications for upgrade packages.
Dust control
Sanding a skimmed wall produces a large amount of fine dust. Even when no hazardous materials are present, it is worth containing: close off the room with plastic sheeting, turn off forced-air heating or cooling and cover vents, use sanding sponges or wet-sanding where possible, and use a vacuum with a HEPA filter or a sander with a dust extractor. A well-fitted respirator is better protection than a basic dust mask. Thin, careful coats reduce how much sanding is needed in the first place. Some finishers also use low-dust compounds, which are formulated so sanding dust falls rather than floating, though they still call for containment and cleanup with a HEPA vacuum afterward.
Lead Paint and Asbestos Before Sanding
Skim coating itself adds new material, but the preparation often disturbs old paint and old compound. Scraping loose paint, sanding glossy surfaces for adhesion, cutting out damaged areas and sanding between coats can all release dust from the original wall.
Lead-based paint
The U.S. Environmental Protection Agency notes that the federal government banned the sale of lead-based paint for use in homes in 1978, and that approximately three-quarters of the homes in the United States built before 1978 still contain some lead-based paint. EPA says any renovation, repair or painting project in a pre-1978 home or building that has lead-based paint can easily create dangerous lead dust.
Under EPA’s Renovation, Repair and Painting (RRP) Rule, anyone paid to perform work that disturbs painted surfaces in homes built before 1978 must be certified and trained in lead-safe work practices. EPA says the rule generally does not apply to homeowners working in their own homes, but it does apply to landlords, home-based childcare operators and people who buy, renovate and sell homes for profit. For do-it-yourselfers, EPA recommends hiring a certified lead inspector or risk assessor to test surfaces before work begins, and if the home’s age cannot be determined, assuming lead-based paint is present. EPA’s DIY lead-safe practices include containing the work area with plastic sheeting, turning off forced-air systems and covering vents, misting surfaces before sanding or scraping, using wet-dry sandpaper or sanding sponges and HEPA vacuums, and cleaning thoroughly when work is complete.
Asbestos in old compound and texture
EPA lists “textured paint and patching compounds used on walls and ceilings” among the places asbestos may be found in homes. Older Front Range houses with original textured walls or ceilings, or with layers of patching from decades past, may contain it. You generally cannot tell by looking, so the safe approach is to have suspect materials sampled by a trained and accredited asbestos professional before sanding or removing them. Covering intact material with a new skim coat without sanding may be an option in some cases, but that decision belongs with a professional who knows what is in the wall.
Mold-Damaged Drywall Should Be Replaced, Not Skimmed
It can be tempting to skim over a stained or spotted wall and paint it. When the staining is mold growth, that approach tends to fail. EPA’s guidance on mold in homes says the key to mold control is moisture control, that water-damaged areas should be dried within 24 to 48 hours to prevent mold growth, and that absorbent or porous materials may have to be thrown away if they become moldy because mold can grow in their empty spaces and crevices. EPA also says not to paint or caulk moldy surfaces, and that paint applied over moldy surfaces is likely to peel.
Drywall is porous, and its paper facing is a food source for mold. The practical sequence is to find and fix the source of moisture, remove and replace the affected drywall, dry the framing, and only then finish and skim the new surface to match the rest of the wall. EPA’s homeowner guidance indicates that most people can handle cleanup of areas smaller than about 10 square feet, while larger areas or significant water damage call for following its remediation guidance or hiring an experienced contractor. In basements and bathrooms, adding ventilation or a dehumidifier helps prevent a repeat.
What Inspectors Notice
The ASHI Standard of Practice requires home inspectors to inspect walls, ceilings and floors but does not require them to inspect paint, wallpaper and other finish treatments. A fresh skim coat and paint job in a house that is for sale can be perfectly legitimate, but inspectors will often look harder at newly finished areas for signs of what might be underneath: staining at the edges of a ceiling, moisture readings that are higher than nearby walls, cracks that have already started to reappear, or bulging that suggests loose plaster. Buyers can ask the seller what work was done and why. Inspectors do not test for lead or asbestos as part of a standard home inspection.
Skim Coat Costs
Costs vary widely with the size of the area, the condition of the existing surface, ceiling height, the number of coats and local labor rates. As rough 2026 guidance for the Front Range, offered as general ranges rather than quotes:
- DIY materials: joint compound, primer, sanding supplies and basic tools are relatively inexpensive for a single room, though wide knives, trowels and a good work light add to the start-up cost.
- Professional skim coat, single wall or small room: often in the hundreds of dollars, sometimes with a minimum charge because each coat needs drying time and a return trip.
- Whole rooms or ceilings: commonly priced per square foot and can reach well into the thousands for large areas, ceilings, stairwells or multiple coats.
- Substrate repair: reattaching plaster, replacing damaged drywall or fixing corners is usually priced separately.
- Testing and lead-safe work: lead and asbestos testing are separate costs, and lead-safe or asbestos-related work practices add labor and cleanup time.
- Painting: priming and painting may or may not be included in a drywall finisher’s quote.
Comparing quotes is easier when each one spells out the area, number of coats, surface preparation, whether testing has been done, how dust will be contained and whether priming and painting are included. For walls with extensive damage, ask for a price comparison between skimming and replacing the drywall outright; in some cases new drywall is comparable in cost and produces a sounder result.
Our main guide to hiring a home inspector explains what inspections cover, and the structure and exterior section covers framing, foundations and moisture issues that can show up in interior walls.
References
- Lead Renovation, Repair and Painting Program — U.S. Environmental Protection Agency
- Lead-Safe Renovations for DIYers — U.S. Environmental Protection Agency
- Learn About Asbestos — U.S. Environmental Protection Agency
- A Brief Guide to Mold, Moisture and Your Home — U.S. Environmental Protection Agency
- ASHI Standard of Practice for Home Inspections — American Society of Home Inspectors
Frequently asked questions
What is a skim coat?
A skim coat is a thin layer of joint compound or plaster spread over an entire wall or ceiling to hide surface defects and create a uniform surface for paint. Finishers typically apply two or three thin coats, sanding lightly between them.
Can you skim coat over plaster walls?
Yes, if the plaster is firmly attached to its lath. Loose, bulging or hollow-sounding plaster needs to be reattached or replaced first, or the skim coat will crack and fail along with it.
Is it safe to sand walls in an older home before skim coating?
Homes built before 1978 may have lead-based paint, and older patching compounds and textures may contain asbestos. Have suspect surfaces tested before sanding or scraping, and use lead-safe practices or certified contractors.
Can you skim coat over mold?
No. EPA advises against painting over moldy surfaces and notes porous materials may need to be discarded. Fix the moisture source, replace the moldy drywall, then finish the new surface.
How much does a skim coat cost?
A single wall or small room often costs in the hundreds of dollars professionally, while whole rooms and ceilings can reach the thousands. Substrate repairs, testing and painting are often extra. These are general 2026 ranges.
Freshly skimmed and painted walls in a house you are about to buy? Talk with us about connecting with a Front Range inspector who can check for hidden moisture, cracking and other conditions behind the new finish.