Floating Vanities: Wall Blocking, Plumbing and Leak Checks
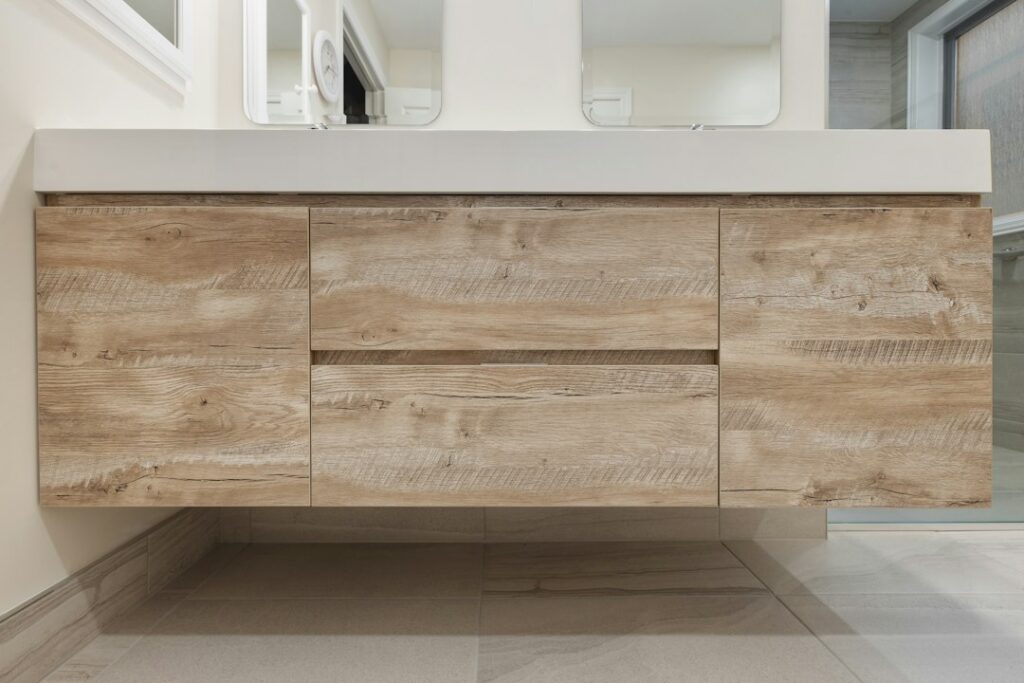
A floating vanity hangs on the wall with open floor space beneath it, which makes a small bathroom feel larger and makes the floor easier to clean. That clean look depends on work nobody sees once the job is finished: framing that can carry the cabinet, the countertop and the people who lean on it, plumbing roughed in at heights that fit the cabinet, and a way to reach the shutoff valves and trap later. A floating vanity also changes how leaks behave. With a floor-standing cabinet, a slow drip usually shows up on the cabinet floor; with a wall-hung unit, water can run down inside the wall cavity instead. This guide covers what homeowners and buyers should know about wall blocking and load, rough-in heights, hidden leaks, access, electrical considerations near the sink and typical costs. Plumbing and electrical changes generally need licensed trades, and many Colorado jurisdictions require permits for that work.
Part of our Plumbing & Water guide — start there for the full picture →
Planning a bathroom or kitchen remodel? Talk to a local remodeler.
📞 Call (844) 791-3031What a Floating Vanity Is and How It Differs
A floating vanity, also called a wall-hung or wall-mounted vanity, is a sink cabinet that attaches to the wall with no legs or toe kick touching the floor. Most are hung with a steel or aluminum rail, a French cleat or heavy lag screws driven through the back of the cabinet into the framing. The bottom of the cabinet typically sits several inches to a foot or more above the floor, and the countertop lands at roughly the same height as a standard vanity, often somewhere between about 30 and 36 inches.
Compared with a conventional cabinet, a floating vanity differs in four practical ways:
- The wall carries everything. A standard vanity rests its weight on the floor. A wall-hung vanity transfers the cabinet, the top, the sink, water in the basin and any downward force from a person leaning on it into the wall framing.
- Plumbing must fit inside a shallower box. Floating cabinets are often drawer-based with a cutout for the trap, so the drain and supply lines need to land in a narrower zone than with an open sink base.
- Leaks have a different path. Water from a loose fitting can follow the pipe back into the wall rather than pooling where it is easy to see.
None of this makes a floating vanity a poor choice. It means the planning has to happen before the drywall goes up, not after the cabinet arrives.
Wall Blocking and Load: The Part That Matters Most
Drywall alone cannot hold a vanity. Hollow-wall anchors, even heavy toggle bolts, are not a substitute for fastening into wood or metal framing designed for the load. The standard approach is solid blocking, typically horizontal 2x lumber installed between the studs at the height of the mounting rail and often again near the bottom of the cabinet, so the installer can drive structural screws or lags anywhere along the width of the vanity rather than only where studs happen to fall.
How much weight is involved
The total load is easy to underestimate. A wide wood cabinet with a stone or quartz top and an integrated or undermount sink can weigh well over a hundred pounds before anyone touches it. Add water in the basin, toiletries in the drawers and the leverage of an adult leaning on the front edge, and the forces at the top fasteners are considerable, because the cabinet acts like a lever pulling away from the wall. Manufacturers usually publish mounting instructions with fastener type, spacing and sometimes a rated load. Following those instructions, and not improvising with whatever anchors are on hand, is the best guide to what the cabinet needs.
Signs of inadequate support
During a walkthrough or home inspection, these are the clues that a floating vanity may not be properly supported:
- The front edge sits lower than the back, or the countertop is no longer level side to side.
- A gap has opened between the top of the backsplash or cabinet and the wall.
- Cracked caulk or grout along the wall joint, especially if it reopens after being re-caulked.
- The cabinet moves or creaks when light pressure is applied to the front edge.
- Drywall cracking or nail pops around the cabinet perimeter.
Movement is more than a cosmetic issue. A cabinet that shifts flexes the drain and supply connections every time it moves, and that repeated stress is a common source of slow leaks.
Drain and Supply Rough-In Heights
With a standard sink base, a plumber has a lot of flexibility because the cabinet is open from the floor up. A floating vanity changes that. The trap, drain arm and supply stops must fit within the cabinet’s interior, often inside a U-shaped drawer cutout, and the bottom of the cabinet sits off the floor. If the drain stub-out is too low, the trap may hang below the cabinet or not fit at all.
A common target for a vanity drain stub-out is somewhere around 18 to 20 inches above the finished floor for a conventional cabinet, but floating vanities frequently need it higher, and the right number depends on the cabinet’s mounting height, the depth of the sink bowl and the drawer configuration. Supply stubs typically sit a few inches above the drain and spread to either side. Because these figures vary by product, the cabinet should be selected before the rough-in, and the plumber should work from the manufacturer’s specification sheet. Moving a drain several inches higher is straightforward with the wall open and an expensive change once tile is installed.
The drain also needs proper slope back to the vent and a correctly configured trap. The guide to P-traps explains why the trap seal matters and what problems look like, including S-traps, missing vents and traps that siphon dry. Space-saving traps marketed for floating vanities exist, and some work well, but whatever is installed should be a listed product and should maintain a water seal.
For the cabinet installation sequence itself, including leveling, securing and connecting the top, the vanity installation guide covers the general steps that also apply to wall-hung units.
Hidden Leaks Behind a Wall-Hung Vanity
Leaks are the biggest long-term risk with any vanity, and the floating design can make them harder to catch early. A drip at a compression fitting or slip nut may run back along the pipe into the wall cavity, wet the bottom plate or subfloor, and never puddle visibly inside the cabinet. By the time someone notices a stain on the ceiling below, a swollen baseboard or a musty smell, the leak may have been active for months.
The U.S. Environmental Protection Agency’s guidance on mold makes the connection directly. In its brief guide on mold and moisture, the EPA states that the key to mold control is moisture control, advises fixing plumbing leaks and other water problems as soon as possible, and notes that if wet or damp materials are dried within 24 to 48 hours after a leak, in most cases mold will not grow. The same guide lists areas inside walls around leaking or condensing pipes among the possible locations of hidden mold. The EPA’s mold course adds that mold can grow on materials such as wood and paper and, if left unchecked, can eventually cause structural damage to building materials.
How to catch leaks early
- Look up and down. Check the underside of the cabinet, the wall below it and the ceiling of any room directly beneath the bathroom.
- Feel the bottom of the drawer box and the cutout area. Dampness, swelling or delamination of the cabinet material is an early sign.
- Run water with the stopper closed, then release it. A full basin draining at once stresses the trap and tailpiece connections more than a trickle does.
- Consider a leak sensor. A small battery-powered water sensor on the floor under the cabinet or inside the drawer cutout costs little and can alert before damage spreads.
- Watch the caulk line. Water splashing over the backsplash and getting behind it is a separate path into the wall that is easy to overlook.
Where moisture damage is suspected, a moisture meter or thermal imaging during an inspection can help locate wet areas without opening the wall, though confirming the source often still requires removing the cabinet or cutting an access opening.
Access to Shutoffs, the Trap and the Drain
Every sink should have individual shutoff valves, and those valves need to be reachable. Drawer-style floating vanities sometimes hide the stops behind a drawer box that must be pulled out completely, or the stops end up below the cabinet in plain view. Neither is ideal, but both are better than stops trapped behind a fixed panel. Before buying, check how the drawers come out and whether the stops, the trap and the faucet connections can be reached without removing the cabinet from the wall.
Older multi-turn valves are known to seize or fail to close fully after years without use. Many plumbers prefer quarter-turn stops when they are already working on a vanity. Supply lines should be in good condition, without kinks, corrosion or bulging, and should be the correct length so they are not stretched tight. Replacing aging braided supply lines during a remodel is inexpensive insurance.
The drain assembly should also come apart for cleaning. Slip-joint traps are designed for this, and a clogged or slow bathroom sink drain is far easier to clear when the trap can be reached. If the faucet will be upgraded at the same time, the bathroom faucet replacement guide explains what is involved and why faucet connections are a common leak point.
Electrical Near the Sink: GFCI and Lighting
Floating vanities often come with lighting under the cabinet, inside drawers or behind a mirror, and many bathrooms add outlets inside drawers for hair tools. Any electrical work near a sink belongs with a licensed electrician, and the details depend on the code edition your jurisdiction has adopted. In general terms, bathroom receptacles are commonly required to have ground-fault circuit interrupter (GFCI) protection under current model codes, and adding a new outlet or hardwired light usually triggers a permit.
A few points are worth checking during a remodel or purchase:
- Test GFCI protection. Press the test button on the outlet or its upstream GFCI; power should cut off and restore when reset. A device that does not trip should be evaluated.
- Under-cabinet LED strips. Plug-in strips with a transformer hidden inside the cabinet should be rated for the location and should not sit where water can drip onto them.
- In-drawer outlets. These are specialized listed products with heat-management features for hot styling tools. A standard receptacle installed inside a drawer is not the same thing.
- Vanity lights. The fixture above or beside the mirror should be rated for the location, especially if it sits close to a shower. The vanity light guide covers fixture placement and wet and damp ratings.
The ASHI Standard of Practice lists GFCI devices among the electrical components a home inspector inspects, along with a representative number of lighting fixtures, switches and receptacles. That means a standard inspection should flag a bathroom outlet that lacks GFCI protection or fails to trip, though it will not evaluate every specialty product inside the cabinet.
What a Home Inspection Covers on a Floating Vanity
Under the ASHI Standard of Practice, a home inspector inspects interior water supply and distribution systems, including fixtures and faucets, and interior drain, waste and vent systems, including fixtures. In practice, that means running water at the vanity, checking for functional drainage, looking for active leaks at accessible connections and noting visible water damage, rust or staining. Inspectors also describe the location of main water shutoff valves, which is worth knowing in any home with wall-hung fixtures.
A standard inspection has limits. The inspector does not open walls, so the condition of the blocking behind a floating vanity is usually inferred from how the cabinet behaves rather than seen directly. Signs like sag, movement, cracked caulk and staining below the cabinet are what point to a deeper problem. If a vanity shows those signs, a follow-up by a carpenter or plumber who can remove the unit is the logical next step. The plumbing and water hiring hub explains which specialists to call for plumbing concerns found during an inspection.
What Floating Vanity Installation Typically Costs
Costs vary widely by cabinet quality, countertop material, how much of the wall must be opened and local labor rates. The following are general 2026 ranges for the Front Range and should be treated as rough planning figures, not quotes:
- The cabinet and top. Ready-made floating vanities with an integrated top often run from a few hundred dollars to around $1,500. Custom cabinetry with a stone or quartz top can cost several thousand dollars or more.
- Swapping a floor-standing vanity for a floating one. Labor commonly falls in the several-hundred to low-thousands range when the wall must be opened for blocking and the drain raised, plus drywall or tile repair.
- Replacing an existing floating vanity of similar size. If the blocking and rough-in are already correct, labor is often closer to a standard vanity swap.
- Leak damage discovered during removal. Subfloor or framing repair, drying and any mold cleanup can add significantly, which is one reason to budget a contingency.
For broader budgeting, the bathroom remodel cost guide places a vanity change in the context of a full or partial remodel. When getting quotes, ask each contractor how they will support the cabinet, whether the drain height will be adjusted, who pulls the permit and how the stops will be accessed after installation.
Practical Checklist Before Installing or Buying
- Choose the exact cabinet first and give the plumber the specification sheet for rough-in heights.
- Install continuous solid blocking at the rail height and, ideally, near the bottom of the cabinet.
- Confirm the trap, stops and supply lines are reachable without removing the cabinet.
- Fill and drain the basin several times after installation and check every connection.
- Place a water sensor under the cabinet and check the ceiling below periodically.
- Verify GFCI protection on bathroom receptacles and test it monthly.
- When buying a home, press gently on the front edge of any floating vanity and note movement, sag or staining.
A floating vanity installed with solid blocking, correct rough-in heights and accessible plumbing can perform as well as any standard cabinet. Most problems trace back to support or access that was not planned before the wall was closed. For help sorting out the right specialists for a bathroom project or home purchase, the hiring process guide explains how to vet inspectors and contractors.
More Questions About Floating Vanities
Are floating vanities harder to install than standard vanities?
Yes, floating vanities are usually harder to install than floor-standing vanities. The cabinet hangs entirely from the wall, so it needs solid blocking or a mounting rail tied into the framing, an accurate level line and plumbing roughed in at heights that suit the higher cabinet. In a remodel, that often means opening drywall to add blocking and move drain and supply lines. A standard vanity, by contrast, sits on the floor and hides most plumbing inside its box. Many homeowners hire a carpenter or plumber for the wall preparation, then handle finish work themselves.
Can a floating vanity hold a stone countertop?
A floating vanity can hold a stone countertop if the cabinet, mounting hardware and wall blocking are rated for the weight. Natural stone and quartz tops are heavy, and the load grows when someone leans on the counter. The manufacturer’s installation instructions usually list the required fasteners and a maximum load, and those limits should be followed exactly. Heavy tops are typically paired with continuous horizontal blocking across several studs and, for wide vanities, concealed steel brackets. Anchors into drywall alone are not suitable for stone.
Are floating vanities a good choice for small bathrooms?
Yes, floating vanities often work well in small bathrooms. Leaving the floor visible underneath makes a room feel larger, and the open space makes mopping easier and leaves room for a scale or step stool. The tradeoffs are less storage than a full-height cabinet and exposed plumbing access that must be planned so the trap stays hidden. Many small-bath designs pair a shallow floating vanity with a recessed medicine cabinet or a wall shelf to make up for the lost storage.
Can you turn an existing vanity into a floating vanity?
Converting an existing floor-standing vanity into a floating one is possible but rarely simple. The cabinet must be strong enough to hang, the wall needs added blocking, and the drain and supply lines may need to move up so they fit inside the raised cabinet. The flooring under the old vanity may also be missing or unfinished, which creates a gap to patch. In many cases it is cheaper and safer to buy a cabinet designed for wall mounting than to modify one built to rest on the floor.
References
- A Brief Guide to Mold, Moisture and Your Home — U.S. Environmental Protection Agency
- Mold Course Chapter 2: Why and Where Mold Grows — U.S. Environmental Protection Agency
- ASHI Standard of Practice for Home Inspections — American Society of Home Inspectors
Frequently asked questions
Can a floating vanity be mounted to drywall with anchors?
It should not be. Floating vanities need to be fastened into solid wood blocking or framing designed for the load, following the manufacturer's instructions. Drywall anchors are not intended to carry a cabinet, countertop and the leverage of someone leaning on it.
How high should the drain be for a floating vanity?
It depends on the cabinet. Conventional vanities often use a drain stub-out around 18 to 20 inches above the floor, but floating units frequently need it higher so the trap fits inside the cabinet. Pick the vanity first and follow its specification sheet.
Why are leaks harder to spot under a wall-hung vanity?
Water from a loose fitting can run back along the pipe into the wall cavity instead of pooling inside the cabinet. Stains on the ceiling below, swollen trim or musty odors may be the first signs, so periodic checks and a leak sensor help.
Does a home inspector check the blocking behind a floating vanity?
Not directly, because inspectors do not open walls. They test the fixture, look for leaks and water damage and note signs such as sagging, movement or cracked caulk that suggest inadequate support.
How much does it cost to install a floating vanity?
Ready-made units often cost a few hundred dollars to around $1,500, and labor to convert from a floor-standing vanity commonly runs several hundred to a few thousand dollars when blocking and drain changes are needed. These are general 2026 ranges that vary by project.
How high off the floor should a floating vanity be?
A floating vanity is usually mounted so the countertop lands at a comfortable height, commonly around 32 to 36 inches above the floor. The gap under the cabinet then depends on the cabinet depth. Taller users often prefer a higher top, and the mounting height should be set before plumbing rough-in.
Can a floating vanity be mounted on a tiled wall?
Yes, a floating vanity can be mounted on a tiled wall as long as the fasteners pass through the tile into solid blocking behind it. Holes are drilled with a tile or diamond bit, and the cabinet should be shimmed so it does not crack the tile when tightened.
Do floating vanities add value to a home?
Floating vanities can make a bathroom look more modern, which may help a home show well, but there is no reliable evidence that they add measurable resale value on their own. Buyers and inspectors pay more attention to whether the vanity is solidly mounted, level and free of leaks.
Planning a bathroom update or buying a home with wall-hung fixtures? Reach out to our team to connect with a Front Range inspector who checks vanities, drains and the moisture clues around them.