EV Charger Installation: Level 2 Costs, Panels and Permits
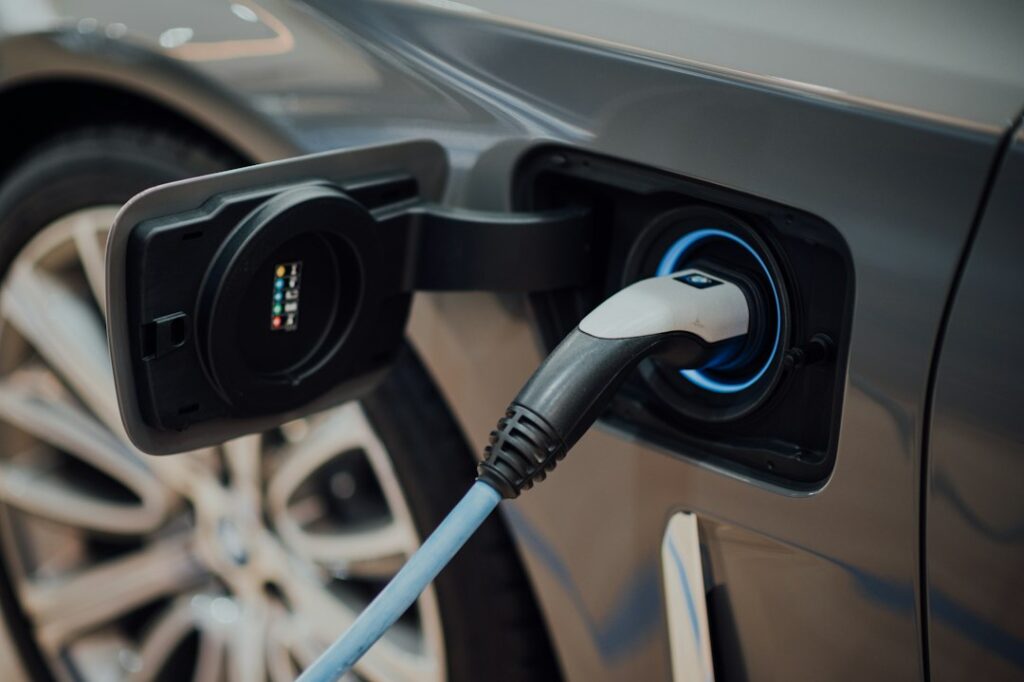
Most electric vehicle owners do the bulk of their charging at home, overnight, in a garage or driveway. That makes the home charger one of the most-used electrical appliances in the house, and one of the largest continuous loads many homes have ever carried. A well-planned ev charging installation starts with a few practical questions: how far the household drives each day, how much spare capacity the electrical panel has, where the car parks, and what the local building department requires. This guide walks through Level 1 versus Level 2 charging, circuit sizing, panel capacity and load calculations, load-management devices, hardwired versus plug-in units, permits and inspections, and what Colorado winters mean for garage and outdoor installs. Cost figures are general industry estimates, not quotes, and code details vary by jurisdiction and code edition, so confirm specifics with a licensed electrician and your local building department.
Part of our Home Electrical guide — start there for the full picture →
What Does an EV Charging Installation Involve?
For most homes, an EV charging installation means adding a dedicated 240-volt circuit from the electrical panel to a Level 2 charger mounted near where the car parks. The electrician sizes the circuit to the charger’s rated output, confirms the panel has enough capacity through a load calculation, pulls a permit, installs the wiring and breaker, mounts the charger or a receptacle, and schedules a municipal inspection. If the panel is short on capacity, the options are a load-management device, a lower charger setting, or a panel or service upgrade.
Some households need far less. A plug-in hybrid or a short daily commute can often be covered by Level 1 charging from an ordinary 120-volt outlet, using the cord set that typically comes with the vehicle. In that case the “installation” may be nothing more than confirming that the garage outlet is on a circuit that is not shared with a freezer, a shop compressor or a space heater.
The right answer depends on driving habits, the vehicle’s onboard charger, the home’s electrical service and the distance from the panel to the parking spot. Those four factors drive almost every cost and design decision that follows.
Level 1 vs Level 2 Charging
ENERGY STAR’s consumer guidance frames the choice around daily mileage and vehicle type. Level 1 chargers plug into a standard 120-volt outlet and, according to ENERGY STAR, add roughly 2 to 5 miles of range per hour of charging. Level 2 chargers run on 240 volts, need a heavy-duty circuit similar to an electric dryer’s, and add roughly 10 to 20 miles of range per hour, with faster rates possible on higher-amperage circuits. ENERGY STAR suggests Level 1 can work for drivers covering under about 40 miles a day or for plug-in hybrids, and points fully electric drivers who cover more ground toward 240-volt charging.
When Level 1 Is Enough
Level 1 suits low-mileage households. A car parked for 12 hours overnight can regain a modest amount of range, which covers many local commutes. The tradeoffs are speed and cold-weather performance. Batteries charge more slowly when they are cold, and a car sitting in an unheated Front Range garage in January may also spend some of that limited power warming the battery. A long road trip or an unexpected errand can leave a Level 1 household short.
Why Most EV Owners Choose Level 2
Level 2 charging can refill most commuting use overnight with time to spare. It also gives drivers flexibility when plans change. ENERGY STAR notes that Level 2 charging is, on average, more efficient than Level 1 while adding several times more miles per hour. For a fully electric vehicle used as a primary car, Level 2 is the common choice, and it is the scenario that involves the panel, the permit and the electrician.
Circuit Sizing: Matching the Charger to the Wire
Level 2 chargers are sold by maximum output current, commonly in ranges such as 16, 24, 32, 40 or 48 amps. Electric vehicle charging is treated as a continuous load in the National Electrical Code, which generally means the circuit must be rated at 125 percent of the charger’s continuous output. In practice, that is why many Level 2 installations land on 40- to 60-amp circuits: a 32-amp charger is commonly paired with a 40-amp breaker, and a 48-amp charger with a 60-amp breaker. These pairings are typical, not universal. The charger manufacturer’s installation manual and the current locally adopted code edition govern the actual breaker and conductor size.
Several details matter here:
- Adjustable output. Many hardwired chargers let the installer set a lower maximum current through a dial, DIP switch or app. That allows a charger to run safely on a smaller existing circuit, or to fit within limited panel capacity.
- Vehicle acceptance rate. The car’s onboard charger caps how fast it can accept AC power. A 48-amp charger offers no benefit if the vehicle tops out well below that. Check the vehicle spec before paying for a bigger circuit.
- Wire length and gauge. Long runs from a basement panel to a detached garage or the far side of a driveway may need larger conductors to limit voltage drop. Distance is one of the biggest cost drivers.
- Future-proofing. Some homeowners run wire sized for a higher-amperage circuit even when installing a smaller charger today, so a second vehicle or a faster charger later does not require new wiring. Ask the electrician to price both options.
Panel Capacity and Load Calculations
The panel question decides whether an EV charger is a modest project or a significant one. A 200-amp service with a gas furnace, gas water heater and gas range usually has room for a Level 2 circuit. A 100-amp service in an older home that already runs electric heat, a central air conditioner, an electric dryer and a hot tub may not.
A licensed electrician answers this with a load calculation based on the National Electrical Code methods the jurisdiction has adopted. The calculation looks at the home’s square footage, fixed appliances, heating and cooling equipment, and planned additions, then compares the result against the service rating. It is a more reliable guide than eyeballing open breaker slots. A panel can have empty spaces and still lack the capacity to add a 50-amp continuous load, and a crowded panel may have capacity but need tandem breakers or a subpanel to make space.
When the numbers come up short, homeowners usually have three paths: reduce the charger’s output to fit, add a load-management device, or upgrade the service. The tradeoffs of a full service change, including utility coordination and typical pricing, are covered in our guide to an electrical panel upgrade.
Load Management as an Alternative to a Panel Upgrade
Load-management devices, sometimes called energy management systems, smart panels or circuit-sharing devices, monitor the home’s total draw and throttle or pause EV charging when other large loads run. Some chargers have this built in through a current sensor clamped on the service conductors. Others rely on a separate device that switches between two loads, such as a dryer and a charger, so they never run at full power together. The National Electrical Code includes provisions that allow approved energy management systems to be counted when sizing services and feeders, but acceptance depends on the code edition and the local authority having jurisdiction.
For many homes with 100- or 125-amp service, load management can be far cheaper than a service upgrade and avoids utility scheduling. The tradeoff is slower charging during peak household use, which overnight charging usually absorbs. It is not a fit for every home. If the panel itself is damaged, obsolete or flagged by an insurer, an upgrade may be the better investment regardless of the charger.
Hardwired vs Plug-In (NEMA 14-50) Chargers
Level 2 chargers come in two installation styles. Plug-in units use a 240-volt receptacle, most often a NEMA 14-50 (the same style used for many electric ranges and RV hookups) or a NEMA 6-50. Hardwired units connect directly to the circuit with no receptacle in between.
Plug-in installs appeal to renters and to homeowners who may take the charger with them when they move. They also allow a portable cord set to be used at home. The tradeoffs:
- Output limits. A charger on a 50-amp receptacle is generally limited to 40 amps of continuous output. Hardwiring allows higher output, up to 48 amps on a 60-amp circuit for many units.
- Receptacle quality. Hours of near-continuous current at a receptacle stress the contacts. Electricians often recommend industrial-grade receptacles for EV use, and some charger makers recommend hardwiring precisely to avoid heat at a plug connection.
- GFCI protection. Recent editions of the National Electrical Code expanded ground-fault circuit-interrupter requirements, and in many jurisdictions a 240-volt garage or outdoor receptacle now needs GFCI protection. Many EV chargers also contain their own internal ground-fault protection. That combination can cause nuisance tripping on some units. Check the charger maker’s guidance and the local code edition before choosing a plug-in setup.
If a GFCI breaker or receptacle trips repeatedly during charging, do not simply swap in a non-GFCI device. Have an electrician diagnose it. Our guide to a GFCI outlet not working explains common causes and which fixes are safe for homeowners.
Permits, Inspections and Choosing an Electrician
A new 240-volt circuit is permitted electrical work in nearly every Front Range jurisdiction, including Denver, Aurora, Colorado Springs and unincorporated county areas. The licensed electrician typically pulls the permit, completes the work and schedules a rough or final inspection. Requirements and fees vary, so confirm locally.
The permit matters for more than compliance. An unpermitted 50-amp circuit can surface during a resale inspection, complicate an insurance claim after a fire, or disqualify the homeowner from a utility rebate that requires proof of a permitted install. Home inspectors evaluate the panel, breakers and visible branch wiring under standards such as the ASHI Standard of Practice. An undersized wire on an oversized breaker, a missing cover, or a charger outlet with no visible permit history are the kinds of observations that show up in reports. For a broader look at how inspectors evaluate electrical systems, see our electrical inspection guide.
When collecting bids, ask each electrician to state:
- Whether a load calculation was performed and what it showed.
- The circuit size, breaker size, wire gauge and wiring method.
- Whether the charger will be hardwired or plug-in, and what GFCI protection applies.
- Whether the permit and inspection are included.
- Any panel work, subpanel, load-management device or trenching needed.
- Warranty on labor and who handles a failed inspection.
Garage vs Outdoor Installs in Colorado Winters
Where the charger goes affects cost, convenience and durability. An attached garage close to the panel is usually the simplest and cheapest location. Detached garages and driveway pedestals add trenching or conduit runs and can push costs up considerably.
Garage Installs
A garage keeps the charger, cable and car out of snow and hail. Even an unheated garage stays warmer than the driveway on a subzero night, which helps battery charging speed. Mount the charger where the cable reaches the car’s charge port without crossing a walkway, and keep the cable off the floor where it can be crushed by a tire or snow shovel. Watch for water: melting snow off a car can pool around a floor-level outlet.
Outdoor Installs
Outdoor chargers need an enclosure rated for the location, weather-resistant connections and, for plug-in units, an in-use cover over the receptacle. Front Range conditions are hard on outdoor equipment: intense UV at altitude, hail, freeze-thaw cycles and wind-driven snow. Charging cables stiffen in cold weather, so a model with a cold-rated, flexible cable is worth considering. If the charger is on an exterior wall that faces the prevailing storm direction, a small overhang or shield helps.
Cold-Weather Charging Habits
Many EVs let owners schedule charging to finish just before departure, which warms the battery and cabin using grid power instead of the battery. Scheduling also lines up with utility time-of-use rates, which often make overnight charging cheaper.
ENERGY STAR Chargers, Utility Rebates and Costs
ENERGY STAR certifies Level 2 EV chargers. According to ENERGY STAR, certified models use about 40 percent less energy in standby mode than non-certified products, and all certified chargers are safety-tested by a nationally recognized testing laboratory. ENERGY STAR also warns that not every charger sold online or in stores is safety certified, and that some carry false certification marks. Buying a certified, listed unit is a simple way to avoid that problem, and some utilities require a certified or networked charger to qualify for rebates or managed-charging programs.
Colorado utilities and some municipalities have offered rebates for EV chargers, wiring and, in some cases, panel upgrades, often with larger amounts for income-qualified households. Program terms, eligible equipment and dollar amounts change frequently and some programs close when funding runs out. Check your electric utility’s current offerings and any federal or state tax credit rules before buying, and keep the receipts and permit record.
Typical Cost Ranges
As rough industry estimates, a basic Level 2 install close to an adequate panel often runs from several hundred to a couple of thousand dollars in labor and materials, plus the charger itself. Level 2 chargers commonly sell from a few hundred dollars to around a thousand dollars depending on output, connectivity and brand. Costs climb with:
- Long wire runs, finished walls that must be opened, or trenching to a detached garage or pedestal.
- A subpanel, load-management device or service upgrade.
- Aluminum or outdated wiring discovered during the work. If the existing wiring is in poor shape, the project can turn into a partial rewire; our house rewiring cost guide covers that scenario.
- Permit fees, which vary by city and county.
Treat these as planning ranges only. Written bids from licensed electricians, based on a site visit, are the only reliable figures.
EV Chargers When Buying or Selling a Home
An existing Level 2 charger can be a selling point, but buyers should confirm it was installed with a permit and sized correctly. A standard home inspection covers the panel and visible wiring; it does not test the charger’s function or communication with a vehicle. Buyers planning an EV can ask the inspector to note the service size, available panel spaces and the panel’s location relative to the garage. Our guide to hiring a home inspector explains what a standard inspection covers and when a specialist is worth adding. Sellers who installed a charger should keep the permit, the final inspection record and the charger manual with the home’s documents.
A quick checklist for planning an install:
- Estimate daily miles and check the vehicle’s maximum AC charging rate.
- Decide on Level 1 or Level 2, and plug-in or hardwired.
- Pick an ENERGY STAR certified, safety-listed charger.
- Have an electrician run a load calculation and quote the circuit, permit and any load management.
- Check utility rebates and time-of-use rates before buying equipment.
- Choose a location that protects the cable and connector from snow, hail and foot traffic.
References
- Electric Vehicle Chargers: Buying Guidance and Certified Models — ENERGY STAR
- NFPA 70, National Electrical Code (NEC) — National Fire Protection Association
- Electrical Home Fire Safety — National Fire Protection Association
- ASHI Standard of Practice for Home Inspections — American Society of Home Inspectors
Frequently asked questions
How much does it cost to install a Level 2 EV charger?
As a rough industry estimate, a simple install near an adequate panel often costs several hundred to a couple of thousand dollars in labor and materials, plus the charger. Long wire runs, trenching, subpanels or a service upgrade can raise the total substantially. Get written bids from licensed electricians.
What size breaker do I need for an EV charger?
EV charging is treated as a continuous load, so the circuit is generally sized at 125 percent of the charger's output. A 32-amp charger commonly uses a 40-amp circuit and a 48-amp charger a 60-amp circuit. Always follow the charger's installation manual and the local code.
Can I install an EV charger on a 100-amp panel?
Often, yes, but it depends on the home's other loads. An electrician's load calculation will show whether there is room, whether a lower charger setting or a load-management device would work, or whether a service upgrade is the better option.
Do I need a permit to install an EV charger in Colorado?
Adding a new 240-volt circuit generally requires an electrical permit and inspection in Front Range cities and counties. The licensed electrician usually pulls the permit. Many utility rebate programs also require proof of a permitted installation.
Is a hardwired or plug-in EV charger better?
Hardwired chargers allow higher output and avoid heat at a receptacle connection, while plug-in units on a NEMA 14-50 outlet are easier to take with you. Plug-in installs may need GFCI protection under recent code editions, which can interact with the charger's own ground-fault protection.
Shopping for a Front Range home and wondering whether the panel can handle an EV charger? Contact us to connect with a local inspector who can document the service size and panel condition before you commit.