Curbless Shower: Floor Slope, Drains and Waterproofing
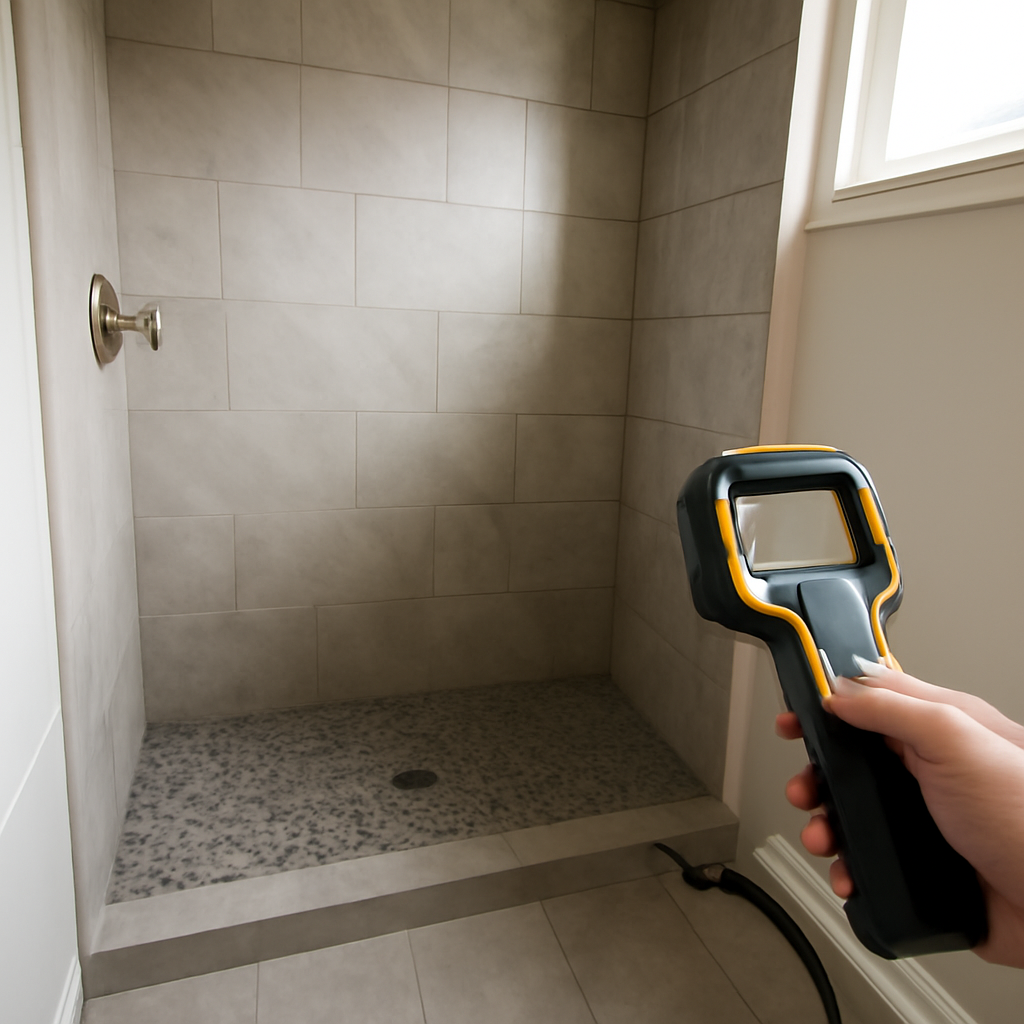
A shower with no step at the entry looks simple: tile runs from the bathroom floor straight into the shower, and a glass panel or nothing at all separates the two. Behind that clean look is some of the most demanding work in a bathroom remodel. A curbless shower has to slope water to a drain without a curb to hold it back, which usually means lowering part of the floor structure, choosing the right drain, and waterproofing far more area than a standard shower. Done well, it is easier to walk into, easier to clean and friendly to wheelchairs and walkers. Done poorly, water ends up on the bathroom floor or inside the framing. This guide covers accessibility and aging in place, recessing the subfloor and joists, linear versus center drains, slope and water containment, whole-floor waterproofing, slip resistance, glass panels, what inspectors look for, and hedged cost ranges.
Part of our Structure & Exterior guide — start there for the full picture →
What a Curbless Shower Is
A curbless shower, also called a zero-threshold, barrier-free or roll-in shower, has no raised curb at its entry. The bathroom floor and shower floor meet at the same level, or nearly so, and the shower floor slopes down to a drain. Water containment comes from slope, drain placement, the size of the wet area and sometimes a glass panel, rather than from a curb.
The design shows up in two main settings. In accessible bathrooms, it allows a person using a wheelchair, shower chair or walker to roll or step in without lifting a foot over an edge. In design-driven remodels, it creates a continuous floor that makes a small bathroom feel larger. Many homeowners choose it for both reasons, planning ahead for the years when stepping over a curb may become harder.
Accessibility and Aging in Place
Falls are a serious concern for older adults. According to the CDC, falls among adults 65 and older caused more than 43,000 deaths in 2024, making falls the leading cause of injury death for that age group, and emergency departments recorded about 4.5 million visits for older adult falls that year. The CDC’s fall prevention guidance lists practical home changes, including adding grab bars inside and outside the tub or shower and next to the toilet.
A curbless shower removes one trip point, but it is only one part of a safer bathroom. Other features commonly paired with it include:
- Grab bars anchored to blocking or framing, not just drywall. The guide to grab bars for showers covers placement and mounting.
- A fold-down or freestanding shower seat.
- A handheld showerhead on a slide bar that can be reached while seated.
- Controls located near the entry so water can be adjusted before stepping in.
- Good lighting and contrasting colors at the floor and wall transitions.
Homeowners weighing options often compare curbless showers with walk-in tubs. A walk-in tub allows soaking but still has a threshold and a long fill and drain time, while a curbless shower has no threshold at all. The guide to walk-in tubs compares the trade-offs, and the guide to tub-to-shower conversions covers the common remodel of replacing an alcove tub with a walk-in shower, curbless or not.
Recessing the Subfloor and Floor Framing
The fundamental challenge is height. A shower floor needs a mortar bed or sloped foam tray thick enough to create slope, plus room for the drain body. In a conventional shower, that build-up sits on top of the subfloor and a curb hides the difference. Without a curb, the shower floor has to start lower than the bathroom floor so that both finished surfaces line up at the entry.
There are a few ways to get that depth:
Raising the rest of the bathroom floor
Instead of lowering the shower, the installer can build up the bathroom floor around it with additional underlayment or mortar. This avoids cutting framing but can create a step at the bathroom door, which defeats part of the accessibility purpose unless the transition is ramped.
Recessing the subfloor between joists
On wood-framed floors, the subfloor in the shower area can be removed and reinstalled lower, set on cleats or ledgers attached to the sides of the joists. This drops the base of the shower an inch or so without altering the joists themselves. The available depth depends on the joist size and the drain location. The guide to subfloor repair explains how subfloor panels are replaced and fastened.
Modifying or lowering joists
When more depth is needed, some projects cut down the tops of joists, notch them, or replace a section of framing with lowered members. Cutting or notching joists reduces their strength. Any plan that alters joists, especially in the middle of a span, should be reviewed by a structural engineer or the joist manufacturer before work starts. Reinforcing cut joists is sometimes done by adding full-depth members alongside them, a technique explained in the guide to sistering joists.
Engineered floor systems add another layer of caution. Wood I-joists and open-web trusses generally cannot be cut or notched in the field without manufacturer approval. The guide to floor trusses covers why altering engineered members is restricted. In homes with trusses, a curbless shower is often planned with a raised bathroom floor or a specialty low-profile tray instead.
Concrete slabs
On slab-on-grade floors, common in Front Range basements and some ranch homes, the slab may need to be cut and the area excavated to make room for the drain and slope. That work involves the plumbing below the slab and sometimes radon mitigation components or vapor barriers, so the scope should be confirmed before demolition.
Linear Drains vs Center Drains
Drain choice shapes the whole floor. A center drain is the traditional round or square drain in the middle of the shower floor. The floor slopes toward it from all four sides, which creates a shallow funnel. In a curbless shower, that four-way slope is tricky at the entry, because the bathroom side of the shower floor has to drop away from the doorway.
A linear drain is a long, narrow channel, often 24 to 60 inches, set along one wall or across the entry. The floor slopes in a single plane toward it, much like a ramp. That single slope makes large-format tile easier to use and makes the transition to the bathroom floor smoother. Linear drains are the most common choice for curbless designs, though they generally cost more than standard drains.
Placement varies:
- At the back wall: the floor slopes away from the entry, so water flows away from the bathroom. This is a common and forgiving layout.
- At the entry: the drain acts as a barrier, catching water before it reaches the bathroom floor. It can work well but places the drain where people walk.
- Along a side wall: useful in long, narrow showers.
Tile-in drain covers let the drain grate blend with the floor. Whichever style is chosen, the drain flange has to bond correctly to the waterproofing system. The guide to shower drains covers drain types, clogs and the connection to the pan.
Slope and Water Containment
Without a curb, slope does all the work of keeping water in the shower. Plumbing codes and drain manufacturers specify a minimum slope toward the drain, and the slope must be consistent so water does not puddle in low spots. Too little slope leaves standing water; too much can feel uneven underfoot and make a shower chair rock.
Several design choices help keep water where it belongs:
- Size of the wet area. Larger showers give spray room to fall before reaching the edge of the sloped zone.
- Showerhead placement. Pointing the main head away from the opening reduces spray toward the bathroom.
- Collapsible water dams. Soft rubber strips at the entry can hold back a little water and fold flat under a wheelchair.
- A slight slope in the bathroom floor toward the shower, in some designs, so any stray water heads back to the drain.
Even good designs let some water out. That is why the waterproofing usually extends beyond the shower itself.
Waterproofing the Whole Bathroom Floor
In a conventional shower, waterproofing covers the pan, the curb and the walls to a set height. In a curbless shower, the boundary between wet and dry is less defined. Many installers and membrane manufacturers recommend extending the waterproofing past the shower opening, and some designs waterproof the entire bathroom floor, turning the room into a wet room.
Common approaches include sheet membranes set in thinset, liquid-applied membranes in multiple coats, and pre-sloped foam trays paired with matching membranes and drains. The membrane should run up the walls a few inches around the bathroom perimeter so water on the floor cannot wick into the bottom plates. Seams, corners, pipe penetrations and the toilet flange area all need detailing.
Water that gets past the membrane can cause the same problems as any shower leak: stained ceilings below, soft subfloor, rot and mold. The EPA notes that the key to mold control is moisture control and that wet materials should be dried within 24 to 48 hours to reduce the chance of mold growth. The guide to shower pan leaks explains the warning signs. Flood testing the membrane before tile goes on, usually for a day or more with the drain plugged, is a common quality check that is especially valuable in curbless installations.
Slip Resistance and Flooring Choices
A flat entry helps with tripping, but a wet floor is still a slip hazard. The U.S. Consumer Product Safety Commission’s home safety checklist for older consumers recommends that bathtubs and showers have non-skid mats, abrasive strips or surfaces that are not slippery, along with at least one secure, easily graspable grab bar, and that the bathroom floor itself be slip-resistant or covered with a secured slip-resistant mat.
In a tiled curbless shower, tile choice is the main lever:
- Small mosaics have more grout joints, which add grip and conform to slope.
- Textured or matte porcelain rated for wet areas is commonly used for larger formats.
- Polished stone and glossy tile are usually poor choices for a shower floor.
Tile manufacturers publish slip-resistance ratings for wet conditions, and asking for those numbers is reasonable when comparing products. Because the same tile often continues from the bathroom floor into the shower, it needs to work for both areas. The general rules in the guide to tile installation on substrate stiffness and mortar coverage apply here too, since a cracked tile on a shower floor can let water through.
Glass Panels and Enclosures
Many curbless showers use a single fixed glass panel instead of a full door. The panel blocks most of the spray while leaving an open entry. Hinged doors are possible but need floor clearance, and a door swinging over a sloped floor requires careful sizing so the bottom edge clears the tile. Fully open designs with no glass rely on a larger footprint and good drain placement.
Fixed panels are typically anchored with clips, channels or a floor track; on a curbless floor, those anchors should be sealed so they do not create a path for water through the membrane. Tempered or laminated safety glass is the standard for shower enclosures. The guide to shower door installation covers hardware, glass thickness and sealing.
What Inspectors Look For
A home inspector evaluating a house with a curbless shower can run the water, check drainage, look for standing water, and note cracked tile, failed grout, loose glass hardware and water marks beyond the shower opening. Under the ASHI Standard of Practice, inspectors inspect plumbing fixtures and interior floors, but inspections are not technically exhaustive and are not required to report concealed conditions. The membrane and any joist modifications below the floor are usually hidden.
Useful clues include ceiling stains or soft spots below the bathroom, sagging or bouncy floors near the shower, and obvious cuts in joists visible from an unfinished basement or crawl space. Buyers who see a recent curbless remodel may ask for permits and, where joists were altered, any engineering documentation. The overview of the home inspection hiring process explains what a standard inspection covers, and the structure and exterior hub links related framing guides.
Planning Steps Before Demolition
Because a curbless shower involves structure, plumbing and waterproofing at the same time, the order of decisions matters. A typical planning sequence looks like this:
- Confirm the floor structure. Find out whether the bathroom sits over dimensional joists, engineered I-joists, trusses or a slab, and which way the framing runs relative to the planned drain.
- Choose the drain and waterproofing system together. Trays, membranes and drains from one manufacturer are designed to connect, and mixing systems can complicate warranties.
- Pick the tile early. Tile size affects slope options and drain style, so it should not be left until the end.
- Plan blocking for grab bars and seats while the walls are open, even if the bars will be installed later.
- Check permit requirements. Plumbing changes and structural modifications commonly require permits and inspections in Front Range jurisdictions.
Contractors who ask about framing type and drain location at the first site visit are usually thinking through these steps; a quote that skips them may be missing scope that shows up later as change orders.
Curbless Shower Costs
Costs depend heavily on the floor structure and how much of the bathroom is involved. These are general 2026 estimates, not quotes:
- Linear drain: often a few hundred dollars to over $1,000 for the drain alone, depending on length and grate style.
- Pre-sloped foam tray systems: commonly several hundred to a few thousand dollars in materials for the tray, membrane and drain.
- Recessing the subfloor: adds carpentry labor; lowering joists or cutting a slab, plus engineering, can add substantially more.
- Full curbless shower remodel: many projects land somewhere around $8,000 to $25,000 or more, with whole-floor waterproofing, glass and accessibility features pushing toward the higher end.
The guide to bathroom remodel cost puts these numbers in context. Some accessibility modifications may qualify for assistance programs or tax considerations, which are worth asking a tax professional or local aging services office about.
References
- About Older Adult Fall Prevention — Centers for Disease Control and Prevention
- Preventing Falls and Hip Fractures — Centers for Disease Control and Prevention
- Safety for Older Consumers: Home Safety Checklist — U.S. Consumer Product Safety Commission
- A Brief Guide to Mold, Moisture and Your Home — U.S. Environmental Protection Agency
- ASHI Standard of Practice for Home Inspections — American Society of Home Inspectors
Frequently asked questions
Do curbless showers leak onto the bathroom floor?
Some water can escape any open shower. Proper slope, a well-placed drain, a glass panel and waterproofing that extends beyond the shower opening keep most water contained and protect the floor from what does get out.
Do you have to cut floor joists for a curbless shower?
Not always. Options include recessing the subfloor between joists, raising the surrounding floor, or using low-profile trays. Cutting or notching joists weakens them, so any joist change should be reviewed by a structural engineer, and engineered trusses or I-joists usually cannot be cut.
Is a linear drain better for a curbless shower?
A linear drain lets the floor slope in one direction, which makes the entry transition smoother and suits large tile. Center drains can work but need four-way slope that is harder to blend into a level bathroom floor.
Are curbless showers slippery?
They can be if the floor finish is smooth. Small mosaics, textured porcelain rated for wet areas, and grab bars help. The CPSC recommends non-slippery shower surfaces and at least one secure grab bar for older adults.
How much does a curbless shower cost?
General 2026 estimates put many full curbless shower remodels around $8,000 to $25,000 or more. Joist or slab work, linear drains, whole-floor waterproofing and glass panels all add to the total.
Thinking about buying a home with a newly remodeled curbless shower, or planning one for aging in place? Get in touch and we can connect you with a local inspector who knows what to check.