Grab Bars for Shower: Placement, Blocking and Installation
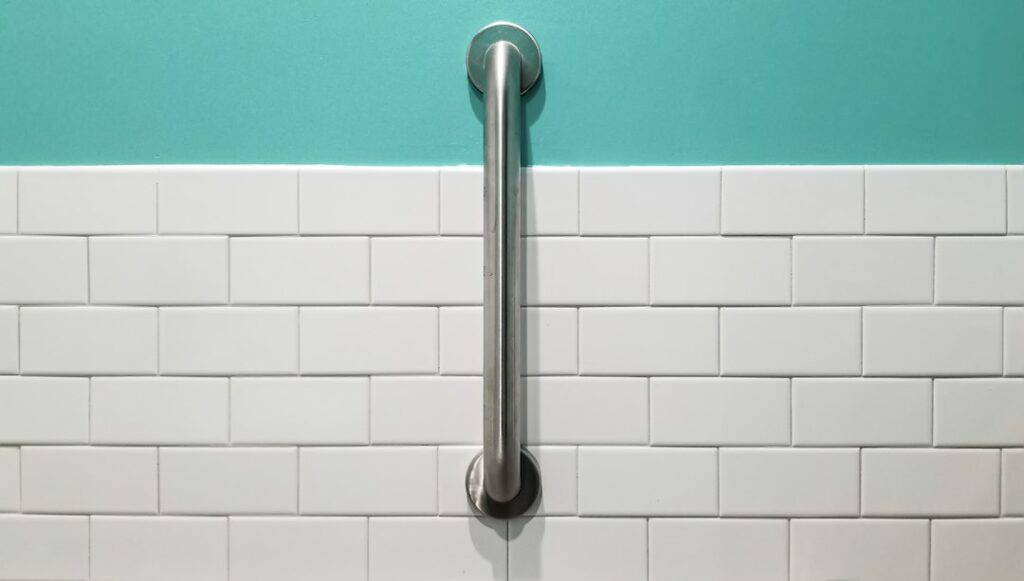
A wet tile floor, a high tub wall and a moment of dizziness are a common recipe for a bathroom fall. A properly anchored grab bar gives the bather something solid to hold while stepping in, turning around, sitting down or reaching for the controls. Done poorly, the same bar can pull out of the wall at the exact moment someone puts full weight on it. This guide to grab bars for shower installation covers where bars usually go, how they should be anchored, the differences between tile, fiberglass and acrylic surrounds, which products are not true grab bars, and what to look for when buying or inspecting a home. It summarizes public-health and consumer-safety guidance current as of 2026; anyone with a specific medical or mobility need should also consult a physician or occupational therapist.
Part of our Structure & Exterior guide — start there for the full picture →
Where Grab Bars for a Shower Should Go
There is no single correct layout, because bathers, showers and tubs differ. Still, most accessibility guidance and installer practice converge on three positions that cover the moments when people most often lose balance: entering, standing or turning, and operating the controls.
A Vertical Bar at the Entry
A vertical bar on the wall at the entrance of a tub or shower gives the bather something to hold while stepping over the threshold or curb. It suits people of different heights because they can grip it wherever is comfortable. In a tub-shower combination, this bar typically sits on the control-end wall near the front edge of the tub. In a walk-in shower, it usually goes on the wall beside the opening.
A Horizontal Bar on the Back Wall
A horizontal bar on the long back wall gives steady support while standing, washing or shifting weight. In a tub, a second, lower horizontal bar is sometimes added to help a bather who sits down in the tub get back up. The commonly cited range for horizontal bars in public facilities under the 2010 ADA Standards for Accessible Design is roughly 33 to 36 inches above the floor or tub bottom, measured to the top of the gripping surface. Private homes generally are not required to follow ADA layouts, but many installers use those dimensions as a starting point and then adjust to the person who will use the bar.
A Bar Near the Controls and on the Side Wall
Turning on the water, adjusting temperature and reaching for a handheld shower head all involve leaning. A short horizontal or angled bar on the control wall gives support during that reach. Where a shower seat or bench is used, a bar on the side wall next to the seat helps with sitting and standing. Angled bars are popular, but some therapists prefer separate horizontal and vertical bars because each orientation supports a different motion; an angled bar can let a wet hand slide downward.
Do Not Forget the Toilet and the Path
The CDC’s older adult fall prevention guidance suggests adding grab bars inside and outside the tub or shower and next to the toilet. The step out of the shower onto a wet floor is a common slip point, so a bar on the wall just outside the shower can be as useful as the ones inside it.
Why Bathroom Falls Deserve Attention
The CDC’s Older Adult Falls Data page states that falls are the leading cause of injury for adults ages 65 and older, and that over 14 million, or 1 in 4, older adults report falling every year. On its Older Adult Fall Prevention page, the CDC reports that falls among adults 65 and older caused over 43,000 deaths in 2024, and that emergency departments recorded about 4.5 million visits for older adult falls that year.
Those figures cover falls everywhere, not only in bathrooms, and they should not be read as bathroom-specific statistics. The bathroom stands out because it combines hard surfaces, water, soap and movements such as stepping over a tub wall or turning while wet. The U.S. Consumer Product Safety Commission’s home safety checklist for older consumers notes that slip-resistant surfaces are especially important in potentially wet locations such as bathrooms, kitchens and entryways.
CDC’s STEADI initiative (Stopping Elderly Accidents, Deaths and Injuries) is aimed mainly at health care providers, but its patient and caregiver brochures pair home changes like grab bars with medication review, vision checks and strength and balance exercise. A grab bar is one piece of a broader plan, not a complete answer on its own.
How Grab Bars Must Be Anchored
A grab bar is only as strong as what holds it to the wall. This is the part of the job that matters most and the part most often done wrong.
Studs or Solid Blocking
The preferred anchor is solid wood framing behind the wall finish. Wall studs in typical houses are spaced about 16 inches on center, which does not always line up with where a bar should go. That is why accessibility-minded builders install horizontal wood blocking, usually 2x lumber or plywood fastened between studs, during framing or a bathroom remodel. Blocking lets a bar be placed exactly where the user needs it rather than where the studs happen to fall. If walls are open during a tub-to-shower conversion, adding blocking costs little and makes future bars much easier to place.
Screws should be long enough to pass through the tile, backer board and any gap, then bite well into the framing. Stainless steel screws are common in wet areas because they resist corrosion. Most bars have flanges with two or three screw holes at each end, and installers generally aim to get every screw into solid material.
When There Is No Stud: Specialty Anchors
Ordinary plastic drywall anchors or light-duty toggles are not appropriate for grab bars. They are meant for picture frames and towel hooks, not for the sudden load of a person catching a fall. Several manufacturers sell specialty grab bar anchors designed to grip the back of tile, backer board or hollow walls when blocking is not available. These products publish their own load ratings, and those ratings depend on correct installation in the wall material listed by the maker. Homeowners who use them should follow the instructions exactly and keep the packaging or product information.
The 250-Pound Concept
The 2010 ADA Standards are commonly cited as calling for grab bars, fasteners and mounting supports that can withstand a 250-pound force applied at any point in any direction. That figure is a design requirement for covered public facilities, not a guarantee about any particular bar in any particular house. Many residential bars are marketed as meeting or exceeding that load, but the claim only holds if the bar is mounted to solid backing with appropriate fasteners as the manufacturer specifies. A strong bar on weak anchors is a weak installation.
Installing on Tile, Fiberglass and Acrylic Surrounds
The wall finish changes the method. A bathroom built in the 1990s on the Front Range is as likely to have a one-piece fiberglass tub surround as tile, and newer remodels often use acrylic or solid-surface panels.
Tile Walls
Drilling ceramic or porcelain tile requires a carbide or diamond bit, slow speed and steady pressure to avoid cracking. Installers often start on a piece of masking tape to keep the bit from wandering and drill through the grout joint when the layout allows. After drilling, each hole is typically sealed with a silicone sealant before the screw goes in, so water running down the wall cannot follow the fastener into the backer board or framing.
Fiberglass and Acrylic Surrounds
One-piece fiberglass and acrylic units are thin and flexible, and there is usually an air gap between the shell and the studs. Clamping a bar tight against that gap can crack the shell or distort it. Some manufacturers offer factory-reinforced zones or bar kits for their surrounds. Otherwise, installers locate framing behind the shell and use spacers or specialty anchors designed for hollow shower walls. Sealing every hole is especially important here, because a leak behind a fiberglass shell can go unnoticed for a long time.
Drilling Near the Pan, Valve and Pipes
Low bars and bars near the controls sit close to supply lines, the mixing valve and, in a tiled shower, the edge of the waterproof pan or membrane. Puncturing a pan liner or a waterproofing membrane can cause a slow leak that shows up months later as a stain on the ceiling below or soft subfloor. If a home already has signs of trouble, the shower pan leak guide explains how those leaks are traced. A stud finder with AC and metal detection, a look at the plumbing access panel and some caution about drilling low on the control wall reduce the risk.
Products That Are Not Grab Bars
Several common bathroom fixtures look like grab bars but are not built or rated to hold a person.
- Suction-cup bars. These are sold widely and attach without tools. They can lose suction on textured tile, grout lines, cracked surfaces or as the cup ages, sometimes without warning. Many carry wording that they are a balance aid only and not intended to support full body weight. They should not be relied on as a substitute for an anchored bar.
- Towel bars. Towel bars are typically held by small screws and light anchors and are designed for a few pounds of wet fabric. Someone who grabs one while falling may pull it straight off the wall. Some manufacturers sell dual-purpose grab bars that double as towel bars, and those are rated as grab bars, but a standard towel bar is not.
- Soap dishes and shelves. Recessed niches, corner shelves and ceramic soap dishes are not handholds, even though people reach for them instinctively.
- Shower doors and curtain rods. Glass doors, frames and tension rods are not designed to stop a fall, and leaning on them can cause injury if they shift or break.
Clamp-on tub rails that grip the side of a bathtub are a separate category. They can help with stepping in and out, but stability depends on the tub wall and on proper tightening, and they need periodic checks.
Choosing a Bar: Size, Finish and Grip
Grab bars come in many lengths, usually from about 12 inches up to 42 inches or more. Longer bars give more positions to grip and are easier to span across two studs. Common diameters are 1-1/4 inch and 1-1/2 inch, and the commonly cited ADA range for round bars is 1-1/4 to 2 inches in outside diameter. Smaller hands often find 1-1/4 inch easier to wrap around. Clearance between the bar and the wall is usually about 1-1/2 inches, which leaves room for a hand but not enough for an arm to slip through and get trapped during a fall.
Finish matters more than it seems. Smooth polished chrome looks clean but can be slippery when soapy. Knurled, textured or peened finishes give a better grip with wet hands. Bars with a contrasting color against the wall are easier to see for people with low vision. Concealed-flange designs look tidy, though they can make it harder to confirm that every screw is still tight.
Fold-down or swing-up bars are useful beside toilets and in tight bathrooms where a fixed bar would be in the way. They typically need very solid backing because the hinge puts leverage on the mounting plate.
Other Slip and Fall Prevention in the Shower
Grab bars work best alongside other changes:
- Slip-resistant flooring. Textured tile, smaller mosaic tiles with more grout lines, or adhesive anti-slip strips on a tub bottom improve traction. Bath mats should have a rubber backing so they do not slide.
- A low or zero-threshold entry. Replacing a tub with a curbless or low-curb shower removes the most common trip point. The bathroom remodel cost guide covers how these projects are typically priced.
- A shower seat and handheld shower head. Bathing while seated reduces time spent balancing on a wet floor.
- Good lighting. A night light on the path from bed to bathroom helps with nighttime trips.
- Scald protection. Pressure-balancing or thermostatic valves and a water heater set to a moderate temperature help prevent sudden temperature swings that can startle a bather. CPSC’s checklist suggests setting water heaters to no more than 120 degrees F to help prevent burns.
For people who want to keep taking baths, a walk-in tub is another option, though it has its own tradeoffs. Stairs are the other major fall location in many homes; the stair railing height guide explains how handrails are typically sized and secured, and the CDC fall prevention guidance also suggests railings on both sides of stairs.
Cost: DIY vs Professional Installation
Costs vary widely by region, wall type and how many bars are installed at once, so any numbers are rough. A basic stainless steel bar may cost roughly $20 to $60, while designer finishes, longer bars and fold-down units can run $100 to $300 or more. Specialty hollow-wall anchors add cost per bar.
Professional installation by a handyman, plumber or aging-in-place contractor is often quoted per bar, and many homeowners see figures somewhere around $100 to $300 per bar for straightforward installs into tile over studs, with higher prices for fiberglass surrounds, glass tile, natural stone or jobs that require opening a wall to add blocking. Bundling several bars into one visit generally lowers the per-bar cost. Some area agencies on aging, Medicaid waiver programs and veterans’ programs help with home modifications in specific cases; eligibility varies, so check directly with the program.
DIY installation is realistic for someone comfortable locating studs, drilling tile and sealing penetrations. The risk is not in the bar itself but in the anchoring. Anyone unsure whether a fastener is in solid framing should stop and get help rather than settle for a mount that only feels tight.
What Home Inspectors Look For
A standard home inspection focuses on the condition of systems and components, and grab bars are usually noted as part of the bathroom rather than load-tested. An inspector may observe whether a bar is loose, missing screws or mounted with visible plastic anchors, whether caulk around the flanges has failed, and whether there are signs of water behind the wall, such as soft drywall, loose tile or staining below. They will also look at the shower enclosure, the tub or pan and the floor for slip hazards and damage.
Buyers who plan to age in place, or who are buying for a parent, may want to ask the inspector specifically about bathroom framing, the condition of the shower pan and whether the walls show evidence of past water damage, since those affect where bars can safely go. The guide to hiring a home inspector covers how to discuss priorities like these before the inspection, and the structure and exterior inspection hub collects related guides on framing, stairs and accessibility features.
Once bars are installed, a simple routine helps: tug each bar firmly every few months, look for movement or cracked grout around the flanges, and recaulk where sealant has pulled away.
References
- Older Adult Falls Data — Centers for Disease Control and Prevention
- About Older Adult Fall Prevention — Centers for Disease Control and Prevention
- Preventing Falls and Hip Fractures — Centers for Disease Control and Prevention
- STEADI: Older Adult Fall Prevention — Centers for Disease Control and Prevention
- Safety for Older Consumers: Home Safety Checklist (Publication 701) — U.S. Consumer Product Safety Commission
Frequently asked questions
How high should a shower grab bar be?
Horizontal bars are commonly placed about 33 to 36 inches above the floor or tub bottom, a range often cited from the 2010 ADA Standards for public facilities. In a private home, the best height is the one that fits the person using it, so many installers adjust from that starting point.
Can grab bars be installed without studs?
Yes, but only with specialty anchors made and rated for grab bars, installed exactly as the manufacturer directs. Ordinary plastic drywall anchors are not appropriate. Solid wood blocking behind the wall is the preferred method when walls are open.
Are suction cup grab bars safe?
Suction-cup bars can release without warning on textured tile, grout lines or as the cup ages. Many are labeled as balance aids only, not for full body weight. They should not replace a properly anchored grab bar.
Can a towel bar be used as a grab bar?
A standard towel bar is held with light fasteners meant for wet towels and can pull out under a person's weight. Some products are rated as both, but only if they are sold and installed as grab bars.
How much does it cost to have grab bars installed?
Many homeowners see roughly $100 to $300 per bar for professional installation into tile over studs, plus the bar itself. Fiberglass surrounds, stone or opening walls for blocking can raise the price, and local rates vary.
Shopping for a Front Range home where an older relative will live, or planning bathroom safety upgrades after closing? Send us a note through the contact page and we can point you to a local inspector who pays close attention to wet-area framing and leaks.