How to Remediate Mold: A Step-by-Step Guide
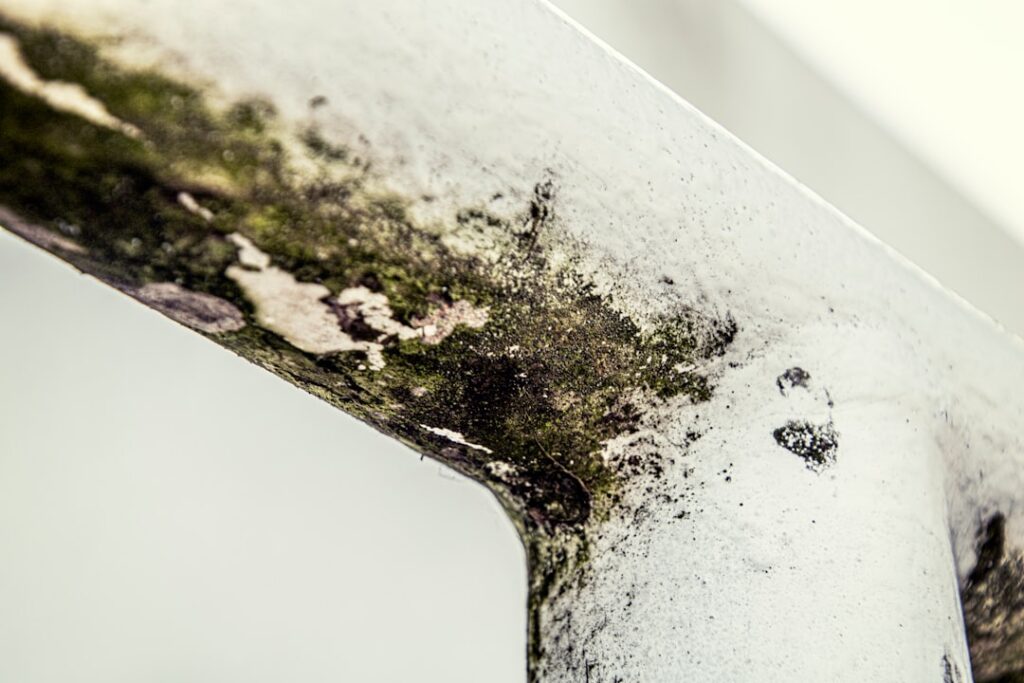
To remediate mold means more than wiping away a stain — it means removing the growth, fixing the moisture that caused it, and verifying the area stays clean. Done in the wrong order, cleanup fails and the mold returns within days. This guide summarizes EPA and CDC guidance current as of 2026 — consult a physician for symptoms and a certified professional for testing decisions.
Part of our Mold Removal & Remediation guide — start there for the full picture →
Is this mold, asbestos, or water damage? Get a free instant screen
Upload a clear photo of the suspect area. You'll get an instant AI screening opinion and what to do next. This is screening guidance, not a professional determination.
Screening guidance only. AI can be wrong. Confirm asbestos, mold type, or lead with lab testing or a licensed professional before acting.
How do you remediate mold correctly?
The EPA’s remediation principle is consistent across all of its guidance: fix the water problem first, then remove the mold. Cleaning growth while moisture remains is wasted effort. The basic sequence is to identify and stop the moisture source, contain the work area, remove or clean contaminated materials based on whether they are porous, dry everything thoroughly, and confirm the result.
Scale decides who does the work. The EPA and CDC indicate that homeowners can generally handle mold patches smaller than about 10 square feet — roughly a 3-by-3-foot area — using standard precautions. Larger contamination, HVAC involvement, or contaminated floodwater calls for professionals trained in containment. Our mold inspection and testing hub helps you judge which category your situation falls into before you start.
Step one: find and fix the moisture source
Every mold problem begins with water. Before touching the growth, trace where the moisture is coming from. Common Front Range sources include bathroom fans venting into the attic, basement and crawl-space humidity, slow plumbing leaks, ice-dam melt, and sprinklers spraying a foundation. A moisture meter or infrared camera helps locate hidden dampness behind walls.
Fixing the source might mean repairing a leak, improving ventilation, sealing a foundation, or running a dehumidifier to bring indoor humidity below 60 percent. The CDC stresses keeping indoor humidity in the 30 to 50 percent range to discourage mold. Skip this step and any cleanup is temporary.
Finding the source is not always obvious. Water travels along framing and the underside of subfloors before it surfaces, so the visible mold may be feet away from the actual leak. A moisture meter helps you trace dampness back to its origin, and an infrared camera reveals cool, wet areas behind intact surfaces. When the source resists detection — a slow leak inside a wall, intermittent roof seepage, or condensation that only forms under specific conditions — that is a signal to bring in a professional with the right diagnostic tools before tearing anything out.
Assessing the scope before you start
Before touching anything, take an honest measure of the problem. Scope determines not just who does the work but how it should be done. Walk the affected area and estimate the square footage of visible growth, then probe for the extent that may be hidden — soft drywall, staining that spreads under paint, a musty smell stronger than the visible mold would suggest.
The roughly 10-square-foot threshold the EPA and CDC reference is a practical dividing line, not a precise legal limit. A small, contained patch on a hard surface with an obvious, fixable source is a reasonable DIY project. Growth that is widespread, involves porous materials over a large area, sits inside the HVAC system, or follows contaminated water moves into professional territory. Be honest about hidden extent: lifting a baseboard or cutting a small inspection hole sometimes reveals that a “small” patch is the visible edge of a much larger problem inside the wall. Our guide to choosing a mold inspector covers when a professional assessment is worth it before you commit to a scope.
Step two: protect yourself and contain the area
Disturbing mold releases spores into the air, so personal protection and containment matter even on small jobs. The CDC recommends at minimum an N95 respirator, gloves, and eye protection without vents. For anything beyond a tiny spot, isolate the work area to keep spores from spreading.
- Wear an N95 (or better) respirator, non-vented goggles, and gloves.
- Seal off the room with plastic sheeting and tape over doorways and vents.
- Turn off the HVAC system so it does not circulate spores.
- Open a window for ventilation if weather allows.
People with asthma, allergies, or weakened immune systems should not perform mold cleanup themselves. The lung-health literature is clear that mold exposure can trigger respiratory reactions, and those individuals face higher risk.
Step three: clean or remove contaminated materials
What you do next depends entirely on the material. The EPA divides surfaces by porosity, and this distinction is the heart of effective remediation.
Hard, nonporous surfaces
Glass, metal, sealed tile, glazed surfaces, and finished wood can be cleaned in place. Scrub with detergent and water, then dry completely. Physical removal of the mold matters more than the specific cleaner — the EPA does not require biocides for routine cleanup.
Porous materials
Drywall, ceiling tiles, carpet, carpet padding, and insulation that have grown mold usually cannot be cleaned because the roots penetrate the material. These should be cut out, bagged, and disposed of. Trying to clean moldy drywall instead of removing it is the most common remediation mistake. For drywall specifically, our guide on how to handle mold on drywall details when a surface can be saved versus replaced.
Step four: dry, clean up, and verify
After removing or cleaning materials, dry the area completely with fans and a dehumidifier. HEPA-vacuum surfaces to capture settled spores, and wipe down the work zone. Bag and seal all debris before carrying it through the home to avoid spreading spores.
Verification is the step homeowners skip most. The area should be visibly clean, free of musty odor, and dry to the touch and on a moisture meter. For larger jobs, professionals perform post-remediation clearance testing that compares the cleaned space against an outdoor baseline. If the smell or staining persists, remediation is not finished.
Common remediation mistakes to avoid
Most failed cleanups trace back to a short list of avoidable errors. Knowing them ahead of time saves money and rework.
- Cleaning instead of removing porous material. Scrubbing moldy drywall leaves the roots behind; it has to come out.
- Skipping the moisture fix. The most common reason mold returns. No repair, no lasting result.
- Painting over mold. Mold-resistant paint does not kill existing growth; it traps it and it bleeds back through.
- No containment. Disturbing mold without sealing the area spreads spores to clean rooms.
- Relying on biocides or fogging. The EPA does not endorse fogging, and a spray cannot substitute for physical removal.
- Leaving the HVAC running. The system pulls spores from the work area and distributes them throughout the home.
Each of these turns a one-time job into a recurring one. The discipline that prevents them — remove, don’t just clean; fix the water; contain the work — is what separates a remediation that holds from one that has to be redone.
Preventing mold from coming back
Remediation is only durable when paired with prevention. Once the area is clean and dry, the goal is to keep conditions inhospitable to mold. The foundation is humidity control: keep the home between 30 and 50 percent, using a dehumidifier in chronically damp spaces like basements and crawl spaces.
Beyond humidity, address the specific vulnerabilities that caused the problem. If a bathroom fan was venting into the attic, reroute it outside. If a basement seeps during spring melt, improve grading and consider a perimeter drain. If condensation forms on cold-season windows, improve ventilation and wipe them down. Inspect likely trouble spots periodically — under sinks, around the water heater, behind appliances — so the next leak gets caught within the 24-to-48-hour window before mold can establish. A home kept dry rarely needs remediation twice in the same place.
When to hire a professional
Bring in a certified remediation contractor when the affected area exceeds about 10 square feet, when mold is inside the HVAC system, when contamination follows sewage or outside floodwater, or when growth keeps returning despite cleanup. Professionals use negative-air containment, HEPA filtration, and proper disposal that DIY efforts cannot match. They also follow the IICRC S520 standard that governs the industry.
An independent assessment before remediation provides an unbiased scope and, when needed, documentation for insurance. To remediate mold successfully, treat it as a moisture problem with a mold symptom — fix the water, remove what it ruined, and confirm the space is dry. Homeowners comparing contractors can review what a credentialed crew should provide in our overview of professional mold remediation services.
What professional remediation includes
Understanding what a professional crew actually does helps you judge a bid and know what you are paying for. A remediation following the IICRC S520 standard is a structured process, not just aggressive cleaning. It typically includes:
- Containment: plastic sheeting and negative-air pressure that keep spores from migrating to clean parts of the home.
- HEPA air filtration: air scrubbers that capture airborne spores during the work.
- Removal and disposal: bagging and discarding contaminated porous materials under controlled conditions.
- Cleaning: HEPA vacuuming and wiping of remaining surfaces.
- Drying: commercial dehumidifiers and air movers to bring materials below the moisture mold needs.
- Verification: on larger jobs, post-remediation clearance testing against an outdoor baseline.
A bid that skips containment or disposal to come in cheaper is not a bargain — it is a job that may spread the problem. The structure above is what makes professional remediation durable, and it is reasonable to ask any contractor to confirm each step is in their scope.
A realistic timeline for remediation
Homeowners often expect mold cleanup to be a single-day event, and small jobs can be. Larger remediations unfold over several days. Day one usually covers setup and containment. The next days handle removal, cleaning, and the start of drying. Drying itself can take two to several days depending on how saturated the materials were, because equipment must pull moisture down to a safe level before the area is sealed up and rebuilt.
Reconstruction — replacing the drywall, flooring, and finishes that were removed — is a separate phase that follows successful remediation and clearance. Rushing the drying step to finish faster is a frequent cause of recurrence, since sealing up materials that are still damp simply restarts the mold cycle behind a fresh wall. Patience during drying protects the work you just paid for.
However you approach it, the principle that ties every step together is simple: mold is a moisture problem wearing a mold disguise. Fix the water, remove what it ruined, dry the space, verify the result, and keep humidity in check. Do those things in that order and the remediation holds. Skip the moisture fix or leave porous material in place, and you will be doing it again in a season. That sequence is the same whether you handle a small bathroom patch yourself or hire a crew for a flooded basement; only the scale and the equipment change. Keep the order straight, and remediating mold becomes a solvable problem rather than a recurring frustration.
References
- Mold Cleanup in Your Home — U.S. Environmental Protection Agency
- Mold Remediation Guide — U.S. Environmental Protection Agency
- About Mold and Your Health — Centers for Disease Control and Prevention
- Mold and Indoor Air Quality — American Lung Association
Frequently asked questions
What is the first step to remediate mold?
Find and fix the moisture source before cleaning any growth. Mold is a symptom of a water problem, so cleanup is temporary if the underlying dampness remains. Repair leaks, improve ventilation, and keep indoor humidity between 30 and 50 percent.
Can I remediate mold myself?
The EPA and CDC indicate homeowners can usually handle hard-surface mold patches smaller than about 10 square feet using an N95 respirator, gloves, eye protection, and ventilation. Larger areas, HVAC involvement, or sewage contamination require professionals.
Do I need bleach or a biocide to remediate mold?
Not for routine cleanup. The EPA emphasizes physically removing mold from hard surfaces with detergent and water rather than relying on biocides. Porous materials like moldy drywall should be removed and replaced, not chemically treated.
How do I know remediation worked?
The area should be visibly clean, dry to the touch and on a moisture meter, and free of musty odor. For larger jobs, professionals run post-remediation clearance testing against an outdoor baseline. Lingering smell or staining means the work is not finished.
Not sure whether your mold job is a weekend task or a professional one? A vetted Front Range inspector can scope it for you — get in touch through our contact page.