Mold Remediation Steps: A Plain-Language Walkthrough
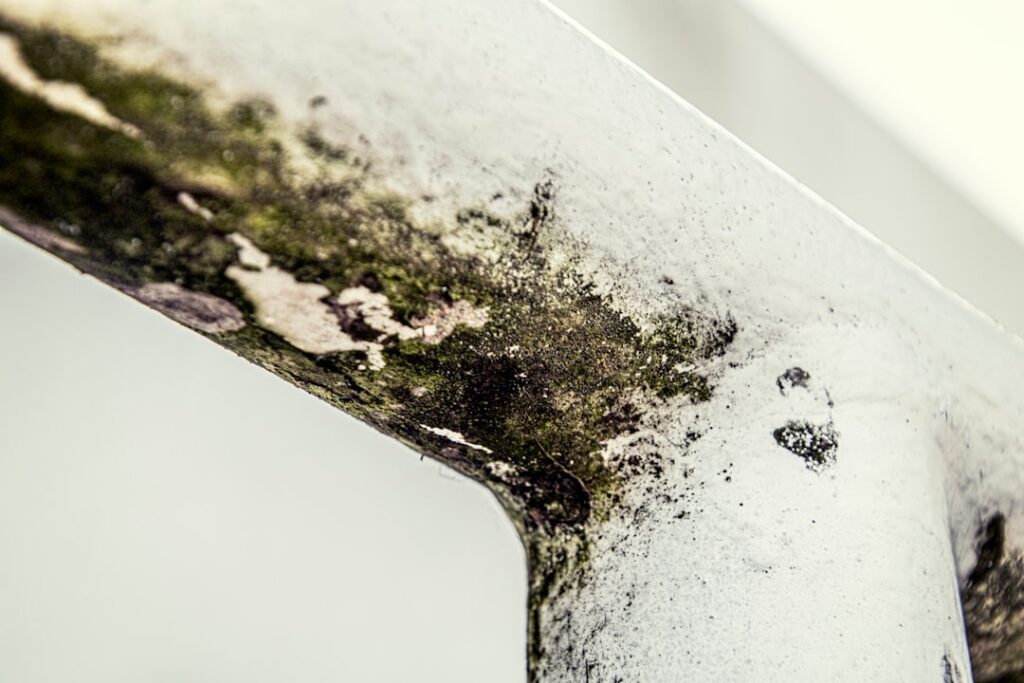
Understanding the mold remediation steps takes the mystery out of a process that can feel intimidating and expensive. Whether a homeowner is doing a small cleanup or hiring a crew for a larger job, the underlying sequence is the same, and knowing it helps you judge whether a contractor is doing the work properly. This guide summarizes EPA and CDC guidance current as of 2026 and is informational only; consult a qualified professional for larger jobs and your physician for any health symptoms.
Is this mold, asbestos, or water damage? Get a free instant screen
Upload a clear photo of the suspect area. You'll get an instant AI screening opinion and what to do next. This is screening guidance, not a professional determination.
Screening guidance only. AI can be wrong. Confirm asbestos, mold type, or lead with lab testing or a licensed professional before acting.
The Core Mold Remediation Steps
Proper remediation follows a logical order: assess the problem and find the moisture source, contain the work area, remove or clean contaminated material, dry the space, correct the underlying moisture, and verify the result. Each step exists for a reason, and skipping any of them — especially the moisture correction — is why mold so often returns. The EPA frames the goal plainly: remove the mold and fix the water problem. Everything below serves those two objectives, and the same logic threads through the mold inspection and testing hub.
Step 1: Assessment and Finding the Moisture Source
Before anything is touched, the affected area is assessed. An inspector or experienced technician locates visible growth, measures moisture in walls and floors with a meter, and often uses thermal imaging to find hidden dampness behind finishes. The single most important output of this step is identifying where the water is coming from — a leaking pipe, a roof penetration, condensation, groundwater, or high humidity. Without the source, the rest of the work is temporary. For larger or disputed situations, an independent assessment separate from the remediation crew adds objectivity.
Step 2: Containment
Mold removal disturbs spores and sends them airborne, so the work area must be isolated from the rest of the home. Crews seal doorways and vents with plastic sheeting and establish negative air pressure using HEPA-filtered machines, which exhaust filtered air outdoors and keep contaminated air from drifting into clean rooms. For small DIY cleanups, containment may be as simple as closing doors, covering vents, and running an exhaust fan to the outside. The principle is the same at any scale: keep spores from spreading during removal.
Step 3: Removing and Cleaning Materials
Porous materials that have absorbed mold — wet drywall, carpet padding, insulation, ceiling tile — generally cannot be cleaned effectively and are removed, double-bagged, and discarded. Hard, non-porous surfaces such as framing, metal, and finished wood are HEPA-vacuumed and scrubbed with detergent and water. The EPA emphasizes physical removal over relying on biocides or fogging; chemical treatment is not a substitute for taking out saturated material. Our walkthrough on removing mold from drywall explains exactly when a panel can be saved and when it must come out.
Step 4: Drying the Affected Area
After removal, the space must be dried thoroughly before any rebuilding. Dehumidifiers and air movers run until moisture readings return to normal for the material. Drying matters because residual dampness invites regrowth and undermines everything done so far. In humid climates and damp basements, this step can take days and may require ongoing dehumidification as a permanent measure.
Step 5: Correcting the Moisture Source
This is the step that determines whether remediation lasts. Repairing the leak, adding ventilation, installing a dehumidifier, regrading soil away from a foundation, or sealing a basement — whatever the source demands — is what stops mold from returning. A remediation that removes growth but leaves the water problem in place is a guaranteed repeat job. Many homeowners discover that the source correction is the most involved and important part of the entire project, and it is the difference between a one-time fix and a recurring expense documented in our look at black mold in walls.
Step 6: Verification and Reconstruction
Once the area is clean and dry, the result is verified. For professional jobs, this often means a clearance inspection — ideally by an independent party — confirming the space is visually clean and dry, sometimes backed by air or surface sampling. Only after verification does reconstruction begin: new drywall, flooring, paint, and trim. Verification provides accountability that the work actually succeeded rather than just looking finished.
The Steps for a Small DIY Job
For a contained patch under about ten square feet on a hard, non-porous surface, a homeowner can follow a scaled-down version of the same sequence. Start by confirming and stopping the moisture source — fixing the leak, improving ventilation, or addressing humidity. Then set up simple containment: close doors to other rooms, cover vents, run an exhaust fan to the outside, and lay down plastic to catch debris. Put on an N95 respirator, gloves, and eye protection, and lightly mist the area first so dry spores do not go airborne.
Scrub the growth off with detergent and water until it is physically gone, not just lightened, then wipe and dry the surface thoroughly with fans and, if needed, a dehumidifier. Bag any debris and used cloths and carry them outside rather than back through the house. Finally, watch the area: regrowth within a couple of weeks means the moisture source was missed or the material is porous and harbors hidden growth. This compact version of the professional process keeps a small job from becoming a large one. Our guide to removing mold from drywall covers when a surface can be cleaned and when it must be cut out.
When to DIY Versus Hire a Professional
The EPA’s threshold offers a clear line. Contained mold under about ten square feet on a hard, non-porous surface is reasonable for a homeowner to handle with an N95 respirator, gloves, eye protection, and detergent. Beyond that — porous materials, hidden growth, HVAC contamination, sewage or floodwater, or occupants with asthma or weakened immunity — professional remediation with full containment and HEPA filtration is the safer route. Professionals also bring the moisture-detection tools to find hidden sources that a homeowner would miss, and the documentation needed for insurance and resale disclosure.
What Equipment Each Step Requires
Knowing the gear behind each step helps a homeowner judge whether a contractor is properly equipped. The assessment step relies on moisture meters and often a thermal imaging camera to find dampness behind finishes, plus a hygrometer to measure indoor humidity. Containment uses plastic sheeting, painter’s or contractor’s tape, and a negative-air machine fitted with a HEPA filter that exhausts filtered air outdoors. A zipper door in the plastic barrier lets workers enter and exit without breaking containment.
Removal involves HEPA-filtered vacuums, scrub brushes, detergent, and heavy contractor bags for double-bagging porous debris. Personal protective equipment — N95 or better respirators, gloves, and eye protection — is standard throughout. The drying step uses air movers and dehumidifiers, with moisture meters again confirming when material has returned to normal. A crew that shows up without HEPA filtration or negative-air capability for a job that disturbs significant growth is not equipped to contain spores, which is a warning sign worth heeding.
How Long Each Step Takes
Timelines vary with scope, but the relative pace of each step is fairly consistent. Assessment is usually a single visit of an hour or two. Containment setup takes from under an hour for a small area to half a day for a large or complex one. Removal and cleaning depend entirely on the amount of material involved — hours for a contained patch, a full day or more for extensive drywall removal across multiple rooms.
Drying is the step most often underestimated and most often rushed. Depending on materials, humidity, and how saturated the area was, thorough drying can take one to several days, and in damp basements it can run longer. Source correction can range from a quick plumbing repair to a multi-day project like regrading or adding drainage. Verification and reconstruction follow once everything is dry. A contractor who promises to complete a significant job in a few hours is almost certainly shortcutting the drying or source-correction steps, which is exactly where regrowth originates. Our walkthrough of remediation versus restoration explains where the cleanup ends and the rebuild timeline begins.
Verifying a Contractor Followed Every Step
Because the steps that prevent regrowth — drying and source correction — are partly invisible in the finished result, accountability matters. Ask your contractor to document each stage: photos of the containment, the removed materials, the moisture readings before and after drying, and the repair made to the moisture source. A clearance verification, ideally by an independent party, confirms the area is clean and dry before reconstruction closes everything up.
This documentation protects you twice. It gives you confidence the work was done correctly rather than rushed to a visible finish, and it provides records for any insurance claim or future resale disclosure. A contractor who balks at documenting moisture readings or the source repair may be skipping those steps. Insisting on the paper trail is one of the simplest ways a homeowner can ensure the full process was actually followed rather than just the visible parts.
Health Context Behind the Steps
The containment and HEPA steps are not formalities. The CDC links indoor mold exposure to nasal congestion, throat and eye irritation, coughing, and wheezing, with stronger effects for people who have asthma or allergies. Removal temporarily raises airborne spore counts, which is precisely why isolating the work area protects everyone in the home. Understanding why each step exists makes it easier to insist that a contractor follow all of them rather than rushing to a visible result.
Households with vulnerable occupants — young children, older adults, or anyone with asthma or weakened immunity — should plan to stay clear of the work zone during removal and let the containment do its job. Anyone who develops or experiences worsening respiratory symptoms during a project should consult a physician. The home-side priority stays the same throughout every step: eliminate the moisture so the conditions that allowed mold cannot return once the work is finished.
Preparing Your Home Before Remediation Begins
A little preparation makes a remediation go faster and protects belongings. Clear the work area of furniture, stored items, and valuables, since anything left in place may need to be covered, moved, or cleaned. Provide clear access to the affected space and to any area the crew needs to reach the moisture source — under sinks, around the HVAC equipment, into the crawl space. Cover or relocate sensitive electronics and porous items that could absorb spores during the work.
Plan for the work zone to be sealed and possibly off-limits during the job, with negative-air machines running. If you have pets or household members with asthma or allergies, arrange for them to stay out of the area, and discuss with the crew whether they should be away from the home entirely during active removal. Confirming these logistics in advance avoids surprises and lets the crew focus on the work rather than on moving your belongings.
After Remediation: Maintaining the Result
Completing the six steps is not the end of the homeowner’s role. A remediation lasts only as long as the conditions that caused the mold stay corrected. Keep indoor relative humidity below 60 percent, ideally 30 to 50 percent, using a hygrometer to monitor and a dehumidifier where needed. Run exhaust fans, fix new leaks promptly, and keep an eye on the spots that gave trouble before.
Watch for early warning signs that the source was not fully resolved: a returning musty odor, fresh staining, or visible regrowth. Catching these quickly keeps a small recurrence from becoming a repeat of the whole project. A properly executed remediation with a corrected moisture source rarely fails on its own; when mold returns, it usually means a new or overlooked water problem, which is why ongoing moisture awareness is the homeowner’s most valuable habit after the crew leaves.
References
- Mold Cleanup in Your Home — U.S. Environmental Protection Agency
- A Brief Guide to Mold, Moisture and Your Home — U.S. Environmental Protection Agency
- About Mold and Your Health — Centers for Disease Control and Prevention
If you want a Front Range professional to confirm the moisture source before remediation begins, reach out through our contact page to connect with a vetted local inspector.