How to Remediate Mold: A Plain-Language Guide
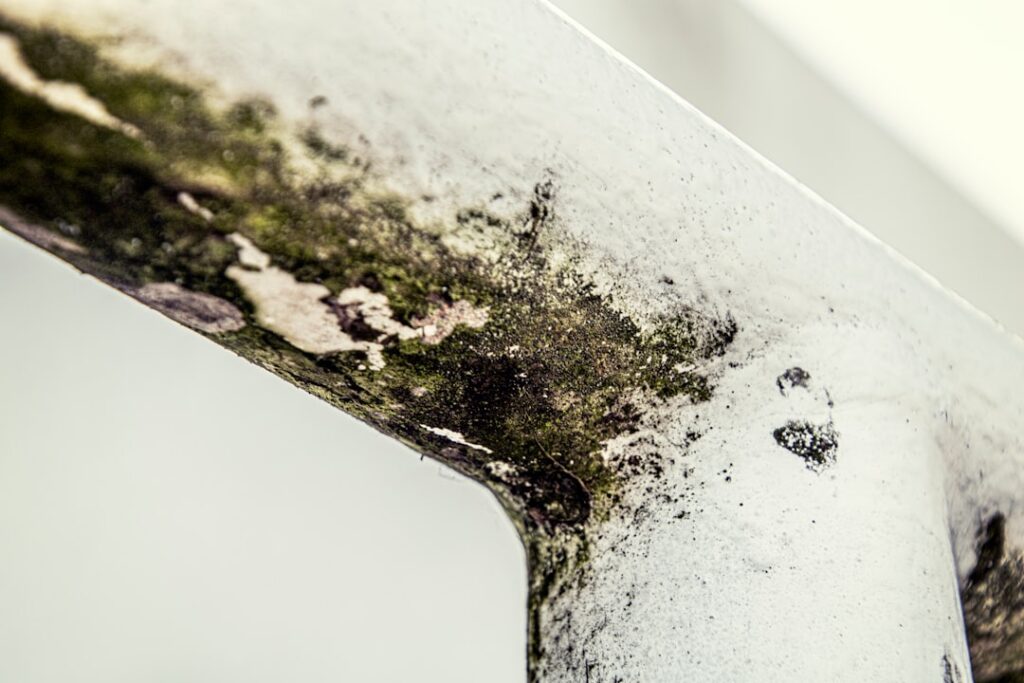
Finding mold in a home raises an immediate practical question: how do you actually get rid of it the right way? Remediating mold means more than wiping a stain — it is a structured process of removing the growth, cleaning surfaces, and fixing the moisture so the problem does not return. Done properly, even a do-it-yourself job follows the same principles professionals use. This guide summarizes EPA and CDC guidance current as of 2026 and is informational only — consult your physician about symptoms and a certified professional for large or hidden growth.
Is this mold, asbestos, or water damage? Get a free instant screen
Upload a clear photo of the suspect area. You'll get an instant AI screening opinion and what to do next. This is screening guidance, not a professional determination.
Screening guidance only. AI can be wrong. Confirm asbestos, mold type, or lead with lab testing or a licensed professional before acting.
How to remediate mold, step by step
For surface mold under roughly 10 square feet, the EPA indicates most homeowners can handle remediation themselves. The sequence below mirrors professional practice scaled to a small job.
1. Find and fix the moisture first. Mold is a symptom of water. Identify the leak, condensation, or humidity feeding it and stop it. Cleaning before fixing the source guarantees regrowth.
2. Gear up. Wear an N95 respirator (or better), rubber gloves, and eye protection without vent holes. Mold cleanup releases spores into the air.
3. Contain the area. Close doors, cover vents, and for anything beyond a tiny patch, hang plastic sheeting to keep spores from spreading to clean rooms.
4. Remove unsalvageable materials. Soaked, moldy porous items — drywall, insulation, carpet, padding, ceiling tiles — usually cannot be cleaned and should be bagged, sealed, and discarded.
5. Clean hard surfaces. Scrub nonporous surfaces with detergent and water. The EPA notes bleach is generally unnecessary; physical removal is what matters, and bleach does not penetrate porous materials.
6. Dry thoroughly. Use fans and a dehumidifier to dry the area completely. Lingering moisture restarts growth within days.
7. Verify and monitor. Confirm no visible mold remains and no musty odor lingers, then watch the area over the following weeks for return.
The 10-square-foot rule and when to stop
The EPA’s general guideline draws the DIY line at roughly 10 square feet — about a 3-by-3-foot patch. Below that, on hard surfaces, with a clear and fixable moisture source, most homeowners can proceed safely. Above it, or when the situation is complicated, professional remediation is warranted.
Stop and reconsider DIY if the growth covers more than 10 square feet, is inside walls or the HVAC system, follows flooding or sewage, keeps returning after cleaning, or if anyone in the home has asthma, allergies, or a weakened immune system. Disturbing large mold areas without proper containment can spread spores throughout the house and make things worse. The broader mold inspection and testing hub explains how professionals assess extent and when sampling helps.
Setting up containment for a DIY job
The step homeowners skip most often is containment, and it is what keeps a small project from spreading spores through the house. Even a modest cleanup releases spores into the air, and without precautions the HVAC system and ordinary air currents carry them to clean rooms.
For a DIY job, close the door to the work area and seal any HVAC vents in the room with plastic and tape so the system does not pull spores through the home. Turn off the central fan while you work. Lay plastic sheeting or towels to catch debris, and keep a sealable trash bag ready for contaminated materials. Lightly misting the moldy surface with water before scrubbing reduces how many spores go airborne. For anything beyond a small patch, hang plastic sheeting to wall off the area. When finished, bag everything, wipe down tools, and change and launder clothing. Scaling these measures to the size of the job is part of doing remediation correctly rather than just cleaning.
Drying: the step that makes or breaks the job
Removing visible mold feels like the finish line, but drying is what actually prevents return. Mold needs only 24 to 48 hours of dampness to regrow, so a surface that looks clean but stays damp will be moldy again within days. After cleaning, run fans to move air across the surface and a dehumidifier to pull moisture from the room. In a contained space, this may take a day or more.
Confirm dryness rather than assuming it. A moisture meter on the cleaned material and a hygrometer reading the room’s humidity tell you whether you have actually succeeded. Professionals dry to documented target readings for exactly this reason. For a homeowner, the practical rule is to keep drying until the material feels and reads dry and the room’s relative humidity sits within the 30–50% range. Declaring victory early is the single most common reason a DIY remediation fails.
What you need and what actually works
The supply list is short: N95 respirator, gloves, eye protection, a stiff brush or sponge, detergent, plastic sheeting and bags, fans, and a dehumidifier. A moisture meter and hygrometer help confirm you have dried things out.
On products, the honest reality is that no spray substitutes for scrubbing and drying. Detergent and water remove most surface mold. White vinegar and 3% hydrogen peroxide help on stains. Bleach whitens but is unnecessary on hard surfaces and useless on porous ones. The comparison in our guide to the best way to clean mold matches products to surfaces so you do not overspend on specialty cleaners.
Remediating specific areas
Walls
Wipe and dry intact painted drywall without soaking it. Replace drywall that is soft, crumbling, or stained through. Tile and concrete tolerate scrubbing well. Detailed wall technique is covered in our guide to cleaning mold off walls.
Bathrooms
Scrub grout and tile, and cut out and replace moldy caulk that will not clean. Improve ventilation to stop recurrence.
Basements and crawl spaces
These damp, enclosed spaces need humidity control after cleaning. A dehumidifier and sometimes a vapor barrier prevent return. Extensive below-grade growth often warrants a professional.
HVAC systems
Mold in ducts or on coils is a professional job. The system spreads spores throughout the home when it runs, and proper cleaning requires specialized access and equipment.
Health considerations during remediation
The CDC reports that disturbing mold during cleanup releases spores that can cause nasal congestion, throat irritation, coughing, wheezing, and eye irritation, with stronger reactions in people who have asthma, allergies, or weakened immune systems. This is the core reason for the respirator, gloves, and containment — the act of remediating temporarily raises exposure before it lowers it. The American Lung Association associates damp, moldy environments with increased respiratory symptoms even in otherwise healthy occupants. People in higher-risk groups should not perform mold remediation themselves, and anyone whose symptoms ease away from home should treat that as a prompt to address the moisture and consult a physician in parallel.
Finding the moisture source before you start
Because remediation targets moisture first, the work really begins with diagnosis, and rushing past this step is why DIY jobs fail. The source almost always falls into one of three categories, each pointing to a different fix. Active leaks — plumbing under sinks and behind walls, roof leaks running down framing, appliance supply hoses, failed window seals — produce localized, recurring growth that stops only when the leak is repaired. Condensation appears where humid indoor air meets a cold surface such as an uninsulated exterior wall, a basement foundation wall, a single-pane window, or a cold-water pipe; there is no leak to find, and the fix is insulation, lower humidity, or better airflow. Chronic high humidity affects a whole space — a damp basement, a crawl space, a poorly ventilated bathroom — where the air itself stays above 50 to 60 percent and the remedy is drying the air with a dehumidifier and ventilation.
A moisture meter and an inexpensive hygrometer turn this from guesswork into measurement. The meter shows whether a material is wet behind a dry-looking surface, and the hygrometer tells you whether the room’s air is the problem. If the source is not obvious and the growth keeps returning, the moisture may be hidden inside a wall cavity or the HVAC system, which is the point where professional moisture mapping with thermal imaging pays for itself.
Handling the materials you remove
What you do with contaminated materials during the job affects whether spores stay contained or spread. Porous items being discarded — drywall, insulation, carpet, padding, ceiling tiles — should be sealed in heavy plastic bags inside the contained area before they are carried out, not dragged through clean rooms uncovered. Wetting the surface lightly before removal reduces how many spores go airborne as material is disturbed. Carry sealed bags out through the most direct route, ideally a door or window near the work zone rather than through the living space. Reusable tools and brushes should be cleaned and the cleaning water disposed of carefully, while disposable sponges and cloths go into the sealed waste. These handling steps cost almost nothing and are the difference between confining a problem to one room and seeding spores across the house during cleanup.
The professional remediation process
When a job exceeds DIY scope, professionals follow a defined sequence: assessment and moisture mapping; containment with plastic sheeting and negative air pressure; HEPA air filtration during work; removal of contaminated porous materials; cleaning and HEPA vacuuming of remaining surfaces; structural drying with commercial equipment; and verification through visual inspection or independent clearance testing before reconstruction. Knowing this sequence helps you evaluate a contractor’s written scope of work and confirm they address the moisture source, not just the visible mold.
Preventing mold from returning
Remediation only holds if moisture is controlled. Keep indoor relative humidity between 30% and 50% per EPA guidance, run exhaust fans in bathrooms and kitchens, repair leaks promptly, maintain gutters and grading so water drains away from the foundation, and dry any wet materials within 24–48 hours. A hygrometer helps you catch rising humidity early. Along Colorado’s Front Range, the dry climate aids fast drying, but basements, winter window condensation, and summer monsoon moisture still create reliable problem zones.
Building a simple moisture-response kit makes prevention automatic. A wet/dry vacuum, a couple of fans, a portable dehumidifier, and an inexpensive moisture meter let you dry a leak or spill within the critical 24–48-hour window before mold can start. Pair that with a habit of checking the usual trouble spots — under sinks, around the water heater, behind appliances, and along basement walls — every month or two, and most remediation needs never develop.
Common remediation mistakes to avoid
A handful of errors repeatedly undo good intentions. Cleaning the mold but never fixing the moisture source guarantees regrowth. Painting or sealing over mold traps it, and it bleeds back through. Relying on a biocide spray or fogger alone leaves porous materials contaminated, because the chemical does not reach the roots. Soaking drywall to clean it drives moisture into the board. Disturbing a large area without containment spreads spores through the house. And calling the job done by appearance instead of confirming dryness invites a fast return. Avoiding these is mostly a matter of remembering that remediation targets moisture first and the visible growth second.
When to call a professional
Bring in a qualified remediation contractor when mold exceeds about 10 square feet, is hidden, is in the HVAC system, or follows flooding or sewage, and whenever occupants have respiratory symptoms that ease away from home. Choose firms trained to recognized standards such as IICRC S520, insist on a written scope that addresses moisture, and prefer independent clearance testing over self-verification.
References
- Mold Cleanup in Your Home — U.S. Environmental Protection Agency
- Mold Remediation Guidance — U.S. Environmental Protection Agency
- About Mold and Health Effects — Centers for Disease Control and Prevention
- Mold and Dampness Indoors — American Lung Association
If a mold problem looks larger than a weekend project or the moisture source isn’t obvious, Front Range homeowners can reach a vetted inspector through our contact page before deciding how to proceed.