Best Way to Clean Mold: Methods and Products Compared
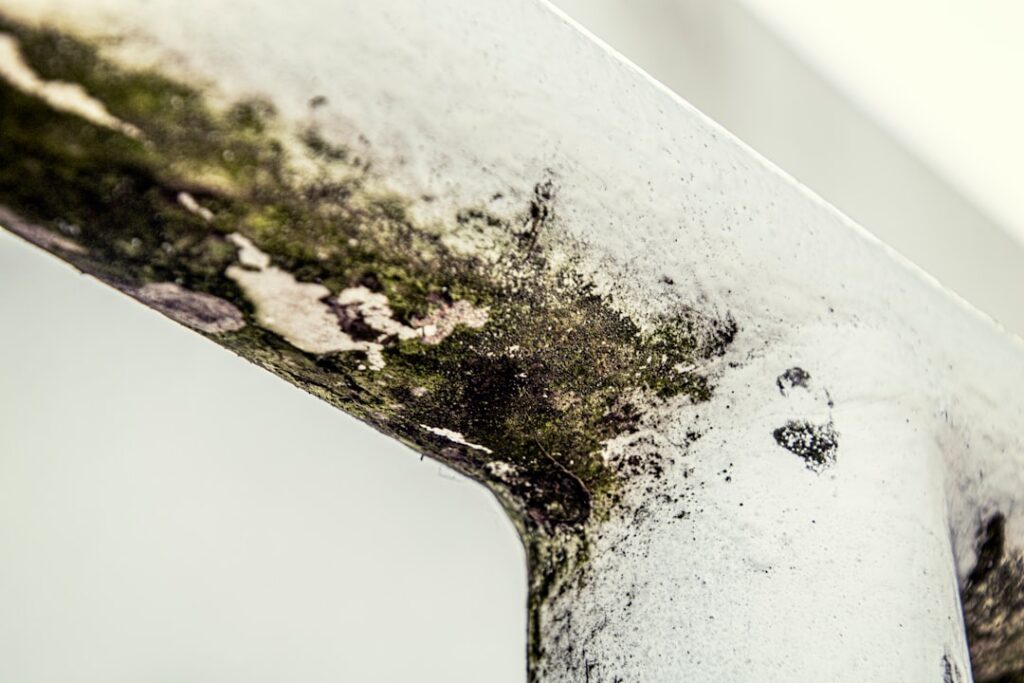
The best way to clean mold depends less on a miracle product and more on matching the right method to the surface and, above all, removing the moisture that fed the growth. Homeowners comparing sprays, scrubs, and professional services usually find that the differences between cleaning agents are smaller than the differences between fixing the source and ignoring it. This guide summarizes EPA and CDC guidance current as of 2026 and is informational only — consult a physician about health symptoms and a certified professional for large or recurring growth. The goal here is a practical comparison so you can choose confidently.
Part of our Mold Removal & Remediation guide — start there for the full picture →
Is this mold, asbestos, or water damage? Get a free instant screen
Upload a clear photo of the suspect area. You'll get an instant AI screening opinion and what to do next. This is screening guidance, not a professional determination.
Screening guidance only. AI can be wrong. Confirm asbestos, mold type, or lead with lab testing or a licensed professional before acting.
What is the best way to clean mold?
For small areas of mold on hard surfaces, the EPA’s recommended method is the most reliable: scrub the surface with detergent and water, then dry it completely. The cleaning agent kills and lifts the growth, but drying is what stops it from returning. Killing mold is not enough on its own — dead spores still trigger allergic reactions, so the growth must be physically removed, not just sterilized in place.
The “best” product varies by surface. Hydrogen peroxide and white vinegar work well on grout, painted drywall, and caulk; bleach excels on glass, glazed tile, and other non-porous surfaces but underperforms on porous materials; plain detergent and elbow grease handle most jobs. What truly separates success from failure is whether you found and fixed the leak, condensation, or humidity behind the mold. For a method-by-method comparison across surfaces, the guide on the best way to kill mold goes deeper, and the broader mold inspection hub explains when cleaning is the wrong call entirely.
Comparing the main cleaning agents
Each common cleaner has a clear best use and a clear weakness. Choosing well means thinking about the surface, the size of the area, and the people in the home.
White vinegar
Vinegar (about 5 percent acetic acid) kills many household mold species and penetrates slightly into porous surfaces, which is why it outperforms bleach on grout and painted drywall. It is cheap, leaves no toxic residue, and is reasonably safe to use indoors with ventilation. Apply undiluted, let it dwell for an hour, then scrub and wipe. The downside is the smell, which dissipates as it dries, and the need for contact time.
Hydrogen peroxide
Three percent hydrogen peroxide is an oxidizer that both kills mold and bleaches out staining. Spray it on, wait about ten minutes, then scrub. It breaks down into water and oxygen, so there is no harsh residue, and it is gentler on the lungs than chlorine bleach. It works well on tile, grout, walls, and many fabrics, though it can lighten some colored materials, so test first.
Chlorine bleach
Bleach removes dark mold staining quickly on hard, non-porous surfaces, which makes it satisfying to use. Its weakness is well documented: on porous materials like drywall and wood, the water carries the bleach in while the chlorine ion stays on the surface, so mold roots survive and regrow. The EPA does not recommend bleach as a routine mold cleaner for porous materials. Never mix it with ammonia or vinegar, which creates toxic gas. The detail on bleach and mold on each surface shows exactly where it helps and where it fails.
Detergent and water
The simplest option is also the EPA’s headline recommendation for hard surfaces. Detergent and water with vigorous scrubbing removes mold physically, and physical removal is what matters most. It is safe, cheap, and works on the widest range of surfaces. Pair it with thorough drying and it handles the majority of small household jobs.
Commercial mold cleaners
Store-bought mold and mildew sprays combine surfactants with an oxidizer or quaternary ammonium compound. They are convenient and often labeled with EPA registration numbers for specific surfaces. Read the label for surface compatibility and dwell time. They are not magic — on porous materials they share bleach’s limitations — but they save mixing and offer consistent strength. The guide on mold and mildew stain removers covers what to look for on the label.
Matching method to surface
Surface type should drive your choice. On glass, glazed tile, sealed countertops, and metal, almost anything works — bleach, peroxide, vinegar, or detergent — because the mold sits on top and wipes away. Dry thoroughly afterward.
On grout and caulk, peroxide or vinegar penetrates the porous joints better than bleach; badly stained or cracked caulk is often best removed and replaced. On painted drywall with light surface mold, gentle detergent or vinegar works, but if the paper face is stained or soft, the drywall has likely absorbed moisture and needs replacement, not cleaning. On bare wood framing, detergent scrubbing followed by complete drying handles surface growth; deeply penetrated or rotted wood must be removed. Carpet, ceiling tile, and insulation that grew mold are porous and generally cannot be cleaned reliably — replace them.
The drywall exception
Drywall causes the most confusion. Surface mold on intact, painted drywall can be cleaned. But once the gypsum core or paper backing absorbs water and grows mold, cleaning the face leaves colonies behind the surface. Soft, bubbled, or stained-through drywall should be cut out and replaced. This is the single most common reason a cleaned spot returns.
Concrete, grout, and natural stone
Masonry surfaces hold moisture differently. Concrete basement walls and floors can be cleaned with detergent and scrubbing, but if the slab is wicking ground moisture, surface cleaning is temporary until the water problem is addressed. Grout is porous and benefits from peroxide or vinegar with dwell time; a stiff grout brush does most of the work. Natural stone like marble or travertine can be etched by acids, so vinegar is a poor choice there — a pH-neutral cleaner or dilute hydrogen peroxide is safer. Always test any agent on an inconspicuous corner of a colored or natural material first.
A safe step-by-step cleaning process
Regardless of product, the sequence is the same. Protect yourself first: wear an N95 respirator, gloves, and eye protection, and ventilate the space. Find and fix the moisture source — a leak, condensation, or high humidity — before you clean, or the work is temporary.
Apply your chosen agent and give it contact time. Scrub the growth off with a stiff brush rather than dry-brushing, which scatters spores. Wipe the surface clean, then dry it completely with fans and, if needed, a dehumidifier. Bag and discard porous materials you removed. Finally, watch the area for a week; rapid return means moisture remains. Do not combine cleaning chemicals at any point.
DIY versus professional remediation
The EPA draws a practical line at roughly 10 square feet of contaminated area. Below that, on hard surfaces, careful DIY cleaning is reasonable for most homeowners. Above it — or whenever mold sits inside porous materials, in HVAC ducts, or follows flooding or sewage — professional remediation is the safer and often cheaper path once you account for spread.
Professionals add containment with plastic sheeting and HEPA-filtered negative air pressure, so spores do not migrate during demolition, plus moisture diagnosis and clearance verification. People with asthma, allergies, or compromised immunity should not perform cleanup themselves. The trade-off is cost: DIY is cheap but limited; professional work is more expensive but appropriate for larger or hidden contamination. The overview of what mold abatement services cover explains where the extra cost goes.
Cost expectations
DIY cleaning costs little more than the price of detergent, vinegar, or peroxide and an N95. Professional remediation ranges widely with project size — a single contained patch sits at the low end, while multi-room post-flood contamination climbs substantially because of containment, material removal, drying equipment, and rebuild. Treat any figure as a range and get more than one written scope.
The hidden cost of cleaning wrong
The cheapest-looking option often becomes the most expensive. Bleaching a porous wall, repainting over mold, or skipping the moisture repair buys a few weeks before the growth returns, usually larger than before because the moisture kept feeding it. Each repeat cleaning carries another round of spore exposure and another lost weekend. Doing the job correctly once — fix the water, remove the material, dry the structure — almost always costs less over a year than chasing the same recurring stain. When the affected area is borderline in size or you cannot find the moisture source, paying for an assessment up front is cheaper than guessing wrong.
Tools that make cleaning safer and faster
A few inexpensive tools improve results. A HEPA vacuum captures loose surface spores before and after scrubbing without redistributing them, unlike a standard vacuum that exhausts fine particles back into the room. Stiff nylon brushes, disposable microfiber cloths, and a pump sprayer for even application of vinegar or peroxide all help. A moisture meter, even a basic one, tells you whether a surface is actually dry before you call the job finished, which prevents the premature closing-up that leads to regrowth.
Protective gear is non-negotiable for anything beyond a tiny spot: an N95 respirator (not a cloth mask), nitrile gloves, and non-vented goggles. For larger DIY jobs, plastic sheeting to isolate the work area and a box fan exhausting out a window reduce how far spores travel. None of this is exotic, and the total outlay is modest compared with a remediation bill, but skipping it turns a contained cleaning into a house-wide spread.
Why cleaning fails and how to prevent regrowth
The most common reason cleaning fails is untreated moisture. Spores are always present in indoor air; they only colonize damp surfaces. If the leak, condensation, or humidity continues, the spot returns within days. The second most common reason is cleaning the surface of a porous material that has already absorbed mold below the surface.
To prevent regrowth, keep indoor relative humidity between 30 and 50 percent, run exhaust fans during showers and cooking and confirm they vent outside, and repair leaks within the 24-to-48-hour window the EPA cites before mold typically begins. In Front Range homes, summer monsoon humidity and winter ice dams are recurring triggers; a basement or crawl-space dehumidifier and clear gutters address both. Consistent moisture control beats any cleaning product.
Front Range factors that affect cleaning
Colorado’s dry climate helps in one respect — surfaces dry faster after cleaning than they would in a humid region, which slows regrowth once the moisture source is fixed. But several local conditions still drive mold. Basement and crawl-space seepage is common in older Front Range housing, summer monsoon humidity spikes feed bathroom and window growth, and winter ice dams push water into ceilings and exterior walls. Homes using evaporative coolers add indoor moisture by design.
These patterns mean the cleaning agent is rarely the deciding factor on the Front Range; the moisture mechanism is. A bathroom that grows mold every summer needs better ventilation, not a stronger spray. A basement corner that darkens each spring needs drainage and grading work. Matching the fix to the seasonal trigger — a dehumidifier for humid weeks, gutter and grading repairs for snowmelt, exhaust-fan upgrades for showers — is what makes a single cleaning hold instead of becoming an annual ritual.
Step-by-step cleaning method that works
Regardless of which product fits the surface, the sequence is consistent. Protect yourself first with an N95 respirator, gloves, and non-vented goggles, and ventilate the space. Confirm the moisture source is fixed or at least identified. Mist the moldy area lightly so spores cling rather than scatter when disturbed. Apply your chosen agent and give it the right contact time — about an hour for vinegar, ten minutes for peroxide, or the label dwell time for a commercial product.
Scrub the growth off with a stiff brush rather than dry-brushing. Wipe the surface clean with disposable cloths and bag them. Dry the area completely with fans and, if available, a dehumidifier, since residual moisture restarts growth. Finally, watch the spot over the following week; a quick return signals that moisture remains and the source needs another look. This disciplined order — protect, fix, apply, scrub, dry, verify — is what separates a lasting result from a temporary one, and it applies whether you reach for vinegar, peroxide, or a store-bought cleaner.
References
- Mold Cleanup in Your Home — U.S. Environmental Protection Agency
- A Brief Guide to Mold, Moisture and Your Home — U.S. Environmental Protection Agency
- About Mold and Health — Centers for Disease Control and Prevention
- Mold and Your Health — National Institute of Environmental Health Sciences
Frequently asked questions
What is the single best product for cleaning mold?
There is no single best product. The EPA recommends detergent and water with scrubbing for hard surfaces. Vinegar and hydrogen peroxide outperform bleach on porous materials like grout and drywall. Drying the surface completely matters more than the agent you choose.
Why does bleach fail on drywall?
On porous drywall, the water in bleach soaks into the material while the chlorine stays on the surface. Mold roots below survive and regrow. Vinegar or peroxide penetrate better, but stained-through drywall should be replaced rather than cleaned.
How do I keep mold from coming back after cleaning?
Fix the moisture source first, then keep indoor humidity between 30 and 50 percent, run exhaust fans, and repair leaks within 24 to 48 hours. Without moisture control, cleaned mold returns within days regardless of product.
When should I hire a professional instead of cleaning it myself?
Hire a professional when contamination exceeds about 10 square feet, sits inside porous materials or HVAC ducts, or follows flooding or sewage. People with asthma, allergies, or weakened immunity should also avoid DIY mold cleanup.
Is killing the mold enough?
No. Dead mold spores still cause allergic reactions, so growth must be physically removed, not just sterilized. Scrub it off and wipe the surface clean rather than spraying and leaving it in place.
Front Range homeowners facing mold that keeps returning can get in touch through our contact page to connect with a vetted local inspector who can pinpoint the moisture source before you spend on cleaning again.