Best Way to Clean Mold Off Walls
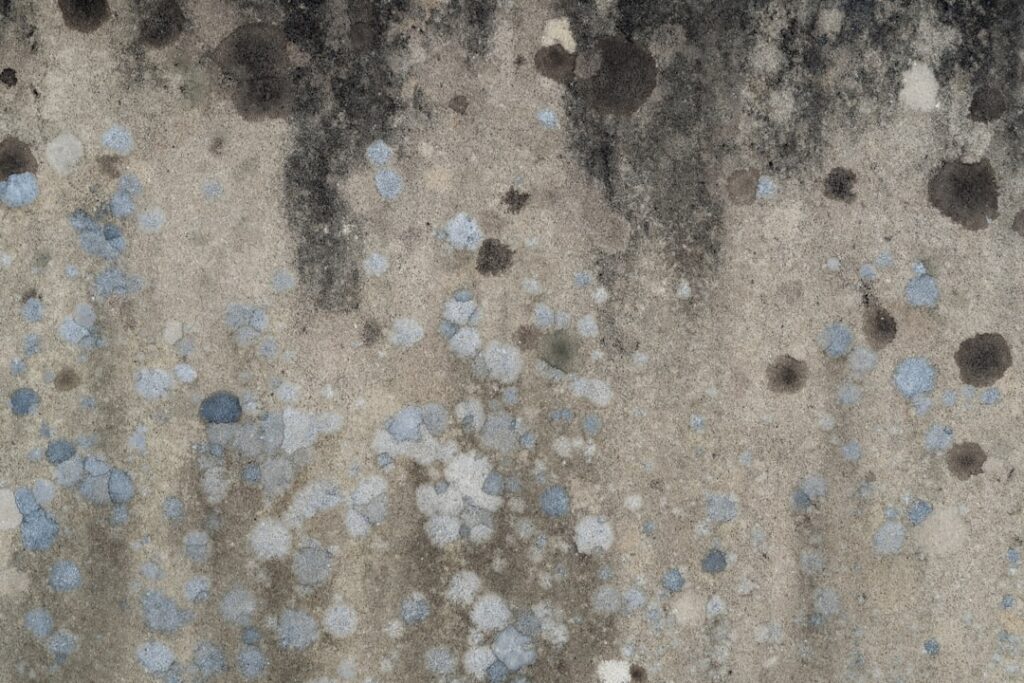
What’s the Best Way to Clean Mold Off Walls?
The best way to clean mold off walls is to use detergent and water on non-porous surfaces, scrub gently, dry the area completely, and fix the moisture source, while wearing protective gear and containing the work; bleach is not required for routine cleaning. This method works for small surface growth on sealed walls and tile, but it has a firm limit: when mold has penetrated porous material like soaked drywall, cleaning will not work and removal is the answer. The EPA recommends soap and water for many surfaces and notes the moisture fix is essential. This guide is educational and is not a remediation or medical diagnosis; treat areas under about 10 square feet as DIY-appropriate.
Is this mold, asbestos, or water damage? Get a free instant screen
Upload a clear photo of the suspect area. You'll get an instant AI screening opinion and what to do next. This is screening guidance, not a professional determination.
Screening guidance only. AI can be wrong. Confirm asbestos, mold type, or lead with lab testing or a licensed professional before acting.
When Cleaning Is the Right Choice
Cleaning works when growth sits on the surface of a non-porous or sealed material and the wall beneath is sound and dry. Painted walls with an intact film, tile, and sealed surfaces fall into this category. The affected area should be small, within the EPA’s roughly 10-square-foot guideline for homeowner cleanup, and there should be no sign that the material itself is soft, crumbling, or saturated.
If those conditions hold, cleaning is genuinely effective and far cheaper than removal. The sections below walk through the method, then cover the equally important question of when cleaning is the wrong choice.
Gather Gear and Set Up Containment
Before cleaning, protect yourself and the rest of the home. Wear an N95 respirator, gloves, and eye protection to avoid inhaling or contacting spores. Even for a small job, hang plastic sheeting to isolate the area and lay sheeting below to catch debris, so disturbed spores do not spread to clean rooms.
Ventilate the immediate area to the outdoors if possible, but keep the work zone contained from the rest of the house. Have disposal bags ready for used rags and materials. This setup takes minutes and prevents turning a small cleanup into a wider problem.
The Soap-and-Water Method
The EPA’s recommended approach for many surfaces is straightforward: scrub the moldy area with detergent and water. Mix a household detergent with water, apply it to the growth, and scrub gently with a brush or cloth, working on the affected spot and a small margin around it. The goal is to physically remove the growth, not just discolor it.
Avoid aggressive blasting that aerosolizes spores. Wipe away the loosened growth with disposable rags, replacing them as they become soiled, and bag the used materials for disposal as you go.
Why Bleach Usually Is Not Necessary
Many people assume bleach is required, but the EPA notes that in most cases ordinary soap and water are sufficient and that biocides like bleach are not recommended as a routine practice for mold cleanup. Bleach can also give a false sense of security by removing color while leaving growth in porous material, and it does nothing about the moisture that caused the problem.
For routine surface cleaning on non-porous walls, detergent and thorough drying outperform a bleach-and-walk-away approach because they pair physical removal with the essential moisture fix.
Dry the Wall Completely
Drying is as important as cleaning. Any residual moisture left in or on the wall invites regrowth, so after cleaning, dry the area thoroughly using fans, increased airflow, and a dehumidifier if available. The surface and the material behind it must return to a genuinely dry state, not merely feel dry to the touch.
Because mold can begin regrowing on a damp surface within 24 to 48 hours, prompt and complete drying is what makes the cleaning hold. Skipping or rushing this step is a common reason growth returns.
Fix the Moisture Source
Cleaning treats the symptom; the moisture source is the cause. A wall grew mold because it got and stayed wet, so unless you address why, the growth returns regardless of how well you clean. Identify whether the cause is a plumbing leak inside the wall, condensation from poor insulation, or humidity from inadequate ventilation, and correct it.
This step is not optional, and it is what separates a lasting result from a temporary one. To trace the water, see how to find the source of mold in a house.
When Removal Beats Cleaning
The most important judgment is recognizing when cleaning will not work. Porous materials that have absorbed mold, such as soaked drywall, the paper backing on drywall, wallpaper, and insulation, cannot be reliably cleaned and should be removed and replaced. If the wall material is soft, crumbling, stained through, or wet behind an intact surface, you are past cleaning.
Removal also wins when the area exceeds the small-area guideline, when growth keeps returning after careful cleaning, or when it extends into the wall cavity. For the surface-by-surface removal method, see mold removal from walls.
Signs You Should Call a Professional
Bring in a professional when the affected area is large, when growth is hidden inside walls or ducts, when there is significant water damage, when growth recurs despite proper cleaning and moisture fixes, or when household members have health sensitivities. These situations exceed what surface cleaning can resolve and call for containment, material removal, and source repair by trained crews.
An inspection can also confirm whether the growth you see is the full extent or the visible part of a larger hidden problem. Start with our mold inspection overview.
Why Scrubbing Technique Matters
How you scrub affects both the result and your exposure. Aggressive dry brushing or power tools aerosolize large quantities of spores, spreading them through the air and onto clean surfaces. The better approach is to keep the surface damp with the detergent solution while scrubbing, which traps spores in the liquid rather than letting them become airborne. Work in deliberate, moderate strokes rather than vigorous blasting.
Wipe away the loosened growth with disposable rags as you go, replacing them frequently so you are not redepositing growth back onto the wall. Bag the used rags promptly. This wet, methodical technique removes the growth effectively while minimizing the spread of spores, which is exactly the balance you want during a cleaning job. Rushing with dry, forceful scrubbing undermines the whole effort by contaminating the surrounding area even as you clean the target spot.
Cleaning Mold From Specific Wall Types
Different wall surfaces call for slightly different cleaning handling even within the non-porous category. Glossy or semi-gloss painted walls release surface growth most readily, since the sealed film keeps mold from penetrating. Flat or matte paint is more porous than it looks and may hold growth more tenaciously, so inspect closely afterward to confirm the growth is gone rather than merely faded. Tile cleans easily, but the grout and caulk lines between tiles are porous and often need extra attention or replacement.
For any surface, the test of success is the same: the growth is physically removed, the surface is left genuinely dry, and it stays clear over the following weeks. If a particular wall type keeps re-growing despite proper cleaning and a dry surface, it signals either that the paint or grout absorbed growth too deeply to salvage or that the moisture source remains active, pointing toward removal rather than another cleaning pass.
After You Clean: Monitor the Spot
Once cleaned and dried, keep an eye on the area for several weeks. If growth returns, it signals either that the material was too saturated to salvage or that the moisture source is still active. Recurrence is your clearest feedback that the spot needs removal or professional attention rather than another round of cleaning.
Maintaining good ventilation and humidity control in the room afterward keeps conditions inhospitable to a repeat, making the cleaning a lasting fix rather than a temporary one.
Choosing the Right Cleaning Agent
The choice of cleaning agent matters less than many homeowners assume. For routine surface mold on non-porous walls, the EPA’s recommendation of detergent and water is effective because the goal is physical removal of the growth, not chemical sterilization. A stiff brush and a household cleaner, applied with some scrubbing, lift the growth from the surface so it can be wiped away and bagged.
Specialized commercial mold cleaners exist and can be convenient, but they are not necessary for the basic task on a sealed, non-porous surface. What they cannot do is overcome the limitations of porous material or substitute for fixing the moisture source. Whatever agent you choose, the decisive factors remain the same: physically remove the growth, dry the surface completely, and address the dampness that caused it.
The Problem With Painting Over Mold
A frequent shortcut is painting over mold, sometimes with paint marketed as mold-resistant, in the hope of covering the problem. This does not work as a cleaning method. Painting over active growth traps it beneath the surface, where it continues if the moisture remains, and the paint typically peels or discolors as the growth pushes through. Mold-resistant paint is a preventive product for clean, dry surfaces, not a treatment for existing growth.
The correct sequence is to remove the growth, fix the moisture source, dry the surface, and only then repaint a clean, dry wall. Painting should be the final cosmetic step after the problem is genuinely resolved, never a way to hide it. Skipping the removal and moisture steps in favor of a coat of paint reliably leads to the growth returning, often worse than before.
Safety Precautions During Wall Cleaning
Even a small cleaning job warrants basic safety measures. Wear an N95 or better respirator to avoid inhaling spores, gloves to protect your skin, and eye protection against splashes and airborne particles. Ventilate the area to the outdoors while keeping it sealed from the rest of the home, and avoid aggressive scrubbing or blasting that aerosolizes large quantities of spores.
People with respiratory conditions, allergies, or weakened immune systems should be especially cautious and may be better served by having someone else do the work or by hiring a professional. Any health concern related to mold belongs with a medical professional. These precautions are simple, but they meaningfully reduce exposure during what is otherwise a straightforward cleaning task.
Preventing Mold From Returning to the Wall
Cleaning a wall successfully is only worthwhile if the growth stays gone, which depends on conditions after the work. Maintain good ventilation in the room, particularly in bathrooms and other damp spaces, and keep humidity in check with exhaust fans or a dehumidifier. Address the moisture source thoroughly so the wall does not get wet again, and monitor the cleaned spot over the following weeks.
If growth returns despite proper cleaning and a dry surface, it signals that either the material absorbed growth too deeply to salvage or the moisture source is still active. In that case, removal rather than another cleaning is the answer. Keeping the wall dry and well-ventilated after cleaning is what turns a one-time effort into a lasting result rather than a recurring chore.
References
- EPA: Mold Cleanup in Your Home
- CDC: Basic Facts About Mold and Dampness
- EPA: A Brief Guide to Mold, Moisture and Your Home
Cleaning not holding, or unsure if your wall needs removal? Get in touch with our inspection team for a clear recommendation.