Mold Removal From Walls: Step Guide
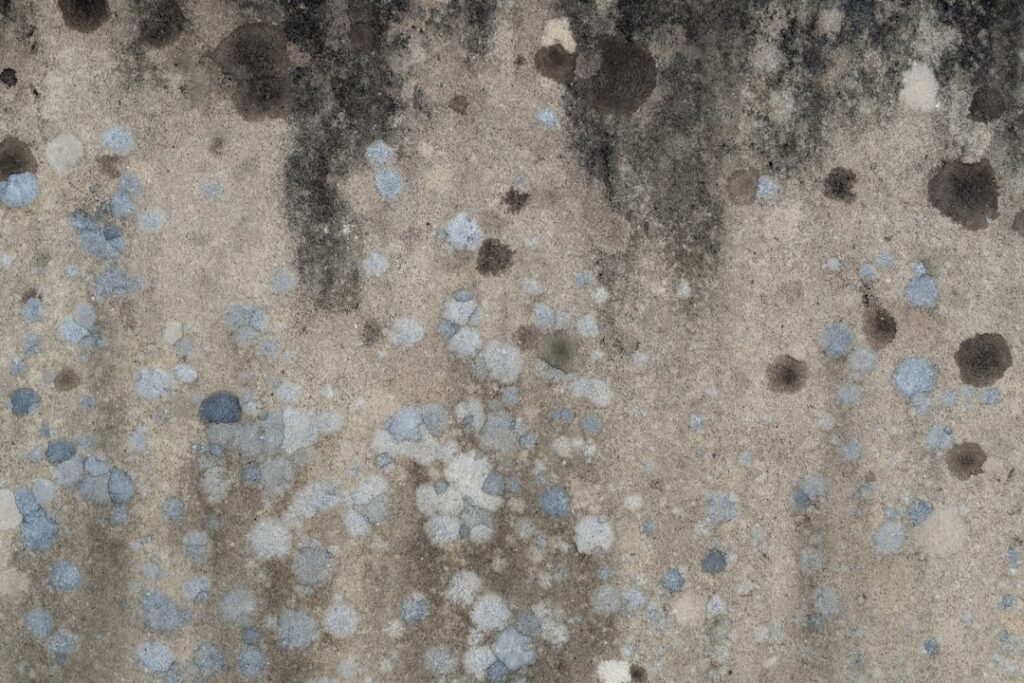
Mold Removal From Walls: A Surface-by-Surface Guide
Mold removal from walls depends almost entirely on the surface you are dealing with: non-porous walls like painted, sealed surfaces and tile can usually be cleaned, while porous materials like unsealed drywall that has absorbed moisture and growth often must be cut out and replaced. The decisive question is whether the mold sits on the surface or has penetrated into the material. The EPA notes that porous items which cannot be fully cleaned should be removed, and that any wall work must be paired with fixing the moisture source. This guide is educational and is not a remediation or medical diagnosis for your specific situation; treat areas under about 10 square feet as DIY-appropriate and larger or hidden growth as professional work.
Part of our Mold Removal & Remediation guide — start there for the full picture →
Is this mold, asbestos, or water damage? Get a free instant screen
Upload a clear photo of the suspect area. You'll get an instant AI screening opinion and what to do next. This is screening guidance, not a professional determination.
Screening guidance only. AI can be wrong. Confirm asbestos, mold type, or lead with lab testing or a licensed professional before acting.
First, Decide DIY or Professional
Before touching the wall, judge the scope. The EPA suggests a homeowner can often handle a moldy area smaller than roughly 10 square feet, about a three-by-three-foot patch, with proper precautions. Larger growth, growth inside the wall cavity, heavy water damage, or health sensitivities call for a professional. Wall mold that has spread behind the surface is frequently bigger than it looks, so be honest about what you are seeing.
If the job is DIY-appropriate, gather protective gear, an N95 respirator, gloves, and eye protection, plus plastic sheeting and tape to contain the area and bags for disposal. Containment matters even on a small job to keep spores from spreading.
Painted and Sealed Walls
A painted, sealed wall is non-porous on its surface, which means surface mold can usually be cleaned if the paint film is intact and the drywall beneath is not soaked. Clean the area with detergent and water, scrubbing gently, then dry it thoroughly, because leftover moisture restarts growth. The EPA recommends soap and water for many surfaces and notes bleach is not required for routine mold cleanup.
The catch is that paint only protects as long as the film is unbroken and the wall behind it is dry. If the paint is bubbling or peeling, or the drywall feels soft, moisture has gotten behind the film and the problem is no longer a surface one. In that case, cleaning the paint will not solve it.
Drywall and Other Porous Walls
Unsealed or water-damaged drywall is porous and absorbent, so mold growth penetrates into the material where surface cleaning cannot reach. When drywall has absorbed both moisture and growth, the reliable answer is removal and replacement rather than cleaning. Cut out the affected section back to dry, sound material, bag it, and dispose of it according to local rules.
This is the limit of DIY for many wall jobs: once you are cutting drywall, you may uncover hidden growth in the cavity, wet insulation, or framing damage. If the affected area exceeds the small-area guideline or the damage runs deeper than expected, stop and bring in a professional. For the cost of larger wall work, see house mold removal cost factors.
Tile and Grout Walls
Tile itself is non-porous and cleans easily, but grout and caulk are porous and hold growth tenaciously. Scrub tile surfaces with detergent and water, then address the grout lines, which often need more thorough scrubbing. Growth that has penetrated deep into grout or caulk may resist cleaning, in which case removing and re-applying the caulk, or in stubborn cases regrouting, is the lasting fix.
Dry the area completely afterward and improve ventilation, since tile walls in showers and tubs stay damp and re-colonize quickly without better airflow and faster drying between uses.
The Critical Limit of Porous Materials
The single most important principle in wall mold removal is that porous materials which have absorbed mold cannot be reliably cleaned and should be removed. This applies to soaked drywall, the paper backing on drywall, wallpaper, and insulation behind the wall. Attempting to clean these leaves growth embedded in the material, and it returns.
Recognizing this limit prevents wasted effort. If your fingernail or a moisture meter shows the wall material itself is soft, crumbling, or wet, you are past the point of surface cleaning and into removal. This is also the point where many DIY jobs should become professional ones.
Fix the Moisture Source First or Simultaneously
Removing wall mold without addressing why the wall got wet guarantees it returns. Before or alongside the removal, identify and fix the moisture source, whether a plumbing leak inside the wall, condensation from poor insulation, or humidity from inadequate ventilation. A wall that keeps getting wet will grow mold again no matter how carefully you clean or replace it.
To trace where the water is coming from, see how to find the source of mold in a house. The moisture fix is not optional; it is the part that makes the removal permanent.
Step-by-Step for a Small Wall Patch
For a DIY-appropriate area on a non-porous surface: put on protective gear, seal off the room with plastic, and lay down sheeting to catch debris. Clean the surface with detergent and water, scrubbing the affected area and a margin around it. Dry the wall completely with fans and good airflow. Bag all used materials and dispose of them. Then monitor the spot to confirm the growth does not return, which would signal an unaddressed moisture source.
Throughout, keep the area ventilated and avoid spreading spores by working gently rather than aggressively disturbing the growth.
Preparing the Room Before You Begin
Thorough preparation makes wall mold removal safer and more effective. Clear the work area of furniture and belongings, or cover anything that cannot be moved with plastic sheeting taped down at the edges. Turn off the HVAC system serving the room so it does not draw spores into the ductwork and distribute them elsewhere. Open a window to the outdoors for ventilation while keeping the room sealed from the rest of the house with plastic across the doorway.
Lay sheeting on the floor beneath the work area to catch debris and make cleanup easier. Have your protective gear on before you start, and keep disposal bags within reach so you can bag contaminated material as you go rather than letting it accumulate. This setup takes only a few minutes but prevents the common problem of spreading spores to clean parts of the home during the work.
Handling Insulation and Wall Cavities
When wall mold removal requires opening up the wall, the cavity behind it often holds surprises. Insulation that has been wet typically cannot be salvaged and should be removed and replaced, because it holds moisture and growth deep within its fibers. The back of the drywall, the framing, and any vapor barrier all need inspection once the cavity is exposed, since growth there indicates the moisture problem reached the structure.
This is frequently the point where a DIY job should become a professional one. Discovering wet insulation, growth on framing, or a hidden leak inside the cavity means the problem is larger than a surface patch. A professional can assess structural involvement, ensure the cavity is fully dried, and rebuild correctly, whereas closing up a wall that still harbors moisture or growth simply hides the problem until it returns.
After Removal: Verifying and Rebuilding
Once the affected material is removed and the moisture source is fixed, verify the cavity and surrounding materials are genuinely dry before rebuilding. A moisture meter confirms readings have returned to normal; rebuilding over still-damp material restarts the cycle. Give the area adequate drying time with fans and a dehumidifier, then check again before closing it up.
Rebuilding involves replacing the removed drywall, insulation, and finishes. Using moisture-resistant materials in areas prone to dampness, such as moisture-resistant drywall in bathrooms, adds a measure of protection against recurrence. Finishing with paint only after confirming the surface is dry, and maintaining good ventilation afterward, helps ensure the repaired wall stays mold-free rather than becoming the site of the next problem.
When Cleaning Walls Is Not Enough
Cleaning fails when growth has penetrated porous material, when it covers a large area, when it keeps returning, or when it extends into the wall cavity. These situations call for material removal and professional help. Recurrence after a careful cleaning is the clearest sign that either the material is too saturated to salvage or the moisture source is still active.
For the specific case of cleaning versus removing on wall surfaces, our companion guide on the best way to clean mold off walls covers method and timing in detail, and you can start any assessment with our mold inspection overview.
Preparing the Room Before You Begin
Thorough preparation makes wall mold removal safer and more effective. Clear the work area of furniture and belongings, or cover anything that cannot be moved with plastic sheeting taped down at the edges. Turn off the HVAC system serving the room so it does not draw spores into the ductwork and distribute them elsewhere. Open a window to the outdoors for ventilation while keeping the room sealed from the rest of the house with plastic across the doorway.
Lay sheeting on the floor beneath the work area to catch debris and make cleanup easier. Have your protective gear on before you start, and keep disposal bags within reach so you can bag contaminated material as you go rather than letting it accumulate. This setup takes only a few minutes but prevents the common problem of spreading spores to clean parts of the home during the work.
Handling Insulation and Wall Cavities
When wall mold removal requires opening up the wall, the cavity behind it often holds surprises. Insulation that has been wet typically cannot be salvaged and should be removed and replaced, because it holds moisture and growth deep within its fibers. The back of the drywall, the framing, and any vapor barrier all need inspection once the cavity is exposed, since growth there indicates the moisture problem reached the structure.
This is frequently the point where a DIY job should become a professional one. Discovering wet insulation, growth on framing, or a hidden leak inside the cavity means the problem is larger than a surface patch. A professional can assess structural involvement, ensure the cavity is fully dried, and rebuild correctly, whereas closing up a wall that still harbors moisture or growth simply hides the problem until it returns.
Cleaning Versus Replacing: Making the Call
The decision between cleaning and replacing comes down to whether the material is non-porous and the growth is on the surface, or porous and the growth has penetrated. Painted walls with intact film, tile, and sealed surfaces lean toward cleaning. Unsealed or soaked drywall, the paper backing of drywall, wallpaper, and insulation lean toward replacement. A moisture meter and a physical check for softness help you judge which side a given material falls on.
When in doubt, lean toward removal for porous materials, because cleaning that leaves embedded growth behind only delays the problem. The cost of replacing a section of drywall is usually modest compared to the frustration of repeated cleaning that never fully works. Making an honest call early prevents wasted effort on material that was never going to come fully clean.
After Removal: Verifying and Rebuilding
Once the affected material is removed and the moisture source is fixed, verify the cavity and surrounding materials are genuinely dry before rebuilding. A moisture meter confirms readings have returned to normal; rebuilding over still-damp material restarts the cycle. Give the area adequate drying time with fans and a dehumidifier, then check again before closing it up.
Rebuilding involves replacing the removed drywall, insulation, and finishes. Using moisture-resistant materials in areas prone to dampness, such as moisture-resistant drywall in bathrooms, adds a measure of protection against recurrence. Finishing with paint only after confirming the surface is dry, and maintaining good ventilation afterward, helps ensure the repaired wall stays mold-free rather than becoming the site of the next problem.
References
- EPA: Mold Cleanup in Your Home
- CDC: Basic Facts About Mold and Dampness
- EPA: A Brief Guide to Mold, Moisture and Your Home
Frequently asked questions
Can mold be removed from a wall, or does the wall need replacing?
It depends on the surface. Painted, sealed walls and tile can usually be cleaned, but porous drywall that has absorbed moisture and growth typically must be cut out and replaced.
Do I need bleach to remove mold from walls?
No. The EPA notes soap and water work for many surfaces and bleach is not required for routine mold cleanup. Thorough drying afterward is essential.
When should wall mold removal be left to a professional?
When the area exceeds about 10 square feet, growth is inside the wall cavity, there is heavy water damage, or occupants have health sensitivities.
Why does mold keep coming back on my wall?
Because the moisture source is still active or the wall material is too saturated to salvage. Fix the leak, condensation, or humidity, and replace porous material that absorbed growth.
Not sure whether to clean or replace your wall? Ask our inspection team to evaluate the surface and the moisture behind it.
Mold removal & cleanup picks
For a small, contained patch (under ~10 sq ft) these EPA-friendly removers handle surface mold. Larger or recurring growth warrants a professional assessment first.
| Product | Why | Buy |
|---|---|---|
 RMR-86 Instant Mold Stain Remover RMR-86 Instant Mold Stain Remover | Fast-acting on stains; ventilate and wear PPE. | Amazon — $29.99 |
 Concrobium Mold Control Concrobium Mold Control | No-bleach formula that also helps prevent regrowth. | Amazon — $11.26 |
 Mold Armor Mold & Mildew Remover Mold Armor Mold & Mildew Remover | Widely stocked bathroom/surface remover. | Amazon — $22.98 |