How to Clean Mold Off a Wall: A Safe Homeowner Guide
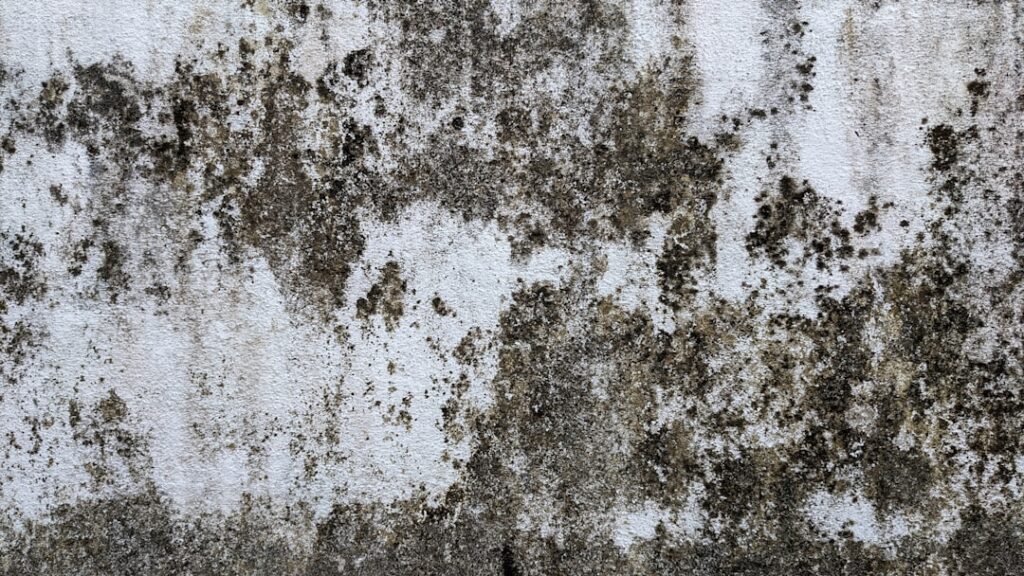
Mold on a wall ranges from a thin haze in a corner to a spreading colony that crumbles the drywall when touched. How you clean mold off a wall depends almost entirely on whether the surface is sealed and intact or porous and saturated. This guide summarizes EPA and CDC guidance current as of 2026 and offers general information rather than medical advice; anyone with respiratory conditions or a weakened immune system should consult a physician before disturbing mold.
Part of our Mold Removal & Remediation guide — start there for the full picture →
Is this mold, asbestos, or water damage? Get a free instant screen
Upload a clear photo of the suspect area. You'll get an instant AI screening opinion and what to do next. This is screening guidance, not a professional determination.
Screening guidance only. AI can be wrong. Confirm asbestos, mold type, or lead with lab testing or a licensed professional before acting.
How to Clean Mold Off a Wall Safely
For a small area of mold on a painted, intact wall, the EPA’s straightforward method is detergent and water, followed by thorough drying. The agency does not require you to identify the species, and it does not recommend chlorine bleach as a routine remover. Work through these steps:
- Stop the moisture first. A roof leak, plumbing drip, or condensation must be corrected, or the mold returns within days.
- Ventilate and put on PPE — an N95 respirator, nitrile gloves, and non-vented goggles.
- Lightly dampen the wall to suppress airborne spores, then scrub with detergent solution and a soft brush or sponge.
- Wipe the residue into a sealed bag, rinse the wall, and dry it completely with a fan or dehumidifier.
If the paint film is sound and the mold sits only on the surface, this is usually enough. If the drywall feels soft, bubbled, or stained through, the mold has penetrated the paper backing and cleaning the surface will not help.
Painted Walls Versus Bare Drywall
The material under the mold decides whether cleaning works. A sealed, glossy painted wall behaves like a non-porous surface — spores sit on top and wipe away. Flat paint, unpainted drywall, and the paper facing of gypsum board are porous. Mold roots grow into the paper fibers, and no amount of surface scrubbing removes growth embedded below.
The EPA recommends discarding and replacing porous materials that are moldy. In practice, that means cutting out the affected drywall section, bagging it, and patching with new board. Trying to salvage saturated drywall is a common mistake that leads to repeat growth. For a fuller picture of testing and assessment before you decide, our plain-language mold inspection hub explains what a professional evaluation covers.
Spotting Hidden Moisture
Mold on the lower few inches of a wall often signals wicking from a wet floor or foundation. Mold high on a wall or ceiling points to a roof or pipe leak above. A musty smell with no visible growth suggests mold inside the wall cavity. A moisture meter, the same tool inspectors rely on, can confirm whether the drywall is still wet behind a clean-looking surface.
The pattern of growth is itself a clue. A roughly circular stain centered on one spot usually marks a point leak, such as a nail-pop in a pipe or a failed supply line behind the wall. Growth that runs in a horizontal band along the floor line points to moisture wicking up from a wet slab or a foundation issue. A vertical streak often follows a downspout problem or a gap in the exterior cladding that lets rain into the cavity. Reading these patterns before you clean tells you where the water is coming from, which is the part of the job that actually matters.
What Kind of Mold Is on the Wall?
Dark wall mold can be any of several species — Cladosporium, Aspergillus, Penicillium, or the slimy dark Stachybotrys chartarum that grows on chronically soaked drywall. The EPA is clear that identifying the species is unnecessary for cleanup, since the removal steps are identical and any indoor mold reflects a moisture problem. The slimy, very dark growth on saturated drywall is a strong sign the board is beyond cleaning and should be replaced, but that is a judgment about the material’s condition, not the species name.
What to Avoid When Cleaning Walls
Dry brushing or sanding moldy drywall sends a heavy cloud of spores into the air and is one of the worst ways to start. Always dampen first. Mixing cleaning chemicals — especially bleach with ammonia or other products — can release dangerous gases, so use one cleaner at a time. Painting over mold without removing it traps the growth and rarely lasts; the new paint peels as the colony keeps feeding on moisture beneath. Our guide to cleaning mold off walls covers these missteps in more detail.
PPE and Containment for Wall Cleanup
Even a modest wall job releases spores. The CDC-recommended baseline PPE is an N95 respirator, gloves, and goggles. For anything beyond a small patch, seal the doorway with plastic sheeting and tape, cover the floor, and run a HEPA-filtered air scrubber if you have one. Bag debris inside the work area and tie it shut before carrying it through the house.
The EPA’s guideline is that a contaminated area under about 10 square feet is generally manageable for a homeowner. Larger growth, mold from sewage or flooding, or anything tied to a chronic leak calls for a remediation contractor with proper containment and equipment.
Set up the work area before you start. Lay plastic or an old sheet along the base of the wall to catch debris, close off the room from the rest of the house, and open a window for ventilation. Keep a sealed trash bag within reach so soiled rags and gloves go straight into it rather than onto the floor. If you expect to cut out drywall, score and remove it in whole pieces where possible instead of breaking it up, which keeps spore release down. Mist cut edges lightly before handling them. These small habits matter more on a wall than on a small tile patch, because vertical surfaces and wall cavities can release spores into a larger volume of room air.
Removing and Replacing Moldy Drywall
When the drywall is saturated or the paper backing is moldy, replacement is the correct fix, and it is well within reach of a handy homeowner for a small area. Mark a clean rectangle around the affected zone, extending a few inches into apparently sound material. Cut along the lines with a drywall saw or utility knife, ideally to the nearest studs so the new piece has something to fasten to. Remove the section in whole pieces, bag it, and inspect the cavity behind it. Check the insulation — if it is wet or moldy, it comes out too — and look at the framing for growth, which can be scrubbed and dried since solid wood can be dried below the level mold needs.
Let the cavity dry completely before closing it back up; a fan and dehumidifier speed this, and a moisture meter confirms the framing is dry. Then install a new drywall patch, tape, mud, and prime with a stain-blocking sealer once everything is dry. Closing a wet cavity behind new drywall simply restarts the cycle, so patience on the drying step is what makes the repair last.
Drying and Verifying the Wall
Drying is the step most people rush. Mold needs moisture to live, so a wall that is cleaned but left damp will regrow. After scrubbing and rinsing, run a box fan and a dehumidifier until the wall and the cavity behind it are dry — this can take a day or more for plaster or thick drywall. A moisture meter reading at or near the level of surrounding dry wall confirms the area is ready.
Verify the work by sight and smell over the following week. No new spotting and no musty odor indicate the moisture source is genuinely fixed. If discoloration remains but the surface is dry and the growth is gone, the mark is a cosmetic stain that can be primed and repainted with a stain-blocking sealer once fully dry.
Preventing Mold From Returning on Walls
Prevention is moisture management. Keep indoor humidity between 30 and 50 percent, which the EPA identifies as the range that discourages mold. Run exhaust fans in bathrooms and kitchens, and pull furniture a few inches off exterior walls so air can circulate and condensation does not form. Insulate cold pipes and exterior walls where practical to stop sweating. Fix leaks within 24 to 48 hours.
In Front Range basements, where cool concrete meets humid summer air, a dehumidifier is often the single most effective tool. Walls that stay below 50 percent humidity simply do not support mold, regardless of what cleaner you use. Long-term, controlling water is the only reliable way to keep a wall clean.
When the Wall Mold Signals a Bigger Problem
Some wall mold is a symptom of a structural or building-envelope issue that a cleaning will never resolve. Repeated growth along the same exterior wall can indicate failed flashing, a gap in the siding, or grading that channels rainwater toward the foundation. Mold that returns every winter on a cold exterior wall often points to a thermal-bridging and condensation problem rather than a leak — the wall surface drops below the dew point and moisture condenses out of the indoor air. Mold spreading from behind a finished basement wall may mean water is entering through the foundation.
In these cases the durable fix lives outside the wall: improving drainage and grading, sealing or repairing the exterior, adding insulation to warm the interior surface, or correcting a foundation moisture path. A professional assessment can identify which of these is at work, and our overview of cleaning mold off walls covers the warning signs that point past simple surface cleaning. Treating a building-envelope problem with a spray bottle is the most common reason wall mold keeps coming back year after year.
Health and Safety While Cleaning a Wall
Cleaning a wall disturbs mold across a larger vertical surface than a small tile patch, so spore release can be significant, especially if cutting or sanding is involved. The CDC associates damp, moldy indoor environments with throat irritation, coughing, nasal congestion, and aggravated asthma in sensitive people, which is why PPE and ventilation matter even for a modest job. Wear an N95 respirator, gloves, and goggles, open a window, and close off the room from the rest of the house. Never dry-sand or dry-brush moldy drywall, since that sends a heavy cloud of spores into the air; dampen surfaces first.
People with asthma, allergies, weakened immune systems, or chronic lung conditions should consider having someone else do the work, and anyone who develops persistent symptoms afterward should consult a physician. There is no need to fear a single “toxic” species, because the cleaning approach is identical for any mold and the CDC reports no conclusive evidence that ordinary household black mold causes the severe illnesses sometimes claimed.
After the Wall Is Clean
Once the growth is gone and the wall is dry, finishing matters. Discoloration that remains is usually a cosmetic stain rather than living mold; prime it with a stain-blocking sealer once the surface is fully dry, then repaint. Resist the urge to paint before the wall and cavity have dried, because trapping moisture under fresh paint restarts the problem and causes peeling. For a replaced drywall section, the new board should be primed and painted to match.
Keep an eye on the spot over the next couple of weeks. No return of growth and no musty odor indicate the moisture source was genuinely corrected. If the patch reappears, the underlying water problem is still active and needs to be traced before any further cleaning or painting. A wall that stays dry and clean through a full humid season is the real sign the job succeeded.
References
- Mold Cleanup in Your Home — U.S. Environmental Protection Agency
- About Mold and Your Health — Centers for Disease Control and Prevention
- A Brief Guide to Mold, Moisture and Your Home — U.S. Environmental Protection Agency
Frequently asked questions
What is the best thing to clean mold off a wall?
For a painted, intact wall, detergent and water work well according to the EPA. Scrub the surface, wipe up residue, and dry thoroughly. Specialized cleaners are optional; the key is removing the growth and eliminating the moisture that caused it.
Can I clean mold off drywall, or does it need replacing?
Sealed, painted drywall with surface mold can often be cleaned. Bare, soft, or saturated drywall has mold growing into the paper backing and should be cut out and replaced, since cleaning the surface leaves the embedded growth behind.
Should I paint over mold on a wall?
No. Painting over active mold traps it, and the paint peels as the colony keeps growing in the moisture beneath. Remove the mold, fix the water source, dry the wall, then prime with a stain-blocking sealer before repainting.
How big can a wall mold patch be before I call a professional?
The EPA suggests areas under roughly 10 square feet are generally manageable for homeowners. Larger areas, recurring growth, or mold from flooding or sewage should be handled by a remediation contractor with containment and proper equipment.
If a wall keeps growing mold and you want a clear read on the moisture source, Front Range homeowners can reach a qualified local inspector through our contact page.