How to Test House for Radon: Step-by-Step Protocol
The instructions printed on a radon test kit are usually a short bullet list. The actual procedure — done correctly — has more nuance: preparing the house, placing the device properly, maintaining closed-house conditions, shipping the kit to a credentialed lab on schedule, and interpreting results against the EPA action level. This guide walks through the full procedure step by step so that a single test produces a result you can trust. The article reflects EPA, CDC, and CDPHE guidance current as of 2026; consult a NRPP-certified pro for real-estate transactions or any result-driven decision.
Part of our Radon Levels guide — start there for the full picture →
Before you start: choosing the right kit
EPA-listed kits come in three main types: charcoal canister, electret ion chamber, and alpha-track. For an initial 2-7 day screening test, charcoal or electret is the typical choice. For a confirmation or seasonal-average test, alpha-track (90 days to 1 year) is appropriate. Buy from a retailer that includes lab analysis fee in the price; some inexpensive kits require a separate payment when you mail the device. Confirm the lab is NRPP-listed for residential radon measurement.
Step 1: prepare the house (12-hour closed-house prep)
Twelve hours before the test begins, close all windows and exterior doors except for normal entry/exit. Maintain heating and air conditioning as you would in normal use; do not turn off the HVAC. Avoid running whole-house fans or window fans throughout the prep and test period. Do not operate fireplaces or wood stoves with their dampers open. The goal is to put the home in a state representative of normal closed-house occupancy, allowing radon concentration to stabilize.
Step 2: select the test location
Place the kit in the lowest level of the home that is regularly occupied or could be occupied. For most Front Range homes with finished basements, this is the basement. For slab-on-grade homes, the lowest occupied living area. Avoid placing the kit in kitchens, bathrooms, laundry rooms, or closets — humidity and air-movement patterns in these rooms distort readings. Avoid placement directly above or near floor vents.
Specific placement criteria
Position the kit 20+ inches above the floor (a shelf, table, or wall mount).
Keep 4+ inches of clearance from exterior walls, furniture, and other objects.
Maintain 3+ feet from doors and windows.
Stay out of direct sunlight and away from heat sources.
Choose a stable location where the kit cannot be moved or disturbed.
Step 3: open and activate the kit
Follow the manufacturer instructions exactly. For charcoal canisters, this typically means peeling a sealed cover from the device and placing it open-side-up. For electret kits, you may need to remove a battery isolation tab or position the device in a specific orientation. Record the exact date and time of activation on the kit’s data card or accompanying log. Many kit failures trace to incomplete activation or misrecorded times.
Step 4: maintain conditions during exposure
For the 48-96 hour exposure period (or longer for alpha-track), continue closed-house conditions. Specifically:
Keep windows and exterior doors closed except for routine entry/exit (typically less than one minute).
Continue normal HVAC operation; do not switch from heating to cooling mid-test.
Avoid running whole-house fans, window fans, or attic fans.
Do not vacuum near the device (creates air movement that distorts readings).
Do not move the device.
Do not test during unusual weather events (high winds, major storms).
Step 5: close out the test
At the end of the prescribed exposure window, close the device per manufacturer instructions. For charcoal canisters, replace the sealed cover and ensure it is airtight. Record the exact close date and time. Package the device immediately per shipping instructions provided with the kit. Avoid leaving it open or in a hot vehicle, both of which can affect results.
Step 6: ship to the lab
Most kits include pre-paid shipping labels. Mail the device the same day or next day at the latest — charcoal canisters lose accuracy as radon continues to decay during transit. Use the carrier specified in the instructions (usually USPS Priority Mail or similar). Retain the tracking number. Some labs offer expedited processing for an extra fee if you need faster results.
Step 7: receive and interpret the result
Lab results typically return in 5-10 business days after the device arrives. The report includes the average radon concentration in pCi/L over the exposure period, the exposure window, the lab identifier, and sometimes an uncertainty estimate. Some labs include guidance text comparing the result to EPA thresholds.
Interpreting the number
Below 2 pCi/L: low risk under current conditions. Retest every 2-5 years.
2-4 pCi/L: intermediate. Mitigation is optional; long-term testing for confirmation is reasonable.
4-10 pCi/L: above EPA action level. Confirm with a second test, then mitigate.
Above 10 pCi/L: substantially elevated. Mitigate promptly.
What to do with a high result
If your result is at or above 4 pCi/L, EPA recommends mitigation. Before committing to a mitigation contractor, run a second short-term test (ideally simultaneously, side-by-side) or upgrade to a professional continuous radon monitor for 48-hour verification. A single short-term test can produce false-high results due to closed-house compliance issues or weather variability. Once confirmed, contact a NRPP- or NRSB-certified mitigation contractor for a quote. Sub-slab depressurization typically costs $1,500-$3,500.
Front Range Colorado specifics
Most Front Range counties are EPA Zone 1 — predicted average indoor radon above 4 pCi/L. CDPHE data shows roughly half of tested Front Range homes register above the action level. The geology beneath Denver, Boulder, Jefferson, Adams, Arapahoe, Douglas, and El Paso counties produces elevated radon emanation from radium-bearing granitic and uranium-enriched sedimentary rock. Testing is essentially mandatory for Front Range homeowners. Our hub on radon testing for Front Range homeowners covers regional context in depth.
Common testing mistakes
Avoid these recurring errors:
Not maintaining closed-house conditions for the 12-hour prep period.
Opening windows during the test (even briefly).
Placing the kit in a closet, kitchen, bathroom, or near drafts.
Forgetting to record activation and close times accurately.
Delaying mailing the kit after the test ends.
Running the test during atypical conditions (vacation away, major HVAC change, severe weather).
Trusting a single test for high-stakes decisions without confirmation.
When to upgrade to professional testing
Use a NRPP-certified pro with a continuous radon monitor for: real-estate transactions (most contracts require professional documentation), post-mitigation verification, litigation contexts, or any result-driven decision where defensible documentation matters. Professional testing produces hourly concentration logs, chain-of-custody documentation, and digital reports that DIY kits cannot match.
Long-term testing as a follow-up
For results in the 2-4 pCi/L range, an alpha-track long-term test (90 days to 1 year) provides better confirmation than a second short-term test. The long exposure window averages out seasonal variation and produces the most representative annual exposure value. Cost is similar to short-term kits ($25-$50). Some homeowners run a long-term test annually as ongoing surveillance regardless of initial result.
Retesting after major changes
EPA and CDPHE recommend retesting after: finishing a basement, replacing the HVAC system, replacing windows or weatherstripping (which tightens the envelope), major foundation work, and 2-5 years under stable conditions. Major renovation often changes the building envelope or pressure dynamics enough to shift radon concentration substantially. Our cluster article on step-by-step radon checking covers the retest workflow in depth.
Consumer continuous radon monitors
For ongoing visibility beyond single tests, a consumer continuous radon monitor ($150-$300 one-time purchase) provides hourly readings. Models like the Airthings Wave Plus, Corentium Home, and Ecosense RD200 are popular entry-level options. Calibration drift over multi-year use is a concern; co-locating with a fresh short-term kit annually helps confirm readings. These devices are not generally accepted for real-estate transactions, but they are excellent for self-monitoring after mitigation.
Documentation to retain
Keep the lab report, the date and time records, and any photos of test placement. If you mitigate, retain pre- and post-mitigation results, the installation paperwork, and the contractor’s RMS-compliance documentation. Future transactions and renovations will reference these records.
Bottom line on how to test house for radon
A correct test combines a credentialed kit, 12-hour closed-house prep, careful placement, maintained conditions through the 48-96 hour exposure, prompt shipping, and informed interpretation of the lab result. For high-stakes decisions, escalate to professional continuous-monitor testing. For Front Range homeowners in EPA Zone 1, testing is the baseline expectation rather than an optional precaution.
Testing multi-level homes
Standard EPA guidance is to test the lowest occupied level. For homes with finished basements, this means the basement. But some scenarios warrant additional testing on other levels.
Walkout basements with mixed occupancy
Walkout basements often have varying air-tightness on different walls and may have separate HVAC zones. Test the most occupied area within the basement; if the result is elevated, consider testing the main floor as well to confirm whether radon migrates up through the home.
Slab-on-grade homes
No basement, but the slab still sits on potentially radon-emanating soil. Test the lowest occupied living area (often the main floor). Slab cracks and unsealed penetrations are the primary entry points.
Multi-story homes with bedroom over garage
Garage spaces sometimes accumulate radon, especially if the garage is below grade or partly basement-like. If a bedroom is above an attached garage, testing both the bedroom and the garage provides a complete picture.
Homes with attached ADUs
Accessory dwelling units (ADUs) often have separate HVAC, foundation, and ventilation patterns. Test the ADU separately if it is occupied or rented.
Why the basement is the highest-risk location
Radon is denser than air and tends to accumulate at the lowest level. Basements have the most extensive contact with surrounding soil (foundation walls and slab). Stack effect creates negative pressure at basement level that pulls soil gas in. Many Front Range basements have sump pits, drain tiles, and foundation cracks that provide direct soil-gas pathways. CDPHE data show basement concentrations typically run 2-5x higher than main-floor concentrations in the same home. Sleeping basement bedrooms therefore present the highest cumulative exposure risk.
Testing during real-estate inspection windows
Most Front Range real-estate contracts include a 7-10 day inspection window during which testing must complete. The compressed timeline favors professional continuous-monitor testing because results are available within 48-72 hours rather than 1-2 weeks for mail-in kits. Coordinate with the inspector to schedule radon testing on the first day of the inspection window so that the result is available before contingencies expire. Confirm with the buyer’s agent that the seller’s home occupancy will not interfere with closed-house conditions during the test.
What happens if you cannot maintain closed-house conditions
Some situations (frequent visitor traffic, vacation rental, multi-occupant household with inconsistent door discipline) make it impractical to maintain strict closed-house conditions for 48-96 hours. In these cases, switch to a long-term alpha-track test (90 days to 1 year). The long exposure period averages out daily ventilation variation and produces a more representative result. Continuous monitors are also less protocol-sensitive than short-term passive kits because the device records actual conditions throughout the period.
Re-checking after mitigation
If your initial test confirms elevated radon and you proceed with mitigation, retest 24-30 days after system commissioning. The system needs time to stabilize the sub-slab pressure differential. The post-mitigation test should show concentration below 4 pCi/L and ideally below 2 pCi/L. If the post-mitigation result remains elevated, the contractor should diagnose the issue (additional suction point needed, sealing of remaining openings, fan upgrade) and recommission. Compliant contractors include retest in the original installation cost.
References
- EPA Citizen’s Guide to Radon — U.S. Environmental Protection Agency
- CDC radon overview — Centers for Disease Control and Prevention
- CDPHE home radon testing guidance — Colorado Department of Public Health and Environment
- American Lung Association radon information — American Lung Association
Frequently asked questions
How long should a radon test run?
Short-term DIY kits (charcoal or electret) require 48-96 hours of closed-house exposure. Long-term alpha-track tests run 90 days to 1 year. Professional continuous radon monitors typically run 48 hours minimum. Closed-house conditions must be maintained throughout.
Can I open windows during a radon test?
No. Closed-house conditions must be maintained throughout the test period and for 12 hours before. Open windows allow radon to ventilate out, producing artificially low readings that may miss a real problem. Normal entry/exit through doors (under one minute) is acceptable.
Where in the house should I place the test kit?
In the lowest level regularly occupied — typically the basement. Position 20+ inches above the floor, 4+ inches from walls, 3+ feet from doors and windows. Avoid closets, kitchens, bathrooms, and locations near drafts or heat sources.
What if my result is borderline at 2-4 pCi/L?
Run a long-term alpha-track test (90 days to 1 year) to confirm whether the average annual exposure is closer to 2 or 4 pCi/L. Mitigation is optional in this range but reasonable, especially for homes with basement bedrooms or long basement occupancy.
Front Range homeowners ready to test their house for radon under transaction-grade conditions can contact our team for a referral to a NRPP-certified measurement professional.
Test your home for radon
Radon is invisible and odorless, so a test is the only way to know your level. A short-term kit gives a first reading in days; a digital monitor tracks it over time.
| Product | Why | Buy |
|---|---|---|
 AirChek Charcoal Radon Test Kit | Lab fee usually included; EPA short-term protocol. | Amazon |
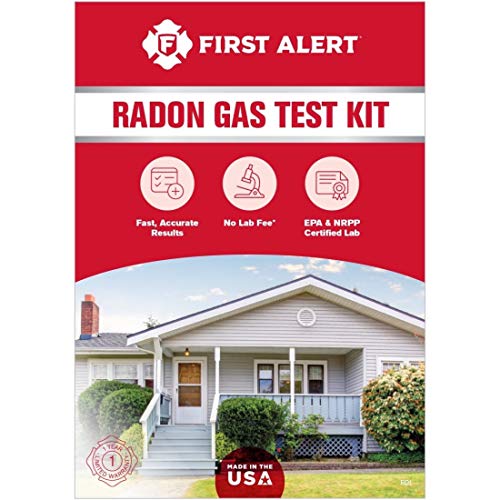 First Alert RD1 Radon Test Kit | Widely stocked; 48-hour charcoal test. | Amazon — $17.95 |
 Airthings Corentium Home | Digital monitor with a long-term average. | Amazon — $142.99 |