Radon Barrier: What Homeowners Need to Know
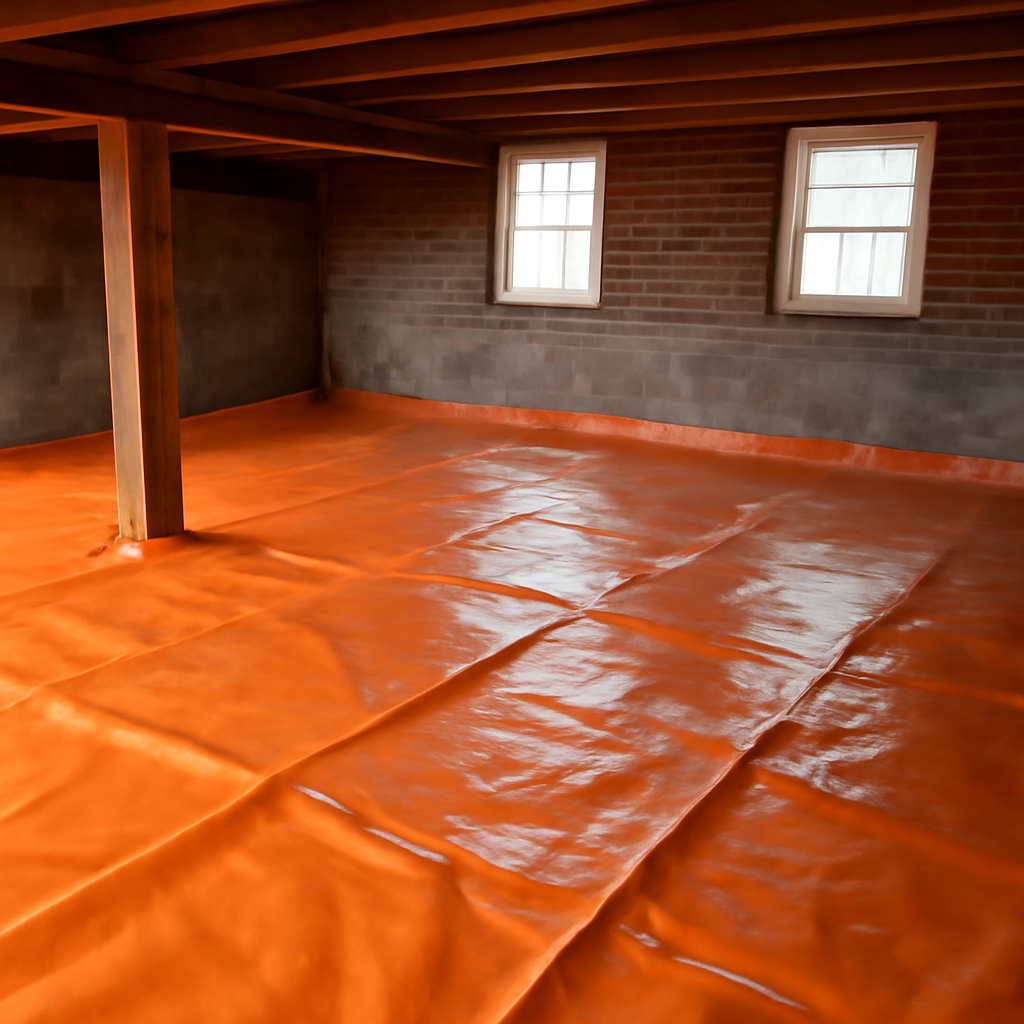
A physical barrier between the soil and a home’s living space is one of the most effective ways to keep radon from entering, especially when it is installed during construction. A radon barrier is a sealed membrane, usually heavy polyethylene sheeting, placed beneath a slab or across a crawl-space floor to block soil gas at the point where it would otherwise seep in. Used on its own or as part of a larger system, it is a cornerstone of radon-resistant construction. This guide explains what a radon barrier is, how it works, where it fits among other mitigation methods, and its limits. It reflects EPA guidance current as of 2026 and is educational rather than a diagnosis; consult a certified radon professional for testing and mitigation decisions.
Part of our Radon Levels guide — start there for the full picture →
What Is a Radon Barrier?
A radon barrier is a continuous, sealed membrane installed between the ground and a building’s interior to reduce the passage of radon gas from the soil into the home. In most cases it is a heavy-gauge polyethylene sheet, often six mils or thicker, with seams overlapped and sealed and edges fastened to foundation walls. Specialized multi-layer membranes designed specifically for radon and gas resistance are also used where higher performance is needed.
The barrier works by interrupting the pathway radon naturally takes. Radon forms continuously in soil and rock as uranium decays, and it migrates upward, entering homes through cracks, gaps around pipes, sump pits, and the porous contact between soil and slab. A sealed membrane covering that contact area blocks much of that movement, dramatically reducing the gas that reaches the living space. Understanding the source helps; our explainer on what causes radon gas describes the soil-to-home pathway the barrier is designed to cut off.
Radon barriers appear most often in two settings: beneath the slab of new construction and across the floor of a crawl space. In new builds, the membrane is laid over the sub-slab gravel before concrete is poured, integrating it permanently into the foundation. In crawl spaces, the membrane is laid across the dirt floor and sealed to the walls and piers, a step that also controls moisture and the conditions that allow mold to grow.
How a Radon Barrier Works in New Construction
The most effective place for a radon barrier is in a home being built, because the membrane can be integrated into a complete radon-resistant design at minimal added cost. The EPA promotes radon-resistant new construction, which combines several features: a layer of clean gravel beneath the slab to let gas move freely, the sealed barrier membrane over that gravel, a vent pipe running from the gravel up through the roof, and sealed entry points.
In this configuration, the barrier blocks the bulk of soil gas while the gravel and vent pipe give any remaining radon an easy path to escape harmlessly above the roofline. Many such systems are passive, relying on natural stack-effect airflow through the vent pipe. The key advantage is that the rough-in is inexpensive during construction, and if testing later shows a need, a fan can be added to convert the passive system to an active one. The relationship between passive design and a later fan is covered in our guide to passive radon systems.
Because so much of the Front Range sits in elevated-radon territory — Denver, Douglas, El Paso, and Boulder counties among them — radon-resistant construction with a quality barrier is a sensible default for new homes in the region. Building it in costs far less than retrofitting mitigation after the fact, and it positions the home to stay below the EPA action level of 4 picocuries per liter (4 pCi/L) from day one.
Radon Barriers in Crawl Spaces
Crawl-space homes are particularly vulnerable because exposed soil offers a large surface for radon to enter. Laying a sealed membrane across the entire crawl-space floor, overlapping and sealing the seams, and securing the edges to the foundation walls creates an effective barrier. This is often paired with sub-membrane depressurization, where a fan draws gas from beneath the membrane and vents it outside. The membrane does double duty, cutting radon entry and controlling ground moisture that would otherwise feed mold and wood decay.
The Limits of a Radon Barrier
A radon barrier is powerful but rarely a complete solution by itself, and understanding its limits prevents false confidence. No membrane is perfectly airtight in practice. Penetrations for plumbing and support columns, seams, and the junction with foundation walls are all potential leak points, and over time a membrane can be punctured or pulled loose. A barrier reduces radon entry substantially, but it does not guarantee a level below the action threshold on its own.
This is why barriers are usually combined with venting. The EPA’s radon-resistant approach pairs the membrane with a gravel layer and a vent pipe precisely because the two together perform far better than either alone. The barrier blocks most of the gas, and the vent gives the remainder a controlled exit. When a passive system does not achieve a low enough reading, adding a fan completes the job. A barrier is best thought of as one layer in a system rather than a standalone fix.
Retrofitting a barrier into an existing slab-on-grade home is also impractical, since the membrane belongs beneath the concrete that is already poured. For finished homes with elevated radon, active soil depressurization is usually the route rather than tearing up a slab to install a barrier. The barrier’s sweet spot is new construction and crawl spaces, where it can be installed cleanly. The broader menu of options for an existing home is laid out in our overview of radon mitigation systems.
Installation and Testing
Proper installation determines how well a barrier performs. The membrane should be a suitable thickness, laid without gaps, with seams generously overlapped and sealed using compatible tape or sealant. Edges must be sealed to foundation walls, and every penetration — pipes, posts, sump openings — needs to be carefully boomed and sealed. Sloppy seams and unsealed penetrations are where most barriers underperform.
In new construction, the barrier is part of the foundation work and is best handled by a builder familiar with radon-resistant techniques. In crawl spaces, a radon mitigation contractor typically installs the membrane and any accompanying depressurization fan. Either way, the workmanship at seams and edges is what separates an effective barrier from a leaky one.
Testing is the only way to confirm the barrier is doing its job, because radon is invisible and odorless. After installation and occupancy, the home should be tested, and if the result meets or exceeds 4 pCi/L, the system may need a fan added or other measures taken. A barrier that tests well is reassuring; one that does not signals that the system needs to move from passive to active. Pairing a quality barrier with testing, and adding active venting when the numbers call for it, is the dependable way to keep radon out of a home over the long term.
Materials and Specifications That Matter
Not all membranes are equal, and the material chosen affects how well a barrier performs and how long it lasts. Standard polyethylene sheeting in heavier gauges is common and economical, but it can be punctured during construction and degrades faster under stress. Reinforced or multi-layer membranes designed specifically for gas and radon resistance offer greater durability and lower permeability, which matters in higher-radon settings or where the membrane must withstand foot traffic during a build.
Thickness is a frequently cited specification, with heavier sheeting resisting tears better than thin material. Equally important is the system of seam tapes, sealants, and boots used to seal overlaps and penetrations, since a barrier is only as good as its weakest seam. A premium membrane installed with sloppy seams can underperform a modest membrane installed meticulously, which is why workmanship often matters more than the headline gauge number.
For crawl spaces, the membrane doubles as a vapor barrier controlling ground moisture, so durability under occasional foot traffic and resistance to tearing become practical concerns. Homeowners weighing options should focus less on chasing the thickest possible sheet and more on a quality membrane installed correctly, with attention to every seam, edge, and penetration. The combination of suitable material and careful installation is what delivers reliable performance.
Radon Barriers Versus Other Mitigation Methods
Placing the barrier in context against other methods clarifies when it is the right tool. Active soil depressurization, the workhorse of radon mitigation for finished homes, uses a fan to draw gas from beneath the foundation and vent it outside; it is the standard retrofit solution and reliably drives high readings down. A barrier, by contrast, is a preventive measure best installed during construction or across a crawl space, where it blocks entry before the gas reaches the living space.
The two are not mutually exclusive and often work together. In radon-resistant new construction, the barrier blocks most gas while a vent pipe and, if needed, a fan handle the remainder. In a crawl space, a sealed membrane paired with sub-membrane depressurization combines a physical barrier with active venting for strong results. Sealing cracks and entry points supports either approach but, as the EPA notes, rarely achieves an adequate reduction on its own because gas finds countless small pathways.
Cost and timing drive the choice. Installing a barrier and passive system during construction is inexpensive relative to retrofitting mitigation later, which is the central argument for building radon-resistant features into a new Front Range home from the start. For an existing slab home with elevated radon, tearing up the slab to install a barrier makes little sense, so active depressurization is the practical answer. Matching the method to the situation — barrier for prevention in new builds and crawl spaces, active systems for remediation in finished homes — is how a homeowner gets reliable protection without wasted expense.
Long-Term Performance and Maintenance
A radon barrier installed beneath a slab is essentially permanent and requires no maintenance, which is one of its advantages in new construction. Once the concrete is poured over a properly sealed membrane, the barrier is protected and stable for the life of the foundation. This durability is part of why building it in during construction is so cost-effective compared with any later intervention.
Crawl-space membranes are more exposed and benefit from occasional inspection. Foot traffic, stored items, or work on under-floor systems can tear or displace a membrane over time, and a damaged barrier admits more radon and moisture than an intact one. Periodically checking that the membrane remains sealed at seams, edges, and penetrations keeps a crawl-space barrier performing as intended, and repairing any damage promptly preserves its effectiveness.
Regardless of the setting, periodic radon testing is the ultimate check on long-term performance, because it measures the result rather than assuming it. Testing every couple of years, and after any significant change to the home, confirms the barrier and any accompanying venting continue to hold levels below the action threshold. A barrier is a durable, largely passive defense, but pairing it with the discipline of periodic testing is what gives a homeowner lasting confidence that radon is staying where it belongs.
For Front Range buyers evaluating new construction, asking the builder directly about radon-resistant features is a worthwhile step. Confirming that a quality barrier, a sub-slab gravel layer, a vent pipe, and sealed entry points are part of the design — and that the home will be tested after completion — costs nothing and positions the household to stay below 4 pCi/L from the day they move in. Building these features in is far cheaper than retrofitting them, so the question is best raised before the slab is poured rather than after closing.
References
- Radon-Resistant Construction Basics — U.S. Environmental Protection Agency
- Radon and Your Health — Centers for Disease Control and Prevention
- Radon Guidance for Colorado Homeowners — Colorado Department of Public Health and Environment
Frequently asked questions
What is a radon barrier?
A radon barrier is a sealed membrane, usually heavy polyethylene, installed between the soil and a home's interior to block radon gas from entering. It is placed beneath a slab in new construction or across a crawl-space floor and sealed at seams and edges.
Does a radon barrier work on its own?
A barrier substantially reduces radon entry but rarely guarantees a safe level alone, because penetrations, seams, and wall junctions can leak. The EPA pairs membranes with a gravel layer and a vent pipe, and a fan can be added if testing shows it is needed.
Can I add a radon barrier to an existing slab home?
Generally no. The membrane belongs beneath the concrete, so retrofitting one into a poured slab is impractical. Existing slab-on-grade homes with high radon usually use active soil depressurization instead. Barriers suit new builds and crawl spaces.
How do I know if a radon barrier is working?
Test the home after installation, since radon is invisible. If the level meets or exceeds the EPA's 4 pCi/L action level, the system may need a fan added or other measures. Only a radon test confirms the barrier is performing.
Front Range homeowners planning new construction or worried about a crawl space can connect with a vetted local radon professional for barrier and testing guidance by getting in touch through our contact page.
Test your home for radon
Radon is invisible and odorless, so a test is the only way to know your level. A short-term kit gives a first reading in days; a digital monitor tracks it over time.
| Product | Why | Buy |
|---|---|---|
 AirChek Charcoal Radon Test Kit | Lab fee usually included; EPA short-term protocol. | Amazon — $21.95 |
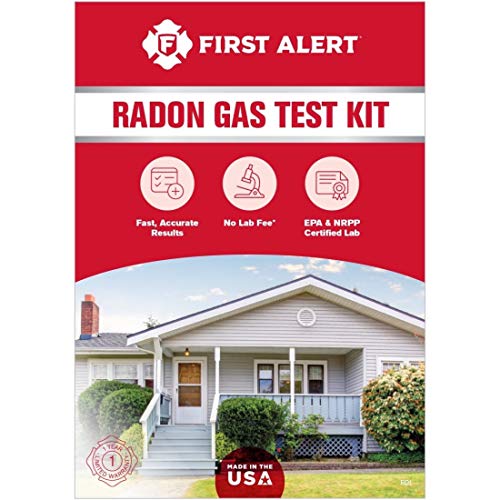 First Alert RD1 Radon Test Kit | Widely stocked; 48-hour charcoal test. | Amazon — $16.98 |
 Airthings Corentium Home | Digital monitor with a long-term average. | Amazon — $147.33 |