How to Use a Multimeter: Voltage, Continuity and Resistance
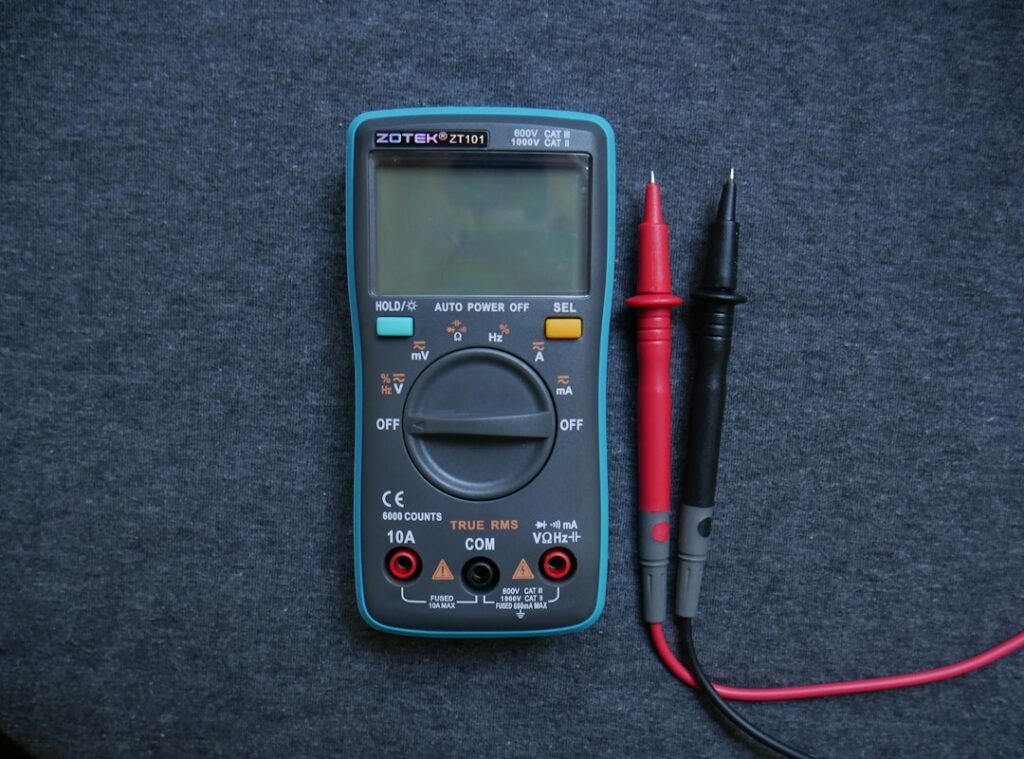
To use a multimeter, set the dial to the quantity you want to measure, plug the black lead into the COM jack and the red lead into the jack marked for volts and ohms, then touch the probes to the circuit and read the display. For voltage, the circuit stays live and the probes go across it; for continuity and resistance, the power must be off first. Those basic steps are simple, but the meter is only as safe as the habits of the person holding it, so this guide puts safety first: how category ratings work, why the current jack is the most common way people damage meters, and how to confirm a circuit is dead before touching it. It then walks through worked examples for checking an outlet, a battery, a fuse, a switch and a water heater element. It summarizes general practice and OSHA electrical-safety rules current as of 2026. Panel work and anything beyond simple testing belongs with a licensed electrician.
Part of our Home Inspection Tools guide — start there for the full picture →
The Quick Version: Dial, Jacks and Probes
Most digital multimeters share the same layout. A rotary dial selects the function, a display shows the reading, and three or four jacks on the front accept the test leads.
| To measure | Dial setting | Red lead jack | Circuit condition | Probe placement |
|---|---|---|---|---|
| AC voltage (outlets, appliances) | V with a wavy line (V~) | V/Ω | Live | Across the two points (parallel) |
| DC voltage (batteries, low-voltage supplies) | V with a straight line (V⎓) | V/Ω | Live | Red to positive, black to negative |
| Resistance | Ω | V/Ω | De-energized and isolated | Across the component |
| Continuity | Ω with a speaker or diode symbol | V/Ω | De-energized | Across the path being checked |
| Current | A or mA | A or mA jack | Circuit opened and meter placed in series | In line with the load, never across a source |
The black lead almost always stays in COM. The red lead moves. Most homeowner tasks never need the current jacks at all, and leaving the red lead in the V/Ω jack is a good default.
Safety First: Ratings, Leads and De-Energizing
A multimeter puts two metal probes into contact with live conductors. The meter, the leads and the user’s habits are the only things between a test and a shock or arc flash. Three rules from workplace electrical safety translate directly to home use.
Use a meter rated for the circuit
OSHA’s general industry rule on use of electrical equipment requires that test instruments and their accessories “be rated for the circuits and equipment to which they will be connected” and designed for the environment in which they will be used. For a multimeter, that rating appears as a measurement category (CAT) and a voltage printed near the jacks.
- CAT II covers circuits plugged into receptacles, such as appliances and portable tools.
- CAT III covers building wiring: the electrical panel, branch circuits, hardwired appliances and permanently connected equipment.
- CAT IV covers the service entrance: the utility connection, meter base and service conductors.
The higher categories are built to withstand larger transient voltage spikes that can occur closer to the utility supply. A meter marked CAT III 600 V is a sensible minimum for anyone testing household circuits beyond the receptacle. Very cheap meters without a clear category marking, or with only the lowest category, belong on batteries and electronics, not on household wiring. The leads carry their own rating, and it should match or exceed the meter’s.
Inspect the meter and leads every time
The same OSHA rule requires that test instruments, leads, cables, probes and connectors be visually inspected for external defects and damage before use, and that damaged items be removed from service. In practice, check for:
- Cracked or melted insulation on the leads
- Exposed metal at the probe base or the plug ends
- A cracked meter case or a missing battery cover
- Loose jacks, or leads that do not seat fully
- A low-battery warning, which can cause wrong readings
Probes with finger guards and short exposed tips are safer than long bare tips, which can bridge two terminals in a crowded box.
De-energize and verify before touching
OSHA’s rule on selection and use of work practices requires that live parts be de-energized before work on or near them, with limited exceptions, and that a qualified person use test equipment to verify that circuit parts are de-energized. That standard governs workplaces, but the principle applies at home: switching off a breaker is not proof the circuit is dead. Labels on panels are often wrong, multi-wire circuits can share a neutral, and some boxes contain wires from two different circuits.
The habit electricians use is often called live-dead-live:
- Test the meter on a known live outlet to confirm it reads correctly.
- Test the circuit you turned off and confirm it reads zero, checking hot to neutral, hot to ground and neutral to ground.
- Test the known live outlet again to confirm the meter did not fail during the check.
A non-contact voltage tester is a useful quick screen before opening a box, but it can miss voltage in some situations, so a contact meter is the confirmation step.
Never put the meter in current mode across a source
The single most common way people destroy a meter, and sometimes injure themselves, is leaving the red lead in the A or mA jack and then touching the probes across an outlet or battery. In current mode, the meter is nearly a short circuit. Across a live source, that can blow the meter’s internal fuse at best, and at worst create an arc. Quality meters use high-energy fuses on the current inputs and some warn when a lead is in the wrong jack, but the safest habit is simple: return the red lead to V/Ω immediately after any current measurement.
Other habits that prevent accidents
- Keep one hand away from the work when probing live circuits, and avoid touching grounded metal.
- Stand on a dry surface. Damp basements and garages raise the risk.
- Connect the black lead first and remove it last when probing a live circuit.
- Set the dial before touching the circuit, not while the probes are in contact.
- Wear safety glasses when testing at a panel or hardwired equipment.
OSHA’s electrical safety overview notes that electrical hazards include shock, electrocution, fires and explosions. Treat every unknown conductor as live until the meter proves otherwise.
Best Multimeter: our top 3 picks
| Product | Best for | Key features | Price | Buy |
|---|---|---|---|---|
| Fluke 17B+ | Best overall for home systems |
| $144.08as of Oct 19, 2026 9:27 pm GMT+0000 | Buy now →Check current price |
| Klein MM420 | Auto-ranging True RMS pick |
| $61.01as of Oct 19, 2026 8:59 pm GMT+0000 | Buy now →Check current price |
| Klein MM325 | Manual-ranging basics |
| $29.98as of Oct 19, 2026 9:27 pm GMT+0000 | Buy now →Check current price |


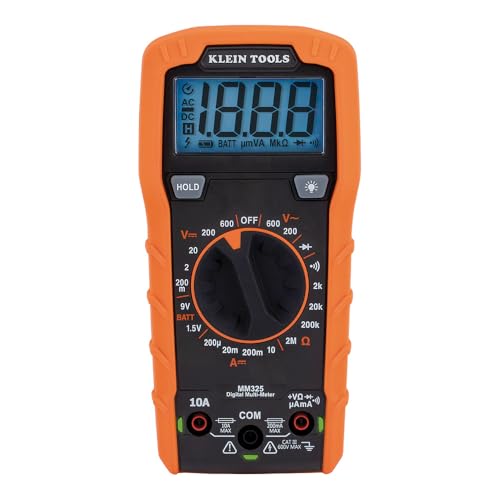
Prices are Amazon’s listed prices as of the time shown and change often; check Amazon for today’s price. As an Amazon Associate we earn from qualifying purchases.
Worked Example: Measuring AC Voltage at an Outlet
A standard 120-volt receptacle is the most common first test.
- Inspect the meter and leads. Black in COM, red in V/Ω.
- Turn the dial to AC volts. On a manual-ranging meter, choose the range just above the expected voltage, such as 200 V or 600 V.
- Insert the black probe into the larger slot (neutral) and the red probe into the smaller slot (hot). Keep fingers behind the guards.
- Read the display. A healthy U.S. receptacle typically reads somewhere around 115 to 125 volts.
- Move the black probe to the round ground hole and leave the red in the hot slot. This should read about the same.
- Check neutral to ground. This should read close to zero.
What the results suggest: zero on all three points to a tripped breaker, a failed GFCI upstream or an open connection. Normal hot-to-neutral but zero hot-to-ground suggests a missing or disconnected ground. A noticeable voltage between neutral and ground can point to a loose neutral or a heavily loaded circuit. Any of those findings is a reason to call an electrician rather than to open the box.
A 240-volt circuit for a dryer or range follows the same logic, but the higher voltage and larger conductors raise the stakes, and a CAT III meter is the minimum for that work.
Worked Example: Measuring DC Voltage on a Battery
- Turn the dial to DC volts and pick a range above the battery’s rating.
- Touch red to the positive terminal and black to the negative.
- Read the display. A minus sign means the probes are reversed, which is harmless on DC.
A fresh 1.5-volt alkaline cell usually reads a little above its rated voltage, and one well below it is near the end of its life. A 9-volt smoke-alarm battery that reads well under its rating is worth replacing. Car batteries are typically assessed with the engine off after sitting, but a meter reading alone does not prove a battery can deliver starting current, which is why shops use load testers. Cold Front Range winters are hard on car batteries, so this quick check is a common one in December.
Worked Example: Checking Continuity
Continuity mode beeps when there is a complete, low-resistance path between the probes. It answers yes-or-no questions such as whether a fuse is blown or a switch closes.
- Turn off power and unplug or remove the part being tested. Continuity testing on a live circuit can damage the meter and gives misleading results.
- Set the dial to continuity (the speaker or diode symbol).
- Touch the probes together. The meter should beep and read near zero. This confirms the leads are good.
- Touch one probe to each end of the fuse, wire or switch terminals.
- A beep means a continuous path. Silence, or a display reading OL (open loop), means the path is broken.
For a light switch removed from the wall, the meter should beep across the terminals with the toggle up and go silent with the toggle down. For a cartridge fuse, silence means it is blown. For a long extension cord, testing each conductor end to end can find a broken wire.
Worked Example: Measuring Resistance
Resistance mode gives an actual value in ohms, which helps when a part should have a known resistance. A common household example is an electric water heater element.
- Turn off the water heater’s breaker and verify it is dead with the live-dead-live check at the element terminals. Water heaters run on 240 volts.
- Disconnect at least one wire from the element so the meter measures only the element, not the rest of the circuit.
- Set the dial to ohms and touch the probes together to note the lead resistance, usually a fraction of an ohm.
- Touch one probe to each element terminal and read the value.
- Compare it with the expected value. As a rule of thumb, an element’s resistance is roughly the square of the rated voltage divided by its wattage, so a 4,500-watt element rated at 240 volts works out to about 12.8 ohms.
- Check from each terminal to the metal tank or element flange. A reading of continuity there suggests the element is shorted to ground.
A reading of OL across the terminals means the element is open and has failed. A reading close to the calculated value means it is likely fine. The same approach applies to smaller units, including the electric models covered in our guide to point-of-use water heaters, although checking the manufacturer’s service information is always the better source.
Other Useful Household Tests
Once the basic modes are familiar, a meter can answer several other common questions around a Front Range house:
- Thermostat wiring. Most forced-air furnaces use a 24-volt AC control circuit. With the furnace powered, measuring AC volts between the R and C terminals at the thermostat base typically shows roughly 24 to 28 volts. No reading can point to a blown control fuse on the furnace board or a tripped safety switch. Turn the furnace off before disconnecting any wires.
- Heat tape and roof de-icing cable. Before freezing weather, a resistance check on an unplugged heat cable shows whether the heating conductor is intact. An OL reading means the cable is open and will not protect the pipe or gutter.
- Appliance cords. With the cord unplugged, continuity from each plug blade to the matching conductor at the far end confirms the cord is not broken inside.
- Doorbell transformers. These usually output a low AC voltage that a meter on AC volts can confirm at the transformer terminals.
- Garage door sensors and low-voltage lighting. DC or AC voltage checks at the terminals help separate a wiring problem from a failed fixture or sensor.
In each case, the same rules hold: power off for continuity and resistance, the right function on the dial for voltage, and the red lead out of the current jack.
Common Mistakes and Misreadings
- Wrong function. Measuring an outlet on DC volts gives a meaningless reading. Check the symbol before probing.
- Ghost voltage. High-impedance digital meters can show a few volts, or even dozens, on a disconnected wire running beside live ones. Some meters have a low-impedance (LoZ) mode to help sort real voltage from induced voltage.
- Measuring resistance in circuit. Other components in parallel change the reading. Isolate the part first.
- Dead meter battery. A weak battery can produce unstable or wrong readings, including false zeros.
- Assuming zero means safe. A broken lead or blown internal fuse can read zero on a live circuit, which is the reason for the live-dead-live routine.
Choosing a Multimeter: Typical Features and Costs
Prices span a wide range, so these are typical national ranges rather than quotes:
- Basic meters for batteries and simple continuity checks often cost roughly $15 to $40. Many lack meaningful CAT ratings for building wiring.
- Homeowner and DIY meters with CAT III ratings, auto-ranging and a continuity beeper typically run roughly $40 to $120.
- Professional meters with true-RMS measurement, LoZ mode, high-energy fuses and CAT III/CAT IV ratings commonly run from about $150 into the hundreds.
Features worth paying for include auto-ranging, a fast continuity beeper, true-RMS for motors and dimmers, a backlight for dark crawlspaces and panels, and an input warning that alerts when a lead is in the current jack. Our roundup of the best multimeters compares current models by category rating, features and price.
A multimeter is one of several diagnostic tools homeowners and inspectors carry. The inspection tools and detectors hub collects related guides, including how to use a moisture meter and an infrared thermometer, and the home inspection tools pillar covers the wider kit.
When to Call an Electrician or Inspector
A multimeter is a diagnostic tool, not a license. Stop and call a licensed electrician when:
- The work involves the main panel, service conductors or the meter base
- Readings show a missing ground, a voltage on neutral, or unexpected voltage on metal parts
- Outlets or switches feel warm, buzz, smell burnt or show scorch marks
- The home has older wiring types, such as knob-and-tube or aluminum branch wiring, that need specialized evaluation
- Breakers trip repeatedly or lights dim when large appliances start
During a home purchase, an inspector tests a representative number of receptacles, checks GFCI and AFCI protection where present, and looks inside the panel when it is safe to do so. Front Range buyers who want electrical concerns looked at as part of an inspection can contact our team to be connected with a local inspector.
References
- 29 CFR 1910.333, Selection and Use of Work Practices — Occupational Safety and Health Administration
- 29 CFR 1910.334, Use of Equipment — Occupational Safety and Health Administration
- Electrical Safety Overview — Occupational Safety and Health Administration
Frequently asked questions
How do you test an outlet with a multimeter?
Set the dial to AC volts, put the black lead in COM and the red in V/Ω, then insert the black probe in the neutral slot and the red in the hot slot. A healthy outlet typically reads around 115 to 125 volts. Check hot to ground as well, and neutral to ground should read near zero.
What CAT rating does a multimeter need for home wiring?
For household branch circuits and panels, CAT III rated at 600 volts is a sensible minimum. CAT II covers plug-in appliances, and CAT IV covers the service entrance. The test leads should carry at least the same rating as the meter.
Can you test continuity on a live circuit?
No. Continuity and resistance tests should only be done with power off and the part isolated. Testing continuity on a live circuit can damage the meter and gives unreliable results.
Why does my multimeter show voltage on a wire that is turned off?
Digital meters with high input impedance can pick up induced or ghost voltage from nearby live wires. Some meters offer a low-impedance mode to sort real voltage from induced voltage. Treat any unexplained reading as live until a qualified person confirms otherwise.
What is the most common multimeter mistake?
Leaving the red lead in the current jack and then probing across an outlet or battery. In current mode the meter acts almost like a short circuit, which can blow its fuse or cause an arc. Return the red lead to V/Ω after any current measurement.