Can You Test for Radon Yourself: What Homeowners Need to Know

The short answer to “can you test for radon yourself” is yes — and EPA’s own testing protocols were written with the understanding that millions of American homes would be tested by their owners rather than by professionals. The longer answer is that the result is only as useful as the test conditions were correct. Passive radon test kits cost $15 to $35, take two to seven days, and produce a lab result accurate enough to drive a mitigation decision when the protocol is followed. This guide walks through the procedure, accuracy considerations, and when to step up to a continuous monitor or a certified tester. The summary reflects EPA and CDPHE guidance current as of 2026.
Part of our Radon Levels guide — start there for the full picture →
Can You Test for Radon Yourself: The Direct Answer
Yes. EPA’s Citizen’s Guide to Radon expressly recommends that homeowners test their own homes, and EPA-certified passive kits are designed for self-deployment. The accuracy of a properly conducted DIY test is comparable to a certified short-term professional test, because both use the same laboratory analysis at the back end. The difference is in the field conditions and the verifiability of the sealed-house protocol.
Colorado homeowners have particular reason to test. The Front Range, including the Denver metro and most surrounding counties, sits in EPA Radon Zone 1 — the highest-priority zone with predicted indoor screening levels above 4 pCi/L. CDPHE estimates roughly half of Colorado homes test above the EPA action level.
What a DIY Radon Test Actually Measures
A radon test measures the concentration of radon gas in indoor air over a sampling period. Radon is a colorless, odorless, radioactive gas formed by the decay of uranium and radium in soil. It enters homes through cracks in foundations, sump pits, gaps around plumbing, and crawl spaces. Concentrations are reported in picocuries per liter (pCi/L) in the U.S. or becquerels per cubic meter (Bq/m³) internationally.
The EPA action level is 4 pCi/L (about 148 Bq/m³). The WHO recommends a lower action level of 100 Bq/m³ (about 2.7 pCi/L). The companion guide can I test for radon myself with EPA protocols covers the protocol mechanics in detail.
The Three Main DIY Test Types
Three passive kit types dominate the consumer market, plus a fourth active option for homeowners who want more data.
Activated Charcoal Canister Kits
The most common short-term kit. A small cardboard or plastic container holds activated charcoal that adsorbs radon over a two-to-seven-day exposure period. After exposure, the homeowner seals the canister and mails it to the lab. Cost: $15 to $25 including lab analysis. Accuracy: adequate for screening-level decisions.
Alpha-Track Detectors
A long-term kit that uses a small plastic film that records etched tracks from alpha particles emitted by radon decay. Exposure period is typically 90 days to one year. Cost: $20 to $40 including lab analysis. Accuracy: better representation of annual average radon levels because of the longer sampling period.
Electret Ion Chamber
A precision passive device used more often by professionals. Cost: higher device cost, lower marginal cost per test. Accuracy: high.
Continuous Radon Monitors (CRMs)
An active electronic device that measures and displays radon levels hour by hour. Cost: $100 to $300 for consumer models. Accuracy: excellent, with the bonus of seeing temporal variation. EPA’s radon program recognizes CRMs alongside passive methods.
Placement: Where to Put the Test
Placement is the single most important variable the homeowner controls. A test placed in the wrong location produces a misleading result regardless of how good the lab is.
Floor Level
Test the lowest occupied floor. For most Front Range homes that means the basement if the basement is used for any living purpose, or the ground floor if the basement is unfinished and unused.
Height Above Floor
Two to six feet above the floor. Higher is fine; floor level is not.
Distance From Walls and Surfaces
At least 4 inches from walls, 12 inches from ceilings, and 36 inches from windows or exterior doors.
Areas to Avoid
Kitchens, bathrooms, and laundry rooms (high humidity affects some kit types). Garages and porches (not part of the indoor air the home occupants breathe). Areas directly above an HVAC supply register (the airflow disturbs accurate measurement).
Closed-House Conditions
EPA short-term testing protocols require closed-house conditions during the test. This is the part most homeowners get wrong.
- Windows and exterior doors closed except for normal entry and exit.
- Normal HVAC operation, including the central fan if it normally runs.
- No window fans or whole-house fans.
- Closed-house conditions should begin 12 hours before the test starts and continue throughout the test period.
Open windows during the test will dilute radon levels and produce a falsely low reading. This is the most common reason a DIY test underestimates a home’s actual radon exposure.
Duration
Short-term tests are two to seven days. EPA recommends a minimum of 48 hours and a recommended duration of 3 to 7 days for screening-level decisions. Long-term tests are 90 days or more and give a better representation of annual average exposure.
If the short-term result is close to the 4 pCi/L action level, a follow-up long-term test is the EPA-recommended path. If the short-term result is well above 4 pCi/L (say, 8 pCi/L or higher), proceed directly to mitigation. CDPHE’s radon program follows the same decision framework.
Accuracy Considerations
Several factors influence the accuracy of a DIY test result.
Temporal Variation
Radon levels vary by hour, day, and season. Winter heating-season concentrations are typically higher than summer concentrations because tighter house conditions concentrate radon. A short-term test during a single week may not represent annual average exposure.
Spatial Variation
Different rooms in the same home can have different radon concentrations. The basement is usually highest; upper floors are usually lower. EPA protocol calls for testing on the lowest occupied floor for this reason.
Test Kit Quality
NRPP-listed or NRSB-listed kits use accredited labs. Generic unlisted kits may produce less reliable results. The kit packaging should name the lab and reference the certification.
User Error
Failure to maintain closed-house conditions, incorrect placement, or delayed kit return to the lab can all skew results.
The companion guide radon testing for Colorado Front Range homeowners covers the Zone 1 context and CDPHE-specific guidance.
What to Do With Results
Below 2 pCi/L
Generally considered low. Re-test every two to five years and after any major foundation or HVAC work.
Between 2 and 4 pCi/L
Below the EPA action level but above the level at which the WHO recommends action. EPA suggests considering mitigation if the budget allows. Re-test every two years.
At or Above 4 pCi/L
EPA recommends mitigation. A certified mitigation contractor designs and installs a sub-slab depressurization system, typically $1,200 to $2,500 for a Front Range home. American Lung Association’s radon resources describe the lung-cancer risk that drives the action level.
Above 10 pCi/L
Mitigate promptly. Repeat the test after the mitigation system has run for 24 to 48 hours.
When to Hire a Certified Tester Instead
DIY testing is appropriate for ongoing homeowner screening and for buyers who want a preliminary read before formal inspection. Certified testers are appropriate when:
- The test is part of a real-estate transaction and the contract requires it.
- A lender or insurance carrier requires documented professional testing.
- A previous DIY result was inconclusive and a follow-up needs higher confidence.
- The home has a complex floor plan or multiple foundations and the right placement is unclear.
- The homeowner wants chain-of-custody documentation for legal purposes.
Certified testers typically charge $150 to $250 for a short-term test with continuous radon monitors and a written report.
Seasonal Patterns in Front Range Radon Levels
Front Range homes typically show higher radon levels in winter than in summer. The mechanism is straightforward: cold-weather heating creates a temperature differential between indoor and outdoor air, which generates a slight negative pressure in the basement (the so-called stack effect). That negative pressure pulls soil gas — including radon — through cracks, sump pits, and other foundation openings.
For a homeowner whose only short-term test was conducted in July with results just below the action level, a winter re-test is reasonable. CDPHE recommends winter testing when possible because the higher seasonal levels represent the worst-case condition that mitigation needs to address.
What a Continuous Monitor’s Temporal Data Reveals
A continuous radon monitor’s hour-by-hour data does more than report an average. Patterns in the data reveal home behaviors that affect radon exposure.
Spikes During Heating Cycles
Furnaces that share a basement with the radon source can create local negative pressure during operation, pulling additional soil gas. Spikes that correlate with the heating schedule indicate this pattern.
Drops During Open-Window Periods
An open window dilutes indoor radon rapidly. Visible drops in the temporal data identify when closed-house conditions were broken — important for verifying test validity.
Diurnal Variation
Many homes show predictable day-night patterns in radon, with higher levels overnight when the home is closed and the family is sleeping. This is normal.
HVAC Fan Operation Effects
Running the central fan continuously mixes air across floors and can lower the basement-floor concentration. This is sometimes used as a partial mitigation strategy but is not a substitute for sub-slab depressurization at elevated levels.
Common DIY Test Mistakes
- Placing the kit in a kitchen or bathroom (humidity affects charcoal kits).
- Placing the kit on the floor (too low for representative measurement).
- Placing the kit near an exterior door (drafts dilute the sample).
- Leaving a window open during the test (dilutes radon).
- Running a window fan or whole-house fan (dilutes radon).
- Forgetting to mail the kit promptly after exposure (extended delay affects accuracy).
- Reusing a previously deployed kit (cannot produce a valid result).
- Testing during a brief partial-closure period rather than maintaining closed-house conditions throughout.
The companion guide how to test radon methodology in plain language covers the protocol in additional detail.
How the DIY Test Connects to Mitigation Decisions
A DIY result above 4 pCi/L is the most common starting point for a mitigation project. The next step is engaging a certified radon mitigation contractor for a system design consultation. The contractor will perform diagnostic testing (smoke sticks to identify entry points, sometimes a sub-slab pressure-differential test) and design a sub-slab depressurization system tailored to the home’s foundation type.
Cost for typical Front Range homes ranges from $1,200 to $2,500 for installation. Annual operating cost for the system fan is roughly $50 to $150 in electricity. The system typically lasts 10 to 20 years with periodic fan replacement.
References
- EPA radon program and Citizen’s Guide to Radon — U.S. Environmental Protection Agency
- CDPHE radon and indoor air program — Colorado Department of Public Health and Environment
- American Lung Association radon and health — American Lung Association
- CDC radon and health — Centers for Disease Control and Prevention
Frequently asked questions
How long does a DIY radon test take?
Short-term passive kits sample for 2 to 7 days with lab turnaround of 3 to 10 business days. Long-term alpha-track tests run 90 days to one year. Continuous radon monitors give hourly readings immediately.
How accurate is a DIY radon test?
A properly placed kit with closed-house conditions and NRPP-listed lab analysis produces screening-quality results adequate for mitigation decisions. The main source of error is failure to maintain closed-house conditions during the test.
Do I need to hire a professional?
DIY testing is sufficient for routine homeowner screening. Certified testers are appropriate for real-estate transactions, lender requirements, or situations where chain-of-custody documentation matters.
What if my result is just above 4 pCi/L?
EPA recommends mitigation at or above 4 pCi/L. Borderline results (4 to 5 pCi/L) are sometimes followed by a confirmatory long-term test. Higher readings should proceed directly to mitigation.
Front Range homeowners with elevated DIY radon results who want a certified local mitigation contractor can reach a vetted professional through our contact page.
Test your home for radon
Radon is invisible and odorless, so a test is the only way to know your level. A short-term kit gives a first reading in days; a digital monitor tracks it over time.
| Product | Why | Buy |
|---|---|---|
 AirChek Charcoal Radon Test Kit | Lab fee usually included; EPA short-term protocol. | Amazon — $21.95 |
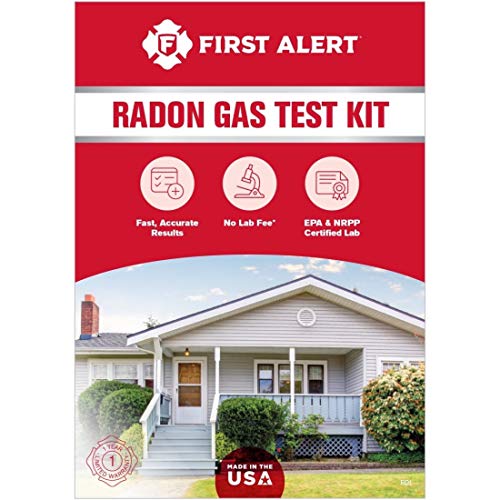 First Alert RD1 Radon Test Kit | Widely stocked; 48-hour charcoal test. | Amazon — $16.98 |
 Airthings Corentium Home | Digital monitor with a long-term average. | Amazon — $142.99 |