How to Test Yourself for Mold: Self-Testing Guide
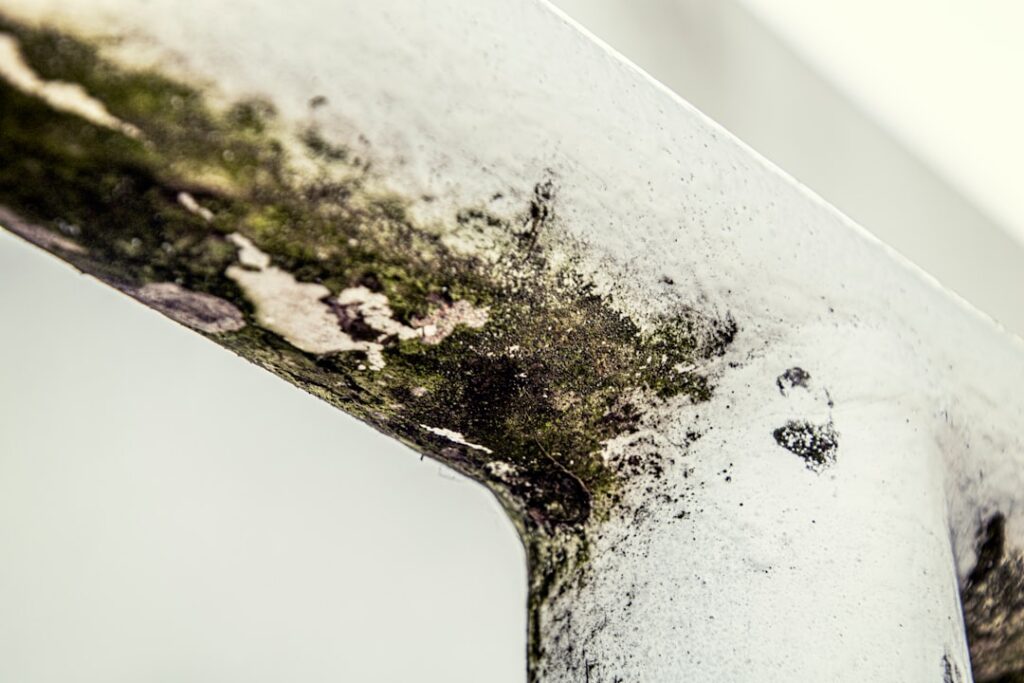
Asking how to test yourself for mold usually comes after spotting a stain, smelling something musty in a basement, or having an unexplained respiratory flare-up. Self-testing is appealing because it skips the $300 to $600 cost of a professional assessment and gives a quick yes-or-no signal that something is growing. This guide summarizes EPA and CDC guidance current as of 2026 and walks through the realistic options homeowners have, from settling-plate kits to lab-confirmed swab analysis. Consult your physician for symptoms and a certified industrial hygienist for clearance after remediation. The goal here is to help Front Range homeowners choose a method that actually answers the question they have.
Part of our Mold Testing & Inspection guide — start there for the full picture →
Is this mold, asbestos, or water damage? Get a free instant screen
Upload a clear photo of the suspect area. You'll get an instant AI screening opinion and what to do next. This is screening guidance, not a professional determination.
Screening guidance only. AI can be wrong. Confirm asbestos, mold type, or lead with lab testing or a licensed professional before acting.
Can You Really Test Yourself for Mold at Home?
Yes, with caveats. Consumer test kits sold at hardware stores or online can tell you whether mold spores are present, and a few will tell you what genus they belong to. What they cannot reliably tell you is whether the spore count is unusual for your climate, whether the species is health-relevant, or where the source is hidden behind drywall. The U.S. Environmental Protection Agency takes a pragmatic position: if you can see mold or smell it, sampling is usually unnecessary because the response (find the moisture source and clean up the growth) is the same regardless of species.
Self-testing makes the most sense in three situations: an occupant has health symptoms with no visible mold, a real-estate transaction requires documentation, or a homeowner wants a pre-remediation baseline to compare against post-cleanup results. Outside those scenarios, the time and $40 to $80 a kit costs is better spent finding the leak that allowed mold to grow.
The Three Self-Test Methods Homeowners Actually Use
Settling-Plate (Petri Dish) Kits
The cheapest option, usually $10 to $20, contains one or two agar plates that you expose to room air for an hour, then seal and incubate at room temperature for 48 to 96 hours. If colonies grow, mold spores were present. The problem is that mold spores are present in essentially every indoor environment in measurable amounts, so a positive result is the default. Without an outdoor control plate exposed for the same duration, the result is uninterpretable. Brands that ship two plates (one indoor, one outdoor) give you a comparison, but you still cannot identify species from color alone.
Surface Swabs and Tape Lifts
For visible suspected growth, a sterile swab or clear adhesive tape lift sent to a participating mycology lab will return a species-level identification within five to ten business days. Kits run $40 to $90 including return shipping and lab fee. This is the most useful self-test for confirming whether the black spots above the shower are Stachybotrys chartarum, Cladosporium, or simply mildew. The Centers for Disease Control note that species identification rarely changes the cleanup approach for small areas under 10 square feet but can matter for insurance claims.
Air Sampling Pump Rentals
Some home-improvement retailers and remediation supply houses rent calibrated air sampling pumps for $50 to $100 per day. These pull a known volume of air through a spore-trap cassette, which a lab then analyzes under microscope. This is the closest a homeowner can get to professional indoor air quality testing without hiring an inspector, and the spore-per-cubic-meter numbers can be benchmarked against outdoor air. Pair it with the guidance in our air-sampling method guide to interpret the cassette results.
Where to Sample Inside the House
Mold concentrates near moisture sources, so prioritize: bathrooms with poor ventilation, basement corners below grade, kitchen cabinets under sinks, laundry rooms, window sills where condensation pools, and any room with a history of roof or plumbing leaks. Front Range homes built before the 1990s often have minimally sealed crawl spaces; pulling a sample there frequently returns the highest spore counts in the property. Avoid sampling in active dust events such as during HVAC cycling or vacuuming, since stirred-up settled spores distort the read.
Outdoor controls matter. Always run a comparison sample on the exterior of the home, ideally 10 to 20 feet from the building envelope and away from compost piles or mulch beds. Indoor spore counts that exceed outdoor counts by a meaningful margin, or that show species not present outdoors, are the signal that something is amplifying inside. The American Industrial Hygiene Association considers a 10x indoor-to-outdoor ratio significant; some labs flag at 3x.
Symptom-Based Self-Assessment
Before spending on kits, run through a symptom checklist. CDC documentation associates indoor mold exposure with nasal congestion, eye irritation, cough, throat soreness, skin rash, and worsening asthma symptoms. People with weakened immune systems or chronic lung disease face higher risk of more serious infections. If symptoms improve when you leave the home for several days and return on re-entry, the home environment is a strong suspect even before a test confirms it.
Self-testing your own body for mold exposure is a different question. Some clinics offer urine mycotoxin panels or blood IgE antibody tests, but mainstream allergists and the National Institute of Environmental Health Sciences caution that these tests have limited diagnostic value outside of specific occupational exposures. Work with a board-certified allergist or pulmonologist before paying out-of-pocket for unproven panels.
How to Read the Results Without Panicking
A positive mold result is not a five-alarm fire. Indoor air everywhere contains some fungal spores, and most species are common environmental fungi that pose no acute risk to healthy adults. What matters is the trend: are levels elevated relative to outside, is a water-damage species (Stachybotrys, Chaetomium) present indoors but not outdoors, and is the visible growth area larger than 10 square feet. The EPA recommends professional remediation for visible mold patches exceeding that threshold or when porous materials (drywall, carpet, ceiling tile) are involved.
If kit results are ambiguous, compare with our walkthrough on how to test if you have mold in your house to cross-reference findings, and read the broader mold inspection and testing hub for context on when DIY ends and a hygienist starts.
When Self-Testing Is Not Enough
Move to a professional inspection if any of these apply: visible growth exceeds 10 square feet, occupants have diagnosed mold-related illness, the source of moisture is hidden behind a wall or under a slab, the home is part of a real-estate transaction, or you are documenting damage for an insurance claim. Certified Microbial Investigators carry calibrated equipment, write IICRC S520-compliant reports, and provide clearance testing after remediation. That third-party verification is what insurers and buyers actually accept.
For Front Range homes specifically, basement and crawl-space conditions vary enough by neighborhood that a local inspector familiar with Denver-area soil and ventilation patterns will catch issues a generic kit misses.
Cost Comparison: Self-Test Versus Professional
The economics of self-testing make sense only when the question is framed correctly. A single settling plate at $15 with paired outdoor control gets you a yes-or-no answer for under $50. A lab-analyzed swab on a visible patch runs $50 to $90 and returns species identification. A three-sample pump cassette survey costs $200 to $400 and delivers spore-per-cubic-meter counts. ERMI dust kits cost $150 to $300 and quantify long-term exposure. A professional Certified Microbial Investigator on the Front Range charges $300 to $700 for a comprehensive assessment that includes site walk, moisture mapping, calibrated thermal imaging, multiple sample types, and a written report.
The honest comparison: a thorough DIY survey approaches the cost of a basic professional inspection once equipment rental and lab fees are summed. What homeowners pay extra for with the professional route is the inspector’s pattern recognition, the third-party documentation that insurers and real-estate attorneys accept, and the calibrated equipment for moisture mapping and thermal imaging. For low-stakes curiosity, DIY wins on cost. For documented investigations tied to health, property value, or insurance, professional is the realistic option.
What to Do With Self-Test Results
A positive self-test on a small visible patch (under 10 square feet on non-porous material) leads to direct cleanup using EPA-endorsed methods: locate moisture source, contain work area, wear N95 respirator and nitrile gloves, scrub with detergent and water, dry aggressively, monitor for return over the following two weeks. A positive on a porous material like drywall or carpet usually means removal of the affected material is necessary rather than surface cleaning alone, and homeowners should match the scope to the contained-cleanup limit (10 square feet, EPA guidance).
A positive air sample without visible growth indicates hidden mold or a transient source like recent flooding. Investigate moisture pathways, check HVAC ductwork, and run repeat sampling after addressing any leaks. A persistent positive in a single room despite cleanup attempts is the strongest signal that a professional inspection with wall-cavity sampling is warranted.
A negative self-test paired with no visible growth and no symptoms suggests the home is likely fine, but a single sample is a snapshot rather than a guarantee. Maintain prevention measures (humidity below 50%, exhaust fans running, leaks repaired promptly) regardless of test results because mold prevention beats mold remediation.
Common Self-Testing Mistakes That Make Results Useless
The most frequent error in DIY mold testing is skipping the outdoor control sample. Without an outdoor baseline, indoor counts have no meaning because some level of mold spores exists in nearly every outdoor environment, and the relevant question is always whether indoor levels exceed the outdoor baseline rather than whether spores are present at all. Always run an outdoor control plate or cassette during the same hour as indoor samples, placed 10 to 20 feet from the building envelope and away from mulch or compost beds where mold concentrations are naturally elevated.
The second-most-common error is sampling during or shortly after vacuuming, dusting, or HVAC startup. These activities stir settled spores into the air and artificially inflate counts for several hours afterward. Schedule sampling for at least 24 hours after any cleaning activity, and run normal household routines during that window so the result reflects typical breathing-zone air rather than an artificial spike.
The third error is disinfecting the suspect area before swabbing. Wiping a visible patch with bleach before sampling kills surface spores and returns a false negative even when the underlying drywall is heavily colonized. Sample first, clean second. A surface swab applied to bleached material will not detect what was originally present.
The fourth error is acting on a single sample. One result is a snapshot of a particular hour and a particular location, and home humidity and air conditions vary across the day. Reliable conclusions usually require two or three samples taken under different conditions, or at minimum a paired indoor-plus-outdoor sample taken simultaneously.
Front Range Considerations for Self-Testing
Colorado homes have some climate quirks that affect self-testing protocols. Front Range humidity is generally low year-round (typically 20% to 40% indoor without humidifiers), which suppresses mold growth in most living spaces but can create surprises in basements where ground moisture migrates through perimeter walls. Summer monsoon weeks push basement humidity above 60% even in homes that maintain dry main floors, and that is when most homeowner mold concerns first develop.
Wildfire smoke season (typically July through September) creates a separate complication: outdoor air samples taken during smoke events return elevated particulate counts and can include fungal spores liberated from burned vegetation. Schedule self-testing for clear-air periods when possible, or document smoke conditions in your sampling notes so the lab can interpret the outdoor control appropriately.
Boulder, Denver, and Jefferson County basements in homes built before the 1980s commonly have minimal exterior waterproofing, and seasonal moisture patterns are familiar to local inspectors. A persistent positive self-test in a Front Range basement combined with visible efflorescence on foundation walls usually indicates a perimeter-drainage issue that warrants foundation contractor consultation alongside any mold remediation.
References
- Mold Cleanup in Your Home — U.S. Environmental Protection Agency
- Mold: Basic Facts — Centers for Disease Control and Prevention
- Mold and Health — National Institute of Environmental Health Sciences
- Mold Inspection Standards — International Association of Certified Home Inspectors
Frequently asked questions
Are DIY mold test kits accurate?
Settling-plate kits give yes-or-no presence readings but cannot identify species or quantify spores reliably. Lab-confirmed swab and air-cassette kits are far more accurate because a mycologist analyzes the sample under microscope. Expect species identification within five to ten business days from reputable labs.
How much does it cost to test yourself for mold?
Settling-plate kits run $10 to $20, lab-analyzed swabs and tape lifts run $40 to $90, and rented air-sampling pumps with cassette analysis run $100 to $200 per day plus lab fees. Total DIY cost is typically a fraction of a $300 to $600 professional inspection.
What does a positive mold test actually mean?
Some mold is present in essentially every indoor environment, so any test will show spores. A result is meaningful only when indoor levels exceed outdoor controls by 3x or more, or when water-damage species like Stachybotrys appear indoors but not outdoors. Always pair tests with outdoor comparison samples.
Should I test for mold before remediation?
A pre-remediation baseline is useful if you want to verify cleanup success with post-remediation clearance testing. For visible patches under 10 square feet on non-porous surfaces, EPA guidance says you can skip sampling and proceed straight to cleanup using soap and water.
Front Range homeowners weighing self-testing against a professional opinion can reach a vetted local inspector through our contact page for a quick consultation before spending on kits.
DIY mold test kits
A test kit can confirm whether a suspect patch is mold and (with lab analysis) what type — though visible mold over ~10 sq ft generally warrants a professional.
| Product | Why | Buy |
|---|---|---|
 DIY Mold Test (lab included) DIY Mold Test (lab included) | Surface + air-sampling options. | Amazon — $49.99 |
 Healthful Home 5-Minute Mold Test Healthful Home 5-Minute Mold Test | Rapid screening strips. | Amazon — $35.47 |
 Mold Test Plates (DIY petri dishes) Mold Test Plates (DIY petri dishes) | Settle-plate style sampling you culture at home. | Amazon — $22.99 |