Remove Black Mold Yourself: A Safe Step-by-Step Guide
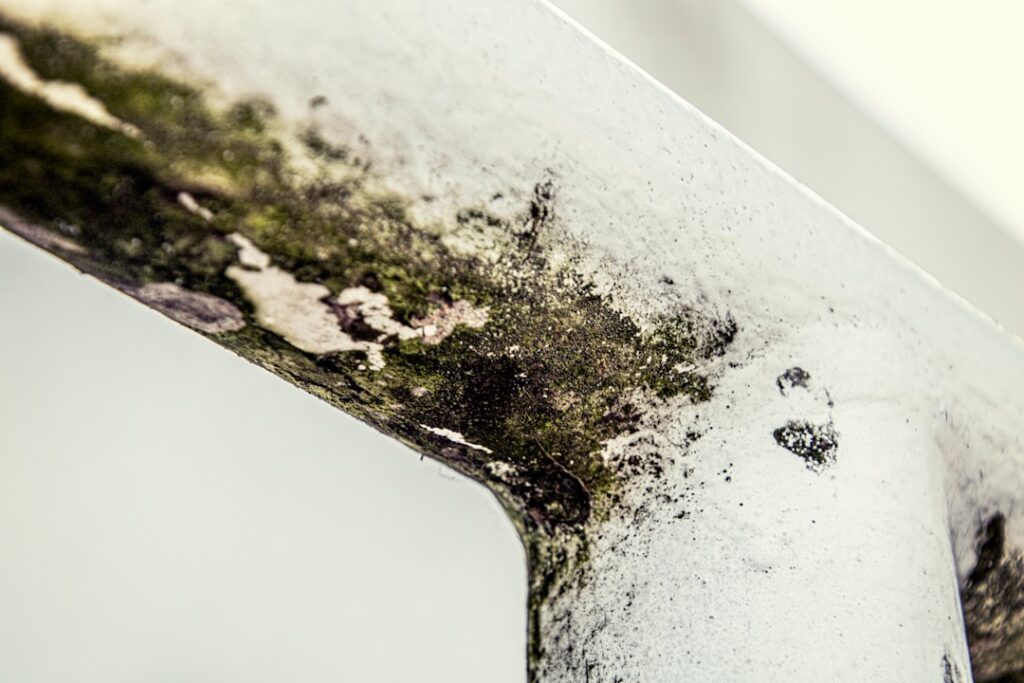
Getting rid of black mold comes down to four moves done in order: protect yourself, physically remove the growth and any material it soaked into, dry the area completely, and fix the water that fed it. Color tells you nothing about species or hazard, so the method is identical whether the patch looks black, green, or gray. This guide follows EPA and CDC cleanup guidance and focuses on what you actually do, not on which spray brand promises the most.
Is this mold, asbestos, or water damage? Get a free instant screen
Upload a clear photo of the suspect area. You'll get an instant AI screening opinion and what to do next. This is screening guidance, not a professional determination.
Screening guidance only. AI can be wrong. Confirm asbestos, mold type, or lead with lab testing or a licensed professional before acting.
Is this a job you should do yourself?
The EPA’s practical cutoff is about 10 square feet, roughly a 3-by-3-foot patch. Under that, a careful homeowner can handle it. Call a remediation contractor when the growth is larger than that, when it followed sewage backup or a flood, or when it sits inside HVAC ducts, where cleaning can push spores through the whole house. Skip the job entirely if you have asthma, mold allergies, or a weakened immune system, regardless of size. The health effects of black mold exposure land hardest on those groups, and no cleanup is worth a respiratory flare.
Gear up and seal the room first
Before you disturb anything, put on an N95 respirator (a dust mask is not enough), nitrile or rubber gloves that reach past the wrist, and non-vented goggles. Wear clothes you can wash hot or throw away. Then contain the work: tape plastic sheeting over doorways and over any supply vents, and switch off the central HVAC so it does not circulate spores. Open a window to the outside for airflow. Disturbing mold is what makes it airborne, so containment done before the first scrub is what keeps a bathroom problem from becoming a whole-house one.
Remove the mold — the part that actually matters
The EPA is blunt on the core principle: physically removing mold matters more than killing it, because dead spores still trigger allergic reactions. So the goal is to get the growth off or out, not just to bleach the stain pale. How you do that depends entirely on whether the surface is porous.
| Surface | What to do |
|---|---|
| Hard, non-porous (tile, glass, metal, sealed countertops, finished wood) | Scrub with detergent and water until the growth is gone, rinse, and dry completely. These can almost always be saved. |
| Semi-porous (grout, bare masonry, framing lumber) | HEPA-vacuum, scrub, and dry. Grout may need a baking-soda paste and a brush; sound framing can be scrubbed and, once dry, lightly sanded. |
| Porous (drywall, carpet, ceiling tile, insulation, upholstery) | If it is more than surface-stained, cut out and discard it. Mold roots into the core where scrubbing cannot reach. |
Trying to salvage soaked drywall is the single most common reason black mold comes back. The rules for cleaning mold on porous surfaces are different enough from hard-surface cleaning that people routinely get this wrong. Mist heavy growth lightly with water before scrubbing to cut down airborne dust, and bag every scrap of debris inside the sealed zone before carrying it out.
What about bleach?
Bleach is the reflexive home remedy, and it is overrated for this job. On a porous material, the water in the bleach soaks into the surface while the chlorine largely stays on top — you get a lighter stain and living mold still rooted underneath. The EPA does not recommend bleach for routine mold cleanup and states that detergent and water works for most jobs. Vinegar or hydrogen peroxide are reasonable choices on non-porous surfaces. Whatever you use, never mix products: bleach combined with ammonia or with vinegar releases toxic gases. A pale stain is not proof of success — see whether dead black mold still matters for why lightened does not mean gone.
Dry the area, then find the leak
Mold needs moisture, so the removal is not finished until everything is dry. Run fans and a dehumidifier, and confirm dryness with a moisture meter rather than by touch before you rebuild, repaint, or re-caulk. The CDC advises keeping indoor humidity below 50 percent. Colorado’s dry air helps surfaces dry quickly, but moisture trapped behind a vapor barrier or below grade can linger and needs to be checked, not assumed.
Then fix the water source, because black mold returns wherever water keeps arriving. On the Front Range the usual culprits are foundation seepage after snowmelt, ice-dam leaks at the roof edge, failing window seals, and chronic bathroom humidity. The EPA’s guidance is unambiguous: control moisture and you control mold. A flawless cleanup undone by an unrepaired leak will regrow within 24 to 48 hours.
The three spots people ask about most
Bathroom. Scrub tile and glass with detergent and dry them. Grout holds mold in its pores — a baking-soda paste and a brush lift most of it, with regrouting as a cosmetic fallback. Silicone caulk that is blackened through should be cut out and replaced, since mold grows beneath it. The durable fix is running the exhaust fan during and for 20 minutes after every shower. The full routine is in getting rid of black mold in the shower.
Basement. Below-grade damp, poor airflow, and porous storage make basements a magnet. Remove and replace moldy drywall, carpet, and insulation; clean salvageable masonry and framing; dry the space with a properly sized dehumidifier; and improve exterior drainage before rebuilding. See removing mold in a basement for the drainage side.
Walls. Intact paint over light surface growth may clean up. Soft or soaked drywall, or growth that returns, means cutting out the section and checking the cavity behind it for hidden mold and moisture before you close it back up.
Keep it from coming back
Prevention is one habit — moisture control — expressed a few ways: keep indoor humidity in the 30 to 50 percent range, run kitchen and bath exhaust fans, dry any wet material within 24 to 48 hours, fix leaks promptly, direct downspouts away from the foundation, and grade soil to shed water. In a basement, a sealed sump pit and a right-sized dehumidifier do most of the work. There is no way to make a home mold-proof, only moisture-controlled, so monitor the repaired area through the next wet season and watch for a returning musty odor.
Frequently asked questions
This guide reflects EPA and CDC mold-cleanup guidance current as of 2026; consult a certified professional for testing and your physician for health concerns. Front Range homeowners who want an independent assessment before or after removal can start at our mold inspection hub.
References
- Mold Cleanup in Your Home — U.S. Environmental Protection Agency
- A Brief Guide to Mold, Moisture and Your Home — U.S. Environmental Protection Agency
- Mold: Frequently Asked Questions — Centers for Disease Control and Prevention
Mold removal & cleanup picks
For a small, contained patch (under ~10 sq ft) these EPA-friendly removers handle surface mold. Larger or recurring growth warrants a professional assessment first.
| Product | Why | Buy |
|---|---|---|
 RMR-86 Instant Mold Stain Remover RMR-86 Instant Mold Stain Remover | Fast-acting on stains; ventilate and wear PPE. | Amazon — $25.99 |
 Concrobium Mold Control Concrobium Mold Control | No-bleach formula that also helps prevent regrowth. | Amazon — $13.48 |
 Mold Armor Mold & Mildew Remover Mold Armor Mold & Mildew Remover | Widely stocked bathroom/surface remover. | Amazon — $22.98 |