How to Remove Mold From Crawl Space Yourself
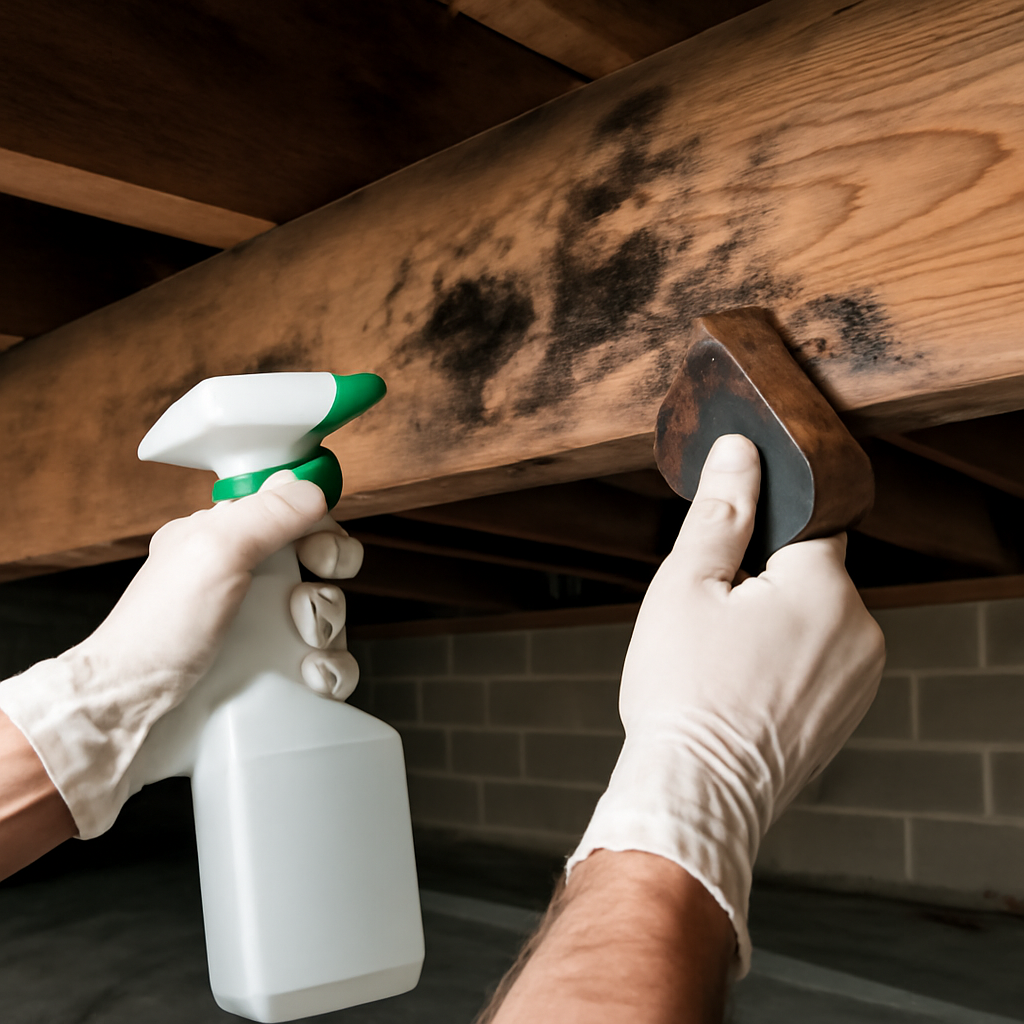
Crawl spaces are out of sight, which is exactly why mold thrives there. They are dark, poorly ventilated, often damp from the ground below, and rarely inspected until a musty smell drifts up into the living space. Tackling crawl space mold yourself is possible for small, accessible growth, but it demands the right precautions and an honest read on when the job is too big. This guide explains how to remove mold from crawl space yourself, the gear and method involved, and the moisture fixes that make it stick. It summarizes EPA and CDC guidance current as of 2026; consult your physician for symptoms and a certified professional for testing or large-scale removal decisions.
Is this mold, asbestos, or water damage? Get a free instant screen
Upload a clear photo of the suspect area. You'll get an instant AI screening opinion and what to do next. This is screening guidance, not a professional determination.
Screening guidance only. AI can be wrong. Confirm asbestos, mold type, or lead with lab testing or a licensed professional before acting.
How to Remove Mold From Crawl Space Yourself
DIY crawl space removal is reasonable only when the growth is small, accessible, and on hard surfaces. The EPA says homeowners can usually clean areas under about 10 square feet on hard materials with detergent and water, followed by thorough drying. Crawl space framing, joists, and concrete piers fall into the cleanable category; insulation and any porous material that is heavily contaminated should be removed and discarded.
The basic sequence is: confirm the moisture source, gear up, clean or remove affected materials, dry the space, and then control the moisture going forward. Because crawl spaces are confined and ventilation is poor, spore exposure during cleanup is higher than in open rooms, so protection matters more here. Anyone with asthma, allergies, or a weakened immune system should not attempt the job.
If the growth is widespread across the framing, the subfloor is affected, or there is standing water, the situation exceeds a DIY scope. The mold inspection and testing hub explains how professionals assess crawl space moisture, and the guide on mold under the house covers the broader crawl space picture.
The Gear You Need
Crawl space work demands more protection than an open room. At minimum, wear an N-95 or N-100 respirator, goggles without vents, gloves, and a disposable coverall or old clothing you can launder separately. A headlamp keeps your hands free, and knee pads or a creeper board make movement bearable in tight quarters.
For cleaning, bring detergent and water, a stiff scrub brush, a spray bottle, and contractor bags for debris. A HEPA-filter vacuum helps capture loose spores; a standard shop vacuum without HEPA filtration will scatter them instead. A fan and a dehumidifier are needed afterward for drying. The CDC notes bleach is not always necessary, so detergent and water or white vinegar are reasonable first choices.
Step-by-Step Removal Method
Begin by ventilating the crawl space if possible and setting up lighting. Put on all protective gear before entering, since disturbing mold releases spores immediately. Remove any heavily contaminated porous materials first, bagging wet or moldy insulation, cardboard, and debris in contractor bags and sealing them before bringing them out.
Next, treat the hard surfaces. Apply detergent and water or undiluted white vinegar to moldy framing and piers, let it dwell, then scrub. Wipe the surfaces and HEPA-vacuum loose material. Work methodically across the space in sections to avoid tracking spores. When finished, run a fan and dehumidifier to dry everything thoroughly, because residual dampness invites regrowth. Shower and launder your clothing afterward.
Why Crawl Spaces Grow Mold
Crawl spaces are moisture traps. Bare-earth floors release ground moisture into the air, and without a vapor barrier that humidity has nowhere to go. Poor ventilation lets it accumulate, and cool surfaces encourage condensation. Plumbing leaks, drainage problems, and water intrusion from poor grading add to the load.
The combination of high humidity and abundant wood framing makes the crawl space one of the most mold-prone areas of a home. Identifying whether your problem is ground moisture, condensation, or a leak directs the fix. Without that diagnosis, cleaning the framing is a temporary measure that the next humid week will undo.
Fixing the Moisture for Good
The durable fix in a crawl space is moisture control, and the single most effective step is usually a vapor barrier. Laying heavy polyethylene sheeting over the bare earth blocks ground moisture from entering the air, which is the foundation of most crawl space encapsulation strategies. Sealing the barrier to the walls and seams improves its effectiveness.
Beyond the vapor barrier, address drainage so water does not pool under the house, fix plumbing leaks, and consider a crawl space dehumidifier to hold humidity below the EPA’s recommended 50 percent. Improving exterior grading and gutter discharge keeps surface water away. The EPA’s central message applies here as everywhere: control the moisture and the mold cannot return. The guide on how to clean mold reinforces the find-clean-dry-prevent approach.
What Not to Do
Do not enter a crawl space without protective gear; the confined air concentrates spores. Do not use a non-HEPA shop vacuum, which spreads spores rather than capturing them. Do not paint or coat over moldy framing, since that traps moisture underneath. Do not mix cleaning chemicals, and avoid bleach-and-ammonia or bleach-and-vinegar combinations entirely.
Do not skip the moisture fix because the framing looks clean, that shortcut guarantees regrowth. And do not press on with a DIY job if you find standing water, widespread growth across the framing, or structural wood damage. Those conditions call for a professional with the equipment and containment to handle the scope safely.
Vented Versus Encapsulated Crawl Spaces
The strategy for keeping a crawl space dry has shifted over the years, and understanding the two approaches helps you choose. Older homes were built with vented crawl spaces, openings in the perimeter intended to let outside air carry moisture away. In humid conditions, though, those vents can let damp air in, where it condenses on cool surfaces and feeds mold, so venting alone often fails to control moisture.
Encapsulation is the modern alternative. It seals the crawl space with a heavy vapor barrier over the ground and up the walls, closes the vents, and conditions the air with a dehumidifier or by extending the home’s HVAC. This creates a dry, controlled environment that resists mold far better than passive venting in many climates. Full encapsulation is a larger project usually handled by professionals, but laying a quality ground vapor barrier is a meaningful step a homeowner can take on its own. The guide on mold under the house covers how encapsulation fits into a long-term plan.
How Crawl Space Mold Affects the Whole House
Crawl space problems rarely stay in the crawl space. A principle of building science known as the stack effect means air tends to move upward through a house, drawing air from the lowest level into the living space above. Estimates commonly cited in the building trades suggest a substantial share of the air on a home’s main floor originates in the crawl space, which means mold and musty odors below can degrade the air people actually breathe.
This is why a musty smell in the living room sometimes traces to growth under the floor, and why crawl space moisture is not a problem you can safely ignore because it is out of sight. It also explains why fixing crawl space mold, through cleanup, a vapor barrier, and humidity control, can improve indoor air quality throughout the home. Treating the crawl space as part of the home’s air system rather than a sealed-off void is the right mental model. The guide on mold under the house explores this connection and the encapsulation strategies that address it.
Inspecting the Crawl Space Before You Start
A careful look around before any cleaning saves effort and reveals the real scope. Use a headlamp to examine the joists, subfloor, piers, and the ground surface. Note where growth is concentrated, whether the insulation is sagging or stained, and whether the vapor barrier, if there is one, is intact or torn. Check for standing water, damp soil, and condensation on the underside of the subfloor.
Look also for the moisture source. A leaking pipe overhead, water pooling after rain, missing or damaged ground cover, and poor ventilation all leave clues. Measuring the affected area roughly tells you whether the job fits the EPA’s under-10-square-foot guideline for DIY or exceeds it. This upfront assessment is what separates a confident, contained cleanup from crawling in blind and discovering a problem far larger than expected. If the inspection reveals widespread growth or standing water, that is the moment to step back and call a professional rather than proceeding.
Handling Insulation and the Vapor Barrier
Insulation and ground cover are central to crawl space mold work. Fiberglass batts stapled to the underside of the subfloor absorb moisture and trap spores, and heavily contaminated insulation should be removed and discarded rather than cleaned. Pull it down carefully into contractor bags, sealing them before dragging them out, since disturbing moldy insulation releases a heavy load of spores.
The vapor barrier on the ground is both a casualty and a solution. A torn or missing barrier lets ground moisture pour into the space, feeding the mold, so part of the fix is laying fresh heavy polyethylene sheeting over the bare earth and sealing it at the seams and walls. If the existing barrier is moldy, remove and replace it. Re-establishing a continuous ground cover is one of the highest-impact steps you can take, because it addresses the single largest moisture source in most crawl spaces. The guide on mold under the house covers encapsulation in more detail.
Drying and Monitoring After Cleanup
Crawl spaces dry slowly because they are enclosed and sit against damp earth, so drying is both essential and time-consuming. After cleaning the framing and replacing the ground cover, run a fan to move air and a dehumidifier rated for the space to pull humidity below the EPA’s recommended 50 percent. A crawl space hygrometer lets you confirm the number rather than assuming.
Monitoring matters as much as the initial cleanup. Check the space periodically over the following weeks for any sign of returning growth, fresh condensation, or new water intrusion, which would indicate the moisture source is not fully controlled. Crawl space mold is notorious for returning when only the visible growth is treated, so the combination of a vapor barrier, drainage fixes, and ongoing humidity control is what makes the result last. If conditions keep returning despite your efforts, a professional assessment of the drainage and ventilation is the logical next step.
When to Call a Professional
Several conditions push crawl space mold beyond DIY. Growth covering more than about 10 square feet, contamination across the framing or subfloor, standing water or flooding, structural wood rot, and a musty smell throughout the house all warrant professional remediation. The EPA recommends professional remediation with containment for larger jobs to prevent spreading spores into the living space above.
Crawl spaces also pose practical hazards: tight clearances, poor air quality, pests, and the risk of disturbing electrical or plumbing lines. A qualified professional has the gear, training, and containment to work safely and can address encapsulation and moisture control as part of the job. For a small, accessible patch on sound framing, careful DIY removal followed by a vapor barrier and moisture control can resolve the problem, but knowing the limit is what keeps a manageable job from becoming a hazard.
References
- Mold Cleanup in Your Home — U.S. Environmental Protection Agency
- A Brief Guide to Mold, Moisture and Your Home — U.S. Environmental Protection Agency
- About Mold and Health — Centers for Disease Control and Prevention
- Mold and Your Health — Colorado Department of Public Health and Environment
If crawl space mold is widespread or you find standing water, a professional assessment is the safer route. We can connect Front Range homeowners with a vetted local inspector. Get in touch through our contact page for a referral.
Mold removal & cleanup picks
For a small, contained patch (under ~10 sq ft) these EPA-friendly removers handle surface mold. Larger or recurring growth warrants a professional assessment first.
| Product | Why | Buy |
|---|---|---|
 RMR-86 Instant Mold Stain Remover RMR-86 Instant Mold Stain Remover | Fast-acting on stains; ventilate and wear PPE. | Amazon — $18.38 |
 Concrobium Mold Control Concrobium Mold Control | No-bleach formula that also helps prevent regrowth. | Amazon — $13.47 |
 Mold Armor Mold & Mildew Remover Mold Armor Mold & Mildew Remover | Widely stocked bathroom/surface remover. | Amazon — $22.98 |