Radon Testing Near Me: A Homeowner’s Guide

Radon is invisible, odorless, and one of the few home hazards you genuinely cannot detect without a test. So when homeowners search “radon testing near me,” they are taking exactly the right first step. The harder question is which kind of test to choose and who should perform it. Options range from a fifteen-dollar DIY kit to a professional continuous-monitor test, and the right choice depends on why you are testing. This guide summarizes EPA and CDC guidance current as of 2026 to compare the methods, explain what professional testing involves, what it costs, and how to find a qualified local tester. For health questions consult your physician; for testing decisions consult a certified professional.
Part of our Radon Levels guide — start there for the full picture →
Why Local Radon Testing Matters Where You Live
Radon risk is intensely local because it comes from the ground beneath a specific home. The EPA maps the country into radon zones, and where your home sits on that map shapes how seriously to take testing. Most of Colorado, including the Denver metro and the entire Front Range, falls in Zone 1, the highest radon-potential category. A large share of Colorado homes test above the EPA action level, which is why radon testing is treated as routine here rather than optional.
That local reality means a “near me” search is not just about convenience; it is about finding testers who understand the regional risk. A Front Range inspector tests radon constantly and knows the closed-house conditions and placement that produce a defensible result. The radon testing hub for Front Range homeowners covers the state’s elevated baseline and why it drives demand for local testing, which is useful background before booking any test.
DIY Kits vs Professional Testing
The first decision is whether to test yourself or hire a professional. Both have a place, and the right answer depends on the stakes.
DIY Test Kits
DIY kits are inexpensive, often ten to forty dollars, and widely available. The two common passive types are charcoal canisters for short-term testing and alpha-track detectors for longer-term testing. The homeowner places the device per the instructions, leaves it for the specified period, then mails it to a lab that returns the result. For a homeowner simply curious about their own long-term exposure, a DIY kit is a reasonable, budget-friendly choice that gives a usable number.
Professional Testing
Professional testers, often home inspectors or dedicated radon firms, typically use continuous radon monitors that record levels hour by hour. This produces more detailed data, resists tampering, and documents the test conditions, which matters when the result will inform a real estate transaction. Professional testing costs more, commonly 100 to 250 dollars, but the added credibility and accuracy are worth it when money or a purchase decision rides on the number.
When You Need a Professional Test
Certain situations clearly call for professional testing over a DIY kit. The most common is a home purchase. During the inspection period, a buyer wants a defensible, tamper-resistant result, because the number may drive a negotiation over mitigation. A continuous monitor placed and retrieved by a professional, with documented closed-house conditions, carries far more weight in that context than a DIY canister a seller could have influenced.
Other situations include confirming a borderline or surprising DIY result, testing after installing a mitigation system to verify it worked, and any case where a homeowner wants documentation for records or insurance. For everyday peace of mind in a home you already own and plan to keep, a DIY long-term kit may suffice, but when the result must be trustworthy to a third party, professional testing is the safer route. The radon inspection guide explains the measurement process and conditions in depth.
What Professional Testing Costs
Standalone professional radon testing commonly runs 100 to 250 dollars depending on the region, the device, and whether it is bundled with a home inspection. When added to a purchase inspection, the incremental cost is often at the lower end of that range because the inspector is already on site. DIY kits, by contrast, run roughly ten to forty dollars including the lab analysis, though some kits charge a separate lab fee.
The price gap reflects what you get. The DIY kit gives a number; the professional test gives a documented, tamper-resistant number with controlled conditions and an expert who can interpret it and advise next steps. For a several-hundred-thousand-dollar home purchase, the modest cost of professional testing is trivial insurance against an invisible hazard. The number it produces can also save far more than it costs if it surfaces an elevated level that the buyer then negotiates into the deal.
How Long Testing Takes and What to Expect
Homeowners often want to know how quickly they can get an answer. A short-term test, the most common type for a purchase, runs from two to seven days of measurement. With a professional continuous monitor, results are typically available immediately when the device is retrieved, since the monitor logs and totals the readings on the spot. With a passive DIY kit, the device must be mailed to a lab after the exposure period, adding several days to a couple of weeks for the lab to process and return the result.
During the test, the home must stay under closed-house conditions, which means planning around the test window: keeping windows and exterior doors shut, running heating and cooling normally, and not tampering with the device. For occupied homes this is a minor inconvenience for a few days. For a vacant home being sold, the seller or agent simply needs to ensure the house stays closed and the device undisturbed. Knowing the timeline helps buyers fit the test inside a tight inspection contingency, which is one reason professionals favor fast continuous monitors for transactions where every day counts.
How to Find a Qualified Local Tester
Not every tester is equally qualified, so a “near me” search should be paired with vetting. The strongest signal of competence is certification through a recognized national radon proficiency program, which indicates training in proper measurement protocols. Many home inspectors carry this credential as an add-on to their general inspection certification.
To find and vet a local tester, start with your state radon program, which often lists certified measurement professionals. In Colorado, the Colorado Department of Public Health and Environment provides radon resources and guidance for residents. Confirm the tester’s certification, ask whether they use a continuous monitor for real estate tests, and check that they document closed-house conditions and device placement. Reviews that mention thoroughness and clear result explanations are more telling than price alone. If the result comes back high, the same local pro can often handle or refer the mitigation, which is covered in the radon remediation guide.
Questions to Ask Before Hiring
A few questions quickly separate qualified testers from casual ones. Ask what device they use and whether it is a continuous monitor. Ask how they ensure closed-house conditions and where they place the device. Ask how quickly results come back and whether they provide a written report. Ask whether they are certified and can show proof. A tester who answers these confidently is one worth hiring, while one who is vague about method or credentials is a reason to keep looking.
Getting an Accurate Result
The accuracy of any radon test, DIY or professional, depends heavily on conditions. For a short-term test, the home should be kept under closed-house conditions, meaning windows and exterior doors stay shut except for normal entry and exit, ideally for twelve hours before and throughout the test. The device belongs in the lowest livable level of the home, away from drafts, exterior walls, and high humidity.
Weather and season also influence readings, which is why a short-term snapshot can differ from the year-round average. A result that lands near the 4.0 pCi/L action level is a strong candidate for a confirmatory test before committing to mitigation. Professionals control these variables as a matter of routine, which is part of why their results are more defensible. Homeowners running a DIY kit should follow the instructions precisely to avoid a misleading number, and treat a borderline DIY result as a prompt for professional confirmation rather than a final verdict.
Avoiding Common Testing Mistakes
Several avoidable errors lead to misleading radon results. The most frequent is failing to maintain closed-house conditions, since open windows ventilate radon away and produce a falsely low reading that does not reflect how the home normally operates. Another is placing the device in the wrong spot, such as a closet, a drafty area near an exterior door, a bathroom with high humidity, or an upper floor far from where soil gas enters. Each of these can skew the number.
Tampering, intentional or not, is a real concern in real estate tests, which is why professional continuous monitors log conditions and flag interruptions. Running a test during severe weather can also distort a short-term reading. Finally, drawing a permanent conclusion from a single short-term snapshot is itself a mistake; a borderline result deserves confirmation. Avoiding these pitfalls is mostly about following the protocol carefully, which is exactly what a certified professional does by default and what a careful DIY tester must replicate by reading and following the kit instructions precisely.
After the Test: What the Numbers Mean
Once results arrive, interpreting them is straightforward against the EPA framework. A reading at or above 4.0 pCi/L is the action level at which the EPA recommends fixing the home. Between 2.0 and 4.0, homeowners may consider mitigating, especially in Zone 1 areas like the Front Range. Below 2.0 is closer to typical indoor levels. Because radon risk is continuous, lower is always better, and a result is a decision point rather than a guarantee. The radon levels chart breaks down each band in detail.
If the number lands in the action range, the next step is mitigation, a reliable fix that vents radon from beneath the foundation before it enters the home. If it is low, periodic retesting keeps the picture current, particularly in high-radon regions where levels can shift after foundation or basement changes. Either way, getting tested is the decisive move; everything that follows is a manageable, well-understood response to a known number.
Timing Your Test
When you test can affect the result, which is worth planning around. Radon levels tend to run higher in winter, when homes are sealed against the cold and heating systems can draw soil gas upward, so a winter test often captures a home’s higher-end conditions. Many professionals consider that a useful, conservative time to measure. Testing during a major weather event such as a storm or high winds, however, can skew a short-term reading, so it is best avoided.
For a home purchase, the timing is usually dictated by the inspection contingency window rather than the season, which is one more reason the closed-house protocol matters: it standardizes conditions so a short-term test taken any time of year produces a usable number. Homeowners testing their own residence for peace of mind have more flexibility and may choose to run a long-term test across multiple seasons for the most representative picture of their true average exposure.
References
- Radon Zones and State Contact Information — U.S. Environmental Protection Agency
- Health Risk of Radon — U.S. Environmental Protection Agency
- Radon Testing Guidance — Centers for Disease Control and Prevention
- Colorado Radon Testing Resources — Colorado Department of Public Health and Environment
Frequently asked questions
Should I use a DIY kit or hire a professional for radon testing?
DIY kits, costing ten to forty dollars, suit homeowners curious about their own long-term exposure. Professional testing, around 100 to 250 dollars, uses continuous monitors that document conditions and resist tampering, which matters for home purchases and other high-stakes results.
How much does professional radon testing cost?
Standalone professional testing commonly runs 100 to 250 dollars, often lower when bundled with a home inspection since the inspector is already on site. DIY kits run roughly ten to forty dollars including lab analysis.
How do I find a qualified radon tester near me?
Look for certification through a recognized national radon proficiency program, and check your state radon program's list of measurement professionals. In Colorado, the Colorado Department of Public Health and Environment offers resources. Confirm they use a continuous monitor for real estate tests.
What conditions affect radon test accuracy?
Short-term tests need closed-house conditions, with windows and doors kept shut for twelve hours before and during the test, and the device placed in the lowest livable level. Weather and season also influence readings, so borderline results warrant a confirmatory test.
Front Range homeowners ready to test can get connected with a vetted local inspector through our contact page for a professional, documented radon test.
Test your home for radon
Radon is invisible and odorless, so a test is the only way to know your level. A short-term kit gives a first reading in days; a digital monitor tracks it over time.
| Product | Why | Buy |
|---|---|---|
 AirChek Charcoal Radon Test Kit | Lab fee usually included; EPA short-term protocol. | Amazon — $21.95 |
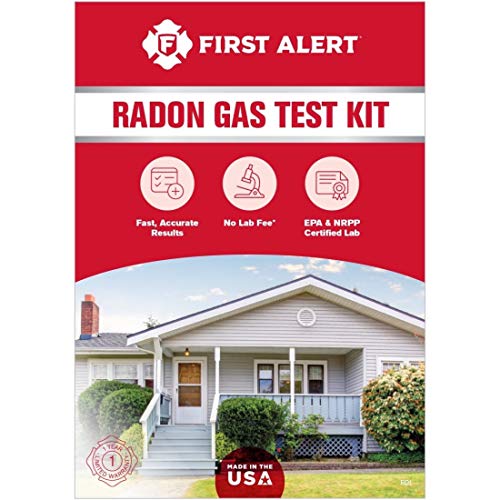 First Alert RD1 Radon Test Kit | Widely stocked; 48-hour charcoal test. | Amazon — $17.95 |
 Airthings Corentium Home | Digital monitor with a long-term average. | Amazon — $142.99 |