Shower Pan Liners: PVC, CPE, Membranes, and Leak Testing
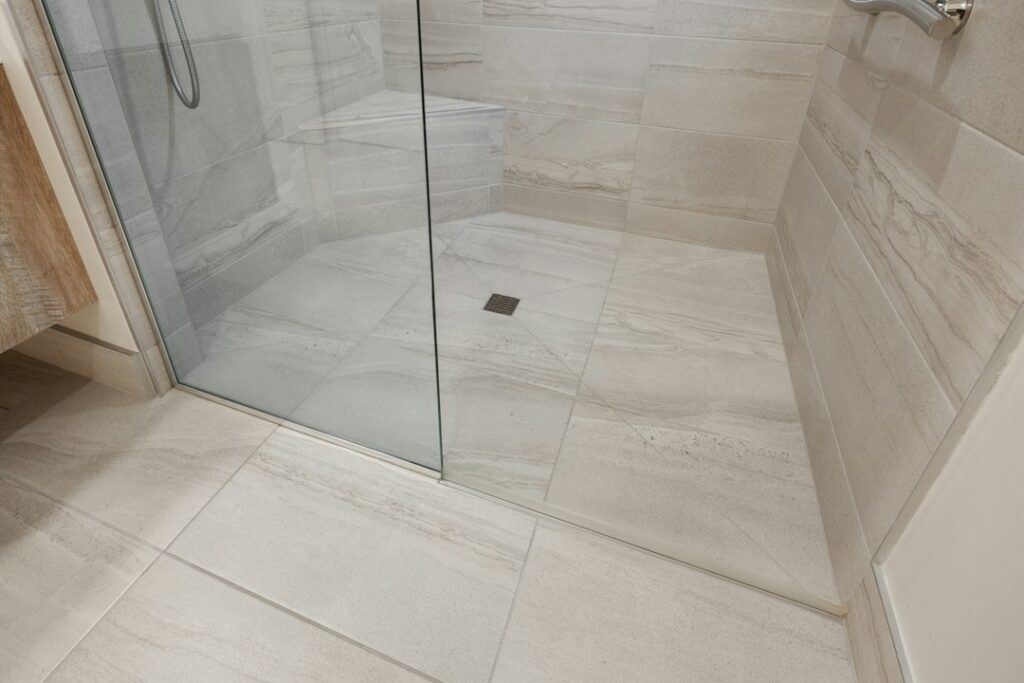
A tiled shower floor looks solid, but tile and grout are not waterproof. In a traditional site-built shower, the part that actually keeps water out of the framing is buried under an inch or more of mortar: a flexible sheet called the shower pan liner. When that liner is installed well, it can quietly do its job for decades. When it is punctured, nailed through, folded badly at a corner or connected to a drain whose weep holes are clogged, water finds its way into the subfloor, the ceiling below or the wall cavity behind the shower. This guide explains how a mortar-bed shower is built, how a shower pan liner differs from newer surface-applied membranes, the failure patterns inspectors and plumbers commonly describe, how a flood test works, and what repairs tend to cost. It is general information for Front Range homeowners and buyers, not a substitute for a licensed plumber.
Part of our Plumbing & Water guide — start there for the full picture →
What a Shower Pan Liner Is and Where It Sits
A shower pan liner is a waterproof sheet, usually PVC or CPE (chlorinated polyethylene), that lines the floor of a site-built shower and runs up the walls and over or inside the curb. It sits between two layers of mortar. Water that soaks through the tile and grout reaches the liner, runs along its surface to the drain, and exits through small openings in the drain body called weep holes.
That design accepts something many owners do not realize: in a traditional mortar-bed shower, the top mortar bed is expected to get wet. Grout and mortar are porous. The system works because the liner below is sloped toward the drain and the drain is built to collect water at the liner level, not only at the tile surface.
The layers of a traditional mortar-bed shower
From the subfloor up, a conventional build commonly looks like this:
- Pre-slope. A layer of mortar placed directly on the subfloor, sloped toward the drain. A slope of about 1/4 inch per foot is a commonly cited target. The pre-slope exists so the liner itself is pitched; a liner laid flat on a level subfloor lets water sit in it.
- The liner. The PVC or CPE sheet, folded (not cut) at the inside corners, turned up the walls well above the finished curb height, and sealed to the lower part of a clamping drain.
- Clamping drain. A two-piece drain. The liner is sandwiched between the lower flange and a clamping ring that is bolted down. Weep holes in the clamping ring let water that collects on the liner drain away.
- Top mortar bed. A thicker, sloped bed of mortar over the liner that supports the tile. Builders often protect the weep holes with a bit of pea gravel or a manufacturer’s weep-hole protector so mortar does not block them.
- Tile and grout. The finished surface, which sheds most water but not all of it.
Our shower drain guide covers the different drain bodies in more detail, including clamping drains and the bonding-flange drains used with newer systems.
PVC vs CPE liners
Both materials are sold in rolls for shower pans. PVC sheets are widely available and common in home-center supply. CPE is often described by installers as somewhat more flexible and more forgiving to fold at corners, and it is typically joined with a solvent or adhesive specific to the product. In practice, the material matters less than the installation details: a correct pre-slope, folded corners, the right height up the walls, no fasteners through the liner low in the pan, and a properly clamped drain. Local plumbing codes regulate shower liners, including how high they must extend, so the specific requirements on a given job come from the jurisdiction and the liner manufacturer.
Shower Pan Liner vs Surface-Applied Membranes
Many newer showers do not use a buried liner at all. Instead, they use a waterproofing layer applied directly under the tile: a liquid-applied membrane rolled or troweled on in coats, or a sheet membrane bonded with thin-set. With these systems the waterproof layer sits just under the tile, so the mortar bed underneath stays dry. They are usually paired with a bonding-flange drain rather than a clamping drain.
There are practical tradeoffs:
- Mortar-bed with liner. Long track record, familiar to many plumbers and tile setters, tolerant of variable framing. The top mortar bed stays damp after use and dries slowly, and failures are hidden under the tile.
- Surface membranes. Less water stored in the assembly, often thinner floors, and some systems are designed for low or zero curbs. They depend heavily on following the manufacturer’s coverage, thickness, seam and drain-connection instructions.
Neither approach is automatically better. Our guide to the shower waterproofing membrane explains the liquid and sheet systems.
Why Shower Pan Liners Fail
Liner failures tend to cluster around a handful of installation mistakes and age-related problems. Without opening the floor, nobody can say for certain which one is behind a particular leak, but these are the patterns contractors most often describe.
Punctures and tears
A liner is a thin sheet, and it is laid down in the middle of an active job site. A dropped tool, a screw left on the pre-slope, a sharp edge on the drain flange or a boot heel on a rough mortar surface can open a small hole. Because the liner is immediately covered with mortar, a small puncture may not be noticed until water has been reaching the subfloor for months.
Fasteners through the curb or low on the walls
The curb is a common trouble spot. The liner wraps over or inside the curb framing, and a fastener driven through it to hold lath, backer board or a door frame can create a direct path for water. The general guidance from tile trade practice is to keep fasteners out of the liner below the expected water line, especially on the top and inside face of the curb. Our shower curb guide covers curb waterproofing details and corner leak points.
Clogged weep holes
If mortar, thin-set or debris blocks the weep holes in the clamping drain, water that soaks through the grout cannot drain off the liner. It accumulates in the mortar bed, which can lead to persistent dark grout, efflorescence, musty odors and, in some showers, leaks around the drain or at the edges of the pan.
Liner not turned up the walls far enough
The liner is meant to run up the walls above the finished threshold so that water at the pan level cannot get over its edge. When the liner stops short, or when it is cut at the corners rather than folded, water can migrate behind the wall board and down into the framing. This is a common explanation offered for leaks that appear on the wall side of a shower rather than below the drain, though other causes, such as a failed wall waterproofing layer or plumbing leaks, are possible too.
Missing pre-slope and age
Some older showers were built with the liner laid directly on a flat subfloor. Water then sits in the liner instead of flowing to the drain, keeping the mortar bed wet much of the time. Separately, very old liners made of lead, copper or early plastics can corrode or become brittle. Many Front Range homes from the 1960s through 1990s still have their original tiled showers.
How a Flood Test Works
A flood test is the standard way to check a shower pan liner before tile goes in, and it can sometimes help diagnose a suspected leak afterward. The basic idea is simple: plug the drain so water collects on the liner, fill the pan to a set depth, mark the water line, and wait.
- During construction. The test is performed after the liner is installed and before the top mortar bed and tile. Water depth is typically kept below the top of the curb. Contractors and inspecting authorities often allow somewhere in the range of 24 to 72 hours, though local requirements and contractor practice vary. A dropping water line points to a leak.
- On a finished shower. Testing an existing shower is less clear-cut. Plugging the drain and flooding the tiled floor may stress grout and caulk that were never meant to hold standing water, and it can make an existing leak worse. Some plumbers instead run water in stages: first only on the floor near the drain, then on the walls, then on the door or curb, to narrow down where water is getting out. That approach is usually safer than a full flood.
Buyers should know that a standard home inspection usually does not include a flood test. The American Society of Home Inspectors (ASHI) Standard of Practice lists filling shower pans and fixtures to test for leaks among the things an inspector is not required to do. A true liner test is typically a separate service performed by a plumber or specialist.
Signs a Shower Pan Liner May Be Leaking
Liner leaks are often slow, which is why they can go unnoticed for a long time. Signs that are commonly associated with a failing pan include:
- Stains, bubbling paint or soft drywall on the ceiling directly below the shower.
- Damp or discolored flooring or baseboard just outside the curb.
- Grout on the shower floor that stays dark long after use, especially near the drain or the curb.
- White mineral deposits (efflorescence) at grout lines.
- Loose or hollow-sounding floor tiles.
- A musty odor that lingers after the bathroom has dried out.
Any of these can also come from other sources, such as a leaking valve, a cracked grout line at the wall or a failed door seal. Our shower pan leak guide walks through how to separate these possibilities before anyone starts removing tile.
The EPA’s WaterSense program notes that household leaks waste large amounts of water nationally and recommends checking the water meter before and after a period when no water is being used. That test targets supply-side leaks, so it will not reveal a pan that leaks only while the shower runs, but it can rule out a pressurized leak behind the wall.
Damage Behind the Tile: Subfloor, Framing and Mold
The real cost of a failed liner is usually not the liner. It is what the water reaches. A slow leak can saturate plywood or OSB subflooring, wet floor joists, stain a ceiling below and, if it continues, lead to rot and mold growth.
The EPA’s brief guide to mold and moisture states that the key to mold control is moisture control, and that drying water-damaged areas and items within 24 to 48 hours can prevent mold growth in most cases. A buried shower leak works against that guidance because the water is hidden and replenished every time the shower is used. The EPA guidance also stresses that cleaning up mold without fixing the water problem means the mold is likely to return, which is exactly the trap with a shower that keeps getting resealed instead of repaired.
When a repair opens the floor, expect the contractor to assess the subfloor and framing before rebuilding. Our subfloor repair guide explains how damaged sections are evaluated and replaced, and the water damage restoration guide covers drying, documentation and when a restoration firm is worth calling, particularly if insurance is involved.
Tile, Grout and Sealer: What They Can and Cannot Fix
Because the visible surface is tile and grout, many owners start there. Cracked or missing grout should be repaired, and sealing cementitious grout can reduce how much water it absorbs. Neither one turns a shower floor into a waterproof layer, and neither repairs a liner that has already failed underneath.
- Grout repair. Useful when grout is cracked, missing or crumbling, especially at changes of plane such as the floor-to-wall joint, where flexible sealant is often the better choice. See our grout repair guide.
- Grout sealer. Can slow water absorption and staining in cement-based grout. It needs periodic reapplication and does not stop water that is already moving through the assembly. See our grout sealer guide.
- Tile choice. Smaller floor tiles conform better to the slope toward a center drain, and slip resistance matters on a wet floor. Our shower tile guide compares common options.
One caution: sealing over a saturated mortar bed can trap moisture. If a floor has persistent dark grout, the source of the water should be identified before applying a sealer.
Repair Options and Typical Costs
A failed shower pan liner generally cannot be patched from above. Replacing it means removing the floor tile, the top mortar bed and often the bottom rows of wall tile, so the new liner can be turned up the walls correctly. Costs vary widely with shower size, tile, access, the extent of hidden damage and local labor rates, so the figures below are rough, general ranges rather than quotes:
- Leak diagnosis or staged water testing by a plumber: often in the low hundreds of dollars, sometimes more if moisture mapping or camera inspection of the drain is involved.
- Liner replacement on a standard stall: frequently in the low-to-mid thousands of dollars once demolition, a new pre-slope, liner, mortar bed and new tile are included.
- Subfloor or framing repair: an additional cost that depends entirely on what is found; small subfloor sections may be modest, while joist repair or ceiling repair below adds more.
- Full shower rebuild with a surface membrane system: often comparable to or higher than a liner replacement, depending on finish choices.
Some owners use a liner failure as the moment to rethink the shower entirely, such as moving to a different waterproofing system or a lower curb. Getting more than one written estimate is a reasonable step.
Questions to Ask Before Hiring a Contractor or Buying a Home
For buyers, a tiled shower over a finished room is worth extra attention. A general home inspector will look at the shower and the ceiling below for visible signs of leakage, and may use a moisture meter, but cannot see the liner. If something looks off, follow-up evaluation by a plumber or tile specialist is the usual next step.
For owners hiring a contractor, useful questions include:
- Will the shower use a traditional liner with a pre-slope and clamping drain, or a surface-applied membrane?
- How far up the walls will the liner or membrane extend, and how will the curb and corners be handled?
- How will the weep holes be protected from mortar?
- Will a flood test be performed, for how long, and can the owner see it?
- Is a permit required for the work in this jurisdiction?
Our hiring process section covers how to vet contractors and inspectors, and the plumbing and water hub collects related guides on drains, fixtures and leaks.
References
- A Brief Guide to Mold, Moisture and Your Home — U.S. Environmental Protection Agency
- Fix a Leak Week — U.S. EPA WaterSense
- ASHI Standard of Practice for Home Inspections — American Society of Home Inspectors
Frequently asked questions
What is a shower pan liner made of?
Most modern liners are PVC or CPE (chlorinated polyethylene) sheets. Older showers may have lead, copper or early plastic liners. The liner sits between a sloped pre-slope and the top mortar bed and is clamped into the drain.
How long should a shower pan flood test last?
During construction, flood tests are commonly run for somewhere around 24 to 72 hours, with water kept below the top of the curb. Local requirements and contractor practice vary, so confirm the expected duration before work begins.
Does a home inspector test the shower pan?
Usually not. The ASHI Standard of Practice lists filling shower pans and fixtures to test for leaks among the things an inspector is not required to do. Inspectors look for visible leak signs, and a plumber can perform a dedicated test if needed.
Can a leaking shower pan liner be repaired without removing tile?
Generally no. The liner is buried under the mortar bed, so replacing it means removing the floor tile and mortar, and often the lowest rows of wall tile. Grout and sealer can help the surface but do not fix a failed liner.
How much does it cost to replace a shower pan liner?
Replacing a liner on a standard stall often runs in the low-to-mid thousands of dollars including demolition, new mortar beds and tile. Hidden subfloor or framing damage adds to that, and local labor rates vary.
Seeing a ceiling stain under an upstairs shower in a home you are about to buy? Reach out through our contact page and we can help connect you with a Front Range inspector before closing.