Shower Pan Replacement: Typical Costs, Pan Types and Leak Signs
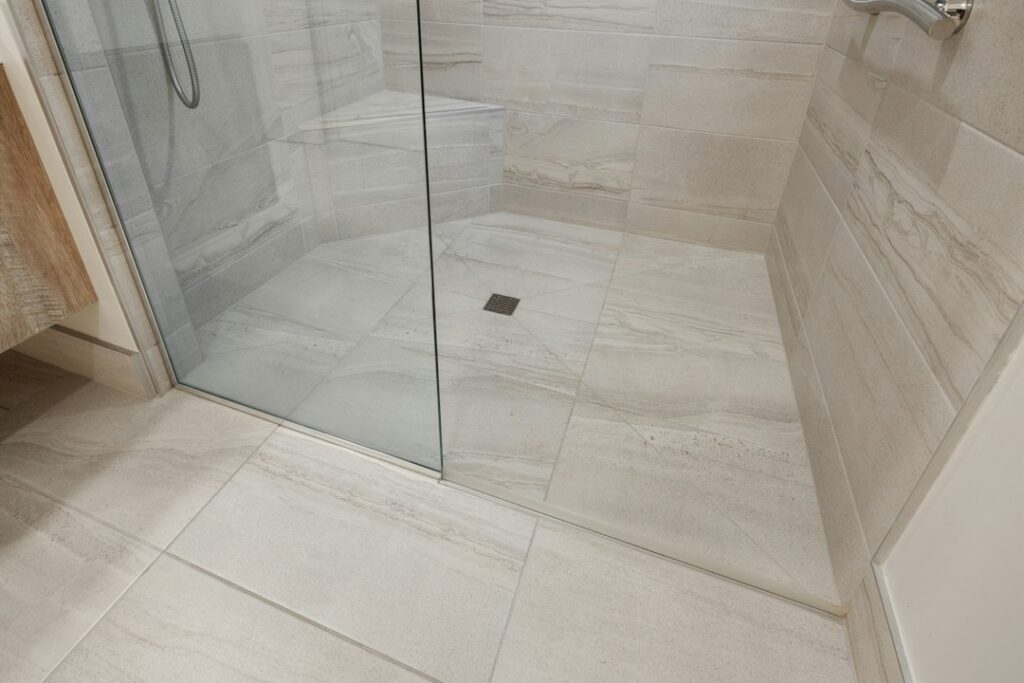
Shower pan replacement typically costs roughly $800 to $2,500 for a prefabricated acrylic or fiberglass pan installed in an existing stall, and roughly $2,000 to $6,000 or more for a custom tiled mortar-bed pan with a new liner or waterproofing membrane. The pan itself is often the smaller part of the bill; the larger costs come from removing tile and wall material, repairing water-damaged subfloor and framing, and rebuilding the lower walls so the new pan and the walls shed water together. If your pan is leaking, the sooner it is addressed, the more likely the job stays at the lower end.
Part of our Structure & Exterior guide — start there for the full picture →
The ranges here are typical national figures for 2026 drawn from common contractor pricing patterns rather than a single published survey. Local labor rates and material choices vary, so get two or three written quotes. For a deeper look at the symptoms before you price anything, see our guide to a shower pan leak.
Planning a bathroom or kitchen remodel? Talk to a local remodeler.
📞 Call (844) 791-3031Typical Shower Pan Replacement Cost at a Glance
| Pan type / job | Typical installed range | Notes |
|---|---|---|
| Acrylic or fiberglass pan, swap in existing stall | $800 – $2,500 | Includes removing old pan and lower wall material; wall surround extra if replaced |
| Solid-surface or cultured stone pan | $1,200 – $3,500 | Heavier, more rigid, often custom-sized |
| Custom tiled mortar-bed pan with liner | $2,000 – $6,000+ | Liner, pre-slope, mortar bed, drain, tile and grout |
| Tiled pan with surface-applied membrane system | $2,000 – $5,500+ | Sheet or liquid membrane over a sloped base |
| Curbless or low-threshold conversion | $4,000 – $10,000+ | Often requires recessing the subfloor and a linear drain |
| Subfloor and framing repair (if damaged) | $300 – $2,000+ | Depends on how far water has spread |
| Wall tile or surround replacement (if needed) | $1,500 – $6,000+ | Often needed because the lower tile row must come out |
Typical national range, 2026 — get local quotes. Most bathroom contractors have job minimums, and the price can climb quickly once old tile and backer come off and hidden water damage is found.
A worked example
A 36 x 48 inch tiled shower in a 1990s home has a leaking pan, with a stain on the ceiling below. A rule-of-thumb budget for rebuilding it as a tiled shower might look like this:
- Demolition of floor tile, mortar bed and the lowest rows of wall tile: roughly $400 to $1,000
- Subfloor patch and blocking where the leak softened the wood: roughly $300 to $900
- New pre-slope, liner or membrane, drain and flood test: roughly $700 to $1,800
- New floor tile and patching or replacing lower wall tile: roughly $800 to $2,500
- Drywall and paint repair on the ceiling below: roughly $250 to $700
That puts the full repair at very roughly $2,500 to $7,000. If the original wall tile cannot be matched, the job may grow into a full surround replacement. A prefab pan in the same opening could cost noticeably less if the wall material can be cut and patched cleanly.
Shower Pan Types Compared
The “pan” is the floor of the shower and the waterproof layer beneath it. What you choose affects cost, lifespan and how easily leaks can be repaired later.
| Type | Upfront cost | Strengths | Weaknesses |
|---|---|---|---|
| Acrylic | Low to moderate | One-piece and seamless; warmer underfoot; easy to clean | Must be fully supported or it can flex and crack; limited sizes |
| Fiberglass (gelcoat) | Lowest | Inexpensive, light, quick to install | Surface wears and dulls; thinner units flex and crack more easily |
| Solid surface / cultured stone | Moderate to high | Rigid, durable, can be custom-cut | Heavy; fewer installers; higher cost |
| Tiled mortar-bed with liner | High | Any size or shape; matches tile design; long life when built well | Depends on skilled installation; failures are hidden until damage shows |
| Tiled base with surface membrane | High | Waterproofing right under the tile; less water held in mortar | Must follow the membrane maker’s details exactly |
Prefab pans
Acrylic and fiberglass pans come in standard sizes and are usually set into a bed of mortar or a manufacturer-approved base so they are fully supported. A pan that is only supported at the edges will flex under foot traffic, and over time that flex leads to cracks near the drain. When the installer quotes a prefab pan, ask how it will be bedded.
Mortar-bed tiled pans and liners
The traditional tiled shower floor uses a sloped mortar layer under a waterproof liner, a second mortar bed on top, and tile and grout as the visible surface. The tile and grout are not waterproof; water that soaks through them is supposed to run along the liner to weep holes in the drain. When the liner is punctured, folded poorly at corners, not sloped underneath, or the weep holes are clogged, water sits in the mortar or escapes into the framing. Our guide to the shower pan liner explains how these assemblies are built and where they typically fail.
Surface-applied membranes
Many tile setters now use sheet or liquid-applied membranes placed directly beneath the tile, often with a bonding flange drain. These reduce the amount of water held in the mortar and can make for a thinner, quicker assembly. They work well when the manufacturer’s details for seams, corners, curbs and the drain connection are followed exactly. See our guide to a shower waterproofing membrane for how the systems differ.
Signs Your Shower Pan Needs Replacement
Shower pan failures are hard to spot because the waterproof layer is buried. The clues usually show up around, below or beside the shower:
- Stains or bubbling paint on the ceiling below a second-floor shower, especially after showers rather than after toilet flushes
- Damp or stained baseboard and flooring just outside the shower
- Loose, cracked or hollow-sounding floor tiles and grout that keeps cracking or turning dark
- Grout lines that stay wet long after a shower, a sign that the mortar bed is saturated
- A persistent musty smell in the bathroom even when surfaces look clean
- Mold or mildew at the base of walls or on trim; our guide to what black mold looks like in a shower helps tell surface mildew from something deeper
- A cracked or flexing prefab pan, often near the drain
- A soft or bouncy floor near the shower entry, which may indicate subfloor damage
Not every one of these means the pan has failed. Leaks from a shower valve, the shower head arm, a door sweep or failed caulk at the curb can produce similar symptoms. That is why testing matters before committing to a full replacement.
How Leaks Are Tested Before You Replace Anything
The flood test
The standard way to check a shower pan is a flood test. The drain is plugged and the pan is filled with water to a level just below the top of the curb, then left for a period, commonly many hours or overnight, while the water level and the ceiling or area below are watched. A dropping level or new wetness below points to the pan or drain connection. Contractors also flood-test new pans before tile goes on, and that step should appear on any rebuild quote.
Isolating other sources
A careful contractor or inspector will try to rule out other sources:
- Running water only on the walls, with the drain open, to check grout and caulk on the walls
- Running water only on the floor, with the drain open, to check the drain area
- Checking the valve and supply pipes through an access panel if there is one
- Watching the water meter with all fixtures off to detect a supply-side leak
The EPA’s WaterSense program suggests checking your water meter before and after a two-hour period when no water is being used; if it changes, you probably have a leak, according to its Fix a Leak Week page. A meter test does not detect drain-side leaks such as a failed pan, but it helps separate supply leaks from drainage leaks.
Moisture meters and thermal imaging
Moisture meters on surrounding walls and floors, and infrared cameras on ceilings below, can show where water has spread. They do not replace a flood test, but they help estimate how much material will need replacing.
What Drives the Price
- Pan type and size: Standard prefab sizes are cheapest. Custom sizes, solid-surface pans and tiled floors cost more.
- Wall material: Replacing a pan almost always disturbs the bottom of the walls. A one-piece fiberglass surround may need to be replaced entirely, while tile walls may allow cutting and patching the lowest rows if matching tile is available.
- Hidden water damage: Rotted subfloor, damaged joists and wet wall framing add carpentry. Our guide to subfloor repair covers what that work involves.
- Mold cleanup: The EPA’s Mold Cleanup in Your Home page notes that if mold covers more than about 10 square feet, homeowners should consult its remediation guidance, and that porous materials that become moldy may need to be thrown away.
- Drain changes: Moving the drain, converting to a linear drain or replacing a corroded drain body adds plumbing labor and may need a permit.
- Curb and threshold changes: Lowering or removing the curb usually means recessing the subfloor between joists, which is a much bigger job. See our guide to a curbless shower for what that involves.
- Access and ceiling repair below: Second-floor leaks often add drywall and paint repair to the ceiling underneath.
- Permits: Simple like-for-like pan swaps may not require one, but plumbing changes usually do. Check with your city or county building department.
Repair or Replace?
Not every leaking shower needs a new pan. These rules of thumb help:
- Failed caulk or grout only: If a flood test passes and the leak shows up only when walls are wet, regrouting, sealing and recaulking may solve it for a small fraction of a replacement.
- Small crack in a prefab pan: Repair kits can patch minor cracks, but if the crack comes from poor support underneath, it will usually return. Replacement with proper bedding is the lasting fix.
- Failed flood test on a tiled pan: A liner or membrane that leaks generally cannot be patched from above. The floor tile and mortar bed usually have to come out.
- Leak at the drain connection: Sometimes the drain body or clamping ring can be repaired with limited demolition, but a failed liner connection usually means rebuilding the pan.
- Age and remodel plans: If the shower is dated, the walls need work anyway, or you want a lower curb, replacing the whole shower may be better value than rebuilding just the pan.
A practical rule of thumb: if the repair cost approaches half the cost of a full replacement, or the shower has already been repaired before, put the money toward a proper rebuild.
Choosing a Pan and Making It Last
When the old pan comes out, you have a chance to choose a system that suits the household for the next couple of decades. A few practical points:
- Who uses the shower: For a guest bath or rental, a well-bedded acrylic pan is often the most cost-effective choice. For a primary bath where the look matters, or an odd-sized opening, a tiled pan may be worth the extra cost.
- Accessibility: If anyone in the home may need a low or no-threshold entry in the future, plan for it now. Adding a curbless entry later means tearing the floor out again.
- Slip resistance: Smaller floor tiles with more grout lines, or textured prefab pans, give better footing than large, smooth tiles.
- Ventilation: The pan and membrane keep water out of the framing, but a working exhaust fan that vents outdoors and runs during and after showers keeps grout, caulk and wall surfaces drier.
After installation, maintenance is simple but easy to neglect. Squeegee or wipe the floor after use, keep the drain clear so water does not pool, re-caulk the change-of-plane joints at the base of the walls and the curb when caulk cracks or pulls away, and replace cracked grout promptly. Ask the installer whether the grout on your floor should be sealed and how often. A tiled shower that is maintained this way, built on a properly sloped and flood-tested pan, can last for decades.
How to Read a Shower Pan Quote
Get two or three written quotes for the same scope and check that each lists:
- Pan type, size and support method (for prefab) or waterproofing system (traditional liner or surface membrane) for tiled pans
- Demolition scope: how much wall tile or surround will be removed
- Drain: reuse or replace, and what type
- Flood test of the new pan before tile or finish goes on
- Unit pricing for hidden damage: subfloor per square foot, framing per stud or joist
- Wall and ceiling repair inside and below the bathroom
- Permit responsibility if plumbing changes
- Warranty on labor and waterproofing
Red flags
- A plan to tile over an old leaking pan, or to “seal” grout as a cure for a failed flood test
- No flood test on a new tiled pan
- A prefab pan installed without full bedding support
- Sudden upgrades to an entire bathroom remodel or “whole-house” mold packages when the problem is one shower
- Pressure to sign on the spot, or a large cash deposit before any work begins
Good questions include how the contractor will confirm the pan is the source, what they will do if the subfloor is soft, and how long the waterproofing will cure before the shower can be used.
Front Range Notes
- Hard water is common in parts of the Front Range. Mineral buildup can clog weep holes in older tiled pans and roughen fiberglass surfaces, so look for it during any evaluation.
- Dry winter air helps bathrooms dry between uses, but it does not stop water trapped in a mortar bed from feeding mold in the framing. A bathroom exhaust fan that actually vents outdoors still matters.
- Basement showers are common in finished Front Range basements. A pan leak on a slab can travel under flooring and wall plates, and may be confused with foundation seepage.
How an Inspector Flags a Failing Shower Pan
The ASHI Standard of Practice directs home inspectors to inspect interior drain, waste and vent systems, including fixtures, and interior water supply and distribution systems, according to the ASHI Standard of Practice. In practice, an inspector will typically run the shower, look for active leaks, check for loose or cracked tile, failed caulk and grout, soft flooring near the entry, and stains on ceilings or walls below. Moisture readings around the base of the shower can reveal a problem the eye cannot see.
A standard inspection does not usually include an extended flood test, so when an inspector suspects a pan leak, the recommendation is typically further evaluation by a plumber or tile contractor who can perform one. Where mold is suspected inside walls, the EPA’s Brief Guide to Mold, Moisture and Your Home is clear that fixing the water problem comes first, and that wet materials should be dried within 24 to 48 hours where possible. Our structure and exterior hiring guides explain how to choose the right specialist.
Buying a home with a stained ceiling under the bathroom, or a shower floor with cracked grout and a musty smell? Contact our team to schedule a Front Range inspection before you close.
References
- A Brief Guide to Mold, Moisture and Your Home — U.S. Environmental Protection Agency
- Mold Cleanup in Your Home — U.S. Environmental Protection Agency
- Fix a Leak Week — U.S. Environmental Protection Agency WaterSense
- ASHI Standard of Practice for Home Inspection — American Society of Home Inspectors
Frequently asked questions
How much does shower pan replacement cost?
A prefab acrylic or fiberglass pan swapped into an existing stall typically runs about $800 to $2,500 installed, while a custom tiled pan with a new liner or membrane often runs $2,000 to $6,000 or more. Hidden subfloor damage, wall tile replacement and ceiling repair below can add substantially. Get local written quotes.
How do you know if a shower pan is leaking?
Common signs include stains on the ceiling below, damp baseboards outside the shower, loose or cracked floor tile, grout that stays wet, a musty smell and soft flooring near the entry. A flood test, where the plugged pan is filled and watched for hours, is the standard way to confirm it.
Can a shower pan be replaced without removing wall tile?
Sometimes, but usually at least the lowest rows of wall tile or surround must come out so the new pan and the wall waterproofing overlap properly. If matching tile is not available, the job may grow into a full wall replacement.
Is an acrylic or tiled shower pan better?
Acrylic pans are less expensive, seamless and quick to install, but must be fully supported to avoid cracking. Tiled pans fit any size and match tile design, but rely on skilled waterproofing. The better choice depends on budget, shower size and the look you want.
How long does a shower pan last?
A well-built pan can last for decades, while a poorly installed one can leak within a few years. Lifespan depends far more on installation quality, proper slope, intact liner or membrane, and maintenance of grout and caulk than on the pan material alone.
Not sure whether a shower is leaking in a home you are buying? Reach out to our team for a Front Range inspection.