Shower Remodel Cost: Refresh, Surround or Full Tear-Out
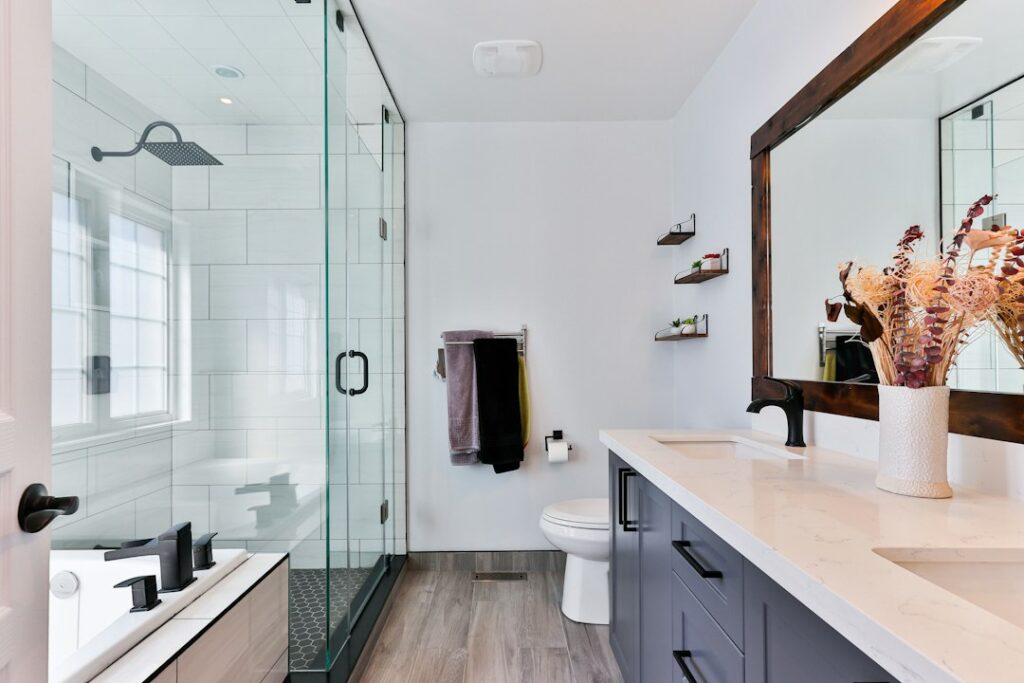
Shower remodel cost depends mostly on how deep the work goes. A cosmetic refresh with new grout, caulk and trim often runs from a few hundred dollars to around $2,500; replacing the surround and base typically costs $3,000 to $8,000; and a full tear-out to the studs with a new pan, waterproofing and tile commonly lands between $8,000 and $20,000 or more. The tier you need is usually decided by what is behind the existing walls, not by the finishes you prefer. This guide explains each tier, the hidden-damage allowance every honest bid should carry, why the valve and exhaust fan deserve attention during the remodel, and how to tell whether a quote is fair. The figures are typical national ranges for planning in 2026; your local labor market, the age of the home and permit rules will shift them, so get written quotes from local contractors.
Part of our Structure & Exterior guide — start there for the full picture →
Planning a bathroom or kitchen remodel? Talk to a local remodeler.
📞 Call (844) 791-3031Shower Remodel Cost by Tier
Most shower projects fall into one of three tiers. Use the table as a typical national range, 2026 — get local quotes before committing. Costs assume a standard stall or tub-shower of average size.
| Tier | Typical scope | Typical range | Usual timeline |
|---|---|---|---|
| 1. Refresh | Regrout or grout repair, recaulk, new showerhead and trim, new door seal or rod | $300–$2,500 | 1–2 days |
| 2. Surround and base replacement | Remove old panels or tile on the walls, install new prefab surround or panels, new base, new valve trim | $3,000–$8,000 | 2–5 days |
| 3. Full tear-out to studs | Demo walls and floor, repair framing and subfloor, new valve, new pan, waterproofing, tile, glass | $8,000–$20,000+ | 1–3 weeks |
| Add-on: layout change | Move drain or valve, enlarge footprint, add niche or bench | +$1,500–$6,000 | Adds days |
| Add-on: hidden damage | Rotted subfloor, framing repair, mold-damaged drywall | +$500–$5,000+ | Varies |
If the project grows to include the vanity, toilet, flooring and lighting, the bathroom remodel cost guide covers full-room budgets.
Tier 1: A Refresh That Buys Time
A refresh makes sense when the shower is structurally sound, dry behind the walls and simply looks tired. Typical work includes:
- Removing and replacing failed grout, or grinding out and regrouting the floor
- Cutting out old caulk at the corners, curb and tub deck and applying new mildew-resistant caulk
- Sealing cement grout after it cures
- Replacing the showerhead, handle trim, tub spout or cartridge
- Replacing the door sweep, seals or the whole door
A refresh does not fix leaks below the tile. If the floor tile is loose, the grout keeps cracking in the same spots, or there is staining on the ceiling below, new grout only hides the symptom. Before paying for a refresh, press on the tile near the drain, look for soft spots in the floor outside the shower, and check below from the basement or ceiling if you can. Those signs mean water has been getting past the tile, and money is better spent on a Tier 2 or Tier 3 job.
Recurring black spotting in grout and caulk is often surface mold on soap residue rather than a sign of hidden damage. Our guide to shower mold removal covers cleaning, and when staining keeps returning after cleaning and recaulking.
Tier 2: Replacing the Surround and Base
The middle tier swaps the visible shell of the shower while keeping the framing and, ideally, the plumbing locations. It is common for older fiberglass stalls, cracked acrylic bases and tub-showers with worn-out tile on the walls.
Typical choices at this tier
- Acrylic or fiberglass surround kits: lowest material cost and quickest to install.
- Solid-surface or cultured-stone panels: grout-free, more durable, and more expensive than basic acrylic.
- Laminated or composite wall panels: often installed directly over prepared backer, with sealed seams.
Panels hide grout lines and are easy to clean, which many owners of rental or secondary bathrooms prefer.
A good Tier 2 bid still includes removing the old surround down to the studs or at least to sound backer. Gluing new panels over damaged drywall or over tile that is coming loose locks in moisture problems. Expect the contractor to inspect the wall once the old surround is out and to tell you before closing it up if anything is wet or soft.
Tier 3: Full Tear-Out to the Studs
A full remodel removes everything down to framing and subfloor and rebuilds the shower from the inside out. It is the only tier that lets you fix a failed pan, change the layout, upgrade the valve inside the wall and add proper waterproofing.
The rebuild usually follows this sequence:
- Demolition and disposal of tile, backer, pan and fixtures
- Assessment and repair of framing, subfloor and any mold-damaged material
- Plumbing rough-in: new valve body, supply lines and drain adjustments
- Blocking for grab bars, glass and niches
- Pan installation: mortar bed with liner, pre-formed foam tray, or prefab base
- Wall backer and continuous waterproofing membrane, then a flood test of the pan
- Tile, grout, sealing, trim and caulk
- Glass measured and installed after tile is finished
Labor dominates the cost. Tile setting, especially with large-format or mosaic tile, is skilled and slow. Materials range widely, from basic ceramic to natural stone. A Tier 3 remodel is also when you can switch from a tub-shower to a dedicated shower or to a walk-in layout, though layout changes add plumbing and floor work.
The Hidden-Damage Contingency
Showers fail slowly. A cracked grout line, a pinhole in an old liner or a poorly sealed valve opening can let small amounts of water into the wall or floor every day for years. Once the old tile comes off, contractors regularly find:
- Rotted or delaminated subfloor around the drain or the curb
- Decayed bottom plates and studs on the wet walls
- Moldy drywall or paper-faced backer behind tile
- Corroded or improperly sloped drain connections
- Old liners that were never sloped, so water sat under the mortar bed
Mold behind tile is a moisture problem first. The EPA’s guidance on mold and moisture says the key to mold control is moisture control, and that fixing the water problem must come before or along with cleanup; porous materials such as drywall and ceiling tile that become moldy may need to be thrown away. EPA also notes that if mold covers more than about 10 square feet, homeowners should consult its guidance for larger cleanups and consider hiring an experienced professional. In a shower remodel, the practical step is simple: moldy drywall and rotted wood come out, the area is dried and the source is fixed by the new waterproofing.
Ask every bidder how they price hidden damage. Good options include a fixed allowance in the contract, a per-sheet price for subfloor or drywall replacement, or an hourly rate for framing repair. A bid with no contingency language is not cheaper; it simply moves the risk to you.
Older homes: test before demolition
Homes built before the 1980s may have asbestos in some tile adhesives, mastics, joint compound or textured ceilings, and homes built before 1978 may have lead-based paint on bathroom walls and trim. If the shower area includes original materials of that age, have suspect materials sampled before demolition. The EPA recommends using trained, accredited asbestos professionals and getting a written contract that specifies the work plan, cleanup and applicable regulations. Our guide to asbestos tile testing explains how sampling works.
Valve Replacement and Scald Protection
The shower valve sits inside the wall, so a full remodel is the cheapest time to replace it. Many older homes still have two-handle valves or early single-handle valves that offer little protection against sudden temperature changes when a toilet is flushed or a washing machine starts.
Two common anti-scald valve types are:
- Pressure-balancing valves: react to changes in hot or cold water pressure and adjust the mix to limit sudden swings. They are the most common and least expensive type.
- Thermostatic valves: sense the actual mixed water temperature and hold it at a set point. They cost more, both for the valve body and the trim, and often allow separate control of volume and temperature.
The U.S. Consumer Product Safety Commission notes that most tap water scald injuries and deaths involve older adults and children under five, and that most adults will suffer third-degree burns after six seconds of exposure to 140-degree water. CPSC urges households to set water heaters to 120 degrees Fahrenheit. A modern valve with a properly set limit stop adds a second layer of protection on top of the water heater setting.
Valve replacement during a remodel typically adds a few hundred to over a thousand dollars depending on the valve type, the trim finish and whether the supply lines need modification. If the walls are staying closed, a cartridge swap may restore function more cheaply, but it does not add anti-scald features to a valve that never had them. For more detail, see our guides on the shower valve and the roundup of the best shower valves if you are choosing hardware yourself.
Exhaust Fan Sizing During a Shower Remodel
Many shower failures start with a bathroom that never dries. A remodel is a good time to fix ventilation, because the ceiling and walls may already be open.
Rule-of-thumb sizing
A common rule of thumb, not a code requirement, is roughly 1 cubic foot per minute (cfm) of fan capacity per square foot of floor area for typical bathrooms up to about 100 square feet, with 50 cfm as a practical minimum. Larger bathrooms, high ceilings, steam showers and long duct runs need more capacity, and an HVAC contractor or electrician can size those properly. Local code minimums also apply; check with your city or county building department.
Worked example: a 7-by-9-foot bathroom has 63 square feet of floor area. By the rule of thumb, a fan of about 70 to 80 cfm gives some margin for duct losses. If the duct run is long or has several elbows, stepping up one fan size is reasonable.
ENERGY STAR says certified ventilation fans use about 48 percent less energy than standard models and must meet maximum sound levels measured in sones. A quieter fan matters more than it sounds: people actually run a fan they cannot hear. Pair the fan with a timer or humidity-sensing control and confirm it vents outdoors rather than into the attic. Our guides to the bathroom exhaust fan and exhaust fan installation cost cover models, ducting and pricing.
Repair or Remodel: A Practical Decision Guide
These rules of thumb help decide which tier to buy. They are guidelines, not hard limits.
| What you see | Likely tier | Why |
|---|---|---|
| Dull grout, old caulk, dated fixtures, no leaks | Tier 1 refresh | Shell and waterproofing appear sound |
| Cracked acrylic base or yellowed fiberglass walls | Tier 2 replacement | Shell has reached end of life; framing may be fine |
| Loose floor tile, soft floor near the shower, ceiling stains below | Tier 3 tear-out | Water has passed the tile; the pan or liner likely failed |
| Valve with no anti-scald protection, or leaks inside the wall | Tier 3, or valve work at minimum | Valve access requires opening the wall |
| Repairs quoted at more than about half the cost of a rebuild | Tier 3 | Rule of thumb: repeated repairs rarely beat a rebuild past that point |
Where the Money Goes in a Full Remodel
Homeowners holding a Tier 3 quote often want to know whether the split between labor and materials looks normal. The breakdown below is a rough planning pattern for a mid-range tiled shower, not a standard; real bids vary with tile choice, layout and local wages.
| Line item | Rough share of a mid-range Tier 3 budget | What pushes it higher |
|---|---|---|
| Demolition and disposal | 5–10% | Mortar-bed pans, cast-iron tubs, upper floors, testing and abatement |
| Framing, subfloor and drywall repair | 0–15% | Rot around the drain, sistered joists, mold-damaged walls |
| Plumbing rough-in and valve | 10–20% | Drain relocation, thermostatic valve, extra outlets |
| Pan, backer and waterproofing | 10–15% | Larger footprint, curbless slope, bonded membrane systems |
| Tile labor | 25–35% | Mosaic floors, large-format walls, patterns, niches and benches |
| Tile and setting materials | 10–20% | Stone, handmade or designer tile |
| Glass, trim and finish work | 10–15% | Frameless doors, tall panels, specialty hardware finishes |
If one line is far outside these patterns, ask why. A high plumbing figure may reflect a valve relocation you agreed to. A very low waterproofing figure may mean the membrane was left out. A missing demolition line may mean disposal is billed separately later.
Ways to save without cutting corners
- Keep the drain and valve in their current locations whenever the layout allows.
- Spend on the pan, membrane and valve; save on tile by choosing standard sizes and simple layouts.
- Use one feature accent, such as a niche or a band of patterned tile, rather than premium tile on every wall.
- Choose a fixed glass panel or a framed door instead of a fully frameless enclosure.
- Schedule the remodel outside the busiest season for local tile crews if your timeline is flexible.
- Handle painting and accessory installation yourself after the trades finish, if your contract allows it.
How to Read a Shower Remodel Quote
Get two or three written quotes, and make sure each bidder is pricing the same scope. A fair quote is detailed enough to compare.
What should be on the quote
- Clear scope: which tier, and what is being removed
- Hidden-damage pricing: allowance, unit prices or hourly rate
- Valve type (pressure-balancing or thermostatic) and whether the valve body is being replaced
- Waterproofing system named, and whether a flood test is included
- Tile and fixture allowances with realistic per-square-foot or per-item amounts
- Ventilation scope if a fan is being added or replaced
- Permit responsibility; plumbing changes and fan wiring often require permits
- Testing and abatement plan for older materials, if relevant
- Schedule, cleanup, warranty and a payment schedule tied to milestones
Red flags
- A low Tier 2 price that skips removing the old surround, or “panels over existing tile” without inspecting the wall
- No mention of a waterproofing membrane on a tiled job
- A refusal to discuss permits when the drain or valve is moving
- High-pressure sales tactics, same-day-only discounts, or a large deposit before work starts
- Bundled “whole-bath” packages that add items you did not ask for
Front Range Considerations
- Basement bathrooms: showers on a slab may need concrete work to move drains, and below-grade drains may need an ejector pump. Seal new floor openings carefully; radon is common in Colorado, and retesting after slab work is a sensible precaution.
- Exterior-wall plumbing: a valve or supply line in an under-insulated exterior wall can freeze during cold snaps. A remodel is the time to add insulation or relocate the valve to an interior wall.
- Permits: rules vary between Denver, suburban cities and unincorporated county areas. Check with your city or county building department.
How an Inspection Flags a Shower That Needs Work
During a home inspection, the shower is checked as a plumbing fixture and as a potential moisture source. The ASHI Standard of Practice has the inspector inspect water supply, drains and fixtures but does not require filling shower pans to test for leaks, so findings are based on visible and measurable symptoms: loose or cracked tile, failed caulk, slow drainage, staining below the shower, elevated moisture readings at the base of walls, and an exhaust fan that is missing or vents into the attic. An inspector’s report usually recommends evaluation by a licensed plumber or tile contractor, who can flood-test the pan or open a small area to confirm what is happening. Buyers can use those findings to request repairs or adjust their offer before closing.
References
- A Brief Guide to Mold, Moisture and Your Home — U.S. Environmental Protection Agency
- Mold Cleanup in Your Home — U.S. Environmental Protection Agency
- Protect Your Family from Exposures to Asbestos — U.S. Environmental Protection Agency
- Avoiding Tap Water Scalds — U.S. Consumer Product Safety Commission
- ENERGY STAR Ventilation Fans — ENERGY STAR
- ASHI Standard of Practice for Home Inspection — American Society of Home Inspectors
Frequently asked questions
How much does a shower remodel cost?
Typical national ranges in 2026 are about $300 to $2,500 for a refresh, $3,000 to $8,000 to replace the surround and base, and $8,000 to $20,000 or more for a full tear-out with new pan, waterproofing and tile. Hidden damage and layout changes add to those figures.
Can a shower be remodeled without replacing the valve?
Yes, a refresh or panel replacement can keep the existing valve and just replace the trim or cartridge. If the walls are opened to the studs, replacing an old valve with a pressure-balancing or thermostatic model is usually worth the added cost.
How much should be budgeted for hidden damage?
Many homeowners set aside 10 to 20 percent of the project cost as a contingency, which is a rule of thumb rather than a standard. Ask each contractor to price subfloor, framing and drywall repair as unit prices or an allowance in the contract.
Does a shower remodel need a permit?
Cosmetic work such as regrouting usually does not, but moving drains, replacing valves, adding a fan circuit or making structural changes often does. Requirements vary, so check with your city or county building department before work begins.
What size exhaust fan does a remodeled shower need?
A common rule of thumb is about 1 cfm per square foot of floor area for bathrooms up to about 100 square feet, with 50 cfm as a practical minimum. Larger rooms, steam showers and long ducts need professional sizing.
Planning a shower remodel and want to know what is behind the tile first? Reach out to our team to connect with a Front Range inspector.